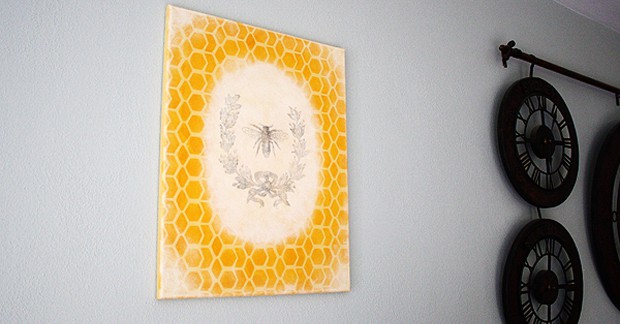
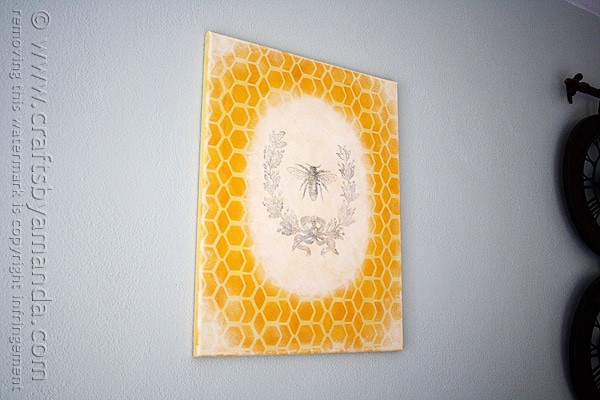
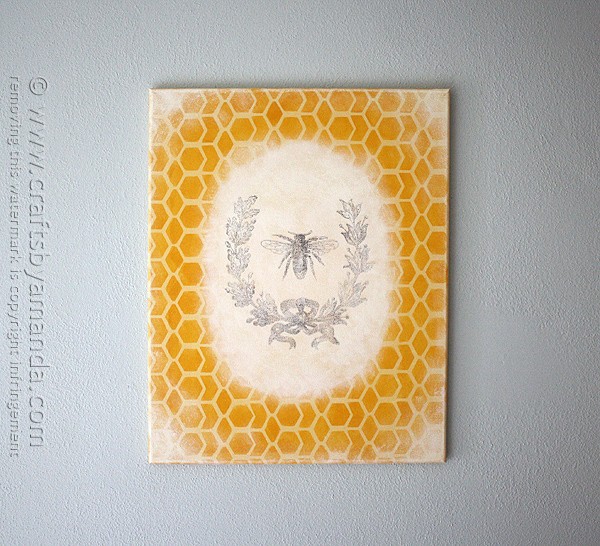
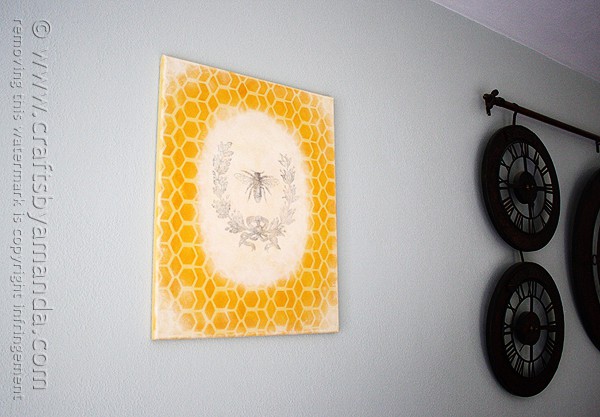
I’ve been getting the itch to redecorate and change out some of my paintings for new ones. I wanted to experiment with some yellow and know that honeycomb patterns are definitely trendy right now. I love the bee designs that are out there, so I decided to combine some stenciling and image transfer to create this honeycomb bee painting on canvas.
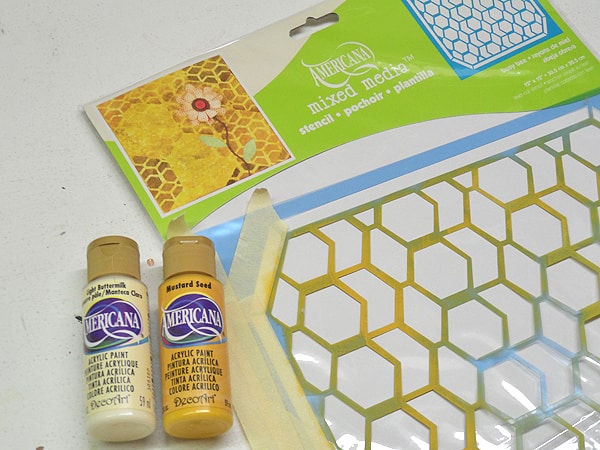
DecoArt recently sent me some of their new stencil, one of them included this honeycomb pattern designed by my very good friend, Jen Goode! I used Americana acrylic paints in Mustard Seed, French Vanilla and Light Buttermilk.
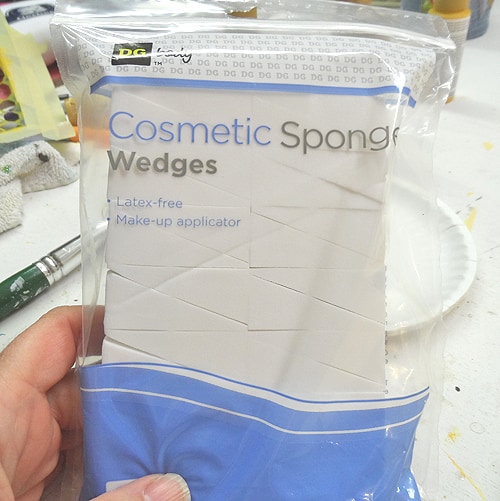
Before I dive into explaining this project, I have to give a shout out to my friend Donna from DecoArt. She told me about using these dollar store cosmetic sponges for stenciling. I will NEVER use any stencil pouncers or brushes ever again. The denseness of the sponge material is perfect for stenciling and they are super inexpensive. I never really liked stenciling before, but these babies have given me a whole new perspective!
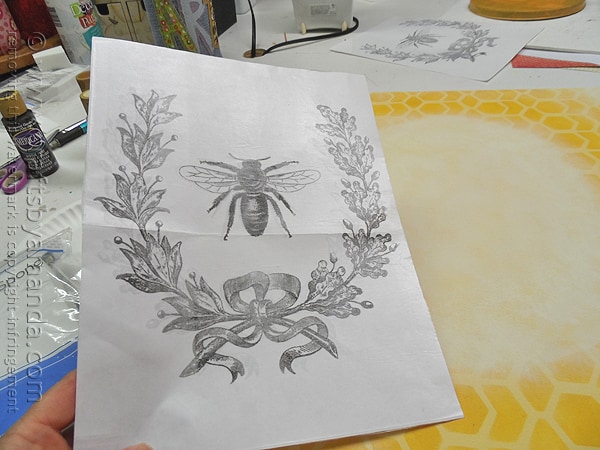
When I originally decided to make this project, I was trying to figure out the best way to add a bee to it. I thought about just painting a bee silhouette, which would have looked nice, but was a bit simpler than I really wanted.
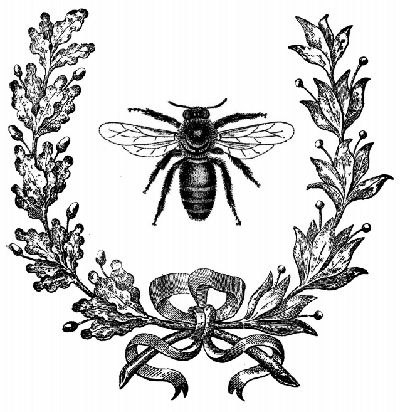
That’s when I went to The Graphics Fairy and found this French Wreath with Bee printable and just loved it! At first I considered decoupaging the bee on, but that would have left white around the edges from the paper. There’s also a reverse decoupage method, a photo transfer like this Vintage Wild Flowers on Wood project, that might have worked, but in the end I decided on a simpler transfer method using freezer paper.
Here’s what you do:
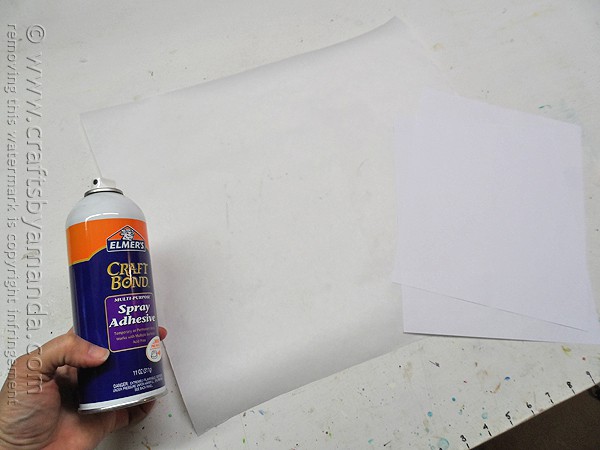
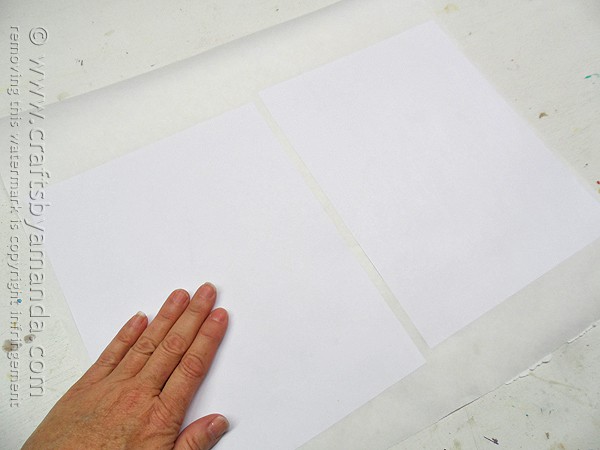
Place the freezer paper shiny side down. Use spray adhesive to attach a regular sheet of copy/printer paper to the dull side of the freezer.
I made two so I could have an extra.
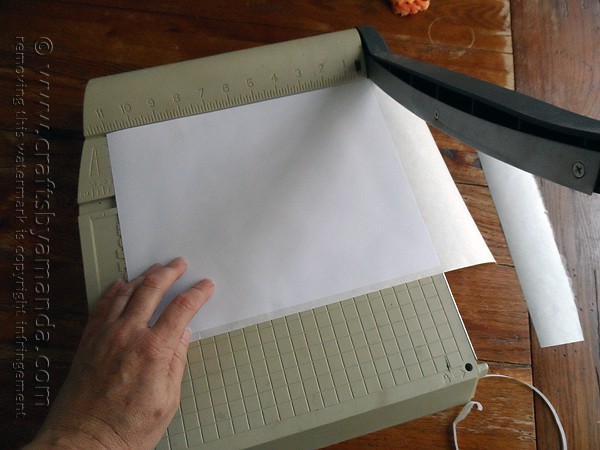
Trim the excess freezer paper off.
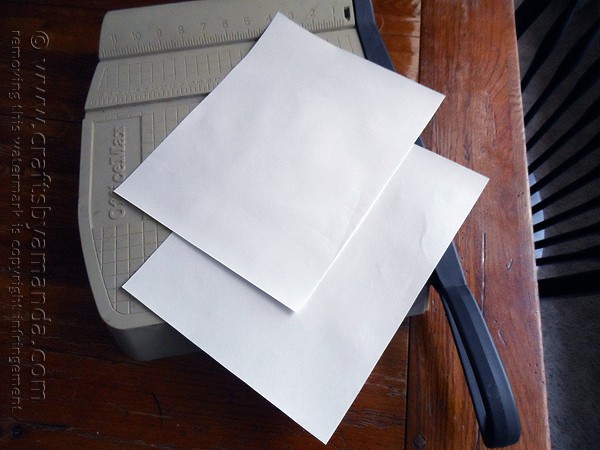
You will end up with a piece of printer paper attached to a piece of freezer paper that can be fe through your printer. That’s all the printer paper is for, to help feed it through.
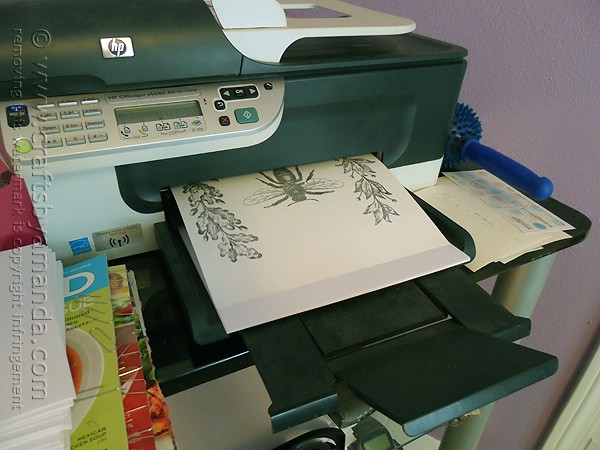
You will need to REVERSE your image. I did this in Photoshop Elements, but as I understand it, you can also do it in Paint. Karen has an easy tutorial for reversing images in Paint. http://thegraphicsfairy.com/how-to-reverse-images-for-transfers/
To reverse an image in Photoshop Elements, open the image then select:
Image > Rotate > Flip Horizontal
Now you need to feed your freezer paper into your printer so that your image will print on the freezer paper side (shiny), not onto the copy paper side.
Be careful not to touch the image after it prints. The ink will still be a bit wet and you can smudge it!
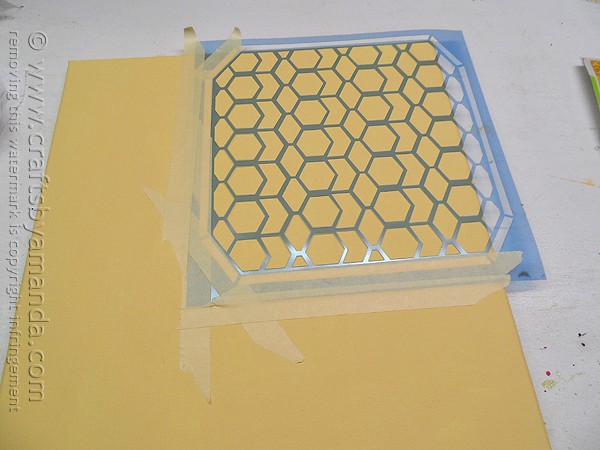
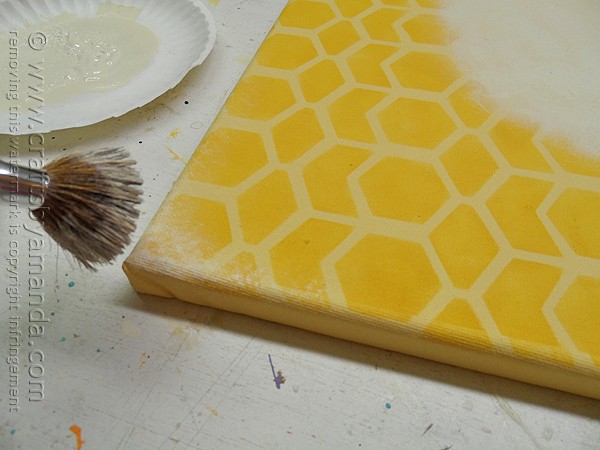
I painted the canvas background with French Vanilla. When it was dry, I used masking tape to hold the honeycomb stencil in place.
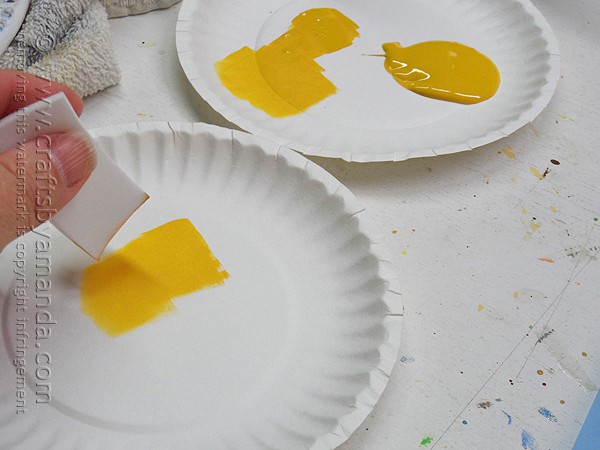
Load a cosmetic sponge with Mustard Seed paint and dab off the excess.

Apply paint over the stencil in an up and down motion so as not to push paint underneath the stencil.
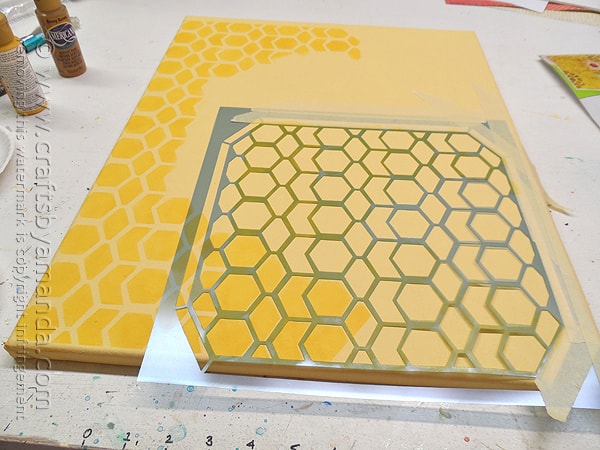
When the first section is done, reposition the stencil, lining up the end of the finished section with the stencil itself. Tape down and continue adding paint.
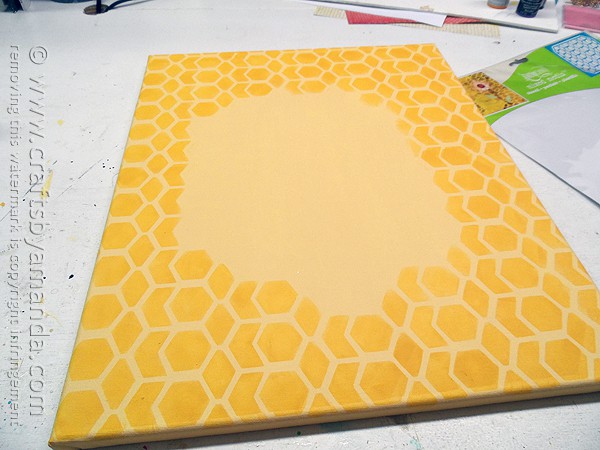
Do this until you’ve gone all the way around, leaving the center of the canvas empty.
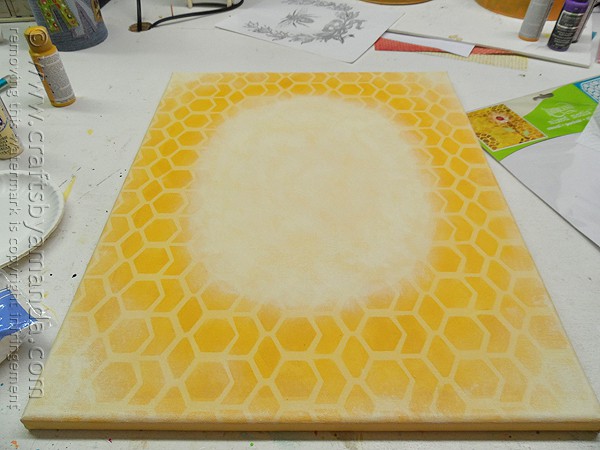
Use a large scruffy brush to add Light Buttermilk paint to the center of the canvas. Don’t be heavy handed, dab off excess paint onto a paper towel before adding to the canvas. Soften the edges of the center oval using the scruffy brush or a cosmetic sponge.
Use a scruffy brush to soften all the edges and corners of the canvas. Let it dry completely.
Now it’s time to transfer the bee! Place the image face down onto the center of the canvas and carefully hold it in place with one hand (or tape it if you like). Rub the back of the paper with a spoon to transfer the ink image from the freezer paper to your canvas. Carefully lifting and peeking to see if it’s transferring is fine, just don’t move it or it won’t be lined up!
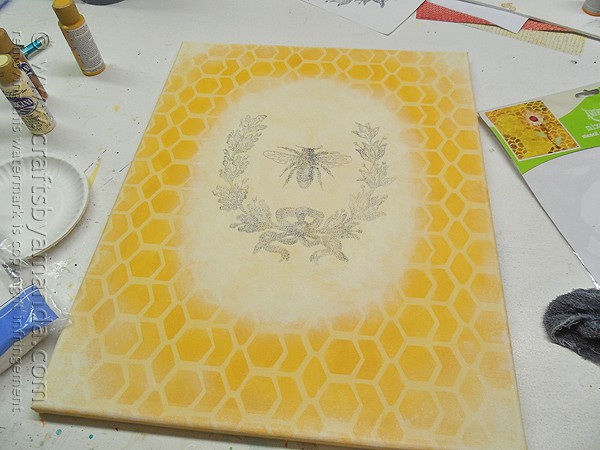
Carefully lift the paper up to reveal your newly transferred design! Allow it to dry for several hours, then spray with acrylic sealer.
If you like canvas projects, you might like this Vibrant Button Tree on Canvas or this White Cherry Blossom Tree Painting, which is one of my all time favorites! You can use epsom salt on canvas for a 3D look or do some simple stenciled pieces like these Stenciled Botanicals.
You can also use hot glue to create these 3D Botanical Mini Canvases or maybe you’d like to try your hand at this Birds on a Branch Silhouette Painting. And speaking of birds, try this Bleeding Tissue Paper Bird Art. No matter what you decide to do, I hope you have fun with it!
I am a DecoArt Core Blogger. I was compensated for this post, but have always loved DecoArt products! Therefore, all opinions expressed here are 100% my own.
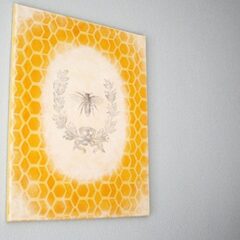
Vintage French Bee Wreath on a Honeycomb Canvas
Supplies
- 18 x24 stretched canvas
- Americana acrylic paint: French Vanilla Mustard Seed, Light Buttermilk
- Freezer paper
- Copy paper
- Acrylic sealer spray matte finish
- Cosmetic sponges
- Scruffy paintbrush
Instructions
- Place the freezer paper shiny side down. Use spray adhesive to attach a regular sheet of copy/printer paper to the dull side of the freezer.
- Trim the excess freezer paper off. This is your transfer sheet.
- You will need to REVERSE your image and print it out onto the freezer paper side of your transfer sheet.
- Be careful not to touch the image after it prints. The ink will still be a bit wet and you can smudge it!
- Paint the canvas French Vanilla. When dry attach stencil with masking tape.
- Load a cosmetic sponge with Mustard Seed paint and dab off the excess.
- Apply paint over the stencil in an up and down motion so as not to push paint underneath the stencil.
- When the first section is done, reposition the stencil, lining up the end of the finished section with the stencil itself. Tape down and continue adding paint. Do this until you've gone all the way around, leaving the center of the canvas empty.
- Use a large scruffy brush to add Light Buttermilk paint to the center of the canvas. Don't be heavy handed, dab off excess paint onto a paper towel before adding to the canvas. Soften the edges of the center oval using the scruffy brush or a cosmetic sponge.
- Use a scruffy brush to soften all the edges and corners of the canvas. Let it dry completely.
- Place the bee image face down onto the center of the canvas and carefully hold it in place with one hand (or tape it if you like). Rub the back of the paper with a spoon to transfer the ink image from the freezer paper to your canvas. Carefully lifting and peeking to see if it's transferring is fine, just don't move it or it won't be lined up!
- Carefully lift the paper up to reveal your newly transferred design! Allow it to dry for several hours, then spray with acrylic sealer.
- Swirling Twirling Ladybugs - July 21, 2026
- Drip Tie Dye Backpack - July 17, 2026
- Mini Coastal Clay Houses - July 14, 2026


Marisa says
Beautiful! Love the honeycomb. So, it doesn’t matter if you use an inkjet printer instead of laser? I know some crafts require laser printer so it doesn’t smear. Thanks for the tutorial too.
Amanda Formaro says
Hi Marisa! Mine is an inkjet. You can always do a small test image to see how it works. Also, if you work within a reasonable amount of time, you can wipe off the first image and run the paper through the printer again :)
Jewel says
This is so lovely. Your directions and pictures are amazing to follow. One Question: Is it necessary to have a reverse image for this picture?
Amanda Formaro says
Hi Jewel! For this particular picture, no you don’t have to have the reverse image. I did it because I like the way it looked as is. If I printed it as is though, when I transferred it to the canvas the image would have been backwards. If you are using an image with words you would definitely need to reverse the image first :)
Angie | Big Bears Wife says
Can you please come and make all of my wall art for my house! I love it
Amanda Formaro says
Haha thanks Angie!
Lana @ Never Enough Thyme says
I really like the French botanical look of this, Amanda! Very current and trendy.
Amanda Formaro says
Thank you so much Lana!