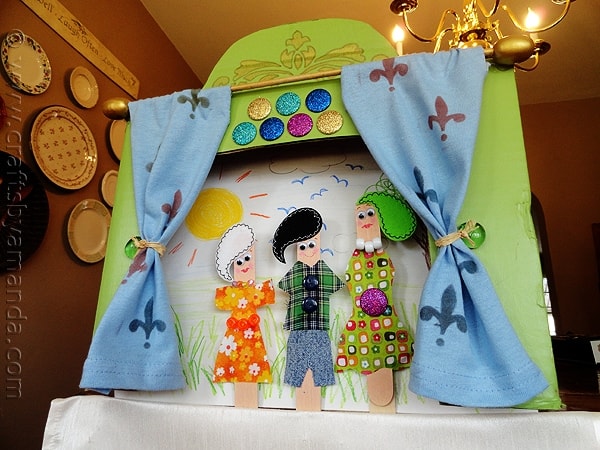
Puppets and puppet shows are a favorite among children. They love to play make believe and create little pretend worlds full of fascinating characters. So why not create a little puppet theater out of a cardboard box, decorate it and make some simple craft stick puppets to star in the show! That’s exactly what I did for my Scribble Shop craft challenge!
Scribble Shop is an online craft supply store with a huge selection of items available, over 75,000! They challenged me along with several other crafty bloggers to take a box filled with miscellaneous craft supplies and create something out of it. The challenge was to use as many of the supplies as we could. Well my friends, I not only used ALL of the supplies that they sent to me, but I also used the box that they came in!
In case you missed it, here’s the video I posted on YouTube opening my box of supplies. I’ll be honest, when I first opened it I couldn’t think of a thing to make! So many different supplies, things I hadn’t thought to put together before. Luckily they sent me the stash a couple weeks early so I could put my thinking cap on. :)
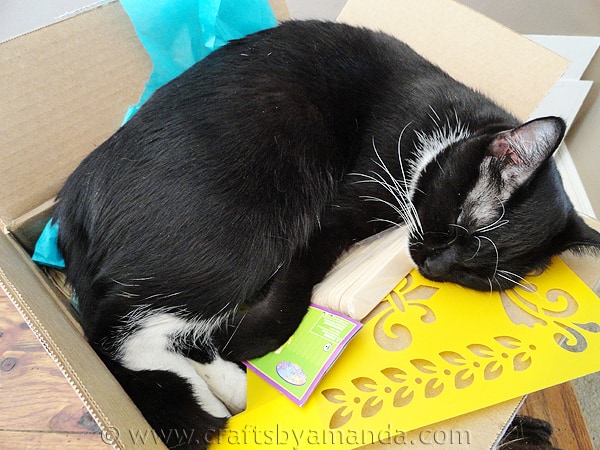
After opening the box I put the supplies back in. It wasn’t long after that one of the cats found that she really liked the supplies too.
Here are the supplies that I used for this challenge.
From my Scribble Shop box of supplies:
Metallic Stamp Pad
Dress It Up Embellishments
Mod Podge
Stencil
Raffia
Glass Gems
paisley Shapes
Popsicle Sticks
Colored Pencils
From my own stash:
Paint: green, peach, gold
Gold paint pen
Small pouncer
Oval wooden beads
Wooden dowel
Fabric scraps
Pony beads
Small crystal beads
Buttons
Googly eyes
Recycled cardboard (cereal box, back of note pad, etc)
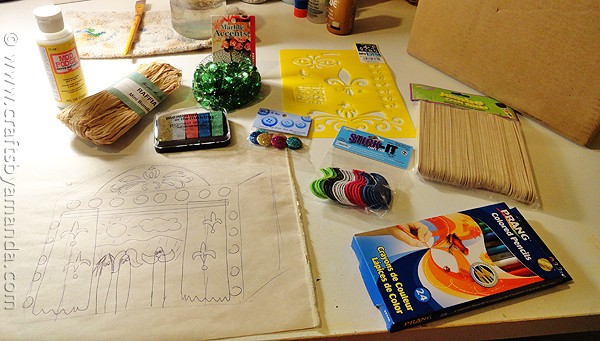
Then one day it hit me. It started with the craft sticks. Puppets were a given. Then suddenly the idea of the puppet theater made from the box popped into my head and it was like the flood gates opened. All the ideas using the different supplies just gushed in, so I sketched out an idea and got to work!
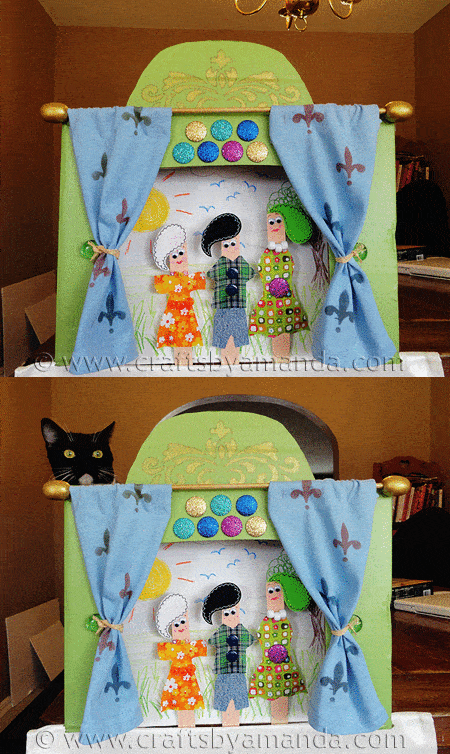
First I cut the flaps off of the open end of the box. Then I trimmed out the stage opening. From that piece I cut a half circle that would fit nicely on top. I used my box cutter to cut a slit for the half circle and made sure it fit.
Then I painted the box with a bright green. Any color would have worked, but I knew I had a few colorful things to work with and I wanted it to be kid friendly for both genders. Green is a nice neutral color. I also chose to you Patio Paint because I really love the coverage that I get with it. You can use your favorite acrylic craft paint in any color you choose. Next I used one of the stencils and some gold paint to add a design to the half circle. I traced the stenciled design with a gold paint pen.
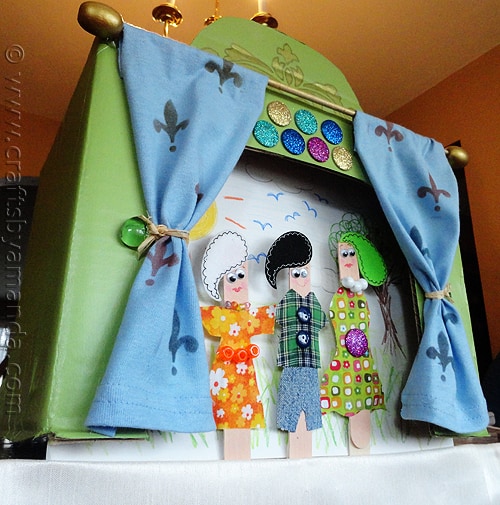
Every theater needs curtains, so I pulled out an old t-shirt I had already cut into for a previous project. I cut two 4″ wide strips and stenciled them using the pigment ink pad and a pouncer. Then after painting a wooden dowel with gold paint, I hot glued the top of the curtains around the dowel.
I had some wooden beads in my stash so I painted those gold and stuck them on the ends of the dowel. Then I hot glued the “curtain rod” to the front of the box. For tie backs, I glued a flat marble to the box, tied the curtain with raffia, and glued that to the marble.
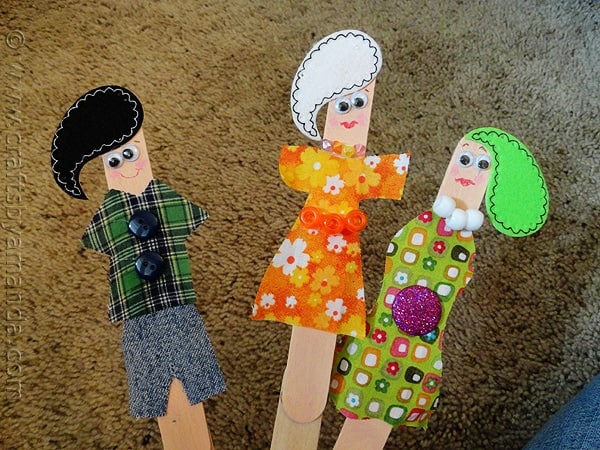
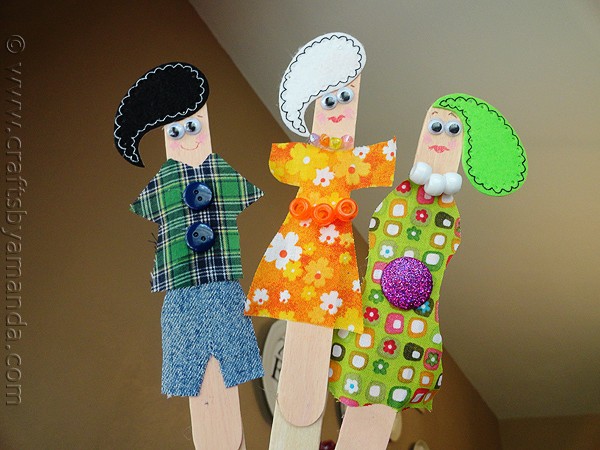
For the puppets, I painted three craft sticks with a peach colored paint. I had some scrap fabric in my stash and cut out some little clothes. I attached the clothes to the craft sticks with Mod Podge. I accessorized their clothes with beads and buttons and used the self stick felt paisleys for the hair. Googly eyes were added last, and I used colored pencils to add rosey cheeks with pink and lips with red. Lastly, I added a second craft stick to the bottom of each puppet to basically give them a handle so little hands and fingers wouldn’t show on stage.
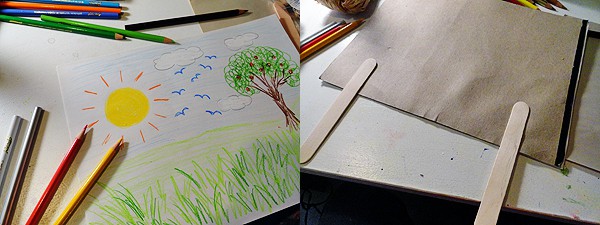
Every stage needs a back drop. While I only made one, your kids could make several scenes. Mine is kind of a spring meadow type look but night time would be fun, or maybe a farm scene or even sky scrapers in the big city! Sky’s the limit. Have your kids draw a scene with colored pencils onto white paper. Use a glue stick to attach the paper scenes to a piece of recycled cardboard, then add craft sticks to the back for handles. You will need a “stage hand” to hold up the scene while the puppeteer carries on the show. The final touch was to add those little colorful “Dress It Up Embellishments” to the top between the two curtains. I think they look like colorful stage lights! :)
So there you have it, your very own puppet show theater! Even Nala likes it! Peek a boo!
Thanks go out to Scribble Shop for sponsoring this fun challenge. You can get all of the items I used by clicking on the links in my supply list. Don’t forget to visit the Scribble blog for inspiration. You should also follow Scribble Shop on Facebook, Google Plus and Twitter.
I was provided product and a stipend to cover my time and expenses when making this project. Please know that the opinions expressed in this post are honest and 100% mine.
- Snowman Slime - December 20, 2024
- Paper Plate Santa, Snowman and Rudolph - December 13, 2024
- Cinnamon Ornaments - December 6, 2024
Vicki O'Dell says
Such a great project! Thank you for doing the project round up too. Great idea! :)
Scribble Shop says
Hi Amanda,
Thank you for participating in the Scribble Shop Challenge.
This is absolutely adorable, I love the popsicle stick character, their hair and outfits are so cute!
We are posting the finalist on our facebook page http://www.facebook.com/ScribbleShop tomorrow, March 30th, 2012.
Stay Tunned!
Amanda says
Thanks! It was a lot of fun :)
Amy* says
This is so adorable! I love all of the details you put into your theater and the puppets. I love that you used the paisley shapes for the hair…especially the green one she is sooo Marge :) your furry little assistant is too cute!
Mod Podge Amy says
GIRL you totally outdid yourself on this one! It’s so cute – and I love that hair :D
Kassi @ Truly Lovely says
This is so fun!!! I’m sure the kiddos will get great use out of this one! :)
Rena says
Very cute! Love the cat, too.
Lolly Jane says
Holy creative! Is there a winner for this challenge? If so you would WIN ;) What a darling project- we had to think way outside the box just to use a few items and are super impressed you used them ALL! Wow!
http://lollyjaneboutique.blogspot.com/2012/03/popsicle-stick-flower-clips.html
:)Kristi & Kelli
Breanna says
it’s just so fantastic!!! brilliant use of all the supplies…and such an adorable addition to a kid’s playroom/area!!! hooray for you!!!
LisaW says
Such a fun project, and great use of those Scribble Shop products!! My kids would love to play with that.
Condo Bleus says
That is so clever! Although I think your cat beat you to using all of the supplies – as a bed.
Sandra says
Such a creative way to use ALL your supplies. We love puppet shows ’round these parts!
Vivienne @ The V Spot says
That is adorable! Very clever and I think the cat is hilarious. :) Your shamrock plant poke went up today. Thank you.
Wendy says
This is so GREAT! I’m participating in the challenge too – my reveal will be Thursday. I love the puppets. Love your hair choice! :) I like those paisley stickers a lot, but didn’t end up using them in my creation.
Diana@The Girl Creative says
Wow! How creative!!! It came out sooooo cute!! Can’t wait to see what everyone else has created. :) xoxo