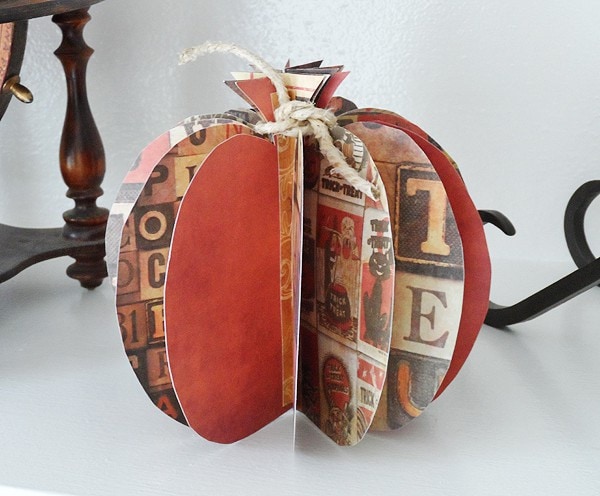
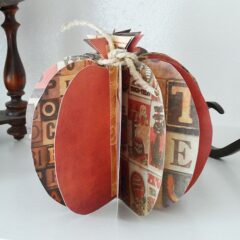
Use fall or Halloween themed cardstock to create this 3D paper pumpkin to display in your home. Add a little twine to the top and you have a simple yet festive piece of decor.

3D Paper Pumpkin
It’s only been a few years that I’ve actually decorated for fall and Thanksgiving. Halloween is a different story, I’ve always decorated for that! However, now that I have visitors more than just my immediate family for Thanksgiving dinner, I like to add a few fall touches here and there.
This 3D paper pumpkin is great for fall but works for Halloween or Thanksgiving as well! Add it to your fall mantle, use it in your Thanksgiving tablescape, or display it at a Pumpkin Painting Party.

Craft Supplies You Will Need
You can find the full printable instructions at the end of this post.
- Heavy two-sided scrapbook paper in fall or Halloween theme
- Scrapbook paper in a similar fall theme, lighter weight
- Glue tape or glue stick
- Twine
- A plain sheet of paper
- Paper cutter (optional)
How To Make A 3D Paper Pumpkin

Cut scrapbook paper into eight 6-inch squares. You will need a total of seven squares.
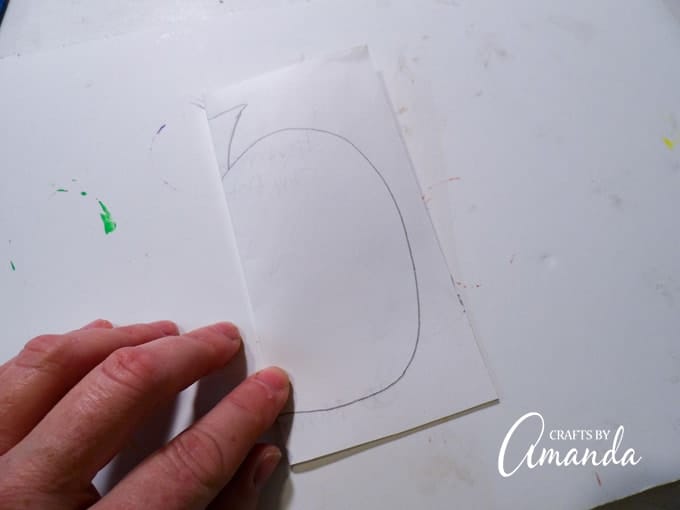
Cut a plain sheet of paper into a 6-inch square. Draw a pumpkin shape onto the paper to create a pattern. Be sure your pumpkin has a stem.
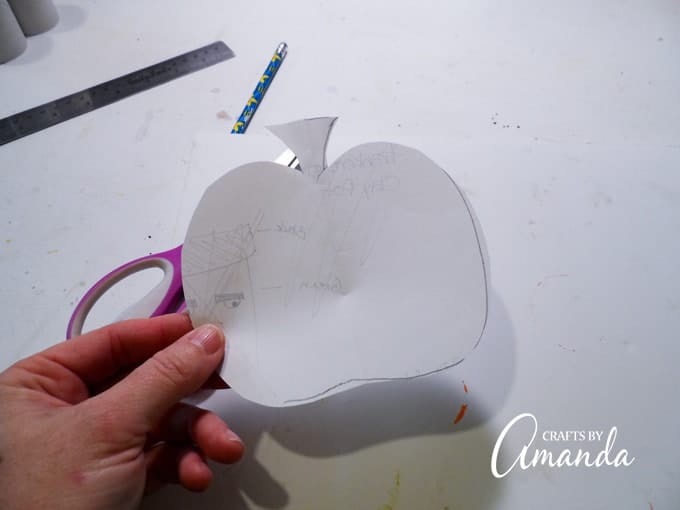
Cut out the pattern.
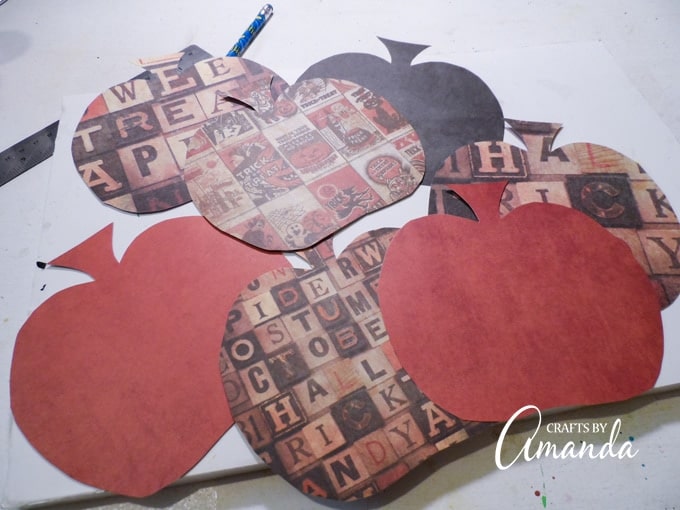
Use the pattern to cut pumpkins from each of the pieces of scrapbook paper.
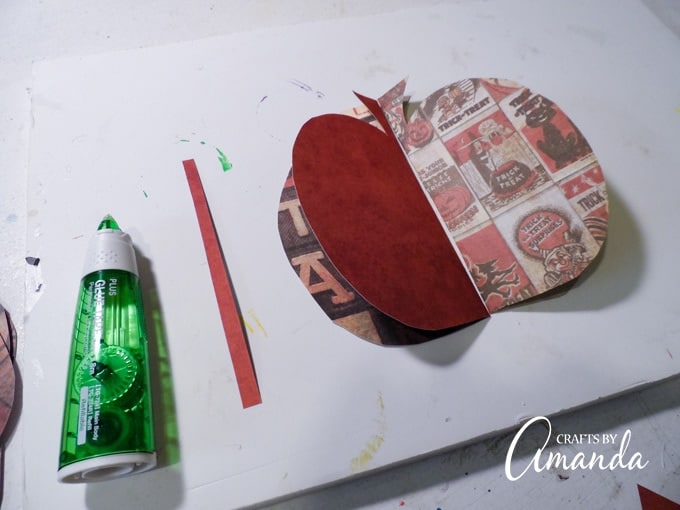
Fold each pumpkin in half and crease. Place two pumpkins, side by side with the creases touching each other. Cut the lighter weight scrapbook paper into half-inch wide strips, the height should be a little shorter than your pumpkins.
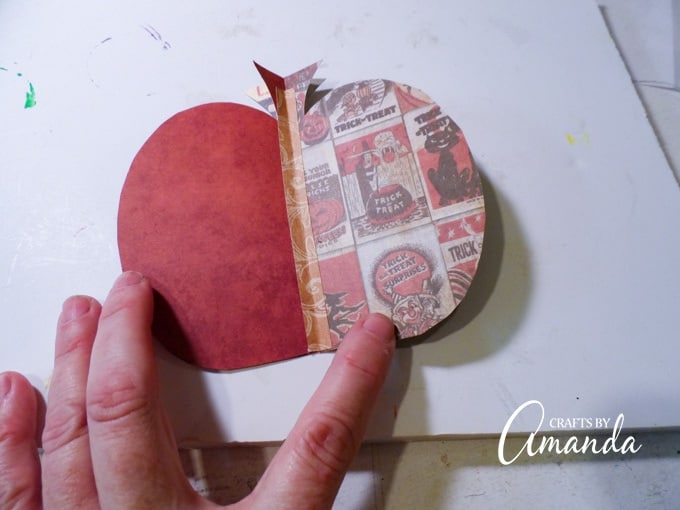
Using the glue tape to add adhesive to the back of the paper strip, then press it onto the creases of both pumpkins, joining them together. Repeat the above process until all of your pumpkins are connected together forming one pumpkin. Cut a piece of twine and tie it carefully around the stem of the 3D pumpkin.
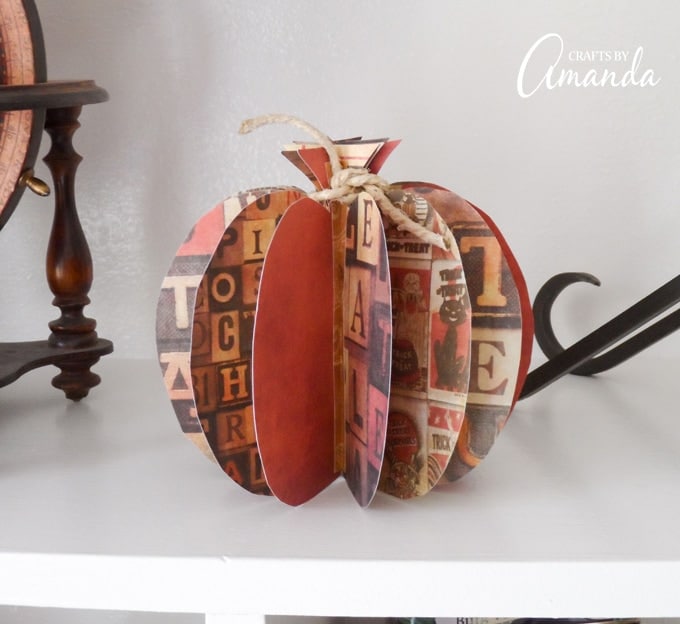
These paper pumpkins are really easy to make and they look great! They are nice and sturdy (depending on the paper you use of course) and can work for the entire fall season. If you’d like to try another easy pumpkin project, these no-sew sweater pumpkins are adorable!
More Fall Crafts
- Fall Luminaries
- Sunflower Wreath
- Mason Jar Lid Pumpkins
- Sunflower Welcome Sign
- Deco Mesh Pumpkin Wreath
- Black Cat Pumpkins
3D Paper Pumpkin
Supplies
- Heavy two-sided scrapbook paper in fall or Halloween theme
- Scrapbook paper in a similar fall theme lighter weight
- Glue tape or glue stick
- Twine
- A plain sheet of paper
Instructions
- Cut scrapbook paper into seven 6-inch squares.
- Cut a plain sheet of paper into a 6-inch square. Draw a pumpkin shape onto the paper to create a pattern. Be sure your pumpkin has a stem. Cut out the pattern.
- Use the pattern to cut pumpkins from each of the pieces of scrapbook paper.
- Fold each pumpkin in half and crease. Place two pumpkins, side by side with the creases touching each other. Cut the lighter weight scrapbook paper into half-inch wide strips, the height should be a little shorter than your pumpkins. Using the glue tape to add adhesive to the back of the paper strip, then press it onto the creases of both pumpkins, joining them together.
- Repeat the above process until all of your pumpkins are connected together forming one pumpkin.
- Cut a piece of twine and tie it carefully around the stem of the 3D pumpkin.
This post was originally published on this blog on Sept. 16, 2013.
- Tie Dye Beach Towels - July 24, 2026
- Swirling Twirling Ladybugs - July 21, 2026
- Drip Tie Dye Backpack - July 17, 2026


Mrs H86 says
I see that this is from a few years back, but I went to your link in Amazon for the heavy cardstock, but it states not sure if or when it will be back in stock. Can you give me an idea of what to look for? I have autumn, but it’s not heavy in the least, not sure what to look for on the front of cardstock, is there a weight to go by or something else to make sure i get as close to what I need to make this? Thank you!
Tawnja says
I’m confused about what the heavier weighted paper is used for. The instrudtions only refer to the scrapbook paper pieces. Thanks!
Joy Senecal says
Im so excited to make this pumpkin! TY for the instructions,
a fellow crafter Joy
Angie Stewart-Lefler says
I absolutely LOVE this idea…will make several sizes! So cute.
Jeanne says
bet could use this process and assorted red papers and make apples, too. smaller size than the pumpkins – 3″ to 4″ would be a good scale. I have raffia so will use that instead of rope to tie on the stems. beige on the pumpkins and green on the apples. I love projects that are more autumn than specific to Halloween. this is perfect for the whole fall season – can’t wait to get started!
Katherine Elliot says
I want to feature your project for Trendy Tuesday article for the blog at Paper Crafters Library, featuring terrific pumpkin crafts. You can ck out the blog here: http://blog.papercrafterslibrary.com/ The image of your project will credit you and link back to your blog as well. If you do not wish to be featured for this article, just let me know.
Amanda Formaro says
Thanks for the feature!
Lulu says
How many peices of paper do you need!?
Amanda Formaro says
Hi Lulu :) It actually says in the printable instructions to cut a total of seven 6-inch squares. I’ve gone ahead and added that to the post as well, to avoid confusion. :)
elizabeth b says
omg yes this is such an amazing thing to make, thanks for the idea its great for decarations
Amanda Formaro says
Thanks Elizabeth, glad you like it!
onel says
Great idea! I can make this for the family photo stand! Thanks for the idea!
Amanda Formaro says
That would fun, thanks!
Theresa @DearCreatives says
This is super cute. I have been making pumpkin banners but, want to make one of these now. Drop by sometime if you like.
Amanda Formaro says
Thanks Theresa, glad you like it :)
BeautifulDestruction says
Great idea. Fun way to add some festive fall decor to my office. thank you!
Amanda Formaro says
Thank you!
Maria G. says
The idea is really funny but I would like make this pumpkin out of the photos from the previous Halloween of my kids. I think it would be creative and funny to look at such an unusual pumpkin with photos of kids in costumes.
Amanda Formaro says
That would be fun!
Pat says
Great idea!