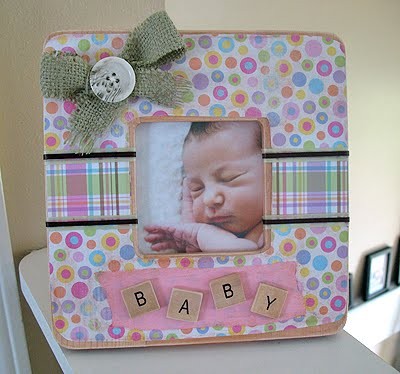
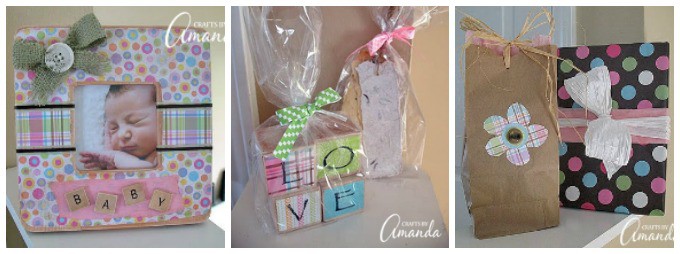
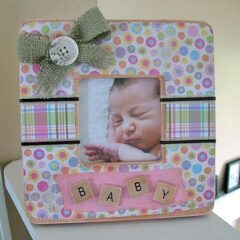
These baby frame and love blocks are a sweet and thoughtful handmade gift idea for the mommy-to-be. Perfect for gifting at a baby shower or as a sweet surprise when the baby arrives. I had everything on hand at my house to make this gift so it was an extremely frugal DIY gift! An easy decoupage project.
Baby Frame and Love Blocks
I was invited to a baby shower. I haven’t been to a baby shower in probably 18 years! If money is tight but you still want to bring a gift made with love, this Baby Frame and Love Blocks are the perfect frugal DIY!

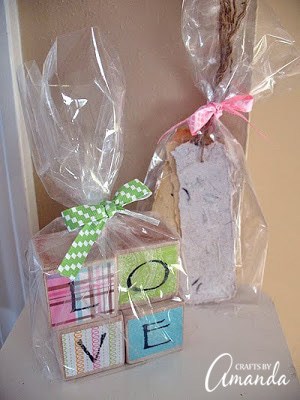
I knew I wanted to make some from the heart but something that was very affordable. So I decided on a cute little frame, some decorative blocks, and threw in some seeded bookmarks I had made previously. I didn’t even buy the gift wrap, so this was an extremely frugal adventure. While this frame is themed for a girl, you could easily change the colors for a boy’s baby shower. And speaking of baby showers, here are some great game ideas for baby showers if you’re having a boy. And before you know it, you’ll be planning a baptism or Christening party!
Total cost to me, including gift wrap = $0.00 :)
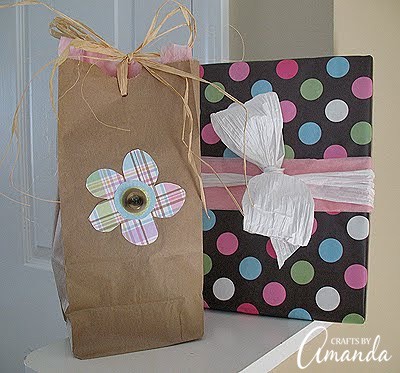
Everything I used I had on hand. So certainly there was a price at some point, but all of these items were in my craft supplies, the wrapping paper I had from a previous birthday, and I decorated a paper lunch bag for the gift bag. I just used some patterned paper cut into a flower shape, different paper for the flower center and a button on top of that. I used a hole punch through the top of the bag and tied it with raffia. For the gift box, I used some leftover pink tissue paper and white twisted paper to tie a bow.
There are affiliate links in this post. That means if you buy something from that link, I will earn a small commission, but it won’t cost you anything additional.
I’m really pleased with how they came out. I just don’t get to craft for ME anymore, it’s always kid’s crafts for work. So it’s really nice when I get the chance to get creative with something like this. I sure hope she likes it!
Note: You can use Modge Podge for this project, but I just use a mixture of white craft glue and water for my decoupage.
What you need to make the Baby Frame
- square wooden frame
- decorative paper (two different patterns, I used circles and checks)
- pink paper
- 3/4″ wide baby green ribbon
- 1/4″ wide brown ribbon
- 12″ x 1″ strip of burlap
- 1″ wide button
- white thread and needle
- alphabet tiles to spell out “BABY”
- white craft glue
- paintbrush
- water
- scissors
- brown paint (antiquing gel is better if you have it!)
- sandpaper
Make a photocopy of the frame, cut out the copy of the frame to use as a pattern. Trace the pattern onto the patterned paper you want to be the main background (I chose the circles).
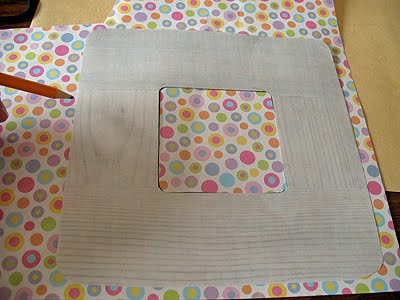
Cut out the patterned paper frame, then cut off about 1/4″ all the way around the outside and the inside of the frame shape.
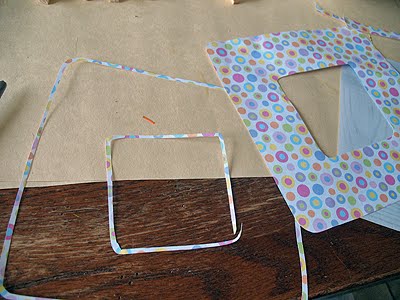
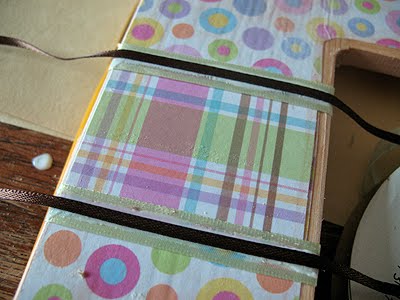
Next, position the paper frame on top of the wooden frame. Eyeball it, then trim where needed. Mix some white craft glue and water, equal parts of each, in a bowl to make your decoupage mixture. Using a paintbrush. decoupage the paper frame onto the wood frame, smooth out any bubbles or air pockets as you go. Cut two pieces of checkered paper, about 2″ in height and the same width as the side of the frame. Position in the center on each side and decoupage on.
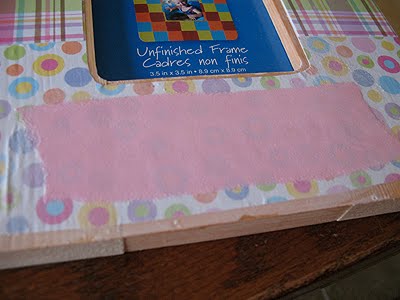
Tear a strip of pink paper to fit at the bottom of the frame and decoupage in place. If you have stain, or better yet, antiquing gel, use that (I only had brown paint, so I watered it down and worked with what I had) to give the paper an aged look. If using watered down paint, be sure to have a rag handy to wipe excess off as you work. Rough up all the edges with sandpaper.
Paint the alphabet tiles with thinned brown paint and wipe off excess. Sand all the edges with sandpaper. Glue the alphabet tiles to the pink paper.
Glue the green ribbon at the top and bottom of the checkered paper, wrapping around to the back and to the inside of the frame. Glue the brown ribbon to the center of the green ribbon.
Tie the strip of burlap into a bow. Sew button to the center of the bow, trim ends of bow if needed and make the edges ragged by pulling off a few threads. Glue the bow to the top left corner of the frame.
Keep scrolling down to find out how to make the Love Blocks!
Baby Frame and Love Blocks
Supplies
- square wooden frame
- decorative paper two different patterns, I used circles and checks
- pink paper
- 3/4 " wide baby green ribbon
- 1/4 " wide brown ribbon
- 12 " x 1" strip of burlap
- 1 " wide button
- white thread and needle
- alphabet tiles to spell out "BABY"
- white craft glue
- paintbrush
- water
- scissors
- brown paint antiquing gel is better if you have it!
- sandpaper
Instructions
- Make a photocopy of the frame, cut out the copy of the frame to use as a pattern. Trace the pattern onto the patterned paper you want to be the main background (I chose the circles).
- Cut out the patterned paper frame, then cut off about 1/4" all the way around the outside and the inside of the frame shape.
- Next, position the paper frame on top of the wooden frame. Eyeball it, then trim where needed. Mix some white craft glue and water, equal parts of each, in a bowl to make your decoupage mixture. Using a paintbrush. decoupage the paper frame onto the wood frame, smooth out any bubbles or air pockets as you go. Cut two pieces of checkered paper, about 2" in height and the same width as the side of the frame. Position in the center on each side and decoupage on.
- Tear a strip of pink paper to fit at the bottom of the frame and decoupage in place. If you have stain, or better yet, antiquing gel, use that (I only had brown paint, so I watered it down and worked with what I had) to give the paper an aged look. If using watered down paint, be sure to have a rag handy to wipe excess off as you work. Rough up all the edges with sandpaper.
- Paint the alphabet tiles with thinned brown paint and wipe off excess. Sand all the edges with sandpaper. Glue the alphabet tiles to the pink paper.
- Glue the green ribbon at the top and bottom of the checkered paper, wrapping around to the back and to the inside of the frame. Glue the brown ribbon to the center of the green ribbon.
- Tie the strip of burlap into a bow. Sew button to the center of the bow, trim ends of bow if needed and make the edges ragged by pulling off a few threads. Glue the bow to the top left corner of the frame.
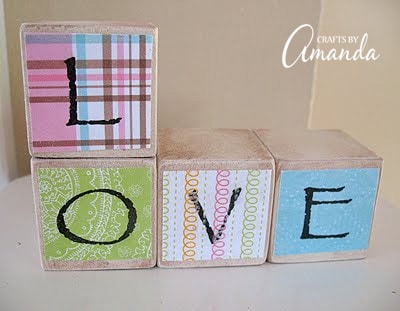
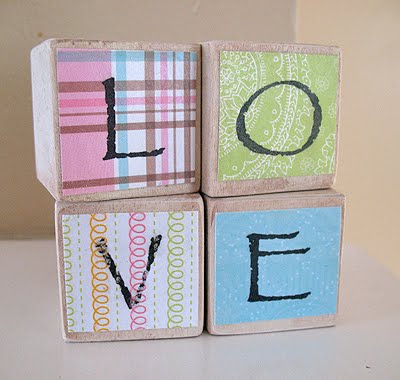
What you need to make Love Blocks
- 4 – 1 1/2″ wooden blocks
- 4 different patterned papers
- antique white paint
- antiquing gel (or thinned brown paint)
- sandpaper
- decoupage mixture (white craft glue and water)
- paintbrush
- scissors
affiliate
Sand the wooden blocks and paint them with antique white. Paint each block with thinned brown paint (or age with antiquing gel) and wipe off. Sand the edges of each block.
Use a software program, like Word, to type “LOVE” in Papyrus font, size 82. Print out the document and size it against the blocks to make sure the font is the right size. Change the word “LOVE” to just the letter “L” and print it on the first paper. Repeat with each letter for each patterned paper.
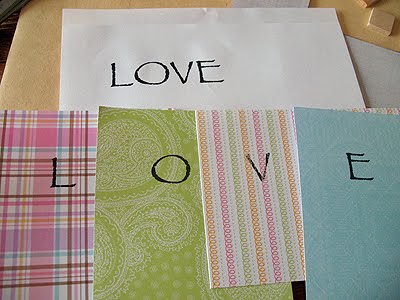
Trace one of the wooden blocks onto a piece of scratch paper and cut out. Cut the square a bit smaller and place it onto a wood block for sizing purposes. There should be visible block all the way around the paper square. If there isn’t, trim it. Using that square paper as your guide, cut out the patterned letters.
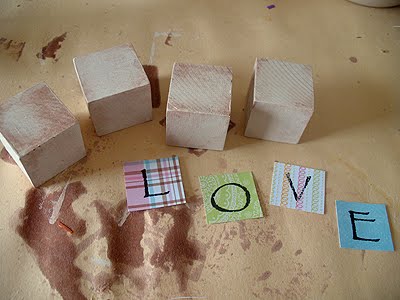
Decoupage each letter onto each block. Let dry.
- These Striped Beach Luminaries can actually be made as a baby shower gift as well! They’d go perfectly with the baby frame and love blocks. Just match up your colors and you have an adorable gift set for the Mom-and-Dad-to-be!
- Can you crochet? If so, these Crochet Baby Loafers would be the perfect addition to your gift!
- You can also easily make these Baby’s First Christmas Ornaments to include with the gift. All handmade with love!
Baby Frame and Love Blocks
Supplies
- 4 - 1 1/2 " wooden blocks
- 4 different patterned papers
- antique white paint
- antiquing gel or thinned brown paint
- sandpaper
- decoupage mixture white craft glue and water
- paintbrush
- scissors
Instructions
- Sand the wooden blocks and paint them with antique white. Paint each block with thinned brown paint (or age with antiquing gel) and wipe off. Sand the edges of each block.
- Use your a software program, like Word, to type "LOVE" in Papyrus font, size 82. Print out the document and size it against the blocks to make sure the font is the right size. Change the word "LOVE" to just the letter "L" and print it on the first paper. Repeat with each letter for each patterned paper.
- Trace one of the wooden blocks onto a piece of scratch paper and cut out. Cut the square a bit smaller and place it onto a wood block for sizing purposes. There should be visible block all the way around the paper square. If there isn't, trim it. Using that square paper as your guide, cut out the patterned letters.
- Decoupage each letter onto each block. Let dry.
- Tie Dye Beach Towels - July 24, 2026
- Swirling Twirling Ladybugs - July 21, 2026
- Drip Tie Dye Backpack - July 17, 2026


Shelley Graham Turner says
Oh I really like these! So adorable. LOVE that you used what you had on hand!!
Amanda Formaro says
Thanks Shelley! It was a grat gift, the new mommy loved it! :)
Amanda says
Hi Anon! You should be able to get these at Michael's, that's where I got these. Hobby Lobby should have them too. If you can't find them, be sure to ask an employee, they are always moving things around!
Anonymous says
I LOVE these blocks! My sister is having her first baby this summer and I'm planning her shower and I would love to make these for her! I've looked at a couple local craft stores and I unfortunately have not been able to find wood blocks like these. Where did you find yours?
Alison says
Hi Amanda!! This is such a cute set!! The blocks are so adorable! I would love for you to link up at our Baby Week link party at Oopsey Daisy:
http://oopsey-daisy.blogspot.com/2010/05/baby-week-and-link-party_05.html
Your stuff is amazing!
~Alison
Kristi Flanagan says
Such a sweet, personalized gift. Love, love love it!
Thanks for planting this creative seed too! Hope to see you again Friday!
Kristi
Punkin Seed Productions
ann says
I read the directions for the LOVE blocks and immediately gathered up the materials and had some made within the hour. I love them!! Thanks.
Lori says
I love all of this!
Thanks for joining Get Your Craft on Thursday. Please join me next week for another wonderful party!!
Please stop by next week I am having guest over each day and I would love for you to tell them HI!
PeaceLoveApplesauce says
Hi!! These are fabulous.. Thanks for the idea!
Visiting from Somewhat Simple. :)
Carolyn @ My Backyard Eden says
Homemade gifts are always so special! Yours turned out great!
Thanks for linking up to Make it Yours Day at My Backyard Eden!
btw- I featured your Checkerboard Easter Cake this week!
Jason and Jill says
Love all of these! I would love for you to come link up over at my blog! I've got prizes :)
-Jill
http://womenwhodoitall.blogspot.com
CJ {Pink Tea} says
I love the blocks. Thanks for mentioning it.
Lanie Ree says
This all turned out so well! I bet the mother-to-be will love everything. And those dollar frames are one of my favorite things to work with. Nice job!
Thank you for linking this to A Little Craft Therapy with Life in the Pitts.
Sarah @ Hennessey House says
wow, these turned out beautiful :)
Pat Harris says
The blocks aare so cute. Love the pastel colors! I especially love the frugality of the gift. Did good. Thanks for visiting junkblossoms. Please visit again soon, we love company. Blessings, Pat
Amanda says
Thank you everyone!
Rachel – YAY! Thanks! Always love be featured on your site :)
katherinemarie – WOW – your photographs are stunning!
katherinemarie says
Your "lo-cost" baby gifts will be life-time treasures!!!! I'm sure mama-to-be was blown away with your thoughtful and creative presents.
funplayroom says
Those blocks are so cute!!! Great idea!!!
Jessica Hills says
Wow those are SO adorable! Seriously…some of the cutest baby gifts I have seen.
Meg says
Very cute. Love the blocks! I'm into name blocks right now, for my kids! So easy and they love to play with them!
Whimsical Creations says
Those are beautiful presents.
Leanne says
I love the blocks and the frame. What great presents to receive. You did a beautiful job.
[email protected] says
That is so cute Amanda. What a great set. Thanks so much for sharing this, I'll be linking.
One Cheap B*tch says
Wow – both of these are great projects! I have a baby shower in June and I definitely think these would make for beautiful gifts for the mom-to-be!
Megan says
A very special gift indeed. I know would kove it! :)