
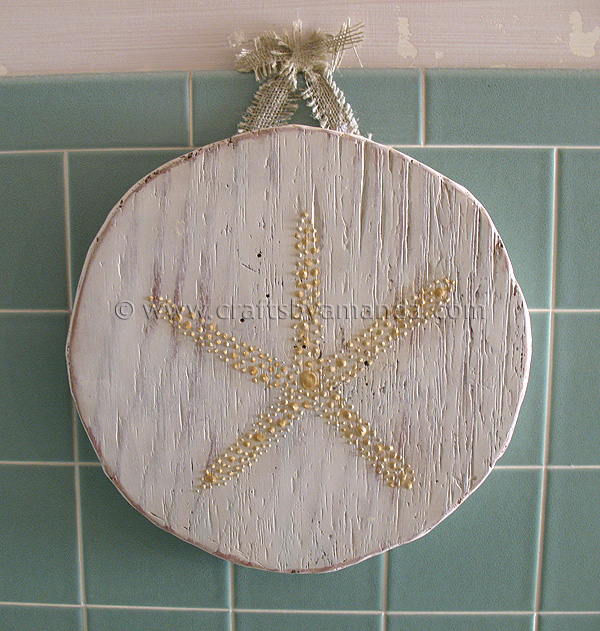
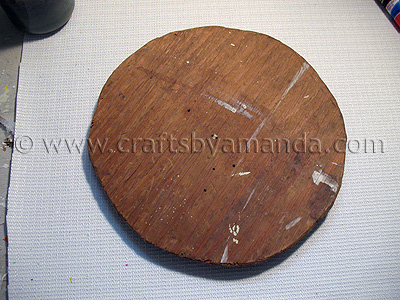
I have decided to give my bathroom a beach makeover. The biggest problem with this bathroom is the overabundance of green tile. It is everywhere. To top that off, there’s an entire wall of cabinets, and they were painted green to match! There was also some really hideous wallpaper and some very ugly ornate fixtures. In order to spruce it up on the cheap as we slowly work through remodeling it, I made this starfish beach plaque from an old ice fishing bucket. Let me show you how…
I have always loved starfish, sand dollars, shells, coral and all other sea decorations. Something I never liked though was the coral pink and seafoam green beach decor of the 1970’s. Unfortunately for me, the bathroom in my house is a combination of the decor I loathe with a Victorian twist. Yuk. We’ve already begun peeling ancient wallpaper and have primed the green cabinets, but we have soooo much more work to do and not enough money to do it with. So in the meantime I’ll be adding some beachy type touches as I work my way through this long, drawn out remodeling adventure.
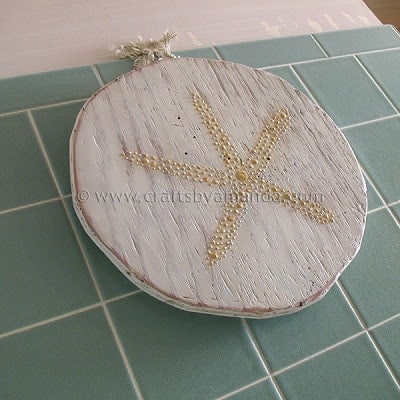
Note: Please ignore the chippy look of my wall above the tile in the first photo. We are in the process of removing some very old and very sticky wallpaper!
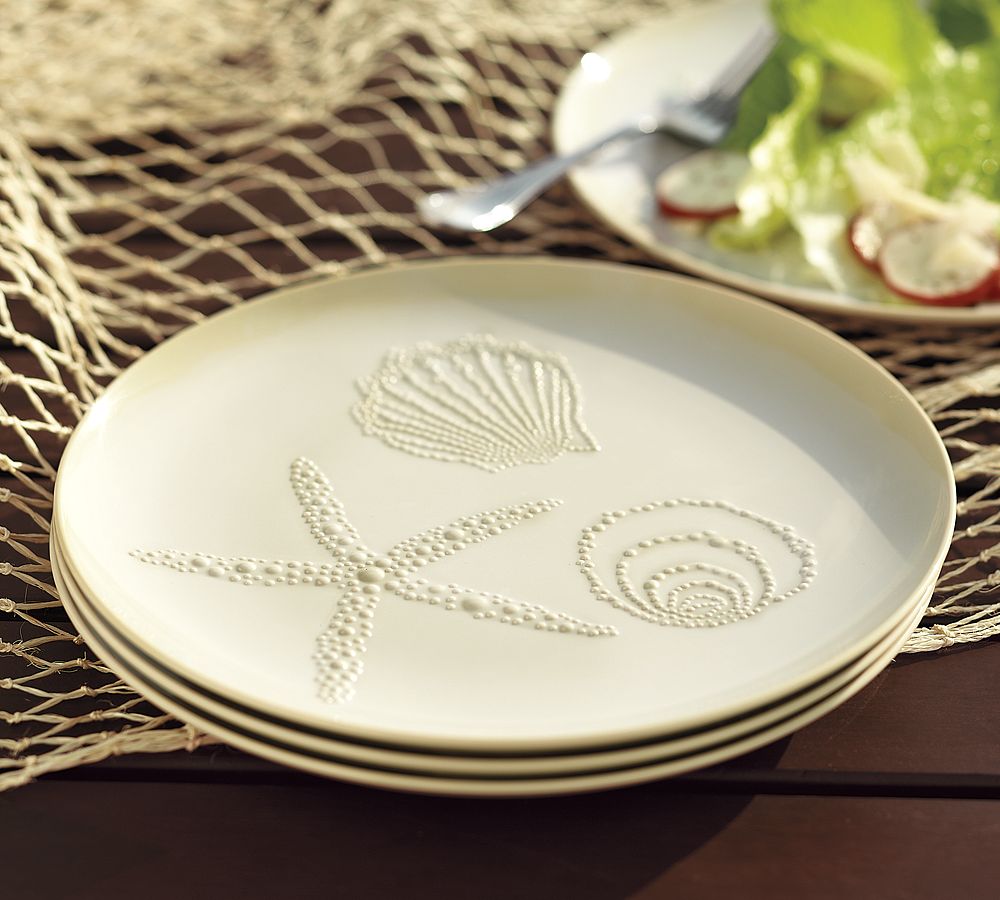
I was flipping through my Pottery Barn catalog when I came across this picture. It’s for their Shell Melamine Salad Plates. I immediately fell in love with the design of the starfish I knew I could recreate it somehow.
So I looked through my stash, and here’s what I came up with…
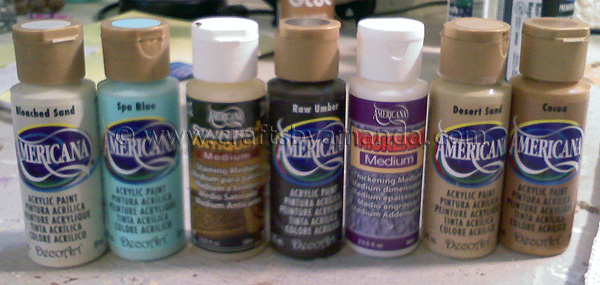
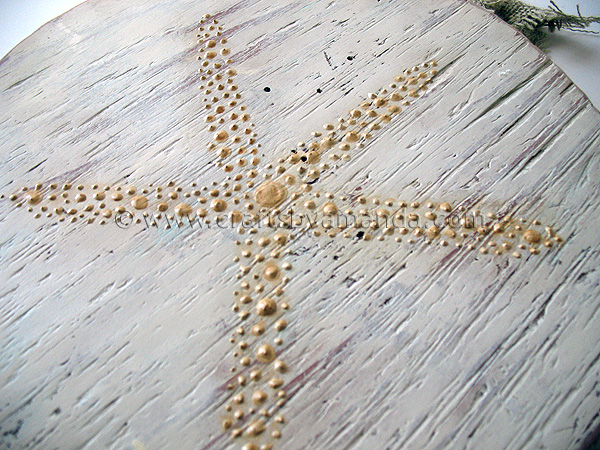
Here’s what I used to create this project. For the base I used Americana Bleached Sand with a few touched of Spa Blue. I used some Raw Umber mixed with Staining/Antiquing medium, then used Americana Desert Sand mixed with an equal amount of Thickening Medium to create the 3D starfish. Finally, I dry brushed on some Americana Cocoa.

First I sanded the entire surface and sides of the wood using my beloved Ryobi hand sander![]() . Then I dusted it off with a soft brush.
. Then I dusted it off with a soft brush.
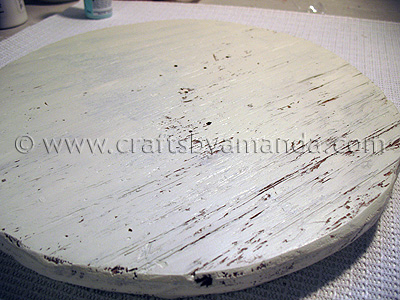
I added a coat of Bleached Sand. I thought about giving it a really good coat of paint, but I was pretty smitten with the way it looked with all the little nooks and crannies. So I just painted until I liked it.
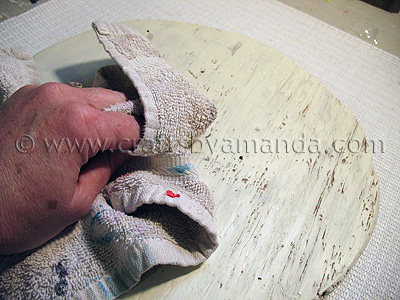
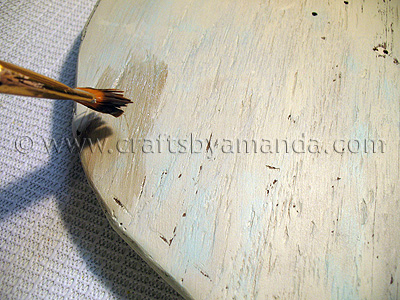
I ran a dry rag over the still damp paint. I wanted to removed any excess paint and dry it off, while giving it a more aged look from the start.
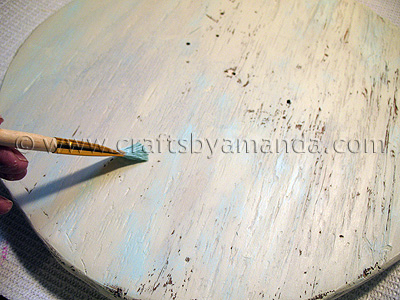
I used a dry brush to randomly add Spa Blue.
Applied the stain…

… and wiped it off, and just kept doing this until I was happy with the results. I didn’t want it to be dark, just a little aged.
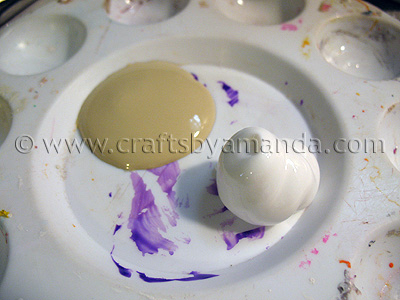
I mixed equal amounts of Desert Sand and Thickening Medium together. Ignore the purple on my palette, it’s stuck there. I need new palettes. :-P
Thickening medium allows your acrylic paint to behave a little more like oil paints in that they don’t dry as quickly and the shape can not only be manipulated, but will also hold up better. I let it dry overnight, then dry brushed some cocoa carefully over the starfish to make it a little darker and make it look a bit sandy.
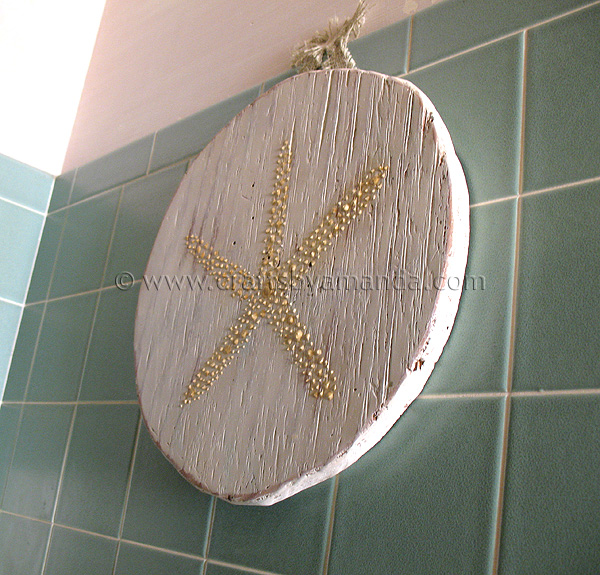
I love the way it turned out and can’t wait to get everything else in my bathroom done!

Distressed Beach Starfish Plaque
Supplies
- plastic bucket lid
- staining/antiquing medium
- thickening medium
- Ryobi Sander
- soft brush
- dry rag
Paint
- Americana Bleached Sand
- Americana Spa Blue
- Americana Raw Umber
- Americana Desert Sand
- Americana Cocoa
Instructions
- First I sanded the entire surface and sides of the wood using my beloved Ryobi hand sander. Then I dusted it off with a soft brush.
- I added a coat of Bleached Sand. I thought about giving it a really good coat of paint, but I was pretty smitten with the way it looked with all the little nooks and crannies. So I just painted until I liked it.
- I ran a dry rag over the still damp paint. I wanted to removed any excess paint and dry it off, while giving it a more aged look from the start.
- I used a dry brush to randomly add Spa Blue.
- Applied the stain…
- … and wiped it off, and just kept doing this until I was happy with the results.
- … and wiped it off, and just kept doing this until I was happy with the results. I didn’t want it to be dark, just a little aged.
- It was easier to show you how I made the dots by using a video…
- I let it dry overnight, then dry brushed some cocoa carefully over the starfish to make it a little darker and make it look a bit sandy.
- Patriotic Bandana Wreath - June 9, 2026
- Ladybug Painted Rocks - June 5, 2026
- Clay Pot Toadstools - June 2, 2026


Elle says
Amanda! Can I just hire you to make all kinds of goodies for my house? I LOVE your ideas. Truly love them!
abeachcottage says
Love this! a very cute project and so beachy. Thanks for the tutorial!
Trisha @ The Sweet Survival says
Looks absolutely perfect with the tile. Great job.
Megan says
I love it Amanda. Perfect for your new bathroom.
Rebecca @ My Girlish Whims says
this is really beautiful!! looks like it belongs in an expensive beach home :)
Green Door Girl says
LOVE this – it is gorgeous, i will definitely vote (off to do this now)- also I would love if you would link up to my party – saturday spotlight – http://www.greendoordesignsblog.com/2011/05/saturday-spotlight-11-features.html
I found you through MET Monday! Great great job!
Libby says
I love it!
Kelsey says
Ooh, that's lovely! It turned out wonderful. I may have to do one of these myself one of these days :)
Lana @ Never Enough Thyme says
Really pretty! This would be a great addition to a beach cottage. Also – gave you a vote!
DebWestbury says
This would look nice in any open airy room…Great job…
Michelle Willow says
I have forwarded two blog awards to your blog as I find it both really inspiring and fabulous: http://willowatsquidoo.blogspot.com/2011/05/couple-awards-to-share-fabulous.html