
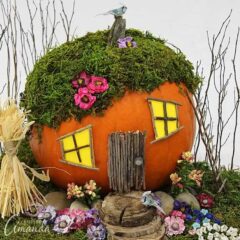
A couple weeks ago my daughter asked if I would help her make a pumpkin fairy house. She wanted to enter it into the pumpkin decorating contest where she works. We talked about what it would look like and then we set out to create this darling fairy house for fall!

Pumpkin Fairy House
When Kristen asked me about this she really wanted to model it after my fairy garden that was in the studio window box. Since the summer season had ended, I had already replaced the fairy garden with a Halloween display including my Barbie Zombies and the Walking Dead door I made for them. I knew the moss in the fairy garden was only going to last one summer. The sun had faded it terribly, so I already intended to recycle all that I could from the garden itself.
We were able to use the bird bath, the stepping stones and even some of the moss and flowers that weren’t exposed to direct sunlight.
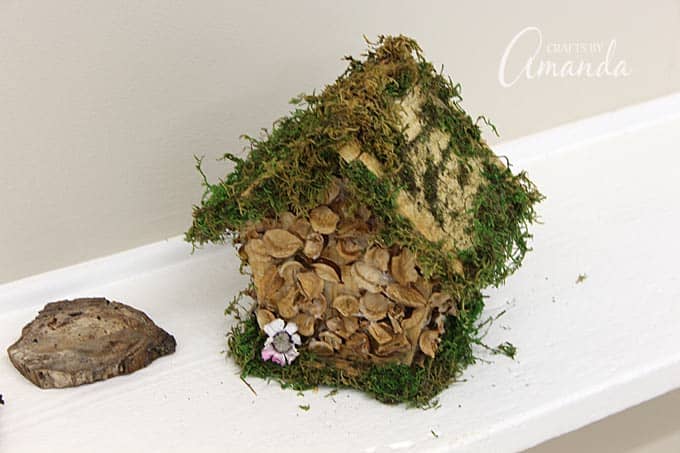
As you can see from the former fairy house, we removed all the old moss and the flowers to reuse in this new project.
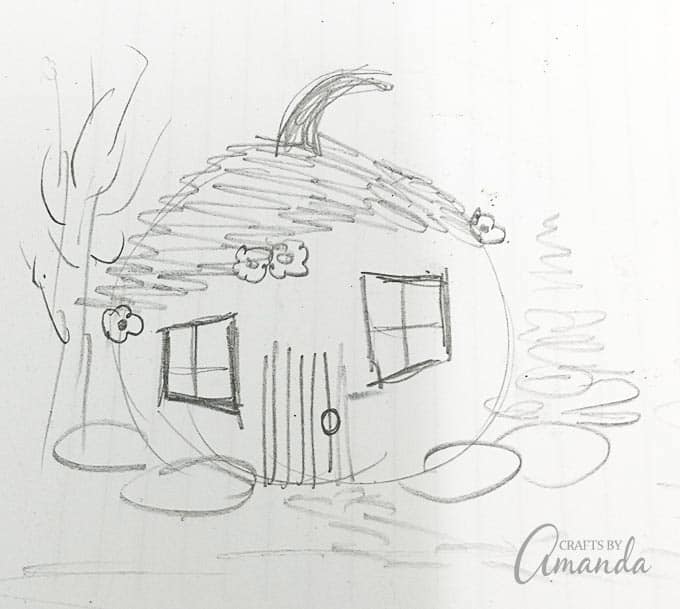
Before starting we talked about the different ideas we had. I sketched it out and we got to work.

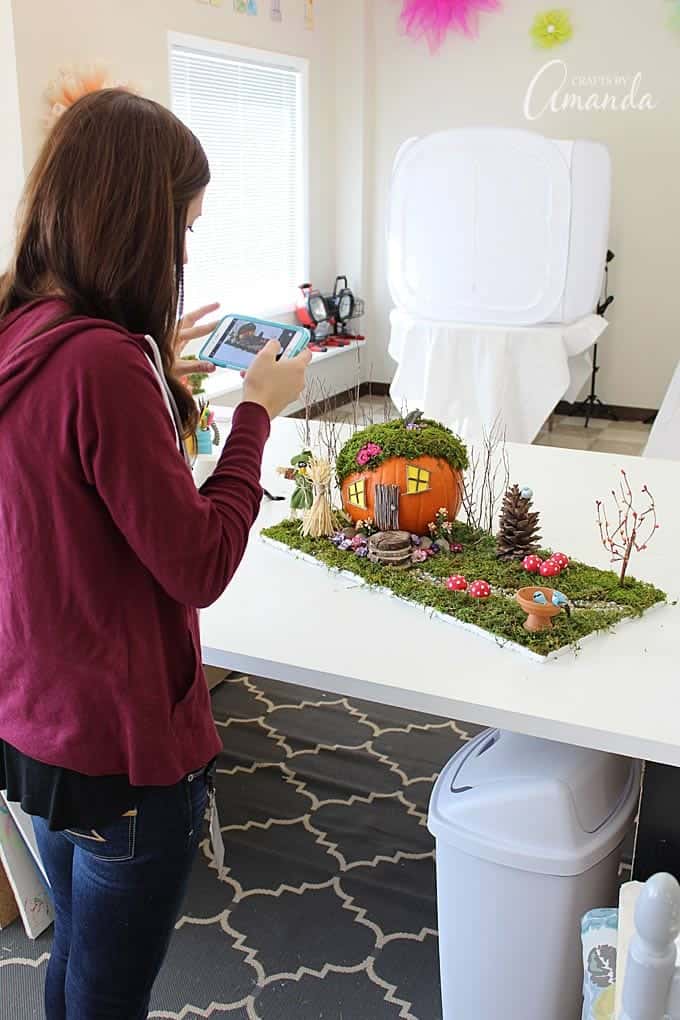
And here was my daughter’s text message to me after the contest… she won! So exciting! She brought the winning pumpkin fairy garden back to my studio so I could display it in the window box. Since Halloween was over it was time to take the zombies in anyway.
There are affiliate links in this post. That means if you buy something from that link, I will earn a small commission, but it won’t cost you anything additional.
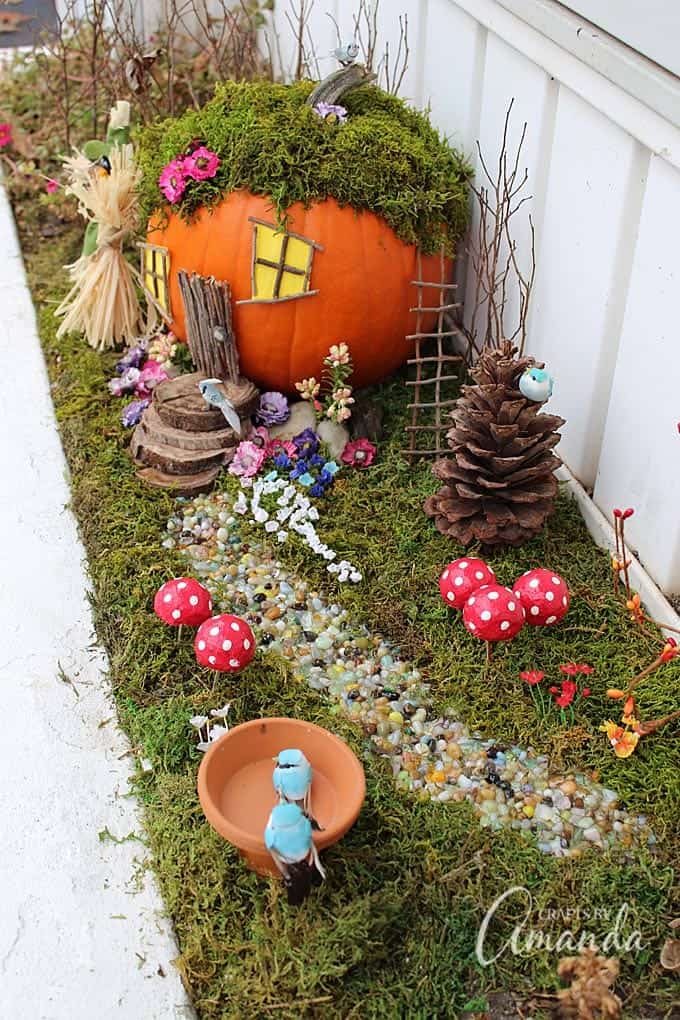
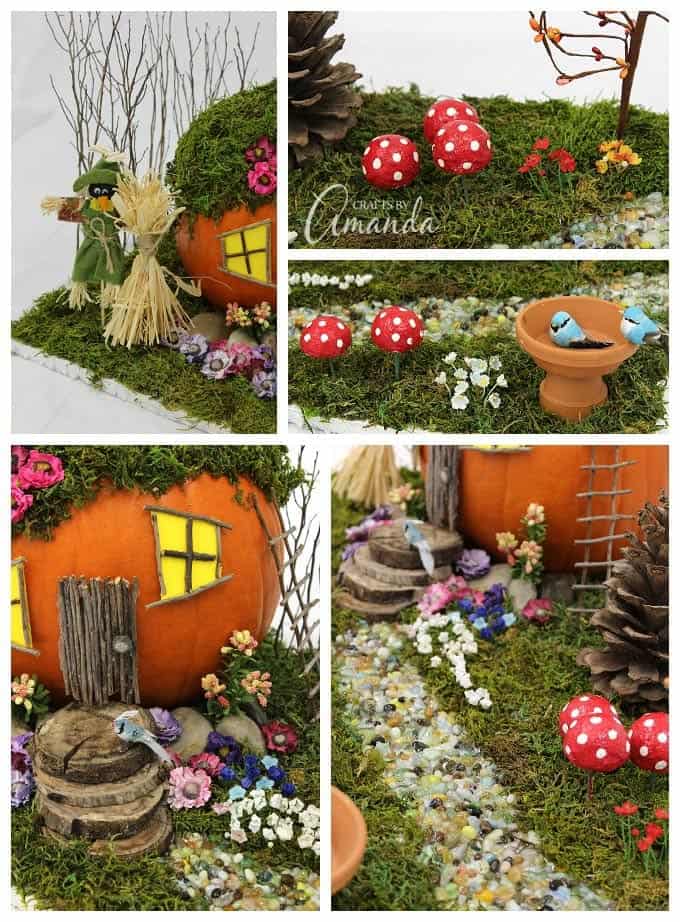
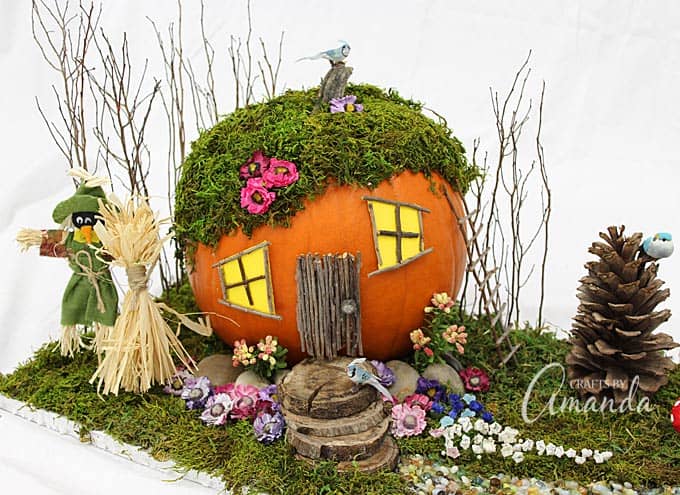
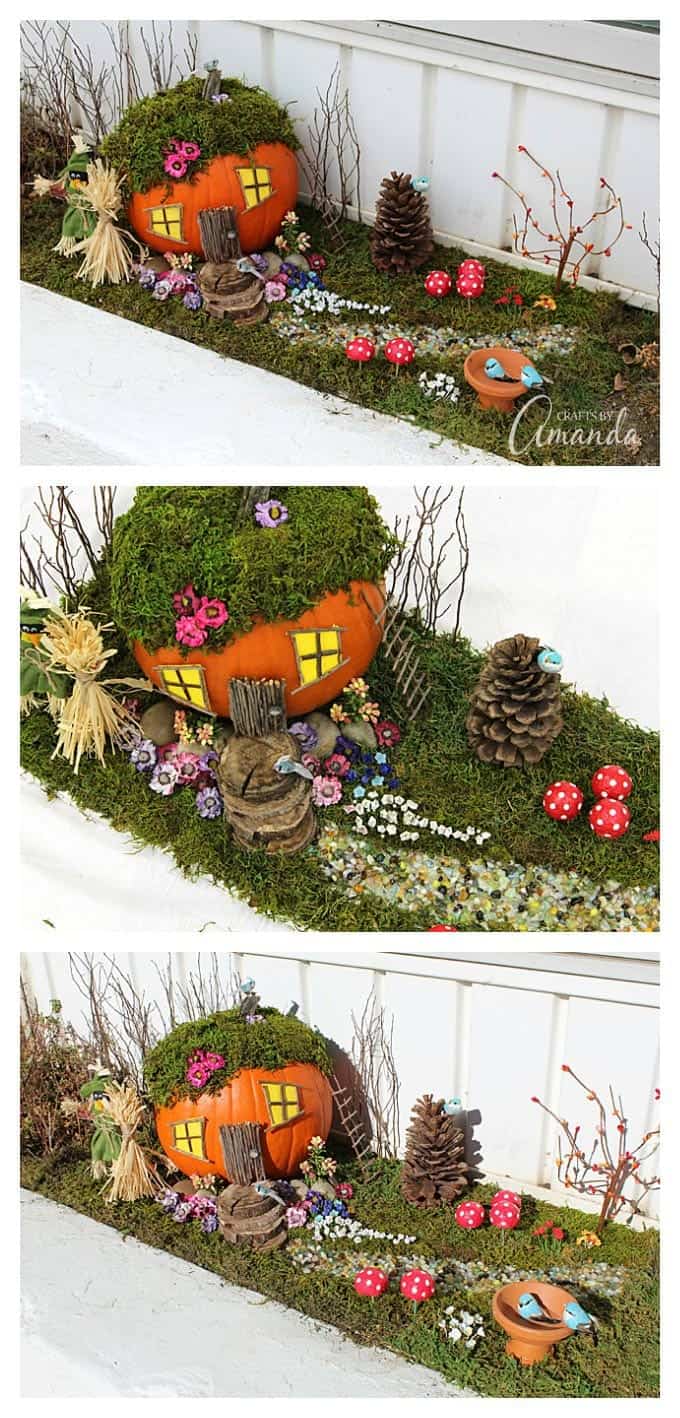
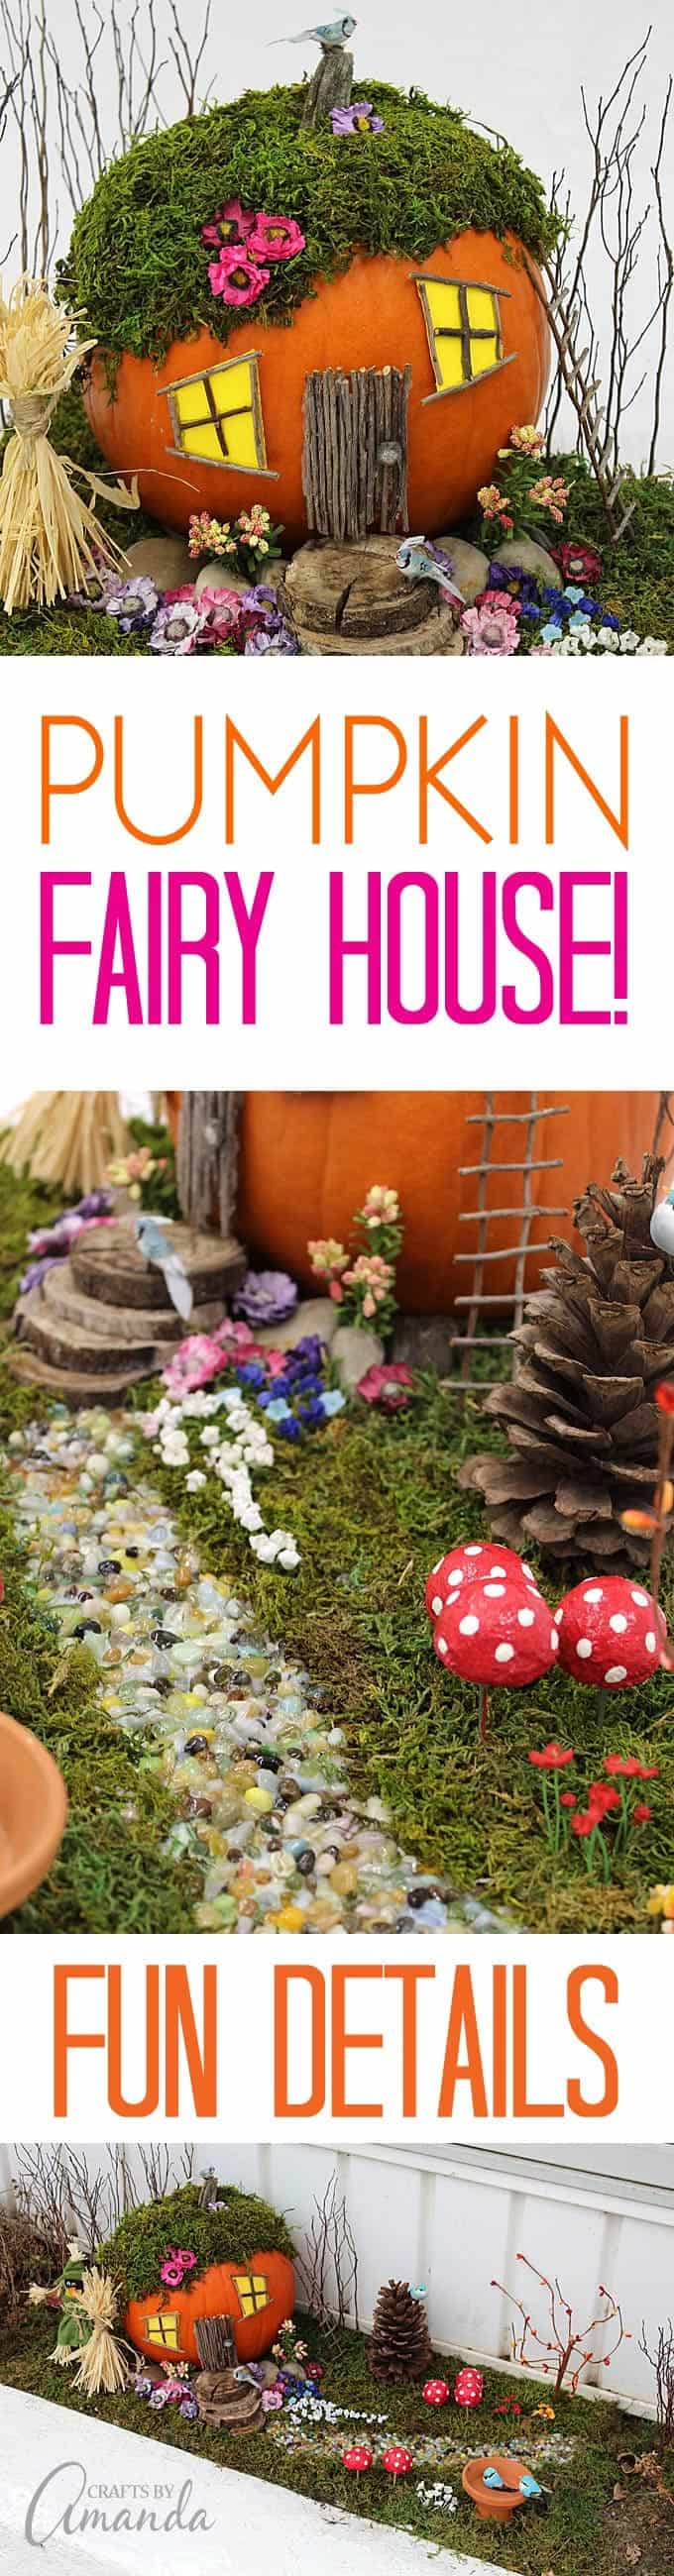
Here are some close up shots of the different areas of the fairy house. We used a real pumpkin, so again, as with my last fairy garden, this project is temporary. However, you could absolutely use a fake pumpkin![]()
to bring out year after year.
Pumpkin Fairy House Details
- The little crow-scarecrow I picked up at Michaels
- I made the toadstools from (1 1/2-inch) Styrofoam balls
 , Smooth Finish and toothpicks
 - The trees are twigs
- A large pinecone acts as a tree
- A floral stem made a nice fall tree
- The bird bath came from my fairy garden and is made of mini clay pots
- We used some river rocks around the base of the house and tucked little silk flowers inside
- The ladder is made from twigs and also came from my fairy garden
- The corn stalk is made from raffia and twine
- The steps are wood slices glued together
- The pathway is a jar of pebbles I bought a while ago
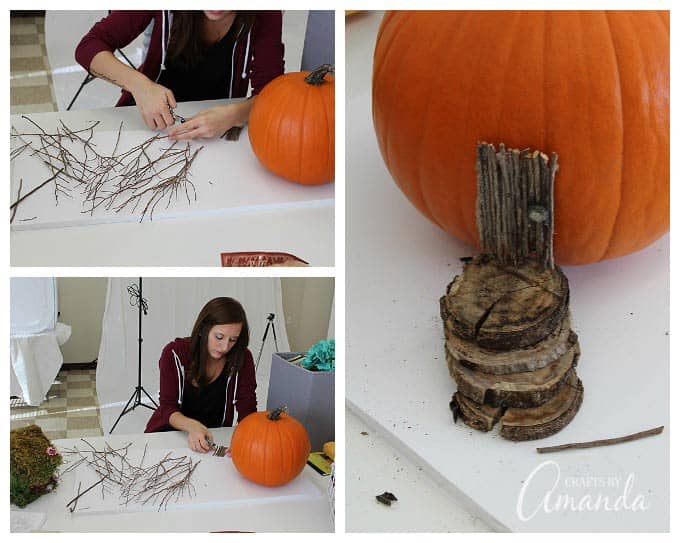
To make the door, we used wire nips to cut small twigs and glued them together. For purposes of the contest, we used hot glue for everything. However, when the fairy house returned to the studio, I reattached most items with regular craft glue. Hot glue melts and cools outside in the sun and shade, causing things to fall off.
Because a pumpkin is round, the door cannot just be glued on at ground level. After gluing the door on we built stairs from the wood slices we recycled from the original fairy garden. Hot glue held them together great.
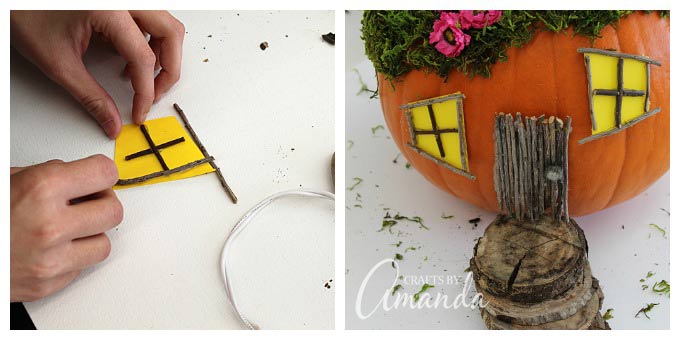
Next we made the windows by cutting shapes from yellow card stock and framing with twigs. After gluing them to the pumpkin, we covered the top with moss to make the roof.
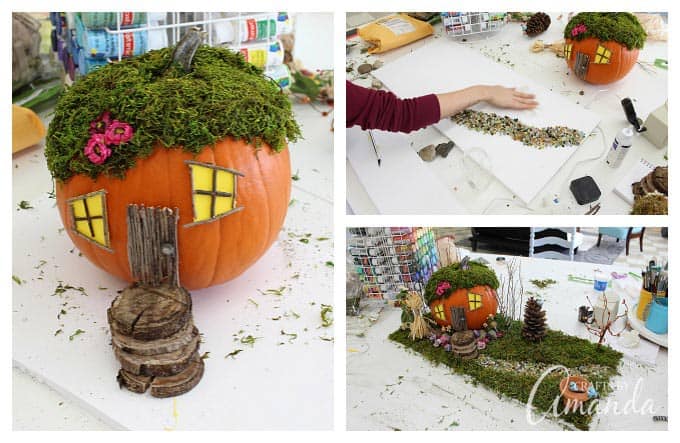
We used a thick piece of foam core board for the base. After deciding where the house would sit, we removed it and added the pebble path. We simply squeezed glue out in the shape of a path and sprinkled the pebbles on top. Then we squeezed glue all over the rest of the board (except where the pumpkin would sit) and covered it with moss.
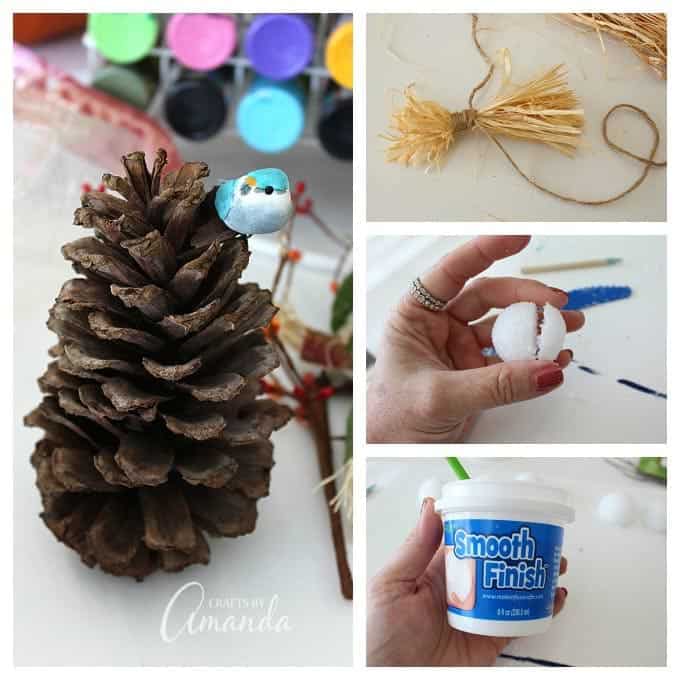
Some of the smaller details included a large pine cone as a tree, tying some raffia with twine to make a corn stalk and making the toadstools. I cut about 1/3 off of the Styrofoam balls and used Smooth Finish over the top to make the foam easier to paint. I used toothpicks as stems.
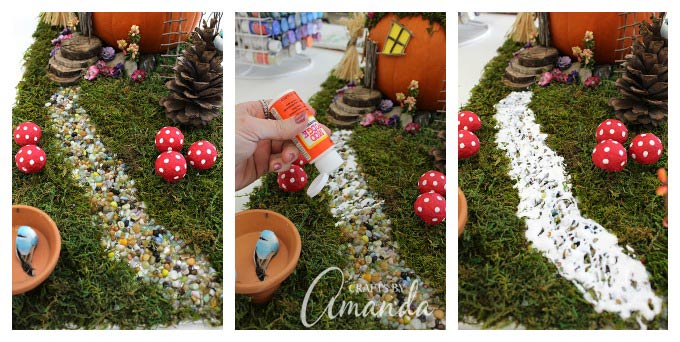
After adding many of the details we realized that the pebbles weren’t all fixed to the board. Many were loose, so I covered the path with Mod Podge. I used a paintbrush to spread it around and make sure all the cracks were filled. I pointed a fan at it overnight to aid the drying process.
Kristen loved the way it came out, even if I did add a few more details after we were done!
I added a few more little flowers and a couple of birds. So if you’re in Twin Lakes, be sure to stop by and check out the window box display!
More Halloween Crafts
- Pumpkin Painting Party
- Decomesh Pumpkin Wreath
- 3D Paper Pumpkin
- Mason Jar Lid Pumpkins
- Black Cat Pumpkins
Pumpkin Fairy House
Supplies
- Pumpkin faux or real, but real will rot
- Sticks twigs, pinecones
- Wood slices
- Pebbles or rocks
- Moss
- Faux flowers
- Yellow card stock for windows
- Miniature birds
- Small clay pot and tray
- Miniature scarecrow
- Styrofoam balls for toadstools
- Red and white paint
- Raffia
- Twine
- Foam core board
- Mod Podge
Craft tools
- Wire snips
- White craft glue
Instructions
- Important Note: These are general instructions. I will tell you how I made mine, but you can just use it as inspiration. You can use any supplies you like or have on hand. Also, a faux pumpkin will last whereas a real pumpkin like we used will eventually have to be tossed in the compost bin.
- Wash and dry the pumpkin.
- To make the door, use wire nips to cut small twigs and glue them together. Because a pumpkin is round, the door cannot just be glued on at ground level. After gluing the door on we built stairs from the wood slices.
- Make the windows by cutting shapes from yellow card stock and framing with twigs. Glue them to the pumpkin, then cover the top with moss to make the roof.
- Lay a piece of foam core out for your base. After deciding where the house will sit, remove it and add the pebble path by squeezing glue out in the shape of a path and sprinkling the pebbles on top. Next squeeze glue all over the rest of the board (except where the pumpkin will sit) and cover it with moss.
- Cover the pebble path with Mod Podge. Use a paintbrush to spread it around and make sure all the cracks are filled. I pointed a fan at it overnight to aid the drying process.
- When done add details. Some of the smaller details included a large pine cone as a tree, tying some raffia with twine to make a corn stalk and making the toadstools. I cut about 1/3 off of the Styrofoam balls and used Smooth Finish over the top to make the foam easier to paint. I used toothpicks as stems. Glue miniature birds onto the clay pot bird bath. Get creative!!
Expert Tips & FAQs
- DIY Mosquito Repellent Candles - July 10, 2026
- Mason Jar Solar Lights - July 3, 2026
- Patriotic Pinwheels - June 23, 2026


Kathleen says
OMGoodness…so amazing!!!!!!! The details, the roof, the birds all of it is just spellbinding
Thank you
Tonia Deakin says
Oh my goodness! Amazing!!
Hina says
Its beautifullllll
Christy says
Beyond Adorable! are the flowers real or made?
Amanda Formaro says
They are silk flowers :)
NormaJean says
Can you say ADORABLE?
Amanda Formaro says
Thank you Normajean!
Sharon says
This is beautiful! Of course your daughter won first place! Love the little mushrooms, too.