
One of my favorite things to make are luminaries. Doesn’t matter what holiday.. Christmas, Halloween, Easter, there’s always a reason for luminaries! Of course, their popularity skyrockets during the Christmas holiday season as people love to line their walks or warm their home with festive lights. 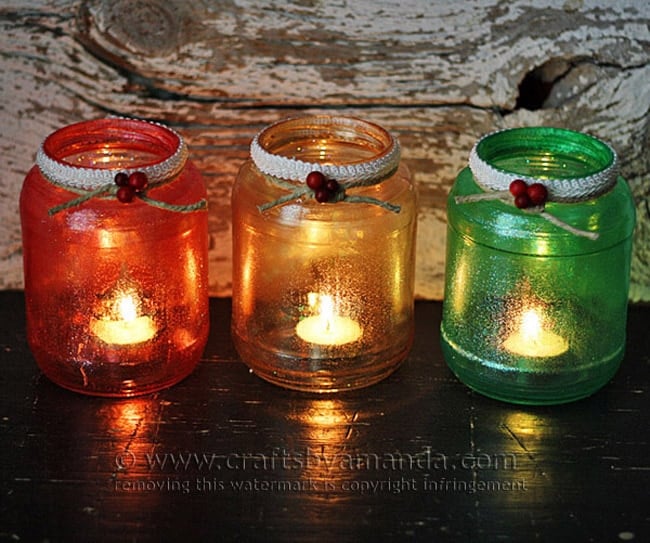
 You may have seen these snowy pinecone candle jars last year, they are really making the rounds this year as people share them all over Facebook and Pinterest!
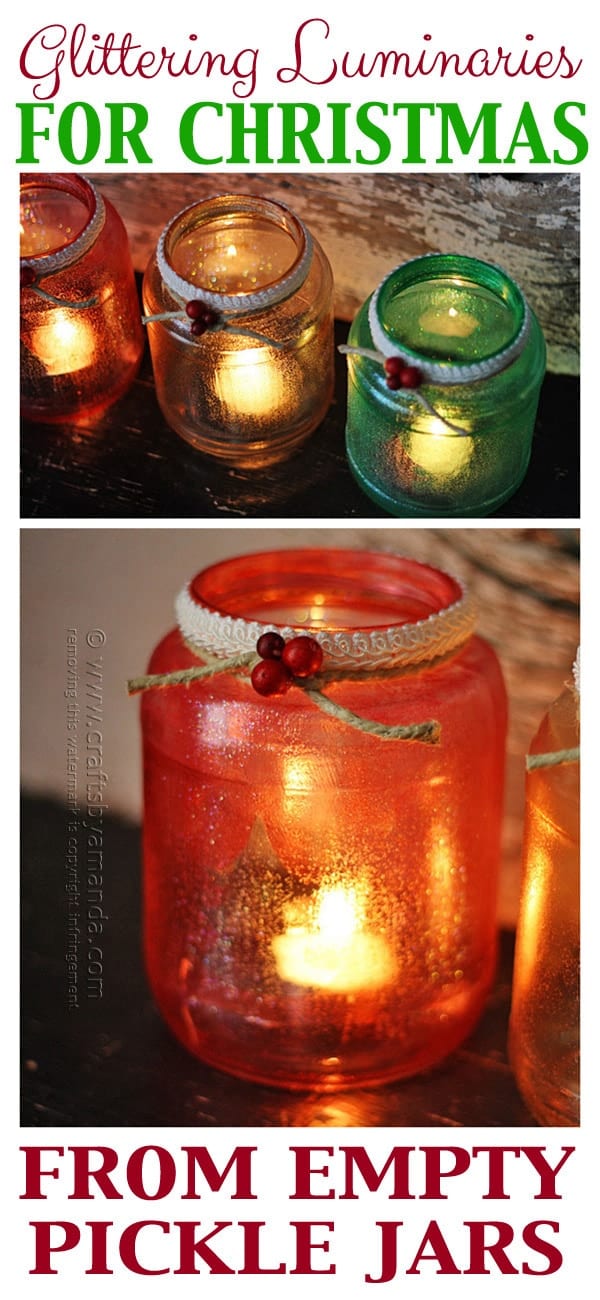
Glitter Christmas Luminaries
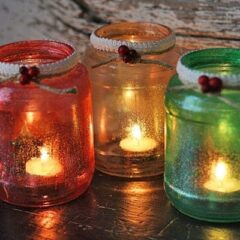
This glittery set of jars all held pickles once. I save all my jars because I know I’ll be turning them into something eventually. I’ve thought about making something like these gorgeous twinkle light jars over at The Idea Room, plus I have all sorts of luminary ideas saved on this Pinterest board.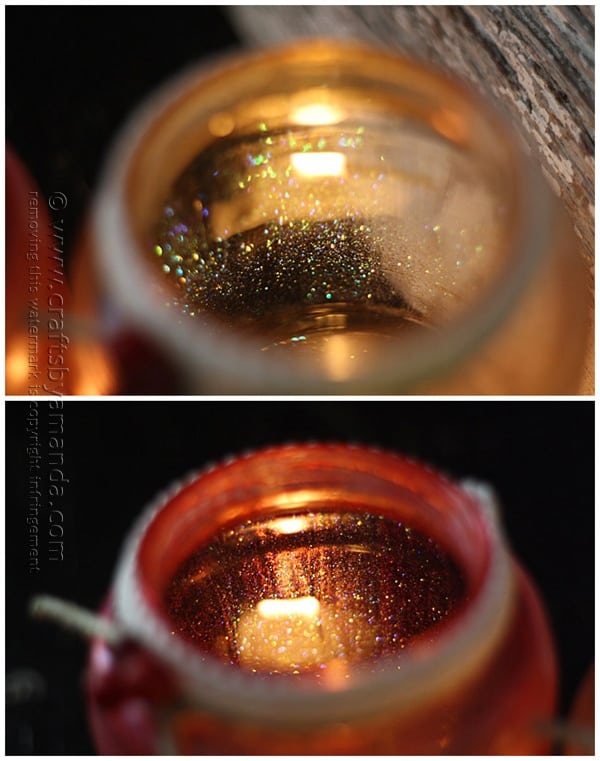 Don’t you just love the way the glitter bounces off the sides?
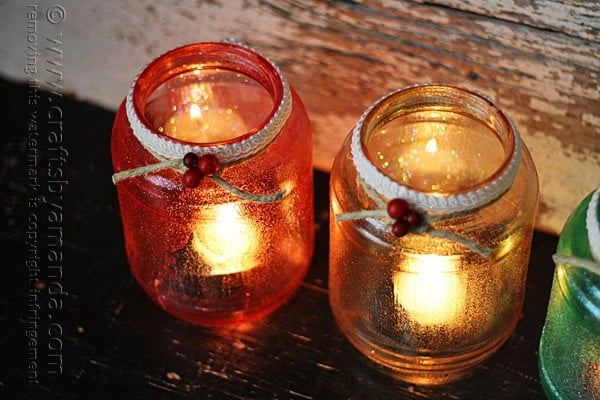
 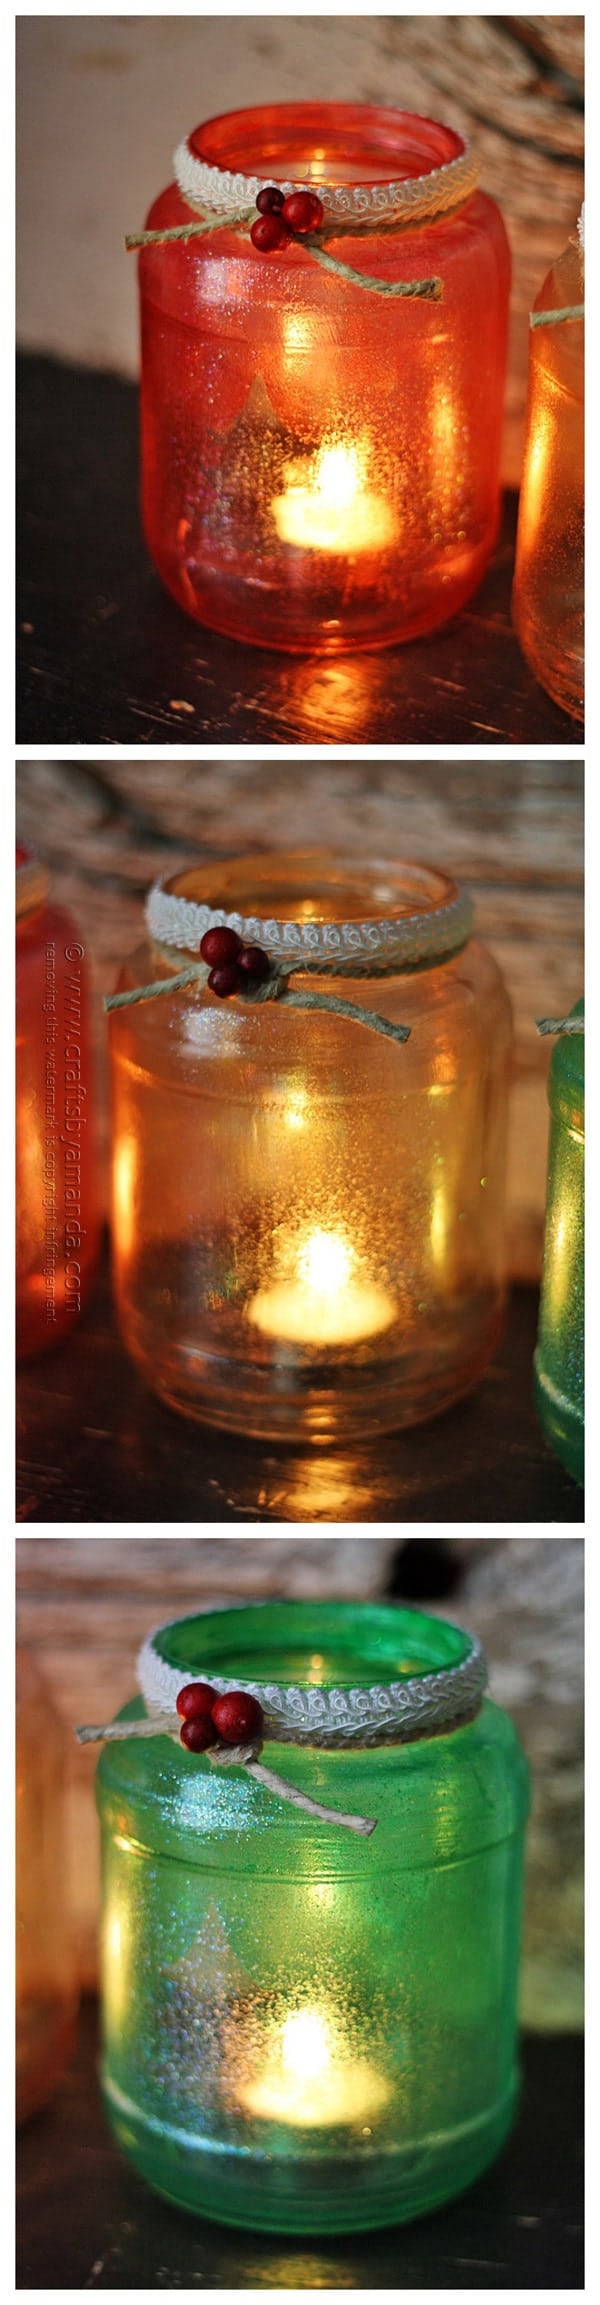 I think my favorite color is the red, but I do love the way that they all came out!
 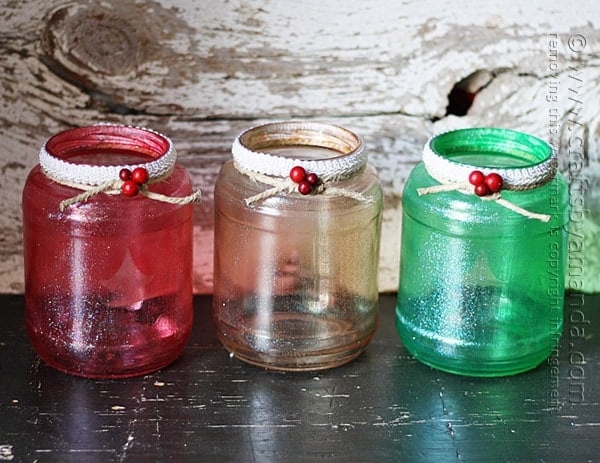 They’re even pretty in the daytime. Though I do prefer them lit up. :)
 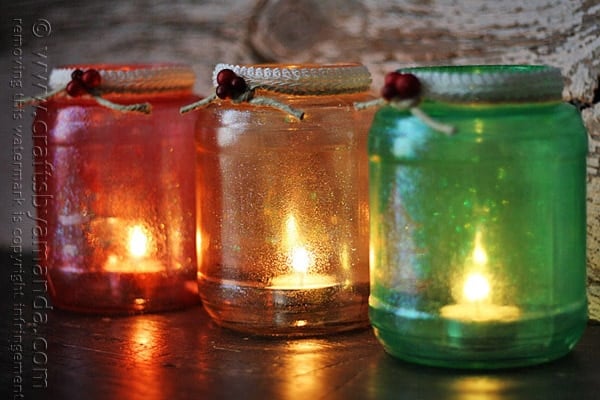 It’s kind of hard to tell, but there’s actually a little Christmas tree shape on the front of each one. In hindsight, if I hadn’t painted the clear glitter over the top of the tree shape it would have been more noticeable. So if you want to, you can skip that step. Note: some links below are affiliate links. That means if you happen to buy something, a small percentage of that sale goes back into this site, which enables me to continue to bring you free tutorials such as this one. So, thanks!
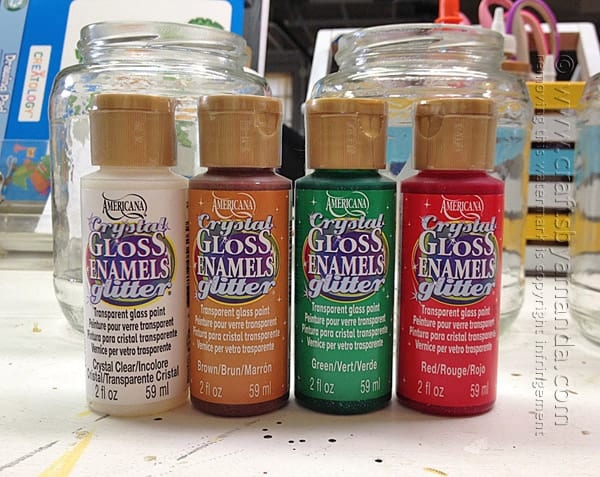
As always, a full printable supply list and instructions are at the end of this post. For this project you will need the following supplies:
Supplies:
- Empty jars
- Clear contact paper

- Tree pattern
- Scissors
- Paintbrush
Crystal Gloss Enamels Glitter:
Embellishments:
- White ribbon
- Twine
- Faux berries
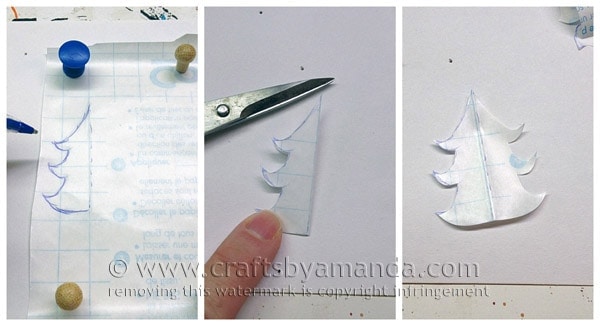 Print off the pattern provided and place it underneath a piece of clear contact paper. I pin mine to a piece of foam core board so I can trace without having to hold the contact paper in place. Trace over the pattern making sure you have an equal amount of space on the right side of the contact paper. Make one stencil for each jar you are making. Fold the contact paper along the dotted line that represents the center of your tree. Cut along the pattern lines. When you open the folded cut-out you will have a tree like this.
 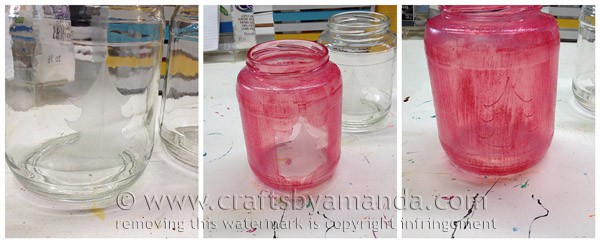 Peel off the backing and press it on to your clean glass jar, making sure there are no air bubbles. Use a paintbrush to apply a coat (does not need to be perfect, just apply it) of Crystal Gloss Enamel Glitter, leaving the area around the tree for last. Paint over the tree stencil.
 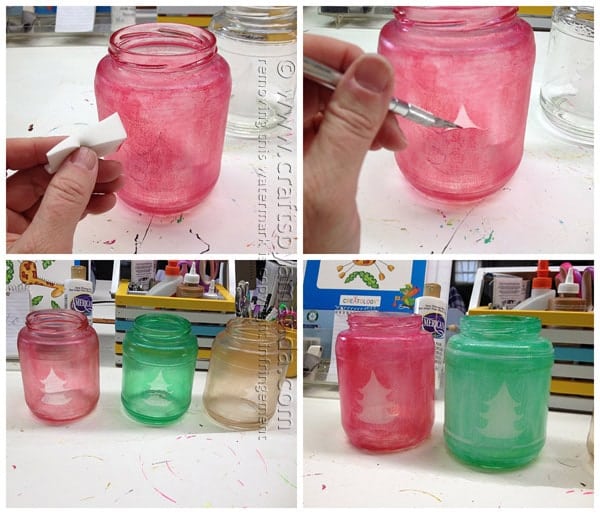 Immediately after you paint, dab a cosmetic sponge over the red paint to mute it a bit. This will also get rid of the streaky lines the brush created. Use the tip of a craft knife to loosen the top of the tree stencil and remove it. Allow the paint to dry for about an hour. As you can see, the trees are very noticeable before the clear glitter coat has been applied. If you prefer the trees to be more prominent, do not remove the stencils until after the final glitter coat (next step). Using a paintbrush, apply the Crystal Clear over the top of the entire jar. Use a generous amount and do not overwork it. A stroke or two, three at the most, will do the trick. If you chose to leave the stencil on, remove it once you are finished painting. Do not wait for the paint to dry. Embellish the rims with a bit of white ribbon and twine and a few faux berries. When your jars have dried (overnight is best) they will have a beautiful, glittery sheen, inside and out!
 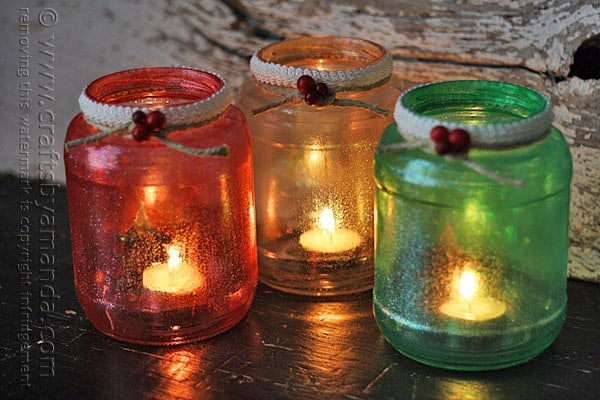 I hope you enjoyed this project and have a magical holiday season! Have fun!
More luminaries
- Snowy Pinecone Candle Jars
- Glow Stick Ice Luminaries
- 5 Minute Winter Tree Lanterns
- Thanksgiving Luminary Vase
- Epsom Salt Luminaries
- Glittery Santa’s Belly Jar
- Fall Napkin Luminaries
Glitter Christmas Luminaries
Supplies
Supplies:
- Empty jars
- Clear contact paper
- Tree pattern
- Scissors
- Paintbrush
Crystal Gloss Enamels Glitter:
- Brown
- Green
- Red
- Crystal Clear
Embellishments:
- White ribbon
- Twine
- Faux berries
Instructions
- Print off the pattern provided and place it underneath a piece of clear contact paper. I pin mine to a piece of foam core board so I can trace without having to hold the contact paper in place. Trace over the pattern making sure you have an equal amount of space on the right side of the contact paper. Make one stencil for each jar you are making.
- Fold the contact paper along the dotted line that represents the center of your tree. Cut along the pattern lines.
- When you open the folded cut-out you will have a tree like this.
- Peel off the backing and press it on to your clean glass jar, making sure there are no air bubbles.
- Use a paintbrush to apply a coat (does not need to be perfect, just apply it) of Crystal Gloss Enamel Glitter (in this case, red), leaving the area around the tree for last.
- Paint over the tree stencil.
- Immediately after you paint, dab a cosmetic sponge over the red paint to mute it a bit. This will also get rid of the streaky lines the brush created.
- Use the tip of a craft knife to loosen the top of the tree stencil and remove it. Allow the paint to dry for about an hour.
- As you can see, the trees are very noticeable before the clear glitter coat has been applied. If you prefer the trees to be more prominent, do not remove the stencils until after the final glitter coat (next step).
- Using a paintbrush, apply the Crystal Clear over the top of the entire jar. Use a generous amount and do not overwork it. A stroke or two, three at the most, will do the trick. If you chose to leave the stencil on, remove it once you are finished painting. Do not wait for the paint to dry.
- Embellish the rims with a bit of white ribbon and twine and a few faux berries.
- When your jars have dried (overnight is best) they will have a beautiful, glittery sheen, inside and out!
- Patriotic Pinwheels - June 23, 2026
- Fingerprint Daddy & Me Coffee Mug - June 12, 2026
- Patriotic Bandana Wreath - June 9, 2026


Susan says
I’d love to make these Glitter Christmas Luminaries but cannot find where to buy the Crystals Gloss Enamels Glitter you used. Is there a substitute that works similar to it? Thank you!
Amanda Davis says
I just checked in with DecoArt and they don’t make that anymore I guess :( They sent me these links
Americana Gloss Enamels Metallics
Americana Gloss Enamels
However, they also make a product called Glamour Dust that may work similarly! https://www.decoart.com/products/glamour-dust-glitter-paint
Rachel says
Luminaries are so beautiful! Thank you for sharing this amazing diy!
Amanda Formaro says
Thank you Rachel :)
S says
If you do a light bake in the oven after painted, these are also dishwasher safe!
Samantha says
So I’m getting onto Christmas a bit early haha! But I think this is a great idea of something to make with my three daughters, it would look fabulous on the porch for our pre-christmas dinners!
Amanda Formaro says
Nothing wrong with Christmas in July, Samantha! :) I hope they turn out well for you if you decide to give them a shot!
Jackson Hernandez says
I’ve just bookmarked this page, fantastic blog!
Amanda Formaro says
Thanks so much, Jackson!
Alice Smith says
Looking for your fish bowl snowman craft
Amanda Formaro says
Hi Alice. That’s actually not my project, I just shared it on Facebook. You can find it here http://www.smartschoolhouse.com/diy-crafts/fish-bowl-snowman/2
Ann says
Can you use regular tea lights? Maybe if in a glass holder?
Amanda Formaro says
Hi Ann, yes of course :)
kathy says
These are so beautifu. I try going to make for family..
Thanks for the great idea …
Kathy says
Thank you for introducing me to this paint! It does a fantastic job. I used a foam stencil pouncer instead of a paint brush and love the textured look it gives.
Amanda Formaro says
So glad you liked it Kathy!
Tanya says
These are gorgeous! I usually try to make paper luminaries around the holidays but they never last long, definitely going to try these this year. Thanks Amanda!
Amanda Formaro says
Thanks Tanya! I hope you enjoy the project!
[email protected] says
I love luminaries also! So calming and beautiful! Pinned!