
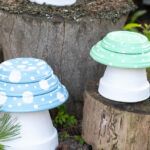
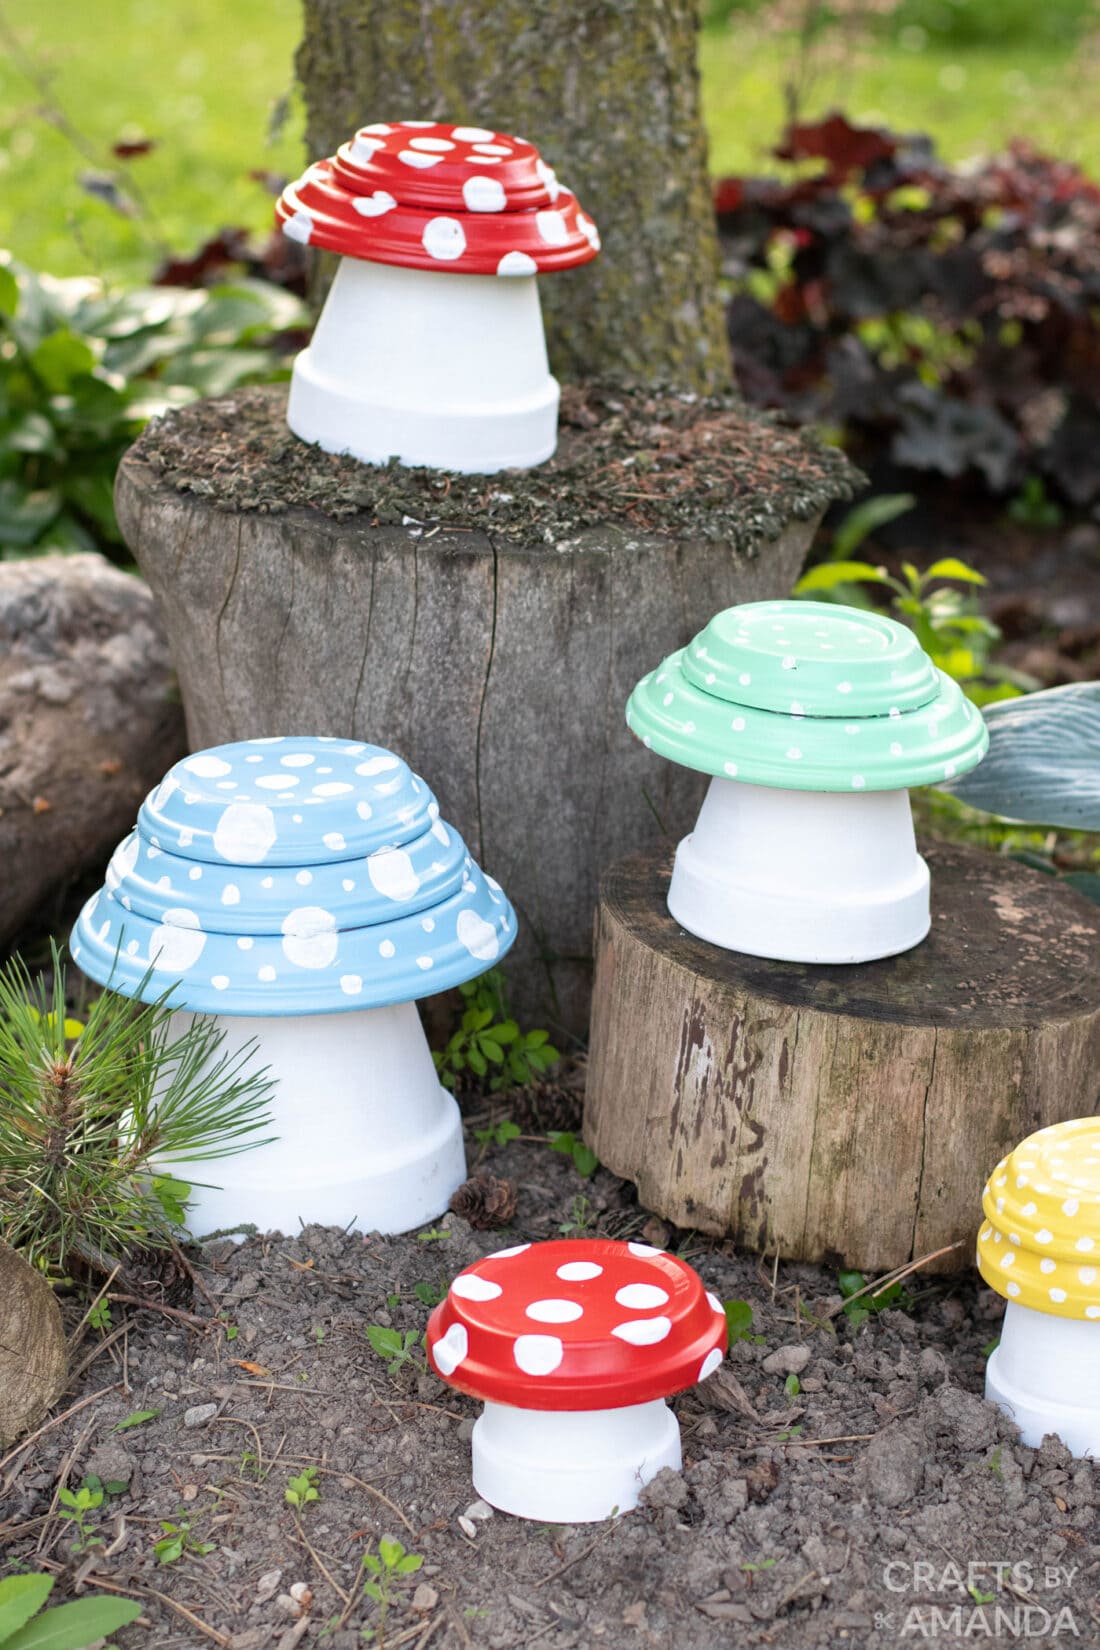
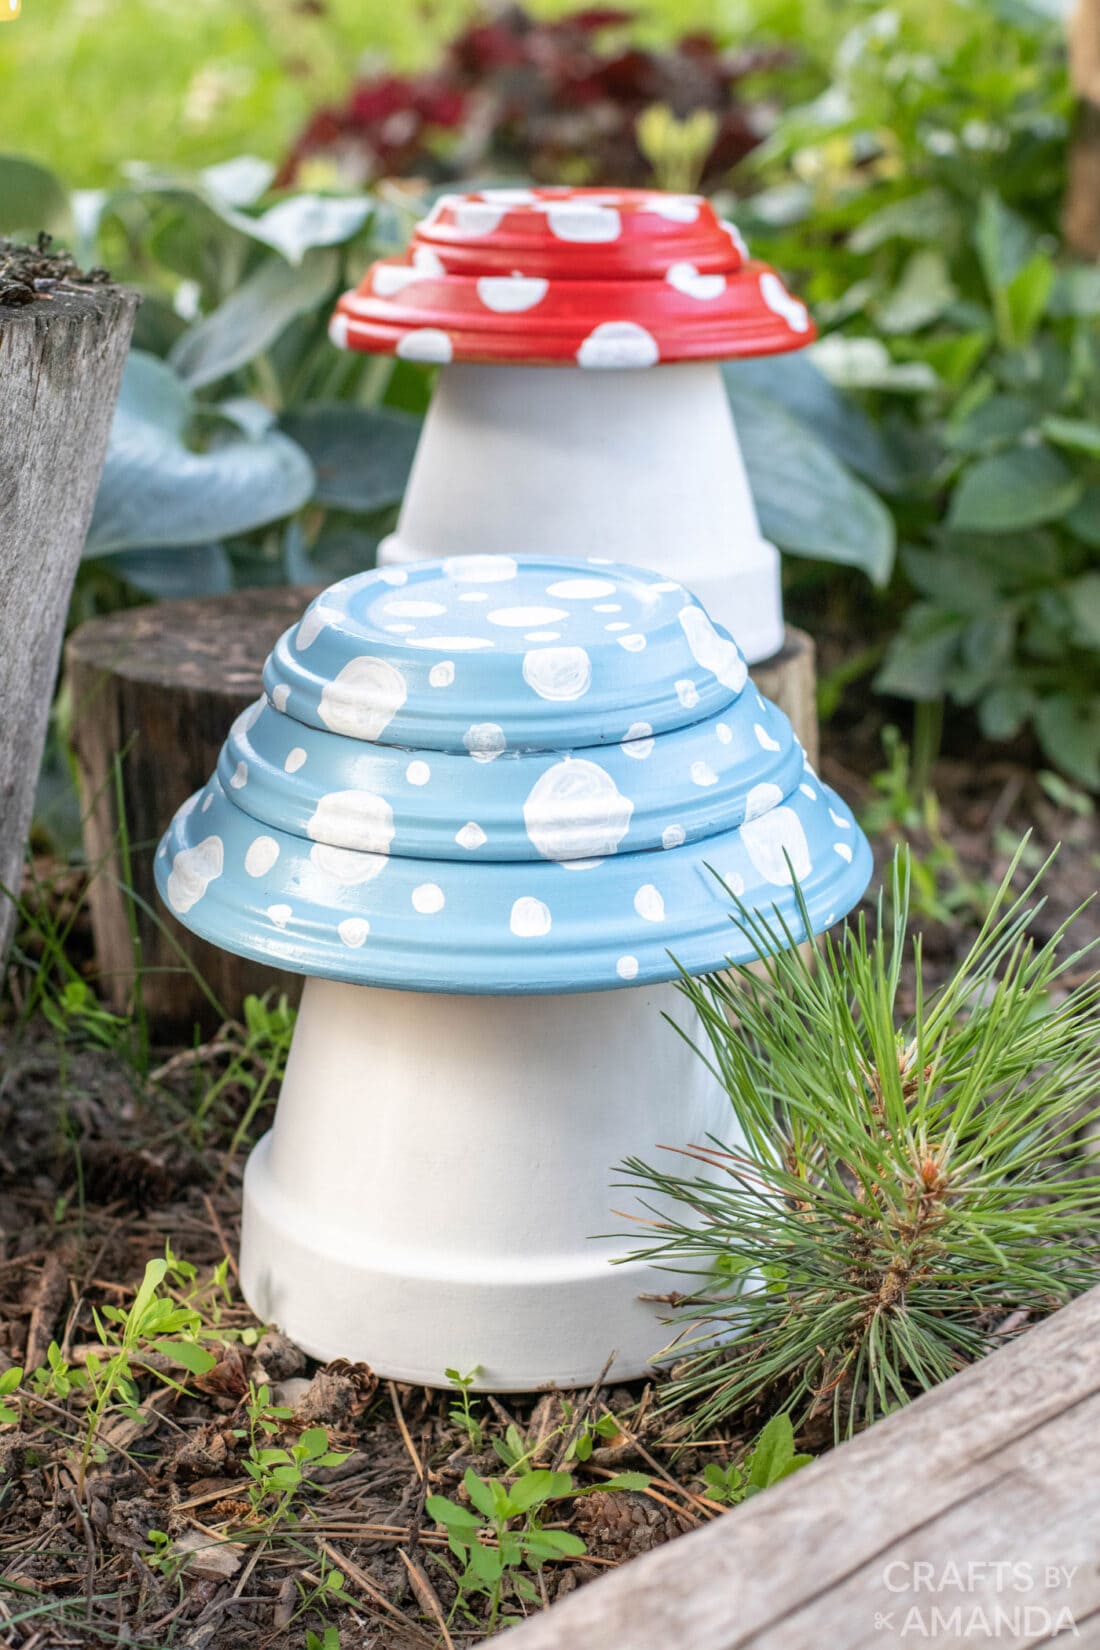
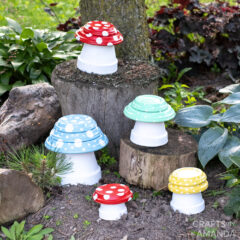
These colorful clay pot toadstools are made with terra-cotta pots and saucers that are decorated with bright and cheery paint colors. They’re a beautiful addition to your garden decor and are actually quite simple to create.
Why we love this project
Making your outdoor space feel whimsical and inviting can be as simple as adding a few statement pieces throughout. That’s where these adorable clay pot toadstools come in!
Along with some other fun garden crafts like a watering can that pours crystals and even some beaded garden sparklers, your yard will be swimming with DIY projects that’ll spark some fun conversation.
Helpful Project Information:
- Age Level: 12 and up
- Mess Factor: Medium (paint)
- Level of Difficulty: Medium
- Time to Complete: Less than 1 hour active
- Cost Estimate: Less than $15.00 depending on what supplies you have on hand
Craft supplies you will need
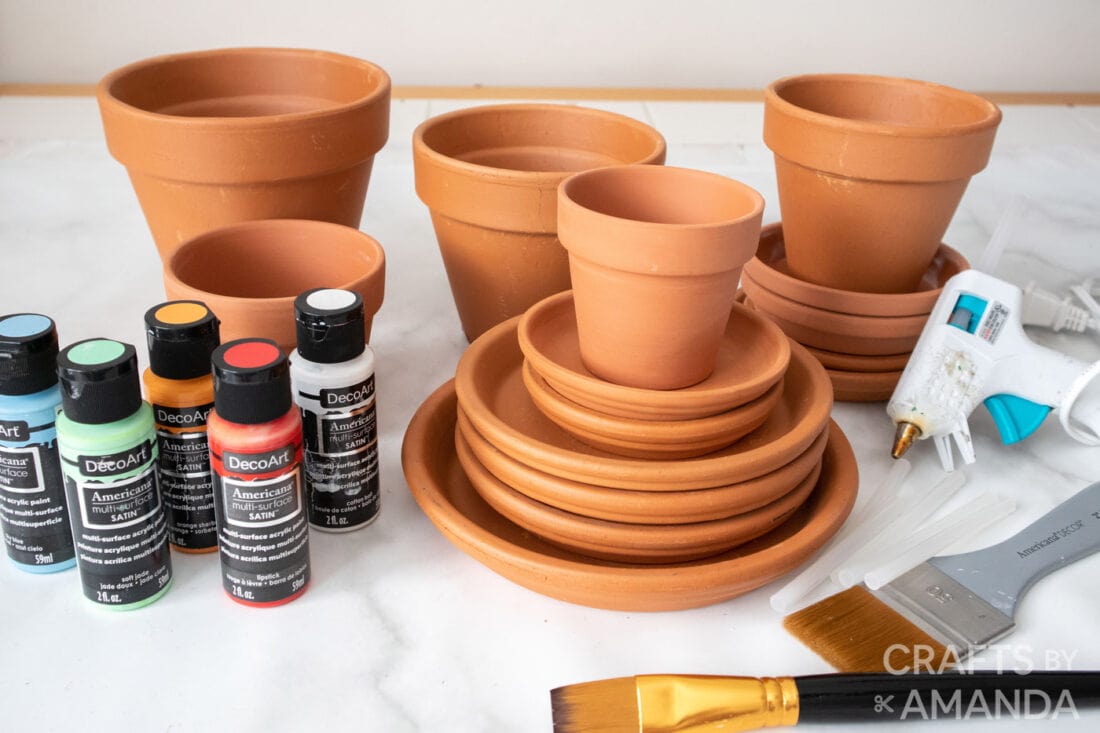
Get full list of supplies and directions in the printable version at the end of this post.
How to Make Clay Pot Toadstools
These step by step photos and instructions are here to help you visualize how to make this project. Please scroll down to simply print out the instructions!
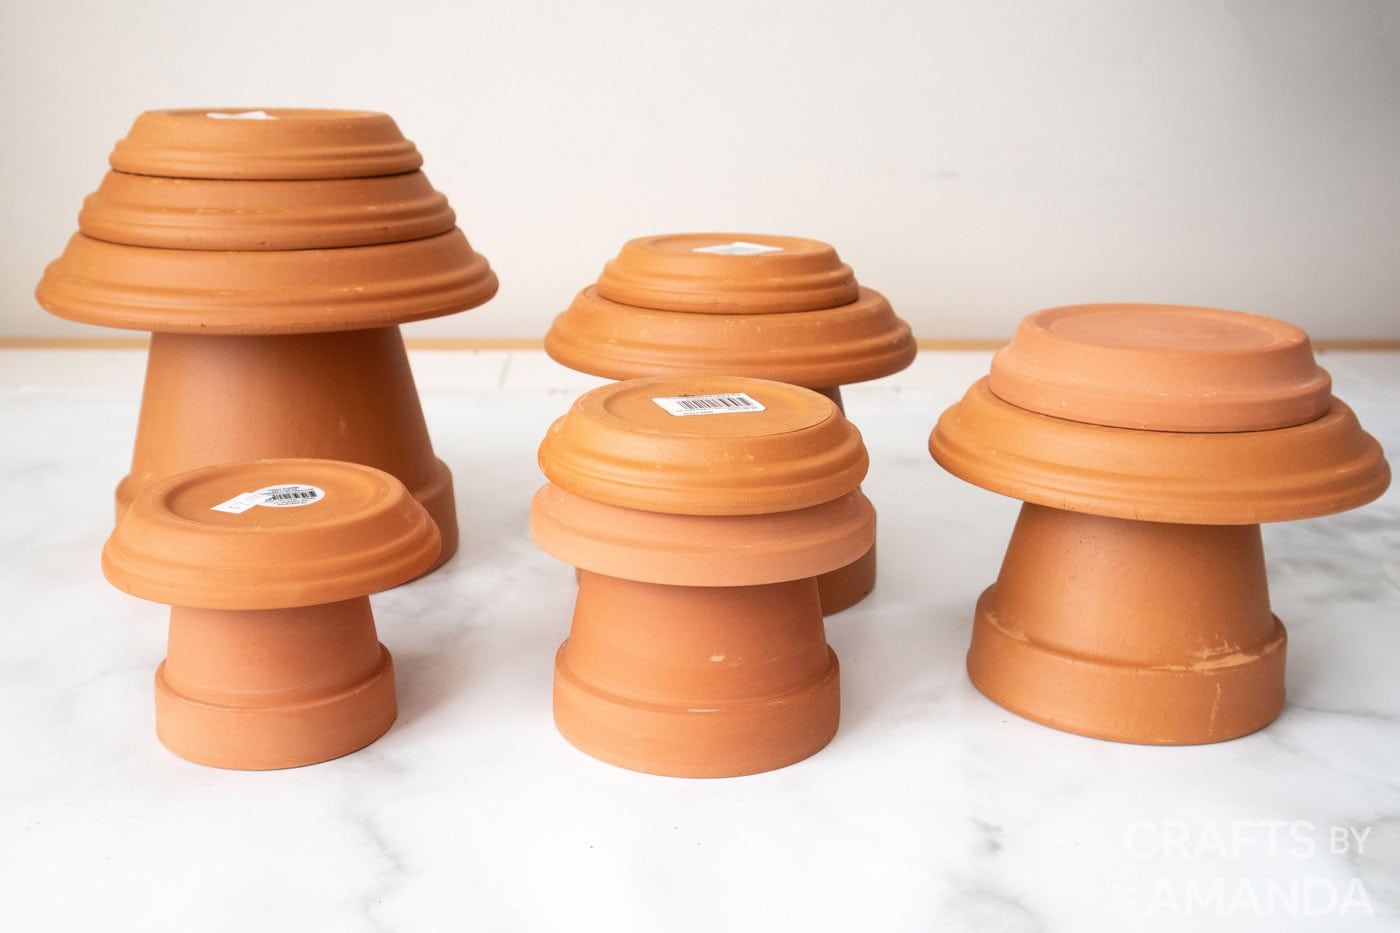
- Remove all labels from the pots and saucers.
- Determine the layout by turning the pots upside down and begin stacking the saucers upside down on top of the pots. Stack the saucers from largest to smallest at the very top.

- Once happy with the placement, decide on the color for each mushroom and then separate the saucers so they don’t get mixed up while painting.
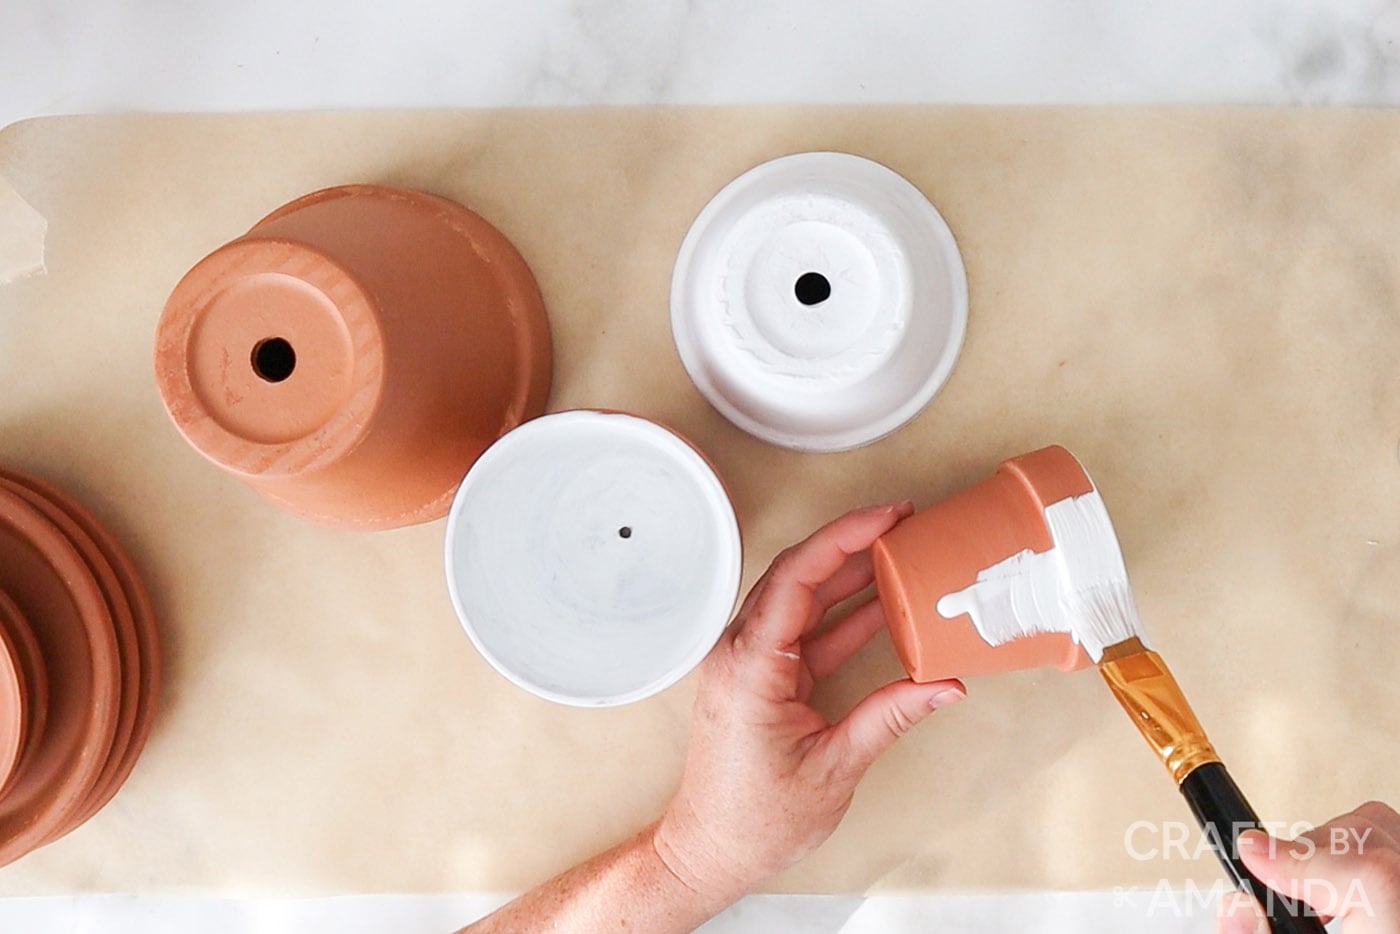
- Apply a coat of white multi-surface paint to all of the pots using the largest paintbrush. Paint the inside of the pots as well to seal all surfaces of the terracotta clay. Let the paint dry fully before applying a second coat of paint and add as many coats of paint as needed until desired coverage is achieved.

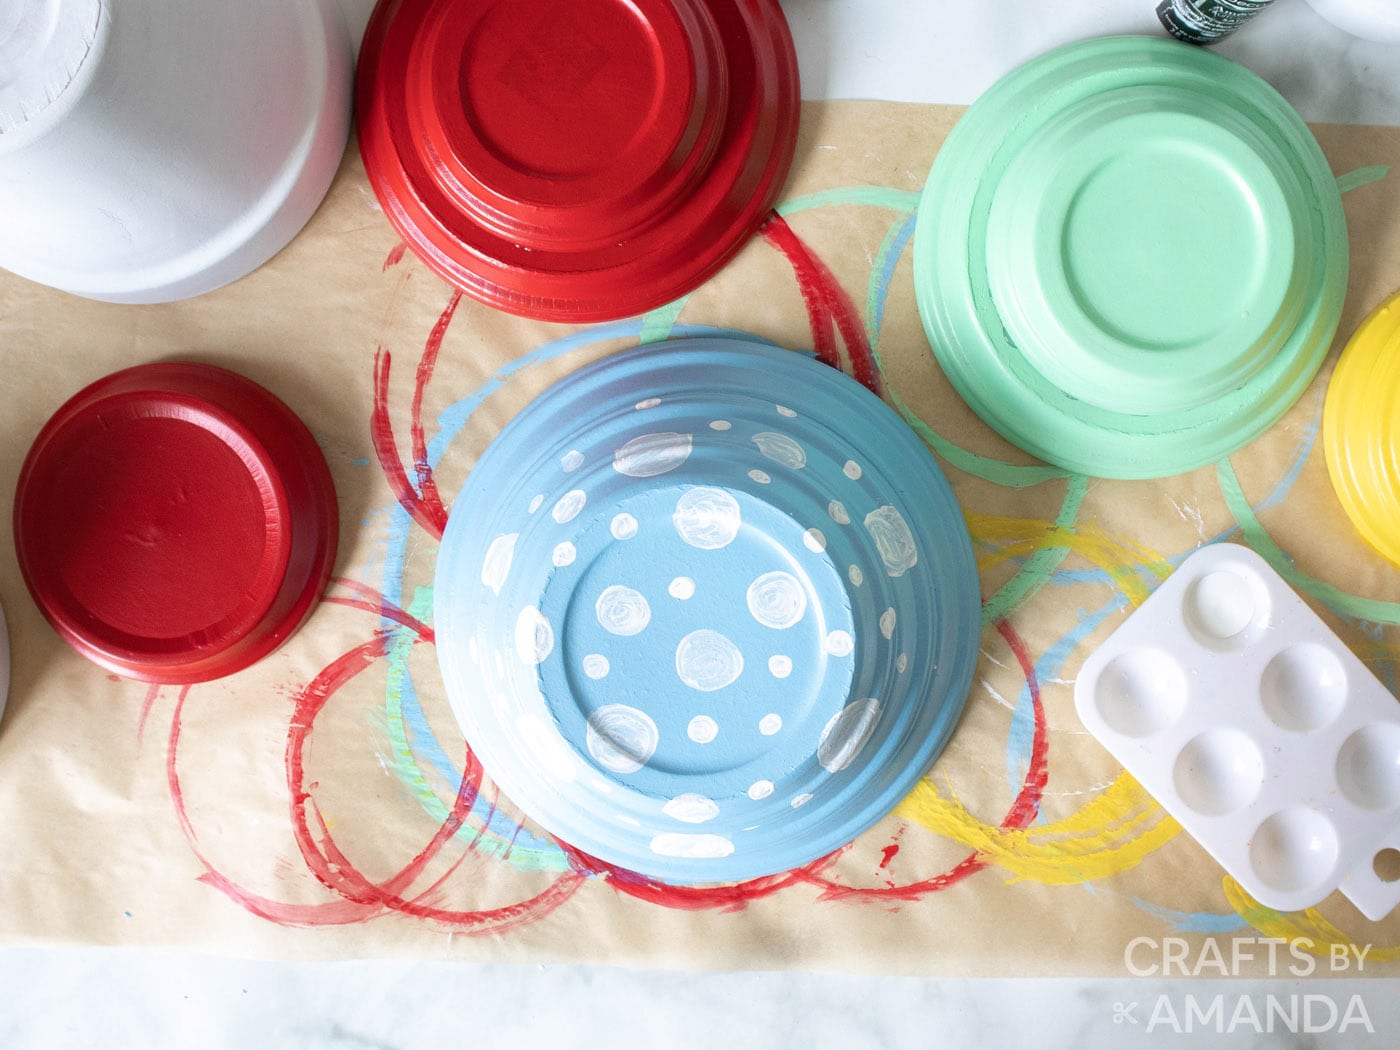
- Paint the saucers in different multi-surface paints. Let the paint dry fully before applying a second coat of paint and add as many coats of paint as needed until desired coverage is achieved.
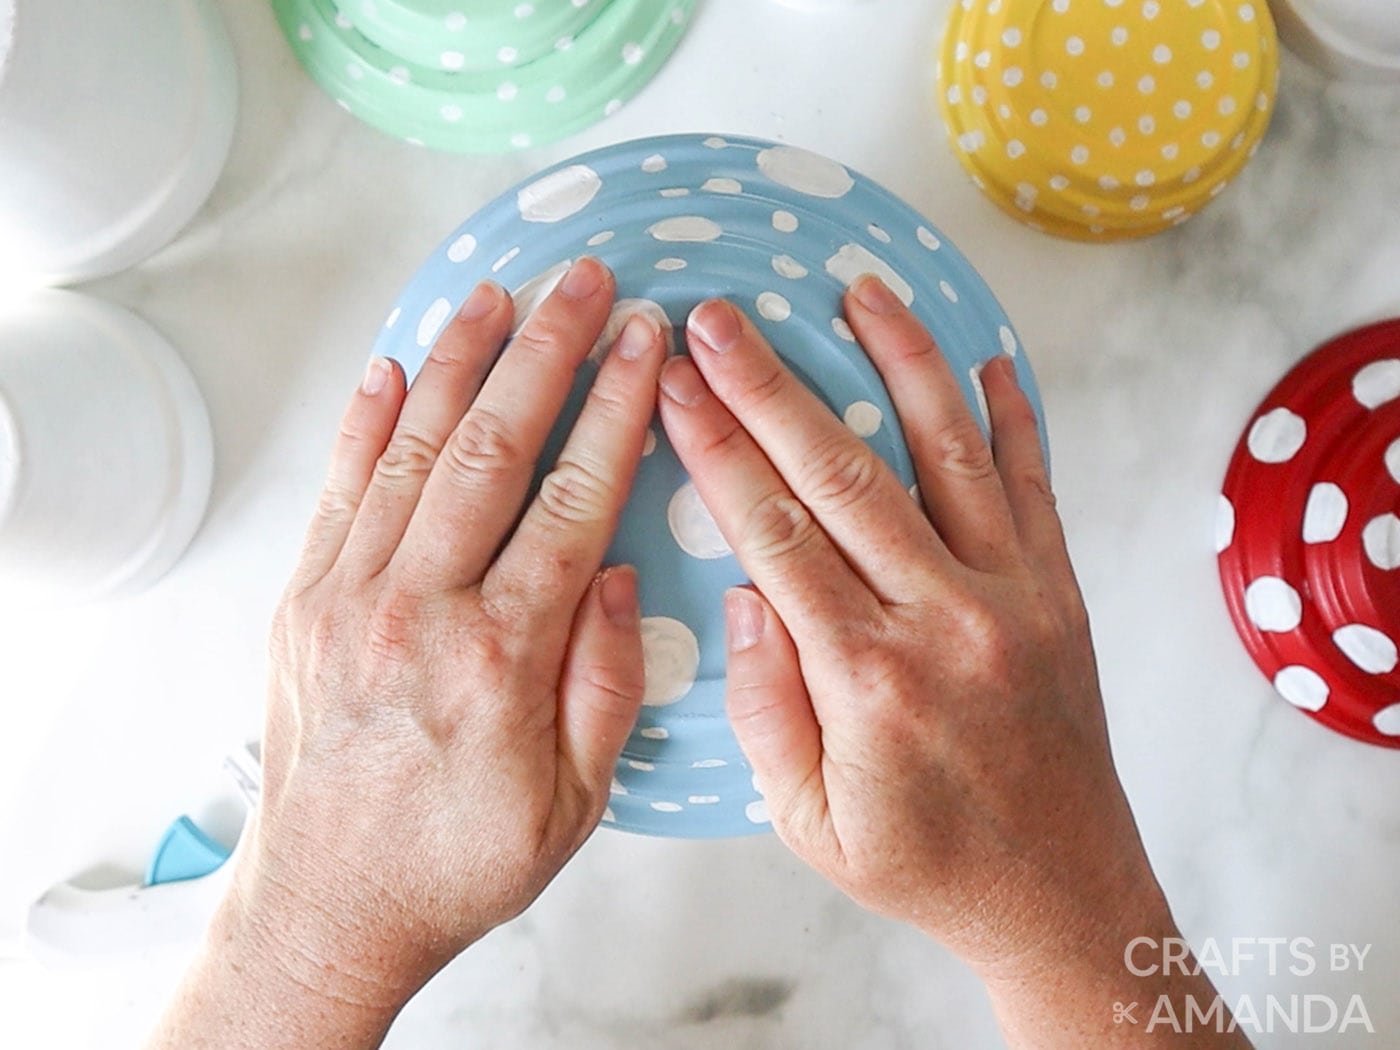
- Once dry, stack the saucers by color to form mushroom tops and paint white polka-dots in varying sizes all over. Apply a second coat for better coverage.

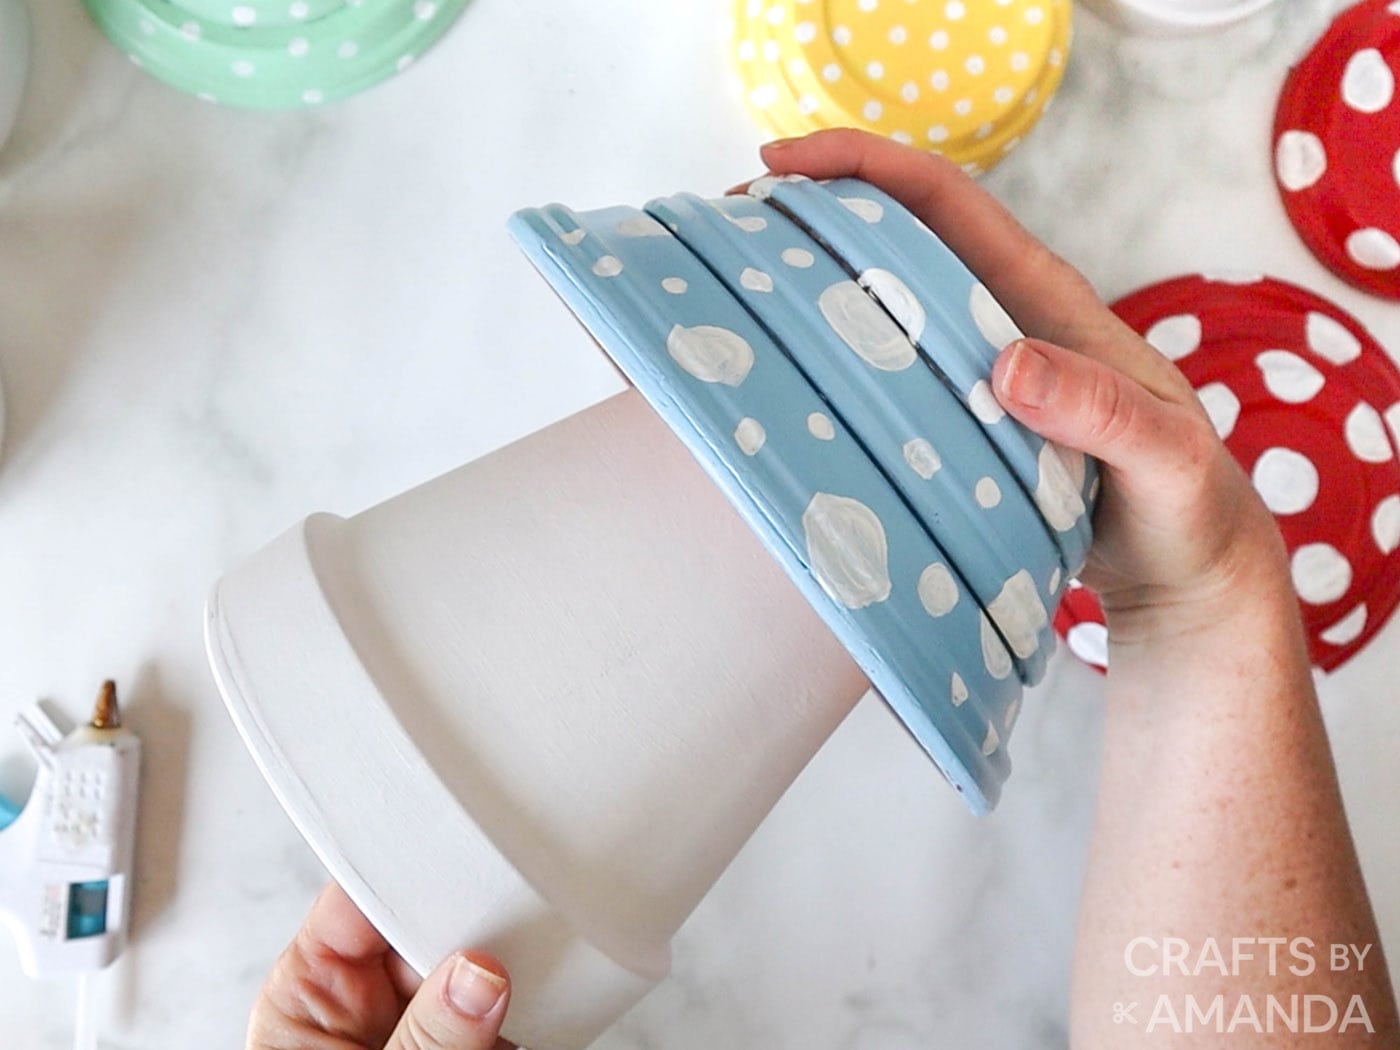
- Turn the now painted pots upside down and begin assembling the mushrooms. Working quickly, apply the hot glue between each layer of pot and saucers until the toadstool mushroom is formed. Gently press the pieces together as the glue dries. Repeat the processor for the remaining terracotta pot mushrooms.
- Finally, place them in your garden to enjoy.

Expert Crafting Tips
- Alternatively, you can try using varying sizes of clay pots and turn them upside down on top of eachother to achieve a mushroom shape instead of stacking saucers together. If you can find the round clay pots near you, this would work good as well!
- You may apply a clear coat on top of the finished product if desired.
- Instead of painting circles with paintbrushes, you could use various sizes of spouncer sponges for a quicker result.
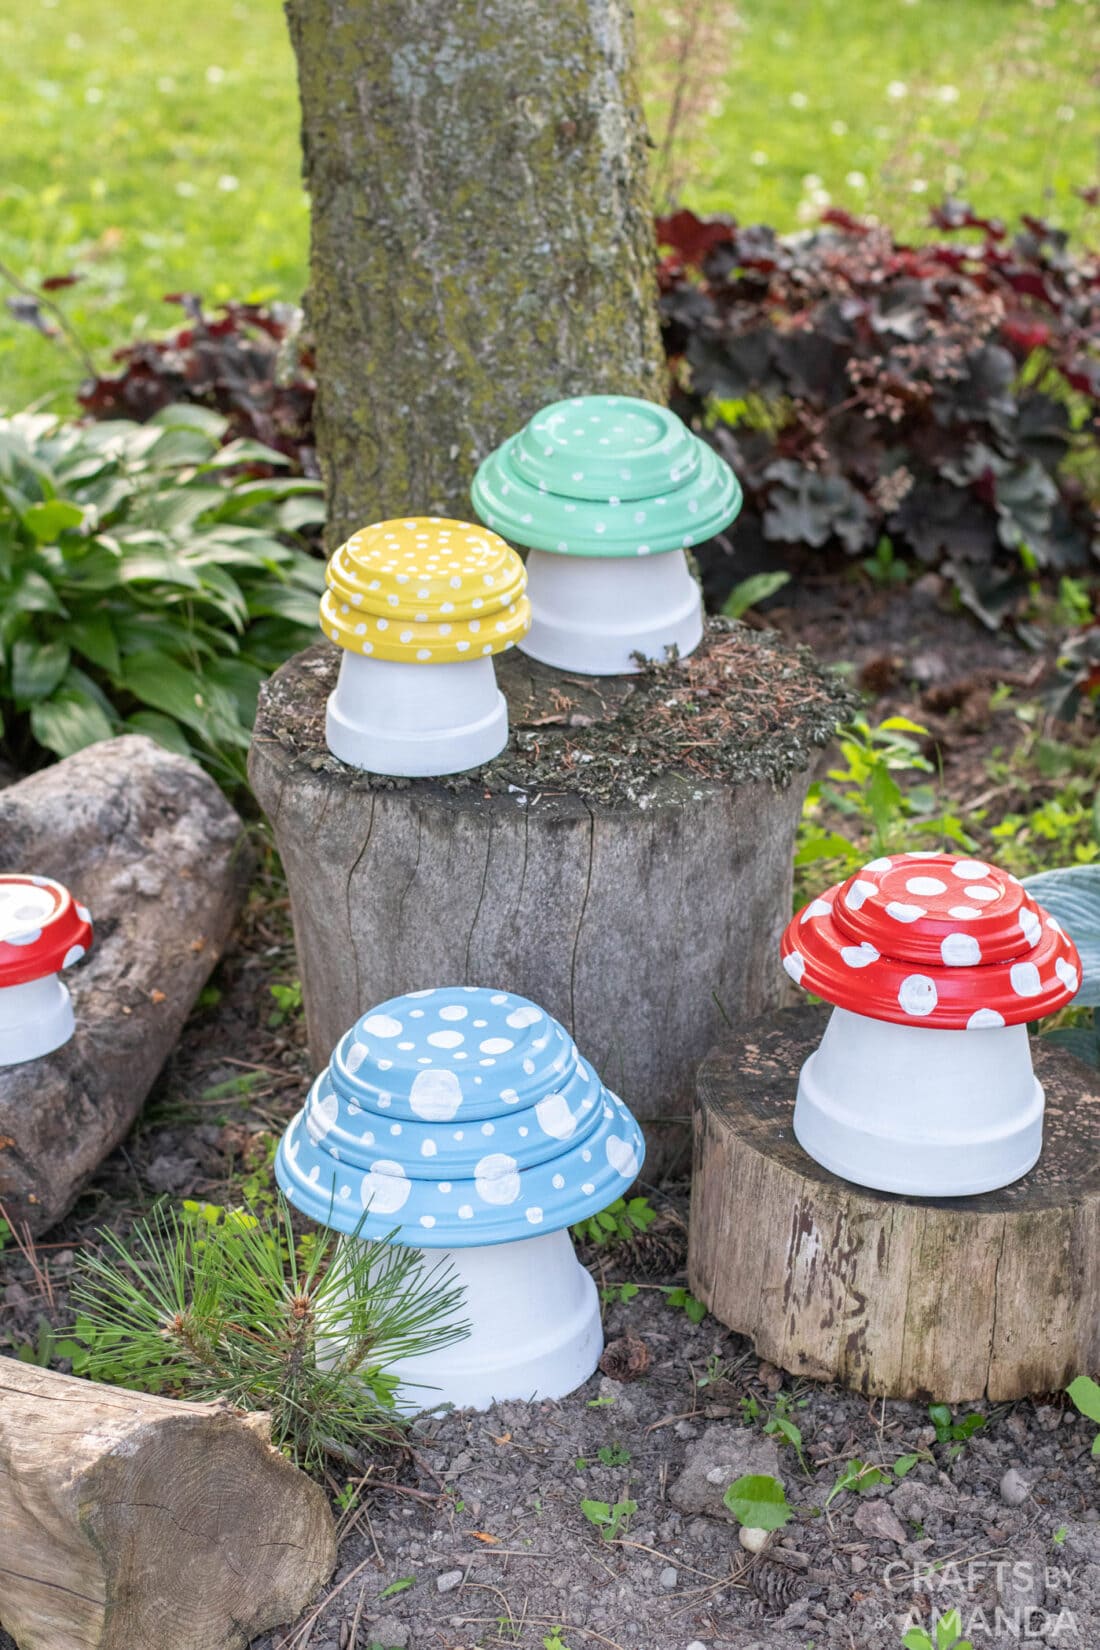
Have fun adding a colorful pop to your outdoor space with these adorable clay pot toadstools. Out of all of our clay pot crafts, these little mushrooms are definitely among our favorites!
More Garden Crafts and Projects
- Cheese Grater Owl
- DIY Garden Stepping Stones
- Mason Jar Wind Chime
- Ladybug Painted Rocks
- Mason Jar Solar Lights
- Terracotta Pot Wind Chimes
I love to create and share my projects with you! I know it’s hard to remember to come back and search, so I’ve made it easy for you with my weekly newsletter! You can subscribe for free and I’ll send you fun crafts and delicious recipes every week right to your email.
Clay Pot Toadstools
Supplies
Blue Toadstool
- 1 5.5” pot
- 5” saucer
- 1 6” saucer
- 1 7.5” saucer
Large Red Toadstool
- 1 4.5” pot with one 6” saucer
- 1 4” saucer
Small Red Toadstool
- 1 3” pot
- 1 4.5” saucer
Large Green Toadstool
- 1 4” pot
- 1 6” saucer
- 1 4” saucer
Yellow Toadstool
- 1 3.5” pot
- 2 4” saucers
DecoArt Americana Multi-Surface Satin Paints
- Cottonball
- Lipstick
- Canary
- Sky Blue
- Soft Jade
Craft tools
- Paintbrushes with assorted tips
Instructions
- Remove all labels from the pots and saucers.
- Determine layout by turning the pots upside down and begin stacking the saucers upside down on top of the pots. Stack the saucers from largest to smallest at the very top.
- Once happy with the placement, decide on the color for each mushroom and then separate the saucers so they don’t get mixed up while painting.
- Apply a coat of white multi-surface paint to all of the pots using the largest paintbrush.
- Paint the inside of the pots as well to seal all surfaces of the terracotta clay. Let the paint dry fully before applying a second coat of paint and add as many coats of paint as needed until desired coverage is achieved.
- Paint the saucers in different multi-surface paints. Let the paint dry fully before applying a second coat of paint and add as many coats of paint as needed until desired coverage is achieved.
- Once dry, stack the saucers by color to form mushroom tops and paint white polka-dots in varying sizes all over. Apply a second coat for better coverage.
- Turn the now painted pots upside down and begin assembling the mushrooms. Working quickly, apply hot glue between each layer of pot and saucers until the toadstool mushroom is formed. Gently press the pieces together as the glue dries. Repeat for remaining terracotta pot mushrooms.
Video
Expert Tips & FAQs
- For the paintbrushes, we used assorted sizes (fine tip, fine angled tip, 1⁄2” flat, and 2” flat).
This post originally appeared here on July 16, 2021.
- Swirling Twirling Ladybugs - July 21, 2026
- Drip Tie Dye Backpack - July 17, 2026
- Mini Coastal Clay Houses - July 14, 2026


Deb W says
What sizes are your large and smaller circles on the
saucers for the tops of the mushrooms?
Lynda Penny says
I’m in the process of making these mushrooms and want to use old tree stumps to set on like you did. My landscaper said he’d get me some stumps if I’d give him measurements. I’m not good at guessing and wondered if you remembered sizes you used, height.& width for 2 different stumps? I’m using same size pots as you did.
Jules says
What kind of paint are you using?
Amanda Formaro says
We used multi-surface paint available at most craft stores and online.
Kristie says
What did you use to get the circles so perfect?
Amanda Formaro says
We actually just used a paint brush, however you can use foam pouncers https://amzn.to/3r3KglY to make great circles!
Susan Ward says
I can’t wait to do this with my Prims Girls at church for Mother’s Day gift. I am also going to do the Unicorn Planter too.
Roxann says
the terra cotta mushroom craft and I want to do the same. Where did you purchase the pots and paints
Mrs H says
Anyone have any luck with finding the 13″ and up size pot? I’ve checked Wally and Amazon, not such luck. Only ones I can find are 5.5″ and I have a few of those at home, would love to make the bigger one. Thank you!
Jancy says
The biggest pot is 5.5
The pots are 3, 3.5, 4, 4.5 and 5.5
I think you are combining the quantity with the pot size.
Barbara A Jones says
You have the cutest projects.
Susan Green says
Could one use the plastic flower pots you get at the nursery instead of the clay pots
Amanda blevins says
I would love to try this I have a bunch of Mini pots bit not bottoms. Any suggestions on what I could use to make the mushroom tops. Thanks in advance for any suggestions.
Amanda Formaro says
Styrofoam balls would work in place of the terra cotta trays.
jane lawrence says
My two great-grandchildren and I are anxious to do the Toadstool craft…As I am on a fixed income, I was hoping you could suggest a less expensive paint to use, especially as numerous coats are needed to achieve the desired effect…Will any acrylic paint work as well?
Amanda Formaro says
Yes, but you will need an outdoor sealer as well.
Amanda Craig says
What outdoor sealer do you recommend
Bonnie says
I am going to make the toadstools for my outdoor frog speakers- but I have a question – I would like to make a pond – no standing water because of mosquitoes- Amy ideas would be helpful- I’m not very crafty and I have been looking Lilly pads for these frogs but once again Amanda came through with toadstools ( which was my first choice). These will placed under my deck which is gravel- so we can enjoy music while in the pool – I would also like any ideas for a closed box to house a small Bluetooth radio that would accent the toads or toad stools. I will surround the area with bricks. Please advise and thanks Amanda!
Joanne says
So adorable. Very Easy paint project and brings a happy touch to the yard. Can’t wait to do this. Thank you.