
These Terra Cotta Pot Wind Chimes are a quick and easy adult craft idea. Add various sizes of pots, a few wood beads, and some twine and you will have music in your garden in minutes. Let your kids paint the pots for an extra special project! This craft combines my love of this watering can that pours crystals with some clay pots. I have wanted a version of that watering can in my garden for a while now and now I have a miniature version!

Terra Cotta Pot Wind Chimes
Add making this terra cotta pot wind chimes to your list for summer crafts! Make some for yourself or to give as a gift. These easy terra cotta pot wind chimes are the perfect way to add some style to your outdoor spaces.
Related: Need more ideas for your garden? Try this burlap mason jar flag or this herb garden planter.

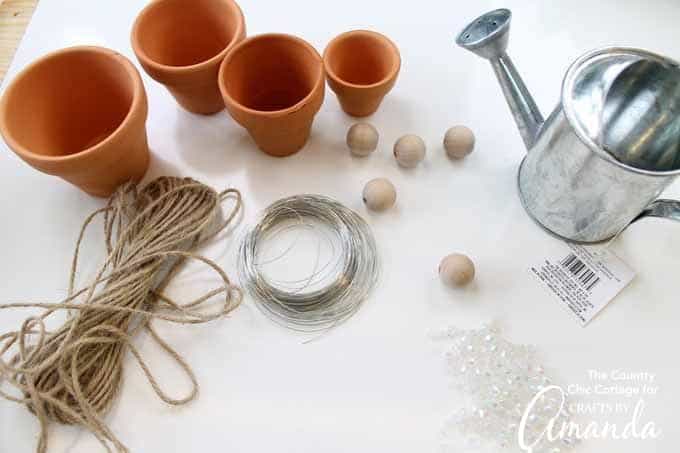
Supplies for making terra cotta pot wind chimes:
- Terracotta pots in various sizes
- Wood beads
- Twine
- Small galvanized watering can
- Wire
- Clear faceted beads
- Jewelry pliers
- Wire cutters
- Scissors
Steps for making wind chimes:
- Begin by adding the beads to the galvanized watering can. Run lengths of wire through the holes as shown below. TIP: Bend the end of the wire slightly and use patience to run through the first hole and locate the second.
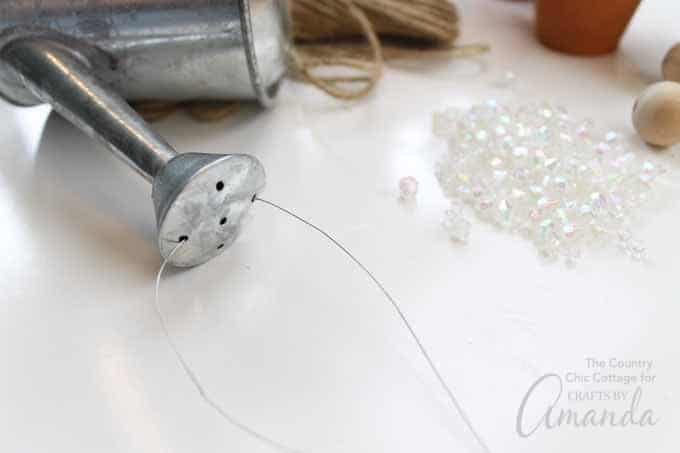
- String various clear faceted beads onto the pieces of wire.
- Wrap wire around itself using jewelry pliers to secure it on the ends.
- Repeat for four strands of beads from the watering can nozzle.

- Start making the wind chimes by running a very long piece of twine through the handle of the small galvanized watering can.
- Tie a knot in the twine (location depends on where the terra cotta pot will sit when added to the twine).
- Add both ends through a wood bead. TIP: Wrap a piece of tape around the ends of the twine to make threading it through easier.

- Place a terracotta pot onto the twine by threading through the drainage hole in the bottom. Allow it to rest on the wood bead.
- Tie another knot above the pot so that the clay pots will hang correctly when assembled. TIP: You can tie and untie these knots until you get the pots placed correctly.
- Add another bead on top of this knot.

- Continue in this method until all of your pots are strung together on the twine.
- Tie twine into a loop at the top to complete your wind chimes.

You will love the magical sound coming from these terra cotta pot wind chimes once they are in your yard. The watering can is the perfect addition to catch the wind and make sure the chimes are always making music.

Doesn’t it look so lovely? Neighbors, friends, and family will all be asking how you made it!

You can make these terra cotta pot wind chimes in any length that you want. You can even use a bunch of terra cotta pots and have some wind chimes that hang from your front porch.
Check out the most popular garden craft on Crafts by Amanda below!
- Rainbow Button Wind Chime
- Ladybug Painted Rocks
- Fairy House Night Lights
- How To Start A Fairy Garden
- Watering Can That Pours Crystals
- Painted Rock Garden Markers
- Clay Pot Toadstools
- Fingerprint Flower Pot

Making Wind Chimes with Terra Cotta Pots
Supplies
- Terra cotta pots in various sizes
- Wood beads
- Twine
- Small galvanized watering can
- Wire
- Clear faceted beads
- Jewelry pliers
- Wire cutters
- Scissors
Instructions
- Begin by adding the beads to the galvanized watering can. Run lengths of wire through the holes as shown below. TIP: Bend the end of the wire slightly and use patience to run through the first hole and locate the second.
- String various clear faceted beads onto the pieces of wire.
- Wrap wire around itself using jewelry pliers to secure on the ends.
- Repeat for four strands of beads from the watering can nozzle.
- Start making the wind chimes by running a very long piece of twine through the handle of the small galvanized watering can.
- Tie a knot in the twine (location depends on where terra cotta pot will sit when added to twine).
- Add both ends through a wood bead. TIP: Wrap a piece of tape around the ends of the twine to make threading it through easier.
- Place a terra cotta pot onto the twine by threading through the drainage hole in the bottom. Allow it to rest on the wood bead.
- Tie another knot above the pot so that the clay pots will hang correctly when assembled. TIP: You can tie and untie these knots until you get the pots placed correctly.
- Add another bead on top of this knot.
- Continue in this method until all of your pots are strung together on the twine.
- Tie twine into a loop at the top to complete your wind chimes.
This post was originally published on this blog on May 10, 2017.

- Mason Jar Bird Feeder - January 9, 2026
- Fall Mason Jars - September 16, 2025
- Burlap Stenciled Pillow Covers - May 16, 2025


Sharon@BlueWillowHouse says
Super cute and excellent tutorial. Thank you for sharing at the Snickerdoodle Create~Bake~Make link party!
Christine says
What a great craft, especially for outdoors. Thanks for joining the Dishing It & Digging It Link Party. I hope you had a good time and met some new friends.
Helen at Pleasures of the NW says
What a fun idea! I’d be honored if you shared this at the Pleasures of the NW’s DIY party!
http://www.pleasuresofthenw.com/crafty-link-58/
Vickie Westcamp says
This is so cute! My mom is an active gardener (at 85 years!) and would love to have one of these! I think I will make one for her for her birthday. Thank you so much for the inspiration!
Amanda Formaro says
Be sure to let us know how it turns out, Vickie! :)
Quirky Homemaker says
I love how these terracotta pot windchimes turned out! I’ve featured them in a roundup post here: http://www.heartfeltbalancehandmadelife.com/2017/05/10-cute-outdoor-chime-diys-to-spruce-up.html
Hope you guys have a great weekend.
Andrea says
These are adorable I love the watering can with beads! I never would’ve thought of that.
Gentle Joy Photography says
What a fun idea! :)
Rina says
Neat idea! I bet the sound is amazing. I do alot of gardening so I have some extra Terra Cotta pots in my garage. This will be going on my project to do list! Also pinning for future reference. Thank You!