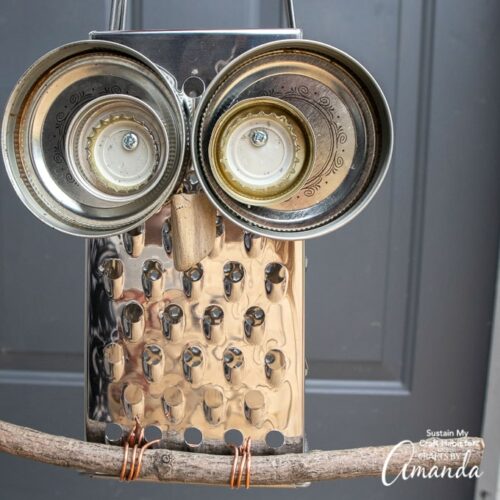
Hi friends, meet Hootie. We never expected to name our cheese grater owl, but this little guy turned out so cute that we felt he deserved a name!

Garden Decor from an Upcycled Cheese Grater
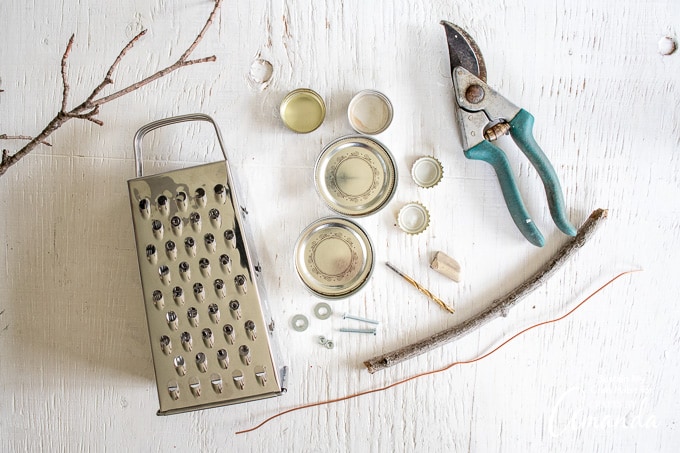
Not only did we make a super cute decoration for the outdoor garden but we used materials we had around the house. An old stainless cheese grater, some mason jar lids, bottle caps, a tree branch, and copper wire were all that were needed to create this adorable cheese grater owl. If you have leftover bottle caps from this project, see this Bottle Cap Horse and Bottle Cap Flower for your garden as well. It feels good to upcycle!
Although this lil’ owl is utterly adorable, his edges are quite sharp (he’s made from a cheese grater after all!). Be sure to place him in the garden away from curious little hands. Over time, the stainless steel will rust adding to the “rustic look” intended for an outdoor garden.

Materials Needed
- Stainless steel cheese grater, size 9” high
- 2 Mason Jar lids, size 2.75” diameter
- 2 Metal bottle caps, size 1.5” diameter
- 2 Metal beer bottle caps, x2, size 1” diameter
- 2 screws with washers and bolts
- Drill or Drill Press with appropriate sized drill
- Copper Wire
- Tree Branch, approx. 9” long
- Small tree branch triangular shaped cutting, approx. 1” long
- Hot Glue Gun with clear glue sticks
- Paper, marker and scissors
How To Make a Cheese Grater Owl
Preparing the Owl Eyes
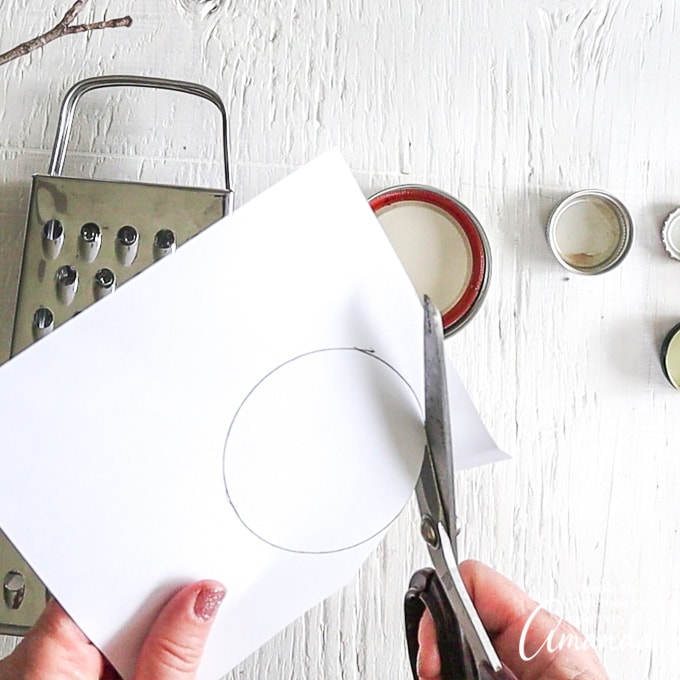
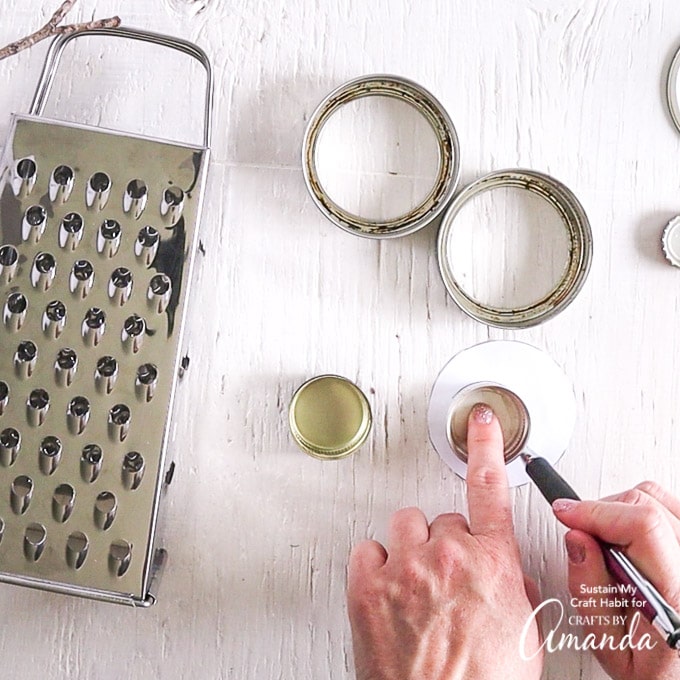
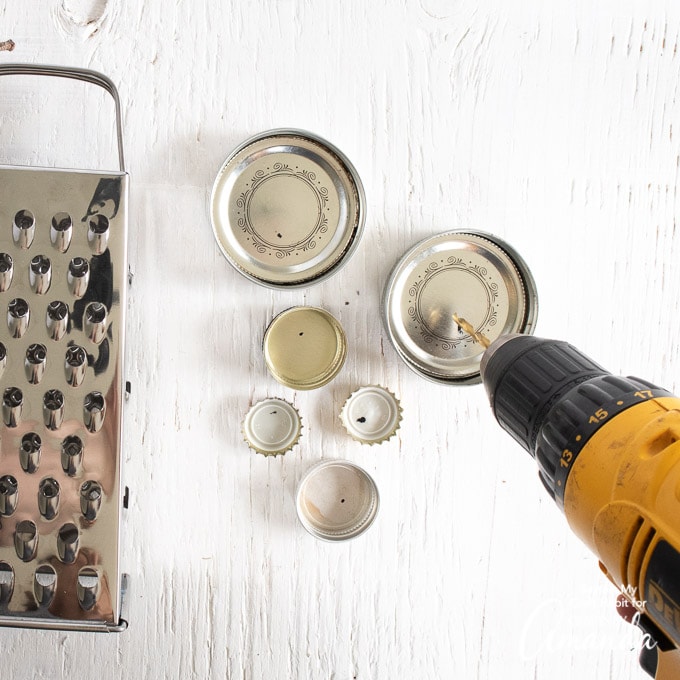
- The lids will form the owl’s eyes to be secured in place with screws. To determine where to drill the holes, create a paper template of the owl’s eyes.
- Trace the largest mason jar lid onto a piece of paper and cut out the circle.

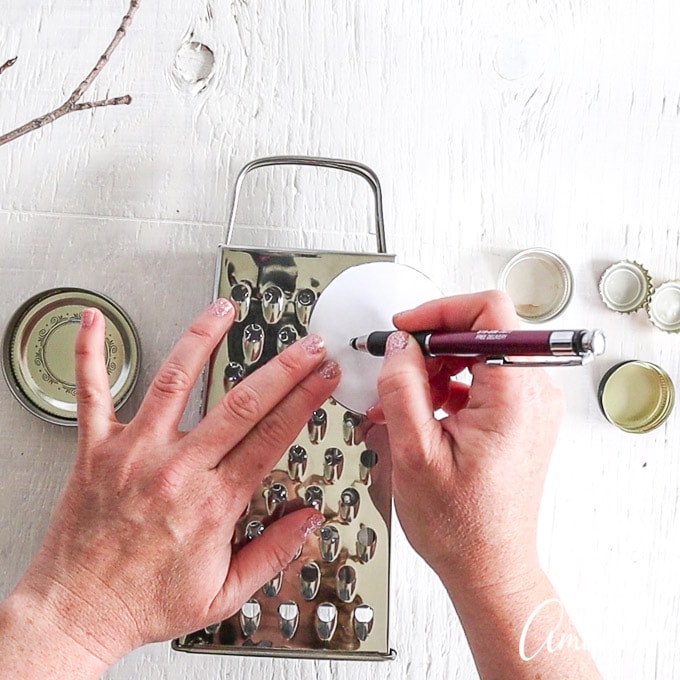
- Position the paper over the cheese grater towards the top aligning the holes from the grater with the location of the drilled holes.
- Mark the position with a marker and transfer the markings on to the lids.
- Repeat with the smaller bottle caps.
- Next, carefully drill holes through the marked positions using a drill press.
Assembling the Owl
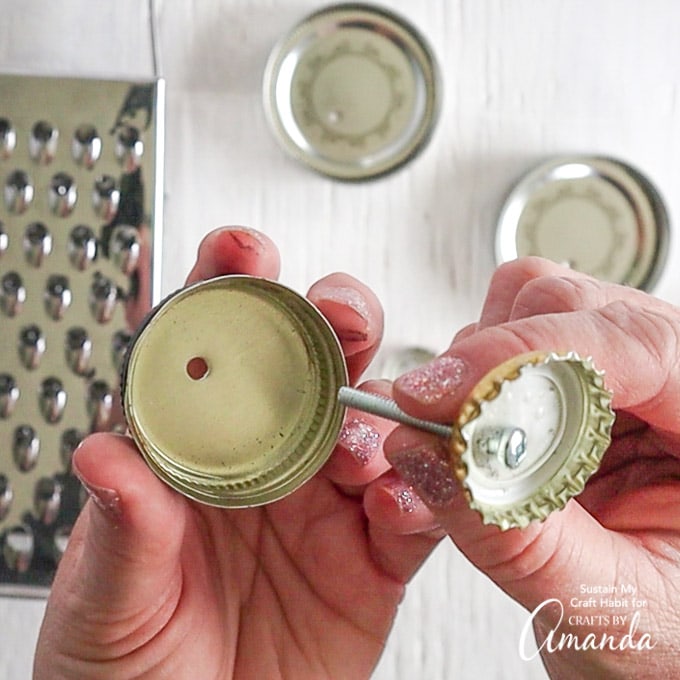
- Working one owl eye at a time, stack the lids from largest on the bottom to smallest on the top aligning the drilled holes.
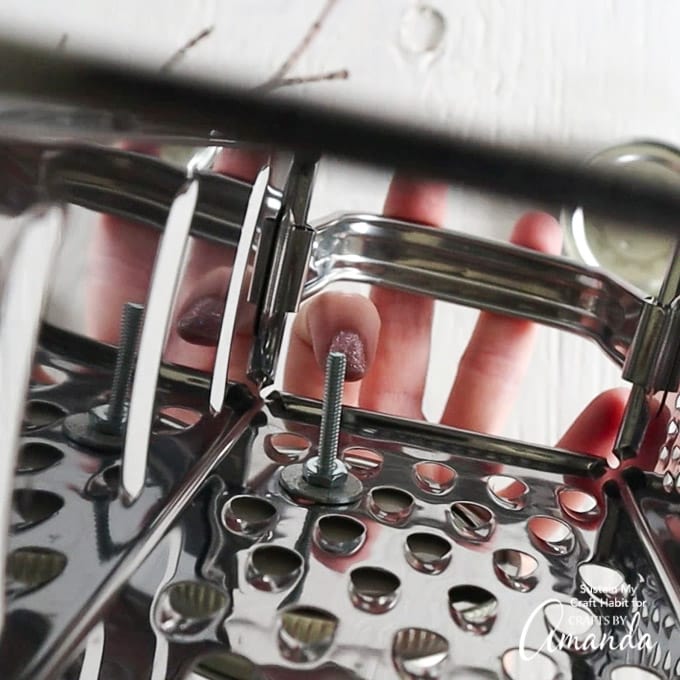
- Push the screw through the holes and then align the screw with the designated cheese grater hole.
- Place the washer and bolt on the other end of the screw (on the inside of the cheese grater) to secure the lids in place.
- Repeat with the other owl eye.
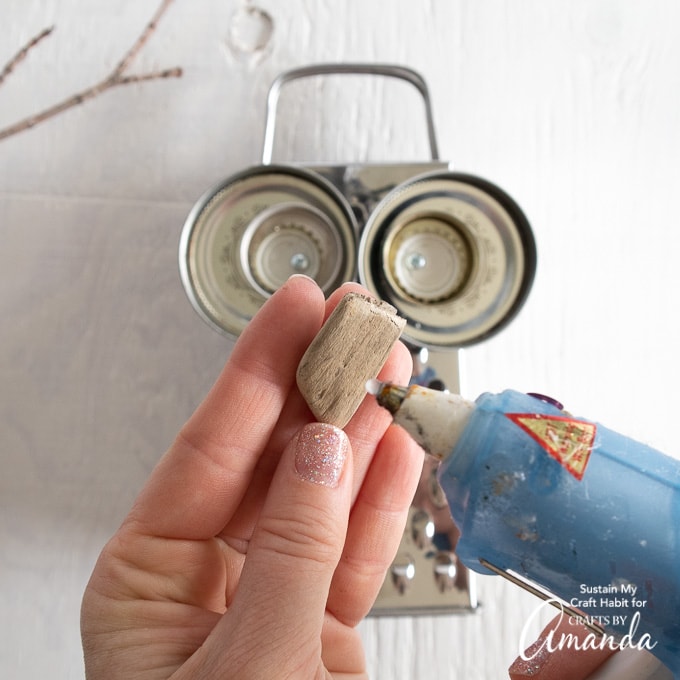
- Heat up a hot glue gun and apply the wood nose piece to the cheese grater in the center just under the eyes.
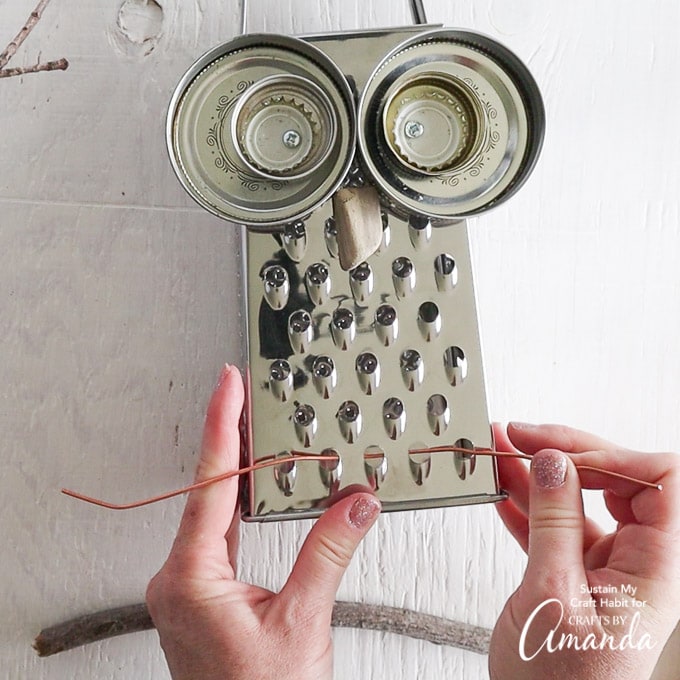
- Lastly, thread the wire through two of the bottom holes of the cheese grater from inside out.
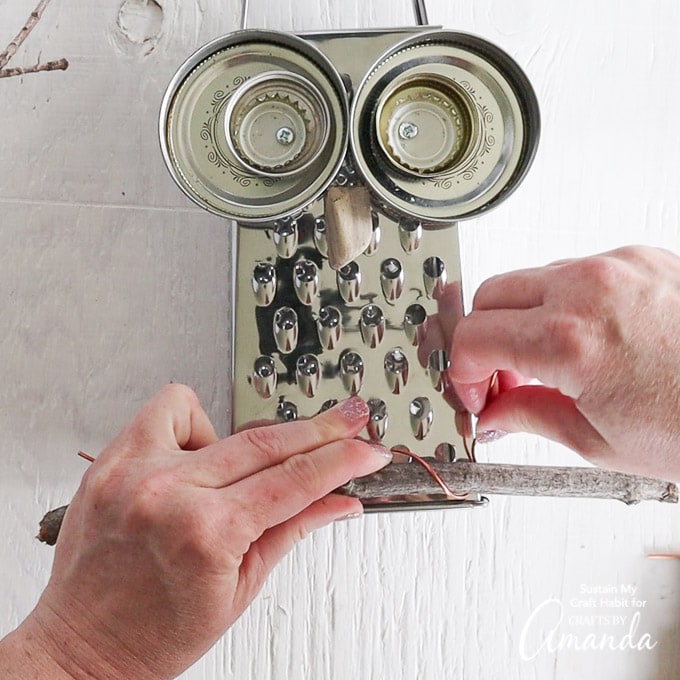
Wrap the wire around a piece of tree branch to secure in place. The wire needs to wrap 3 times to resemble an owl’s claws.
Position the owl outdoors and enjoy watching Hootie watch over the garden. Check out this fun post for more DIY and upcycled garden project ideas.

More DIY Garden Decor Ideas
- Recycled Key Garden Markers
- Ladybug Painted Rocks
- Watering Can That Pours Crystals
- Beaded Decorative Garden Stakes
- Mason Jar Bird Feeder
- DIY Mosquito Repellent Candles
- Clay Pot Toadstools

Cheese Grater Owl
Supplies
- 1 Stainless steel cheese grater 9” high
- 2 pieces Mason Jar lids 2.75" diameter
- 2 pieces Metal bottle caps 1.5" diameter
- 2 pieces Metal beer bottle caps 1" diameter
- 2 screws with washers and bolts
- 1 Drill Press with appropriate sized drill bit
- 1 Copper wire 15" long
- 1 Tree branch 9" long
- 1 Small tree branch triangular shaped cutting approx. 1" long
- 1 Hot glue gun with clear glue sticks
- 1 scrap paper, marker and scissors
Instructions
- The jar lids will form the owl eyes, stacking the smallest lid on the top to the biggest lid on the bottom.
- Create a paper template for drilling holes into the jar lids.
- Mark the positions with a marker and transfer the markings on to the lids.
- Carefully drill holes through the marked positions using a drill press.
- Working one owl eye at a time, stack the lids from largest on the bottom to smallest on the top aligning the drilled holes.
- Secure the owl eyes to the cheese grater with screws, washers and bolts.
- Heat up a hot glue gun and apply the wood nose piece to the cheese grater in the center just under the eyes.
- Thread the wire through two of the bottom holes of the cheese grater from inside out.
- Wrap the wire around a piece of tree branch to secure in place.
- Position the owl outdoors in the garden. Overtime, the stainless steel will rust.
Video
This post originally appeared here on May 22, 2020.
- Pressed Flower Resin Magnets - May 26, 2026
- Pressed Flower Art - May 8, 2026
- DIY Easter Egg Wreath - March 20, 2026


Maureen says
Going to put solar light inside.
Joanne May says
Your cheese grater owl is adorable!
Amanda Formaro says
Thanks so much!
Maria L Wolfgang says
Love this project, thank u for sharing…..
Marilyn says
Cute idea!
Have a great day!
Marilyn ❤️