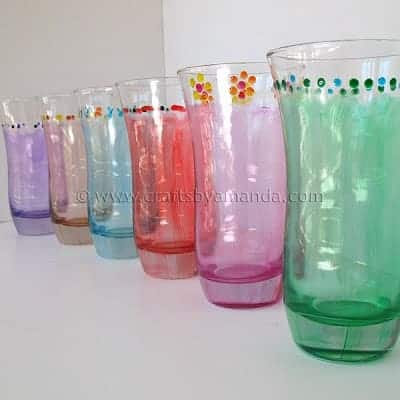

My kids are old enough that we can all use glass to drink out of now. However, it seems they haven’t outgrown using a million cups everyday to drink from. There’s always a sink full of glasses because they take a new one whenever they get a drink. I thought about doing monograms or even names, but I really wanted a set of drinking glasses that were more stylish and grown up. So instead, I went with the color code system.
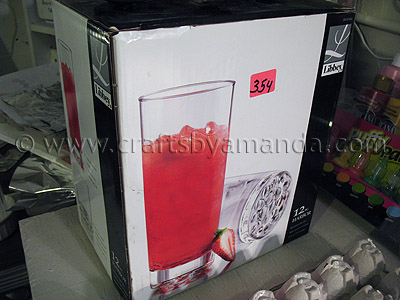
It all started with this box of drinking glasses I bought at the thrift store for $3.54.
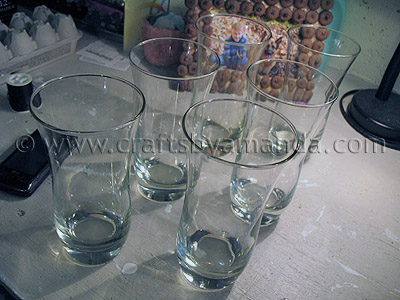
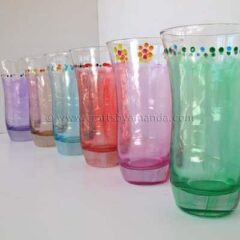
The set includes 6 tall glasses and 6 short glasses. There are six of us, so that’s just perfect!

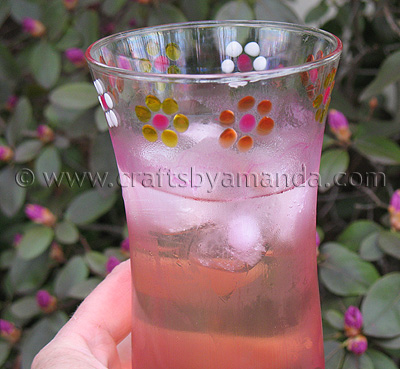
In case you’re wondering how I got this pretty effect, I used DecoArt’s new Crystal Gloss Enamels.
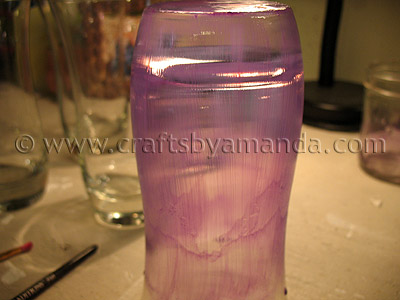
They dry clear and were perfect for this project! I started by turning the glasses upside down and painting in downward strokes. I didn’t paint all the way to the rim as DecoArt suggests that the paint should not touch surfaces that will be in contact with food.

Then I added decorations by dipping the handle end of my paintbrush into the enamels and dotted them onto the glasses.
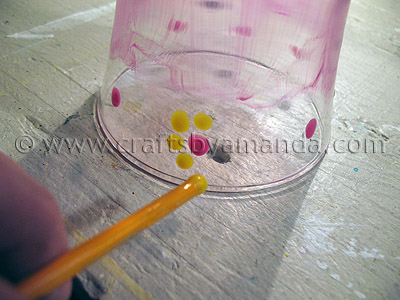
I created flowers using this method as well.
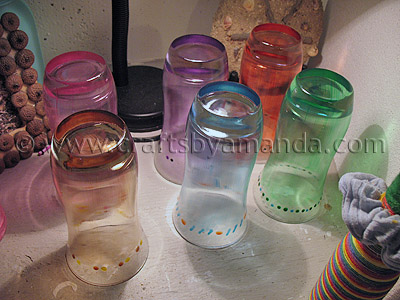
They need to dry for 48 hours.
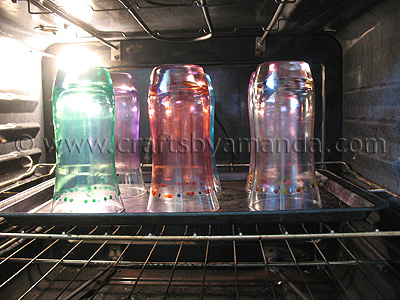
Then after 48 hours, you place them into a cold oven. Then shut the door and turn the oven on to 200 F. Set your timer for 30 minutes. After 30 minutes, turn off the oven and open the door. Allow the glasses to cool in the open oven.
Now give them a quick wash with warm soapy water and rinse. They are now ready to use!


Info from DecoArt: Once painted glassware has dried for 48 hours and been baked according to label instructions, items should be top rack dishwasher safe. Avoid using pot-scrubber cycles. Be aware that some dishwasher detergents can etch glassware and harm hand painted items. When hand-washing, do not soak. Gently wash in warm, soapy water, immediately rinse in cool water and place on a dish towel to air dry.
Crystal Enamel Drinking Glasses
Supplies
- glasses
- DecoArt’s Crystal Gloss Enamels
- paintbrush
Instructions
- I started by turning the glasses upside down and painting in downward strokes. I didn’t paint all the way to the rim as DecoArt suggests that the paint should not touch surfaces that will be in contact with food.
- Then I added decorations by dipping the handle end of my paintbrush into the enamels and dotted them onto the glasses.
- I created flowers using this method as well.
- They need to dry for 48 hours.
- Then after 48 hours, you place them into a cold oven. Then shut the door and turn the oven on to 200 F. Set your timer for 30 minutes. After 30 minutes, turn off the oven and open the door. Allow the glasses to cool in the open oven.
- Now give them a quick wash with warm soapy water and rinse. They are now ready to use!
- Swirling Twirling Ladybugs - July 21, 2026
- Drip Tie Dye Backpack - July 17, 2026
- Mini Coastal Clay Houses - July 14, 2026


Christy Roppel says
It looks like there are brush streaks. Will these disappear when complete?
Amanda Formaro says
No, so if you don’t want the brush streaks you will need to smooth them out while painting.
Kae says
Isn’t there a problem with volatiles if you bake painted glassware in the home oven?
My scientist husband was quite clear and said not in our kitchen …you won’t be doing this.
Amanda Formaro says
I understand his concern, but the temperature to set the oven at is 200 F. It’s a low and slow heat and not hot enough to cause a problem.
painting nut says
Just to clarify, there is no paint or markers on the market in USA that is classified as food safe. Only in Germany.
Non toxic does not mean food safe, they are two different classifications , non toxic means if you got some paint on your finger and happen to put finger in your mouth you won’t die. It is recommended even with non-toxic paint, paint pens or markers ,to decorate below the lip line and only on outside edge of plates away from any contact with food. Also “permanent ” is an industry term for “color fastness ” meaning it wont fade,not how long it will last on the item.
Yolanda Kosakowski says
Was wondering do I need to bake if not drinking out of this just using a decor?
Amanda Formaro says
Hi Yolanda. No that’s not necessary. They can air-cure too, it just takes three weeks. They can still be displayed decoratively during that time, just don’t run them through the dishwasher until then :)
Yolanda Kosakowski says
Thank you very much these r great I’m also going to make wine glasses as well can wait it do them found great wine glasses at our local dollar store
Amanda Formaro says
That’s awesome, they will look lovely!
Linda Harrison says
I love this idea. I am always looking for different ideas to use in my catering and gift baskets. Thanks for another great idea.
admin says
Thanks Linda, glad you like them!
monica says
this may sound obvious, but I would advise that you specify to apply the paint on the OUTside of the glasses. Your tutorial is very similar to another SU tutorial that uses food colouring and podgy on the INside of the glasses, that produces the same effect, only in that one you can’t drink from the glasses due to the application method.
cheers,
Monica
admin says
Thanks Monica! I’ll consider that :)
Anne-Marie says
How beautiful! I vowed not to go to Michaels, however, you’ve inspired me! I’m going out shortly to buy some of these paints and I’ll be decorating some wine glasses! thank you!
Amanda Formaro says
Wine glasses are a great idea!
Dopey LaRue says
These are SO beautiful! I can't wait to copy them :) Thanks!
Anonymous says
Okay, thank you and thanks again for the fast reply(:
Amanda says
Anon – sorry for the confusion! What I mean by that is don't preheat the oven first. Place the glasses in the oven before turning it on, then turn the temp to 200 :) have fun!
Anonymous says
I loved your idea for painting the glasses downward(: I just painted a glass and a jar for a present waiting for them to dry now. The only thing i don't understand is when u said to put them in a cool oven set to 200*? I don't think my oven has a cool setting, what should i do?
Christine Roppel says
What she meant was to put the glasses in a cold (off) oven, then put the temp at 200 so the glasses get “warmed up” slowly as the temp raises to 200 degrees.
Amanda says
Hi Anon – You should be able to get all of these colors at Michael's. Call ahead to see if they have them yet, they are a newer product. :)
Anonymous says
I've been looking for those Crystal Gloss Enamels everywhere. Where did you get them? Is there any store that has them without having to order them online?
Amanda says
They are non-toxic enamel paints. They just don't go through the FDAs process, therefore there is a required statement on the product that says to keep the paint on surfaces that won't touch food. You certainly can use whatever paint you are comfortable with :)
Anonymous says
I am worried about the paint – even if you do not put your MOUTH on it, you touch it, then eat with your hands, etc. Chances are, it'll be fine – but chances are, minute particles are getting into your family's system. Can't you just use food-safe paints next time?
TidyMom says
These are GREAT Amanda
Thanks for linking up! I featured your post in my wrap up http://tidymom.net/2011/im-lovin-it-wrap-up-happy-mothers-day
Happy Mother's Day
Nutmeg Nanny says
You are so amazingly talented! I wish I had skills like this :)
Sarah says
I love this idea! I might be making myself a set pretty soon!
Miss @ Miss in the Kitchen says
Very pretty! I love your ideas and your creativity!
gail says
love your new glasses amanda! sooo pretty! good luck, I hope it cuts down on washing! hehehe
gail
Amanda says
Hi Princess :) I totally understand your concern, so I wanted to let you know that I did contact the paint manufacturer before making these and asked about the toxicity of the paint. They told me that the paint is non-toxic. They said the only reason that they suggest to keep the paint away from surfaces that will touch food is because the FDA has specific testing procedures and rules for products that come in contact with food. The paint does not go through this vigorous step and therefore they make the suggestion to the paint off any surfaces that will be touching food. They did assure me that the paint is non-toxic and are certain it would pass FDA testing if it went through the process. Oh, and on a side note, the glass with the flowers is mine. :)
Princess says
I second Mighty Mom- you don't have them coming into contact with food but with the way you've got them painted they're going to be putting the paint right into their mouths. They're very pretty, and a good idea, but you really shouldn't use those with children- particularly the flower one.
Steph says
Greetings! I'm a new follower… you are an amazing crafter! Thank you for sharing your work. Looks like you have loads of fun while doing all these projects! :)
MessyMissy says
What a pretty transformation!! I would love it if you would link this up to my party A Marvelous Mess….each week I pick one project to feature on my sidebar!! Here is the link: http://marvelouslymessy.blogspot.com/2011/05/marvelous-mess-11.html
Megan'sCookin' says
Those are just to damn cute!!! I would have never thought to paint my own glasses but I LOVE it! Can they go in the dishwasher??
Mighty Mom says
I really love the glasses! Although I think if I make them I will paint the flowers lower from the rim so little mouths don't touch the paint accidentally.
Jen says
Very creative! Perfect for a summer, out-door party. Love it!
Tammy says
Very pretty glasses. They are lovely and so unique!
danielka says
Can you put these in the dishwasher? Love the flowers.
Beth@Wiccan Make Some Too says
Wickedly spiffy idea! I am loving these glasses. Following your blog now & just might be using this idea. Stop on by Wiccan Make Some Too when you get the time & say hi.
Kudos Kitchen says
These are really cute Amanda and such a great idea! I didn't know that DecoArt's had enamel paints. Good to know :)
Tami says
Kudos to you for color coding! I've been threatening to color code everything in my house because my kids go through clean "things" so quickly – towels, glasses, plates, socks…you name it.
You put "pretty" into color coding. :) Very pretty for summer. Great deal on the glasses, too.
Nichol says
I love these, what a great idea! I need new glasses and these are so pretty.
Jill T says
These are too cute! I am definitely bookmarking this one!
Lana @ Never Enough Thyme says
How cool! Another super creative idea from you!
Kristin K. says
I absolutely love them! The possiblities are endless; vases, candy dishes, clear glass plates (paint on the underside of course) We might just end up with a set of AmandaWare pretty darn soon.
Thanks so much!
Tina says
They turned out beautiful! Even after our kids were old enough to use glass glasses, they were so accident prone that I kept using plastic. I understand about the sink full of glasses though. I finally started buying disposable drinking cups and writing their name on them. They'd get a new one every day. They realized they weren't as thirsty as they thought they were when they had to start washing them!