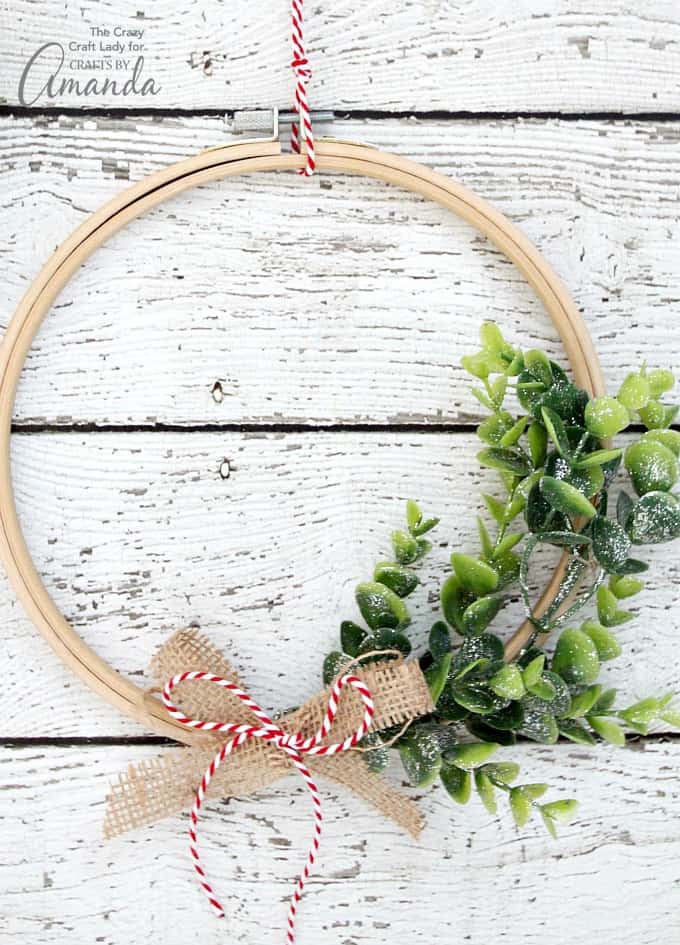
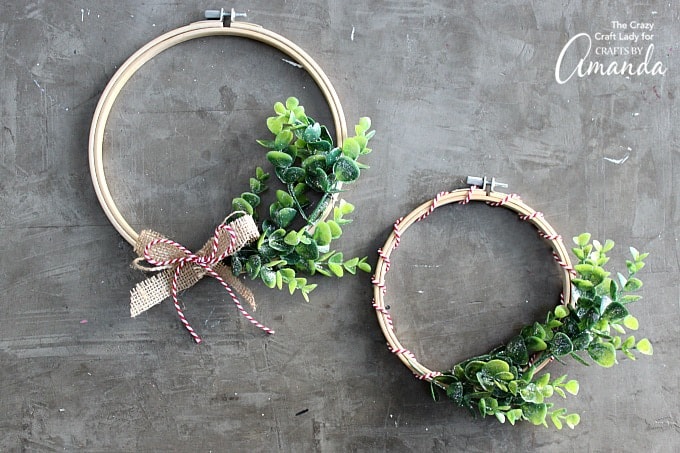
Learn how to make a simple winter greenery embroidery hoop wreath. This easy to make wreath is perfect for decorating before or after Christmas and through the winter.
Winter Greenery Embroidery Hoop Wreath
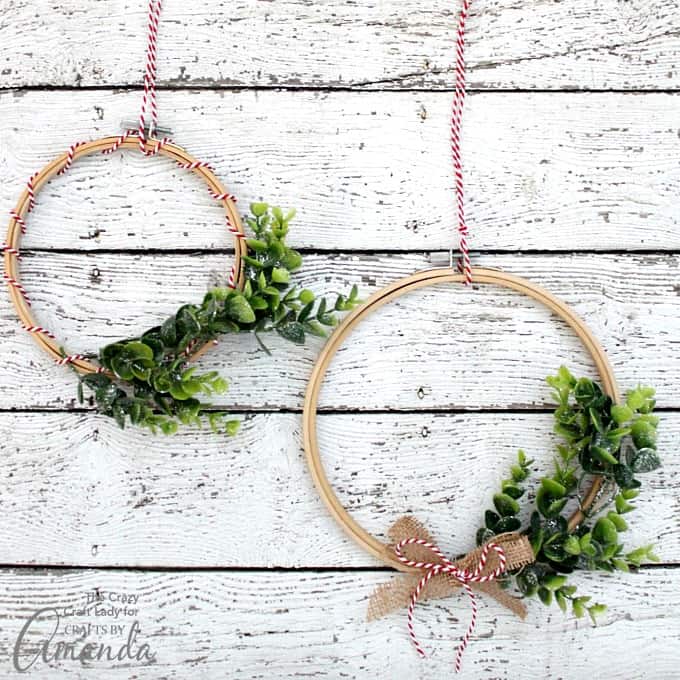
It seems like embroidery hoop wreaths are popping up everywhere lately, and it’s no wonder why. They are simple craft projects, and they are a fun option to try instead of a full, traditional wreath. Make as many as you like. I think that these embroidery hoop wreaths look better when grouped with two or more.
A great idea for turning this winter wreath into a spring-inspired wreath would be to take the look of this Hula Hoop Wreath, and apply the flowers to the embroidery hoops as you would to the hula hoop. Or you can switch it around and make it vice versa.
And if you’re needing more simple (and inexpensive) winter wreath inspiration, check out these Winter Wreath Ideas – they all started with dollar store supplies.
Supplies for this project
- embroidery hoops of various sizes
- red and white twine
- faux winter greenery
- thin brown twine
- scrap burlap / thin burlap ribbon
- scissors
- wire cutter (optional: you’ll need it if your faux greenery is wired)
How to Make an Embroidery Hoop Wreath
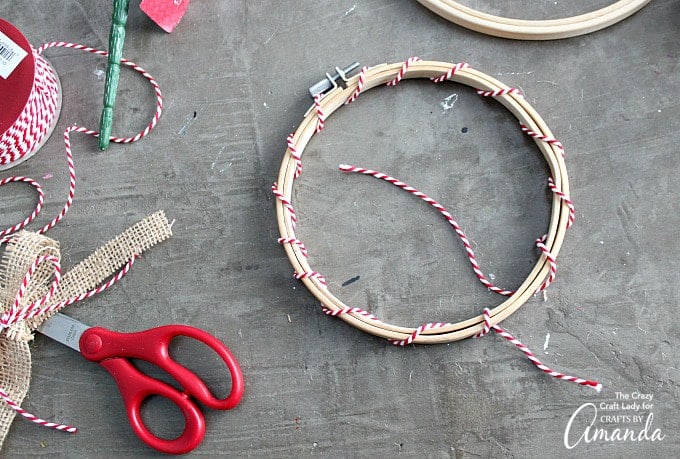
First, wrap the embroidery hoop with red and white twine. Wrap the twine all the way around the hoop, looping at about half-inch intervals. Then secure the ends of the twine with a simple knot.
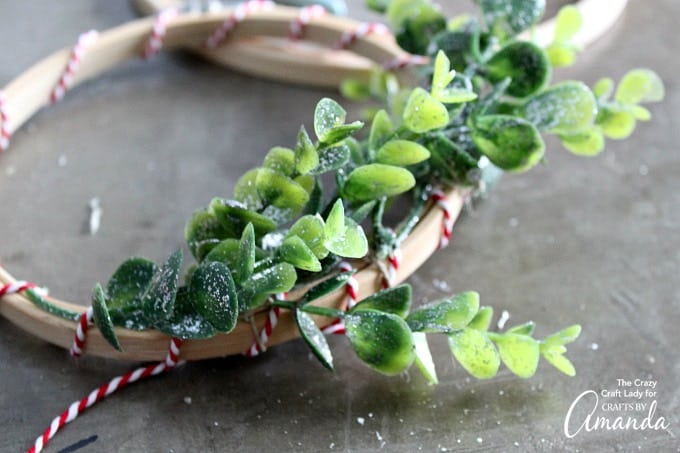
Separate and cut apart the sprigs of the faux winter greenery. I used glittered boxwood, because I think it has more of a wintery feel. You could even use fresh greenery if you would like.
Using thin brown twine, tie small pieces of greenery to the bottom-right edge of the hoop.
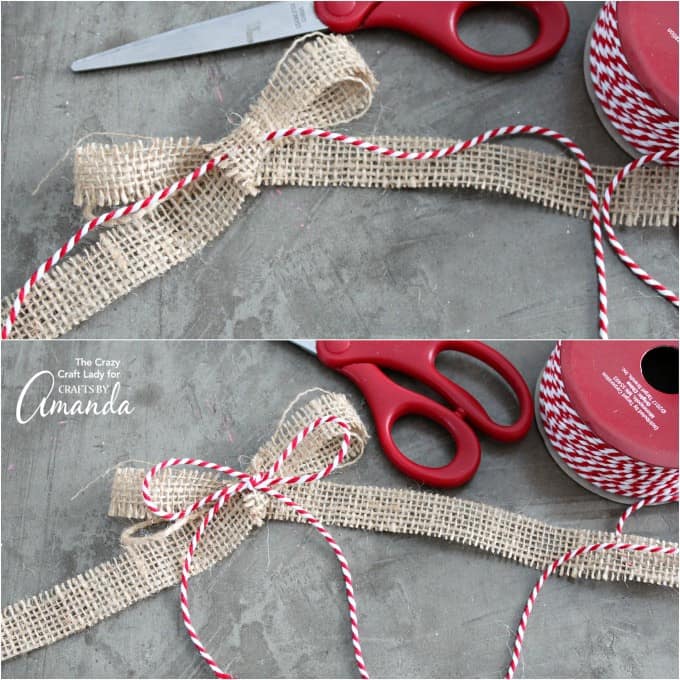
Finally, make a burlap and twine bow for the wreath.
Cut a thin strip of burlap (or use thin burlap ribbon) and tie in a bow. Be sure to cut the burlap straight between the threads to prevent fraying. Since you only need a small piece, you could just use the scraps from another burlap craft project.
Thread a piece of red and white twine through the loop on the front of the bow. Then tie the twine in a bow as well.
Finally, secure the bow to the bottom of the embroidery hoop.
Note: If you want to make multiple wreaths, change them up a bit. Put a bow at the top of one, and the bottom of the other. Try draping the greenery over the top of the hoop, instead of just the bottom or side. Then you can hang your wreaths at various intervals.
Hang your embroidery hoop wreath(s) with twine.
That’s it! This embroidery hoop wreath comes together in a snap, and they’re a great way for making your Christmas decor last through the winter. Have any extra embroidery hoops? Check out more ideas like this Boho Chic Dreamcatcher made from doilies, burlap, lace and an embroidery hoop. Or even this Embroidery Hoop Rainbow Button Tree if you’re looking for a more colorful accent piece!
Winter Embroidery Hoop Wreath
Supplies
- Embroidery hoop of various sizes
- Red and white twine
- Faux winter greenery we used glittery faux boxwood
- Twine
- Scrap burlap/thin burlap ribbon
- Scissors
- Wire cutters
Instructions
- First, wrap the embroidery hoop with red and white twine. Wrap the twine all the way around the hoop, looping at about half-inch intervals.Then secure the ends of the twine with a simple knot.
- Separate and cut apart the sprigs of the faux winter greenery. I used glittered boxwood, because I think it has more of a wintery feel. You could even use fresh greenery if you would like.
- Using thin brown twine, tie small pieces of greenery to the bottom-right edge of the hoop.
- Finally, make a burlap and twine bow for the wreath.
- Cut a thin strip of burlap (or use thin burlap ribbon) and tie in a bow. Be sure to cut the burlap straight between the threads to prevent fraying.
- Thread a piece of red and white twine through the loop on the front of the bow. Then tie the twine in a bow as well.
- Finally, secure the bow to the bottom of the embroidery hoop.
- Note: If you want to make multiple wreaths, change them up a bit. Put a bow at the top of one, and the bottom of the other. Try draping the greenery over the top of the hoop, instead of just the bottom or side. Then you can hang your wreaths at various intervals.
- Hang your wreath(s) with twine.
This post originally appeared here on Dec 15, 2017.
- Lavender Sugar Scrub - April 23, 2024
- Decoupage Wood Slice Ornaments - November 11, 2022
- Black Cat Pumpkins - September 23, 2022


Cheryl says
Thank you so much for this decor. I have hoops, but now I’ll have to get to the dollar store or craft store. Oh My! Can’t wait .
Amanda Formaro says
Have fun Cheryl! :)
Smita says
Simple and elegant
Deirdre Henry says
A simple and very stylish Wreath. So different and elegant. Thank you for the tutorial.
Deirdre
Amanda Formaro says
Thanks Deirdre, hope you get to make it! ;)
Helena says
Wow! a wreath that’s about $3! Cool, i want to try it!