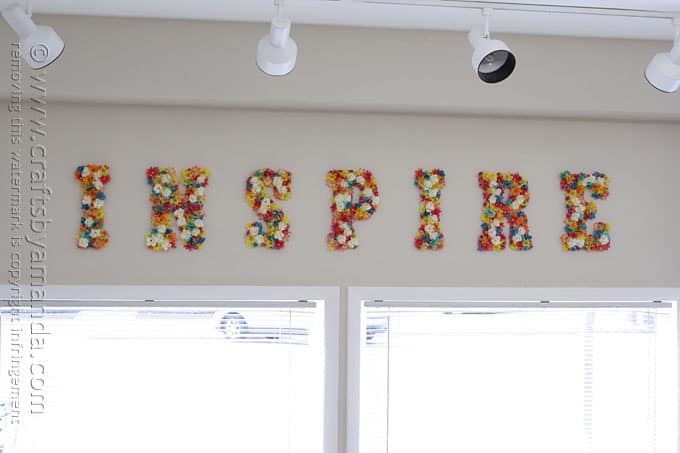
Have you seen them? The flower wall letters that have been “sprouting” up around the Internet lately? Well, I have. I’ve always wanted a place to put big letters up on the wall, and now that I have my studio I have the place… I just needed the letters. Luckily for me, the letters and the flowers were on sale!
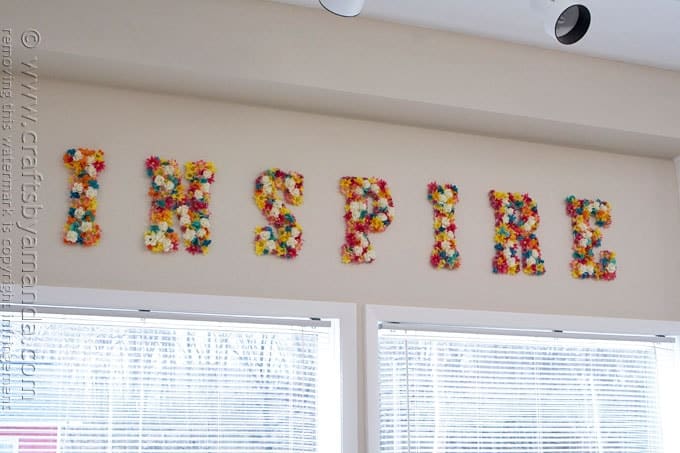
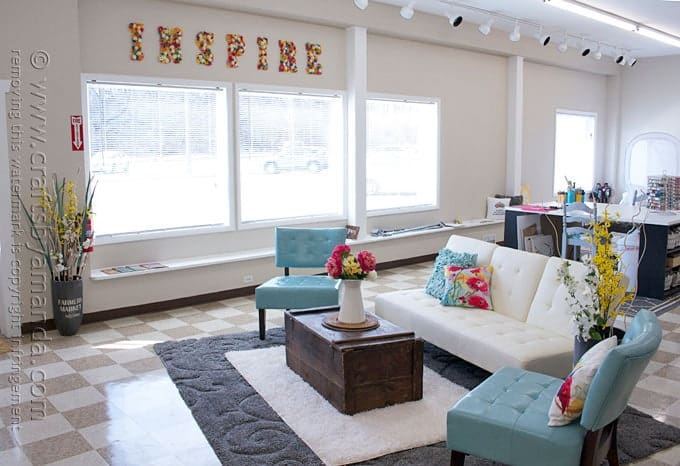
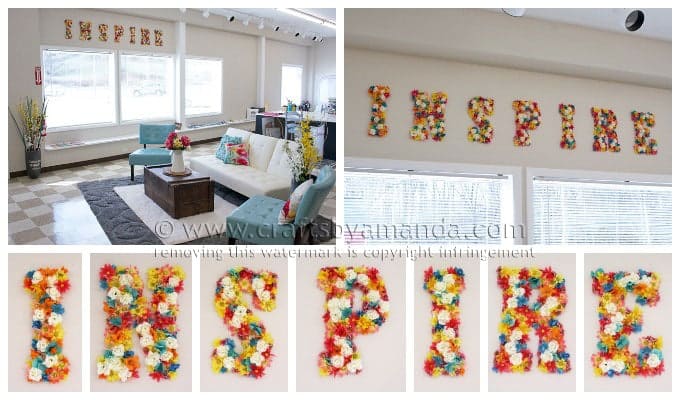
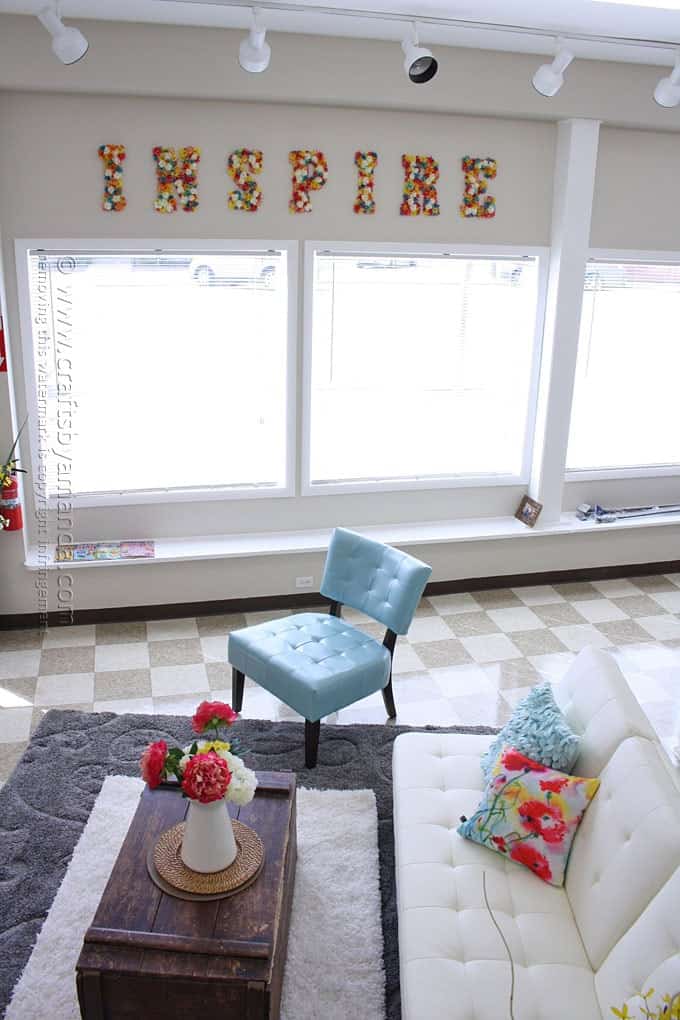
I still owe you a tour of the studio, and that will be coming soon, I promise! But as you’ll see, I’m still working on the wall art. These flower wall letters are only one set of three words I plan to hang. The other two words won’t be flowers, still trying to decide what to do with those. Meanwhile, I’ll show you my process for making these. Getting a good photo of them up on the wall was tougher than I thought, so below I’m sharing one really long photo of all the individual letters so you can see each one. After that, you’ll find the price breakdown and the tutorial.
Flower Wall Letters
I spent $48.08 on flowers. I didn’t use them all, I have about 6 sprigs left. The blue hydrangeas were a bit pricey at $5.39 and the blue apple blossoms were $9.99, which dropped to $5.00 with my Michaels coupon. The rest of the flowers ranged from $0.75 to $1.59 each due to a 60% off sale at Michaels.
The MDF letters were on sale at Hobby Lobby for $2.44 each, which was pretty good considering all the other letters in the store that would be big enough for this project started at $12.00 each! So with tax $18.36 for the letters. The letters that I bought measure approximately 13-inches high. Considering I had some flowers left over, I’d say this project cost about $63.00, not counting the glue sticks I used. I didn’t keep count, but I probably used 15-20 of them!
A less expensive alternative would be to make your own letters from cardboard or poster board. It would be easy enough to do.
I love the way they look and they were super easy to hang using Command Strips.
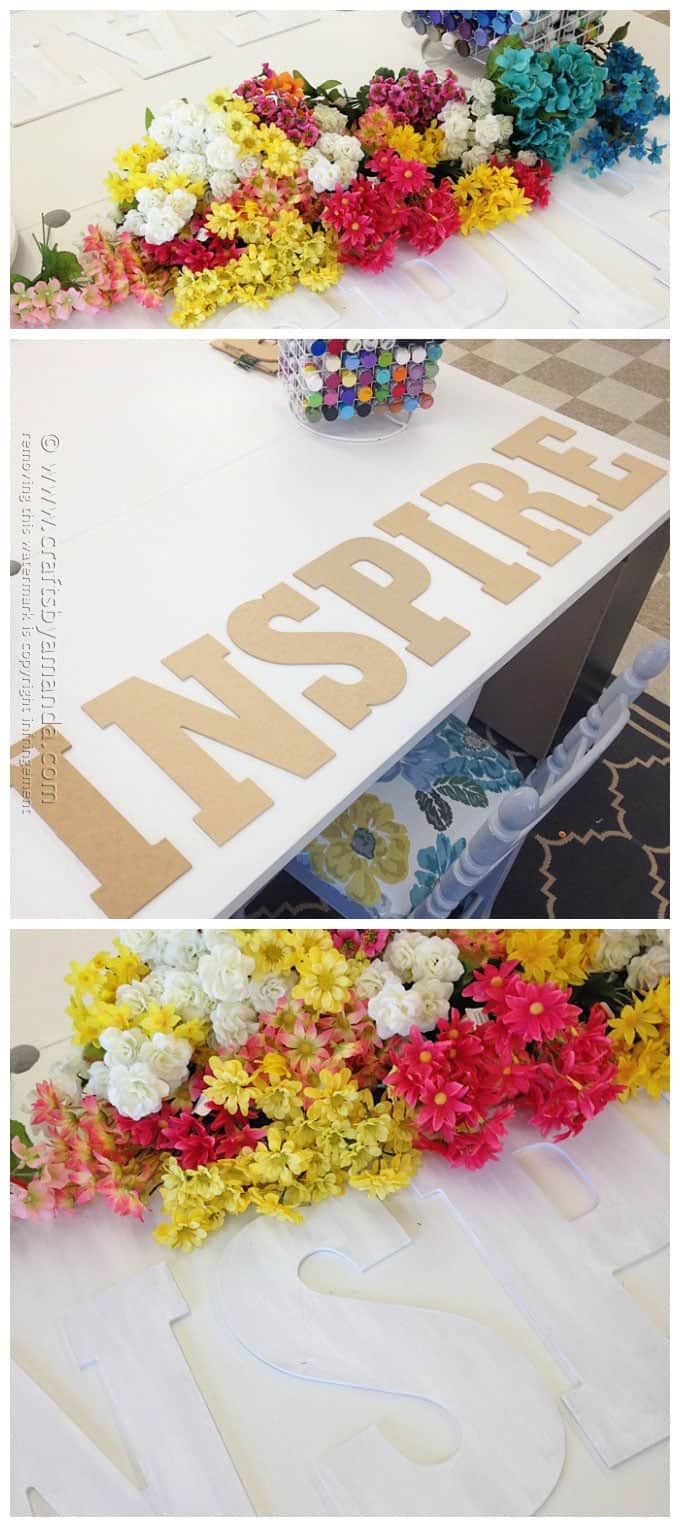
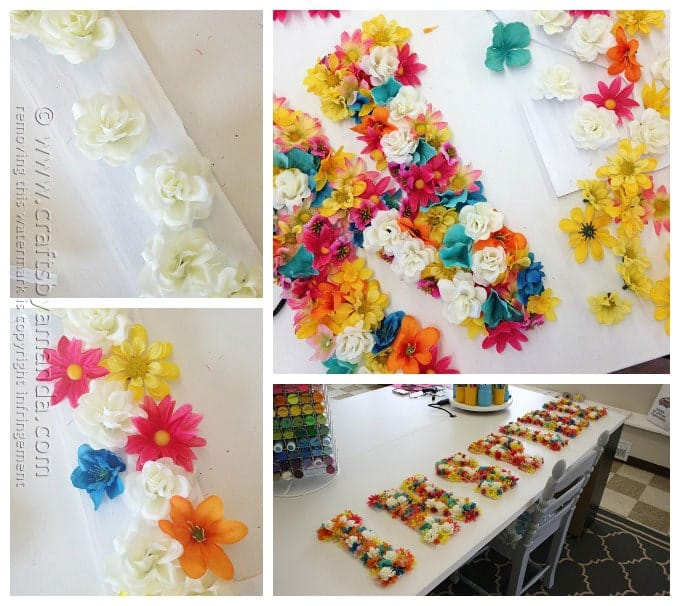
Lay out your letters and gather your flowers. I painted my letters with a coat of white paint. You don’t have to, but I did so if any of the background showed through it wouldn’t be as noticeable.
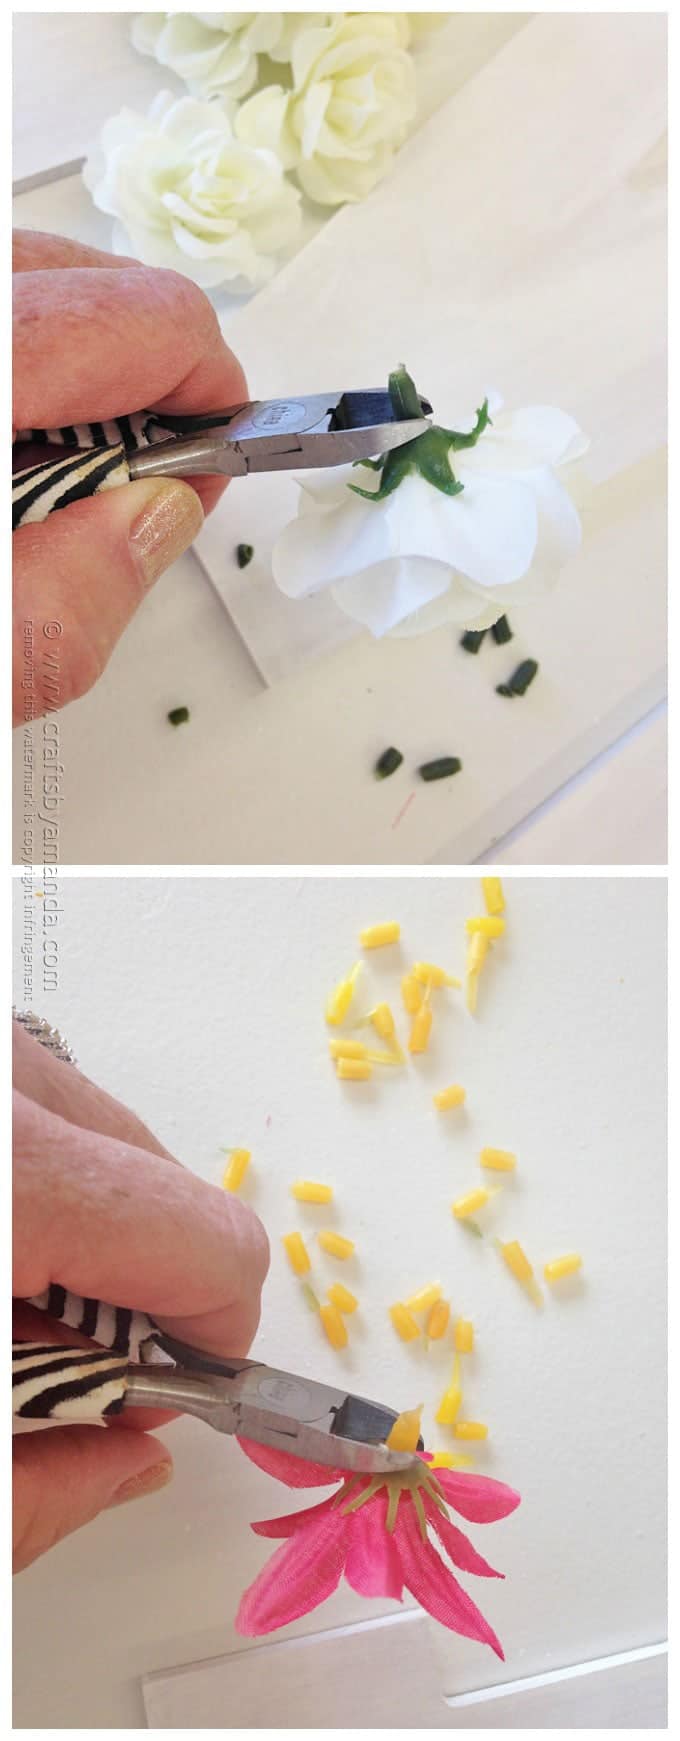
Pull the blooms off of the stems. Use a pair of wire nippers to cut off the tab from the back of the flowers.
Hot glue large flowers to the letters first. Fill in the gaps with additional big and medium flowers, saving the small ones to fill the gaps and cover up the edges. Don’t forget to clean up all the glue strings!
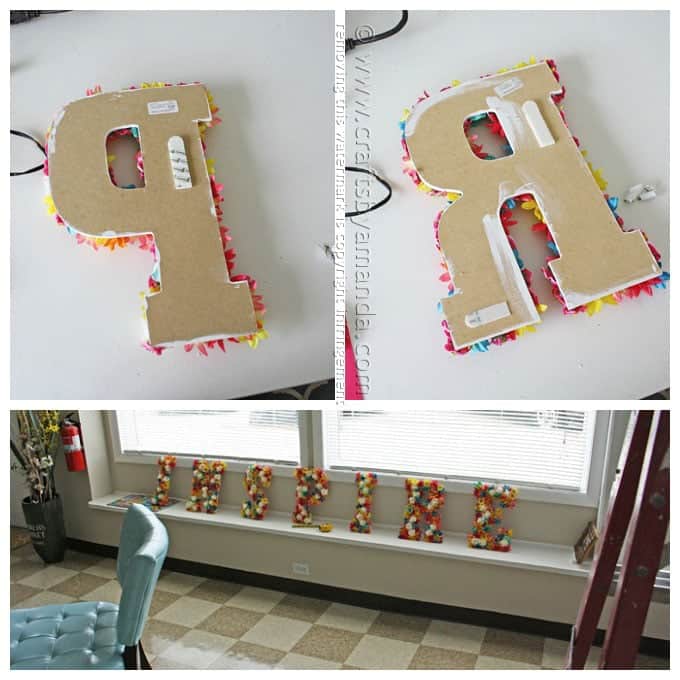
When they were all done I lined them all up on the window seat to see how far apart I wanted to place them. I used a measuring tape to space them evenly (7-inches apart in my case). I used Command Strips on the back of each letter and pressed them to the wall.
Pretty darn fun, huh? I thought so anyway. :)
Hope you enjoyed this project and get some inspiration from it! Have fun!
If you haven’t heard about my studio yet, I’m starting to share projects from it, including these wall letters and these reupholstered craft table stools. More to come, including a new button tree, another painting and more wall letter projects!
More Projects Using Letters
- Watercolor Luminaries - February 11, 2025
- Free Valentine Printables: Cards, toppers, and tags - February 4, 2025
- Valentine Hugs - January 31, 2025



Nazar Seýitmyradow says
I really loved it yes and it was best. But who can tell me how can I make a simply flower from the letter ? I want to give to my girlfriend a different present !
Amanda Formaro says
I’m sorry but I don’t understand the question :/
Jennifer Prentice says
You could always go to a dollar tree and get flowers poster board foam board and stuff for your projects. I may make some of these for my bathroom.
Jennifer says
Love this! How many flowers do you think you used? You wrote the price but I can’t see how many you bought? Thanks!
Amanda Formaro says
Oh my :-/ I’m afraid I can’t really answer that question accurately. I just bought a bunch plus I had some on hand. Terribly sorry!
Activities for Seniors says
Sooo beautiful!
kathy cano-murillo says
So cool, I love this, the letters look fabulous and so does your studio!!
Amanda Formaro says
Thank you so much Kathy!
Nina Lewis says
These are stunningly gorgeous! You never cease to amaze me with your creativity! This is such a fun idea.
Amanda Formaro says
So nice of you to say, thank you Nina!
beatrix bosman says
Gee whiz Amanda, this looks so cheerful and bright. What a lovely idea. You are SO talented.
Amanda Formaro says
Thanks so much beatrix! So nice of you!
Claire says
I am in love with your super cute flowered letters, I’m thinking little girl’s bedroom or a girly bathroom.
Amanda Formaro says
Thank you Claire! :) That would definitely be adorable in a little girl’s room.