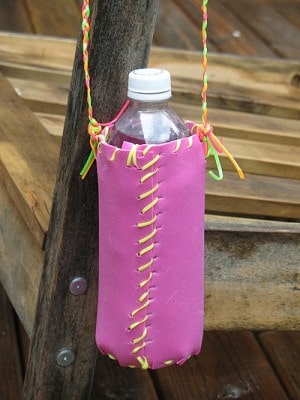
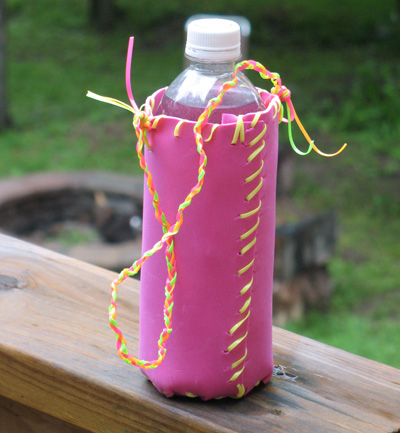
If you are looking for a fun kid’s craft to fight off the winter boredom, sit down and make this fun water bottle carrier. If you are like most of the country, one of your New Year’s resolutions may have been to exercise more, or maybe it was to cut out soda from your diet. Either way, making a water bottle holder is a fun way to encourage you to drink more water and get out for a walk!
This is also great for kids that are in sports, or in the summer like to hike or ride a bike. This holder has a shoulder strap so that it can be carried easily, even while on a bicycle. Great for the summer days ahead that we are all looking forward to!
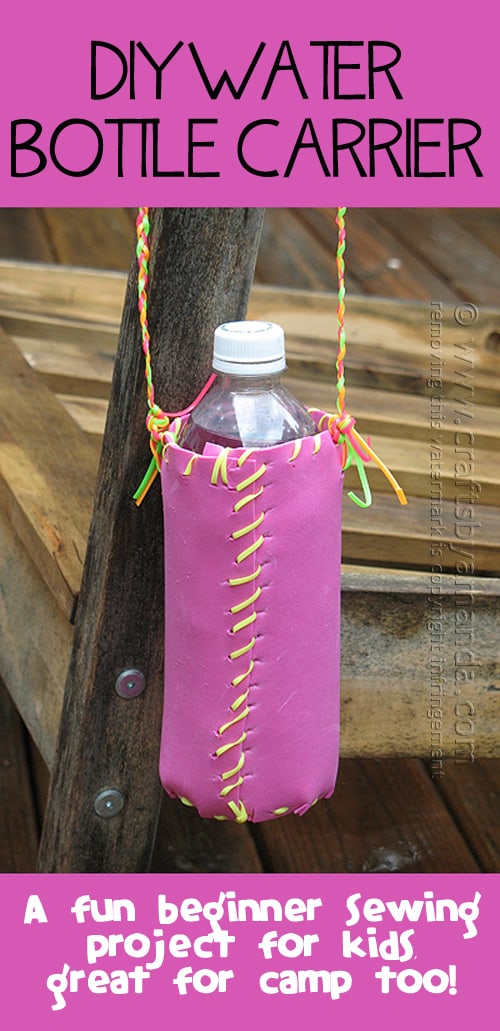
Foam Water Bottle Carrier
1 large sheet craft foam
Lanyard
Child safe sewing needle
White craft glue
Pen or pencil
Scissors
Because water bottles can differ in size, instead of providing a pattern or precise measurement, I’ll show you how to use your bottle as a guide for creating your holder.
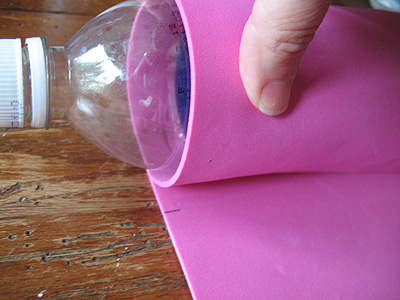
Begin by rolling the water bottle up in the craft foam. Wrap enough foam around the bottle to cover the bottle and overlap by about an inch. Mark with a pen or pencil.
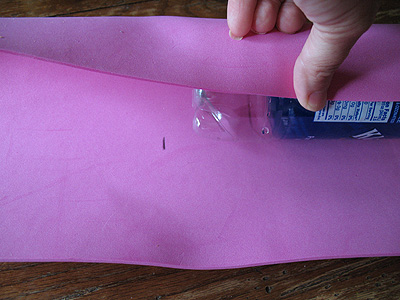
Next, to measure the height, with your water bottle rolled up in the craft foam, leave the top section of the bottle exposed. Draw a mark about an inch below the bottom of the bottle. Cut out your rectangle, using the markings as your guide.

From the remaining foam, trace a circle around the bottom of the water bottle.
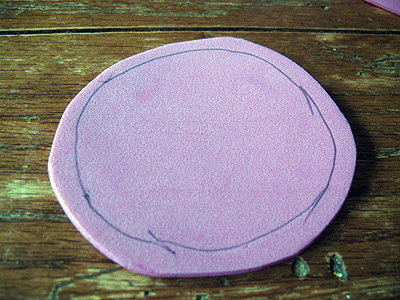
When you cut the circle out, leave a ½ inch border all the way around.
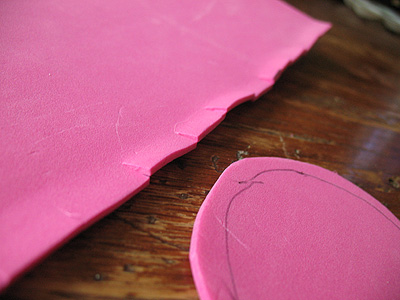
You will need to cut slits in the bottom of the foam, the end that meets the bottom of your water bottle. Cut the slits about an inch apart all the way across the bottom.
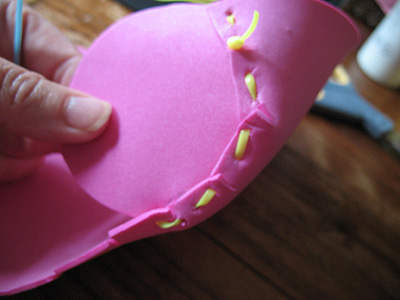
Thread a long piece of lanyard onto a child safe sewing needle. Sew the round piece of foam to the rectangular piece of foam, using the slits to work around the circle.
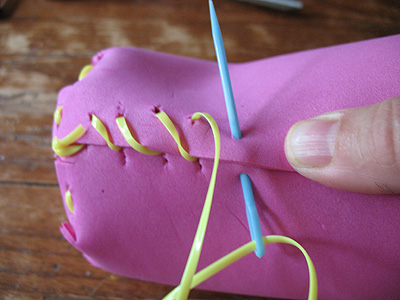
Once the bottom is sewn on, hold the sides of the holder together and start sewing together. Sew all the way up, holding as you go. When you get to the top, continue sewing around the opening of your bottle holder until you get all the way around. Use a piece of strong tape to secure the end of the lanyard inside the bottle holder.

Cut 3 pieces of lanyard in the colors of your choice, as long as you would like your handle to be. Holding them all together, tie one end into a knot, about 3-4” in so that there’s so tail left over. Thread the open ends into a child safe sewing needle and poke through the side of the bottle holder, starting from the inside, about an inch from the top. Pull the lanyard through gently until the knot stops it. Using the long strands and the strands at the end of the knot, tie together, make about 3 knots to make it secure.
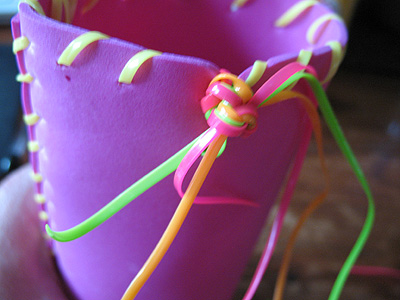
Braid the three long strands of lanyard, leaving about 3-4” unbraided at the end. Thread the open end into the child safe sewing needle and carefully poke through the other side of the bottle holder, again, about an inch from the top. Remove the needle and tie the handle into a knot, re-knot two more times.

If any of your holes from sewing look strained, go ahead and add some white craft glue to reinforce them, let the glue dry completely.
Optional: Lanyard and craft foam come in a variety of colors to suit both boys and girls. Craft foam stickers are also available in a wide variety of shapes and sizes. Boys make like frogs and snakes while girls will be more partial to flowers and hearts. Alternatively, the bottle holder can be left blank or decorated with markers before sewing together.
Foam Water Bottle Carrier
Supplies
- 1 large sheet craft foam
- Lanyard
- Child safe sewing needle
- White craft glue
- Pen or pencil
- Scissors
Instructions
- Because water bottles can differ in size, instead of providing a pattern or precise measurement, I’ll show you how to use your bottle as a guide for creating your holder.
- Begin by rolling the water bottle up in the craft foam. Wrap enough foam around the bottle to cover the bottle and overlap by about an inch. Mark with a pen or pencil.
- Next, to measure the height, with your water bottle rolled up in the craft foam, leave the top section of the bottle exposed. Draw a mark about an inch below the bottom of the bottle. Cut out your rectangle, using the markings as your guide.
- From the remaining foam, trace a circle around the bottom of the water bottle. When you cut the circle out, leave a ½ inch border all the way around.
- You will need to cut slits in the bottom of the foam, the end that meets the bottom of your water bottle. Cut the slits about an inch apart all the way across the bottom.
- Thread a long piece of lanyard onto a child safe sewing needle. Sew the round piece of foam to the rectangular piece of foam, using the slits to work around the circle.
- Once the bottom is sewn on, hold the sides of the holder together and start sewing together. Sew all the way up, holding as you go. When you get to the top, continue sewing around the opening of your bottle holder until you get all the way around. Use a piece of strong tape to secure the end of the lanyard inside the bottle holder.
- Cut 3 pieces of lanyard in the colors of your choice, as long as you would like your handle to be. Holding them all together, tie one end into a knot, about 3-4” in so that there’s so tail left over. Thread the open ends into a child safe sewing needle and poke through the side of the bottle holder, starting from the inside, about an inch from the top. Pull the lanyard through gently until the knot stops it. Using the long strands and the strands at the end of the knot, tie together, make about 3 knots to make it secure.
- Braid the three long strands of lanyard, leaving about 3-4” unbraided at the end. Thread the open end into the child safe sewing needle and carefully poke through the other side of the bottle holder, again, about an inch from the top. Remove the needle and tie the handle into a knot, re-knot two more times.
- If any of your holes from sewing look strained, go ahead and add some white craft glue to reinforce them, let the glue dry completely.
- Swirling Twirling Ladybugs - July 21, 2026
- Drip Tie Dye Backpack - July 17, 2026
- Mini Coastal Clay Houses - July 14, 2026


Elaine says
Great idea. Thanks. I have all the ingredients for this project so I can make it with my grandson next time I visit.
Amanda Formaro says
Hope you have fun Elaine!
Amanda says
How fun! So glad the yarn worked too, that is great to know!
Jillzy says
Amanda, the oh-wonderful-oz of crafting! i love this craft! I just made one for my daughter and it was so easy. I didnt have any lanyard (and even if i did, i wouldnt know where it was!) so I used yarn. works just as well. thank you thank you!
Rachel {BubblyNatureCreations.com} says
This is so cute! I need to make one for when we go to camp- I am always losing my bottles!!!
Please share this over here: http://www.bubblynaturecreations.com/2011/02/project-party-weekend-flavored-lip.html
We would love to have you join us!
creativejewishmom/sara says
Super cute amanda! And we even have all these supplies on hand, maybe I can convince my daughter to make this one! All the best and thanks for sharing on Craft Schooling Sunday!
Amanda says
You can most certainly make it for a reusable bottle :)
Anonymous says
Cute craft – but those bottles end up in the landfill too often – better yet, make it for a reusable bottle!
Sarah says
This would make a GREAT girl scout project!! Many camping/hiking activities require a water bottle with a strap so they can carry with them at all times. And on top of that, this would likely help earn a patch for sewing :) Thanks for the idea!!