
This handprint Easter lily is an easy craft for young kids to make using basic supplies and scissors. This project can easily be created with the supplies you have on hand, making it virtually free!

Handprint Easter Lily Tutorial
Real lilies are fragrant and come in a variety of colors including white, yellow, orange, pinks and more. Some even have “brushstrokes” and spots of color! I’ve created two different methods here for you to make a sweet handprint Easter lily into a paper bouquet! To make the paper lilies “fragrant,” add a spritz of perfume to the finished flowers!

Craft supplies you will need
You can find the full printable instructions and materials list at the end of this post.

Helpful Crafting tools
- Pencils (round ones are better if you have them)
- Scissors (multiple pairs if you are working with a group)
- Ruler
- Tablecloth or newspaper to cover work surface
Craft Information
- Age Level: 4-8 years old.
- Mess Factor: Minimal. Paper cutting and possible coloring with markers.
- Time to Complete: 15 minutes per flower, depending on how much kids do independently.
- Cost estimate: price-per-project ranges between $0.10-$0.25 depending on the supplies you have on hand.
Craft Tips
- Construction paper is really the best paper for this project. If you don’t have any, you could use printer paper but it maybe a little harder to work with as it is thin and may rip. Card stock is not recommended as it is too thick.
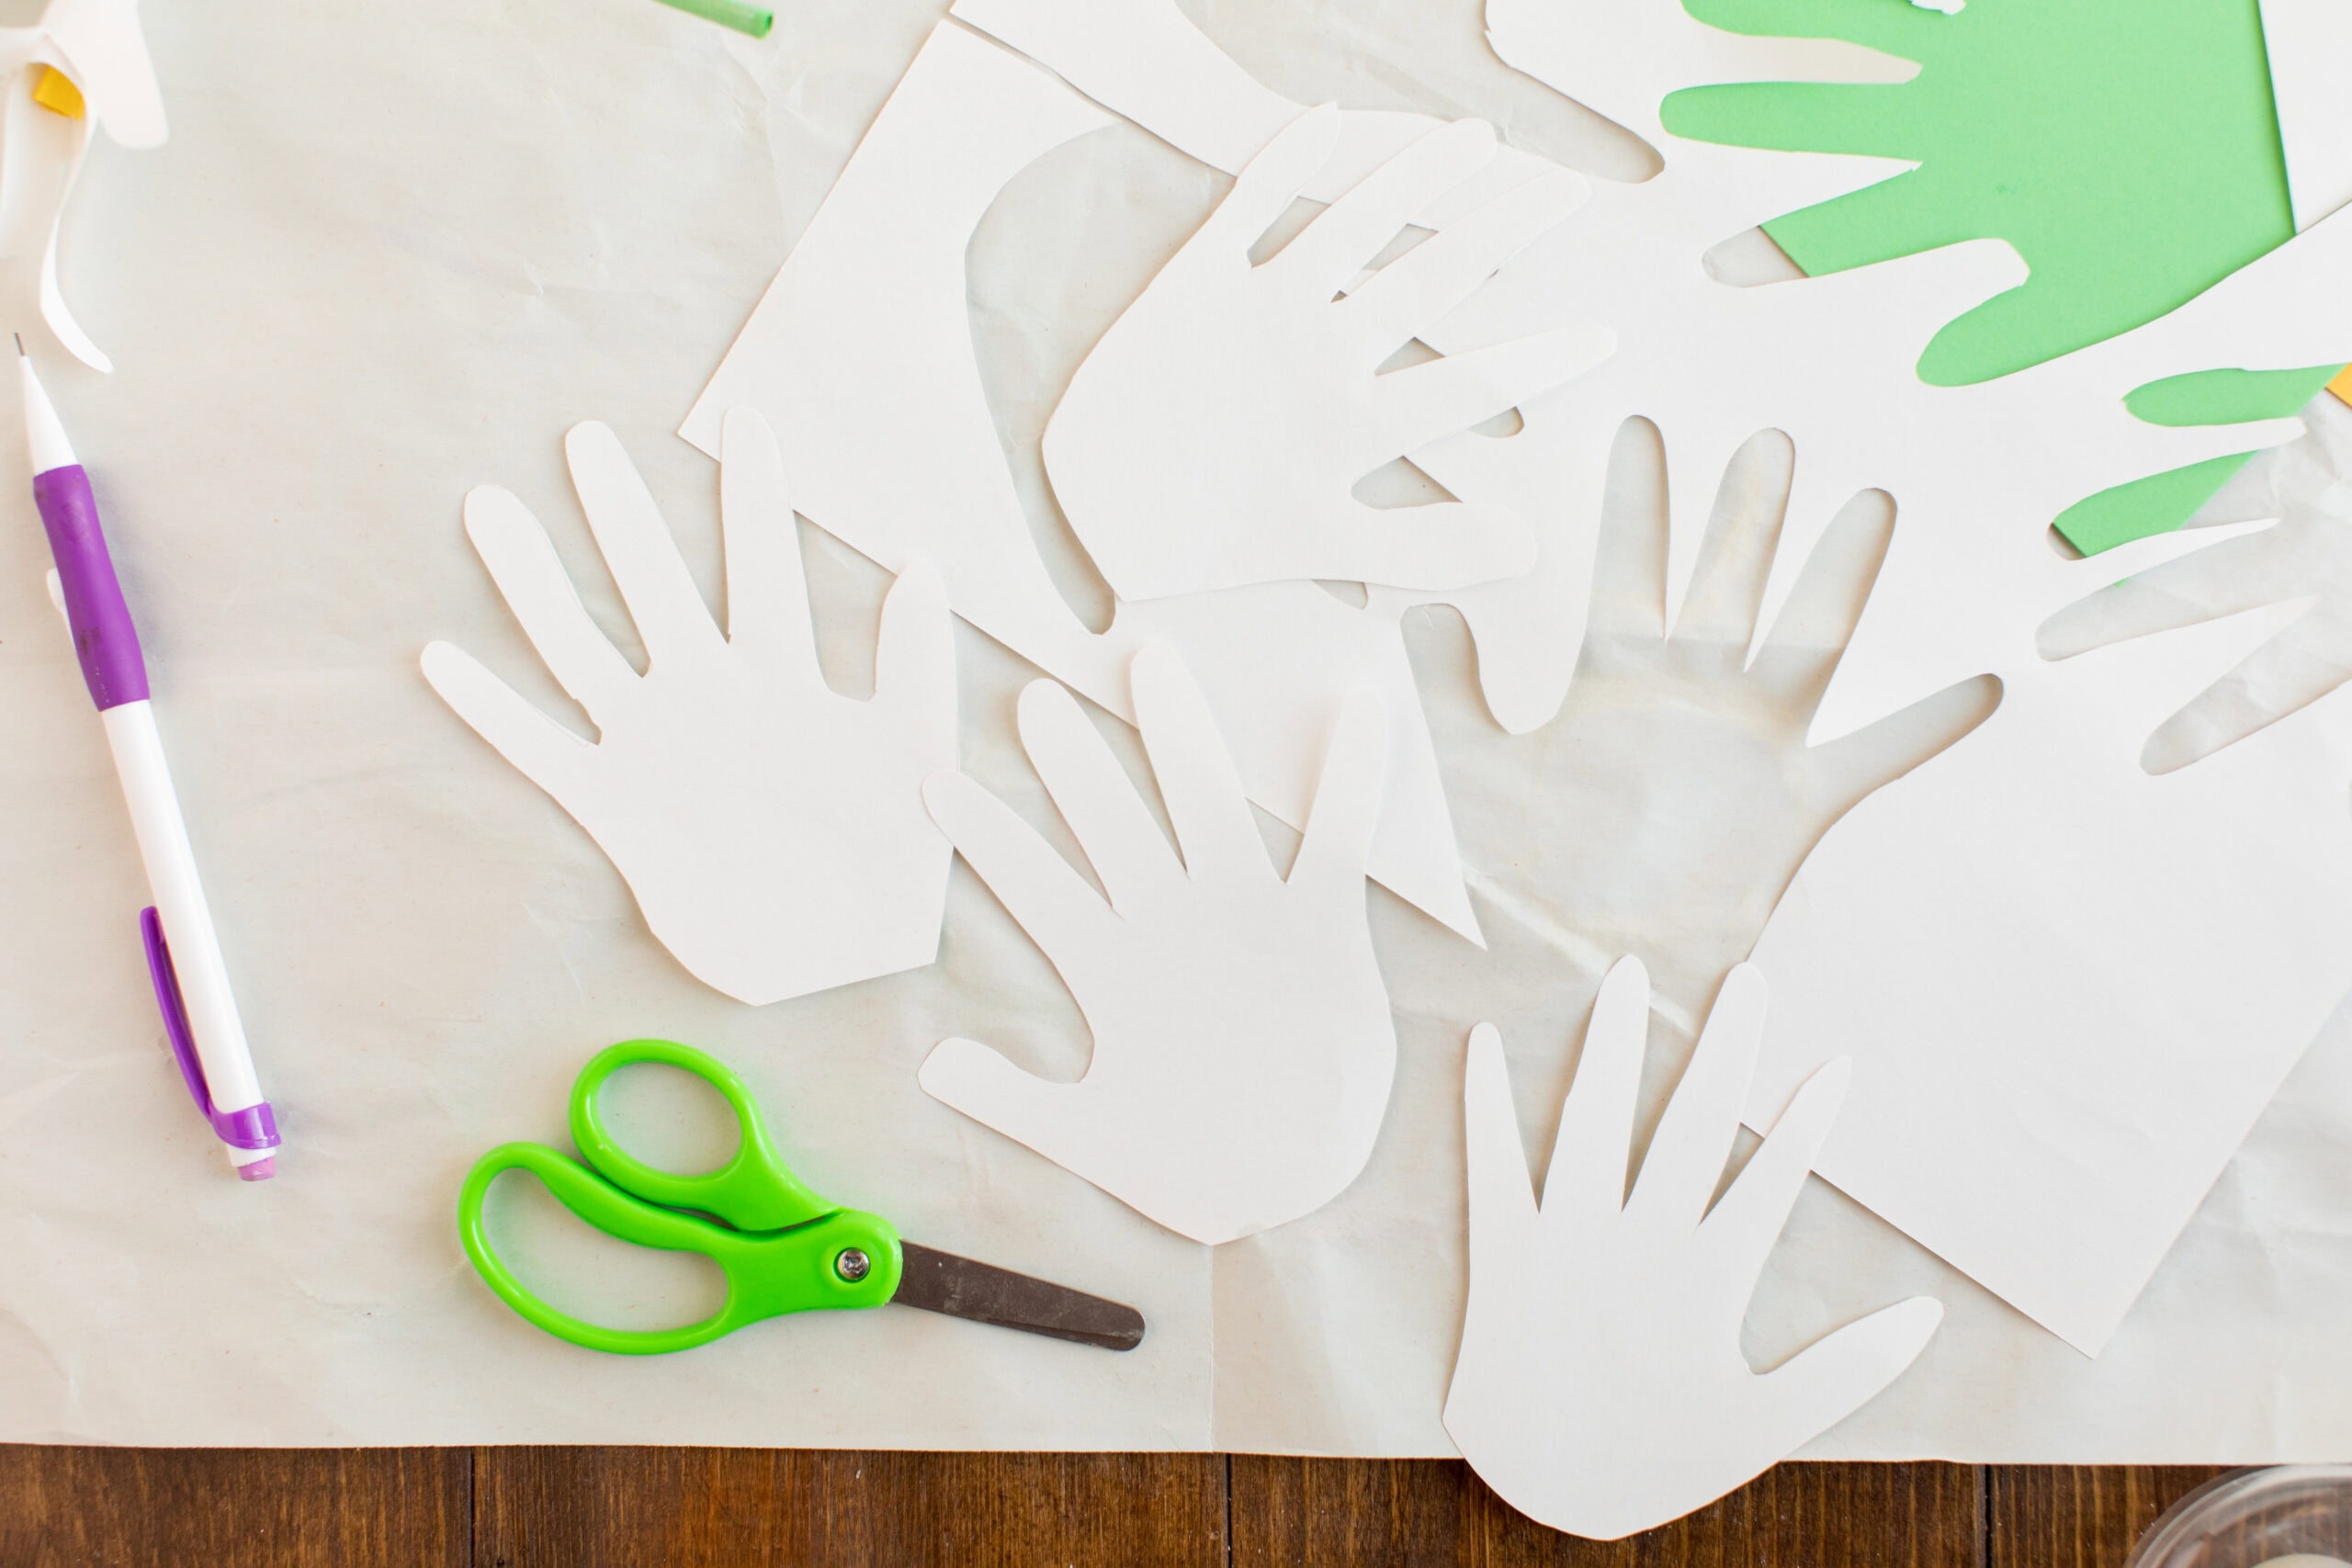
- Depending on the size of handprint, you can easily get 3-4 (or more) handprints out of 1 sheet of construction paper. Enough to make a nice bouquet!
- If you are working with younger kids, be ready to help as needed with cutting and taping the pieces together.
- Younger kids may need help tracing their hands on the white construction paper.
- If you are working with a group of kids, it maybe helpful if you manage the dispensing of tape pieces as they are needed. Or tear off a bunch and have them ready to go.
How to Make a Handprint Easter Lily
I have created this project two different ways. One by using only construction paper for the flowers and the other by using wooden chopsticks (the freebie ones you get with take-out orders) for the stem.
Instructions for Handprint Easter Lily (using construction paper as the stem)
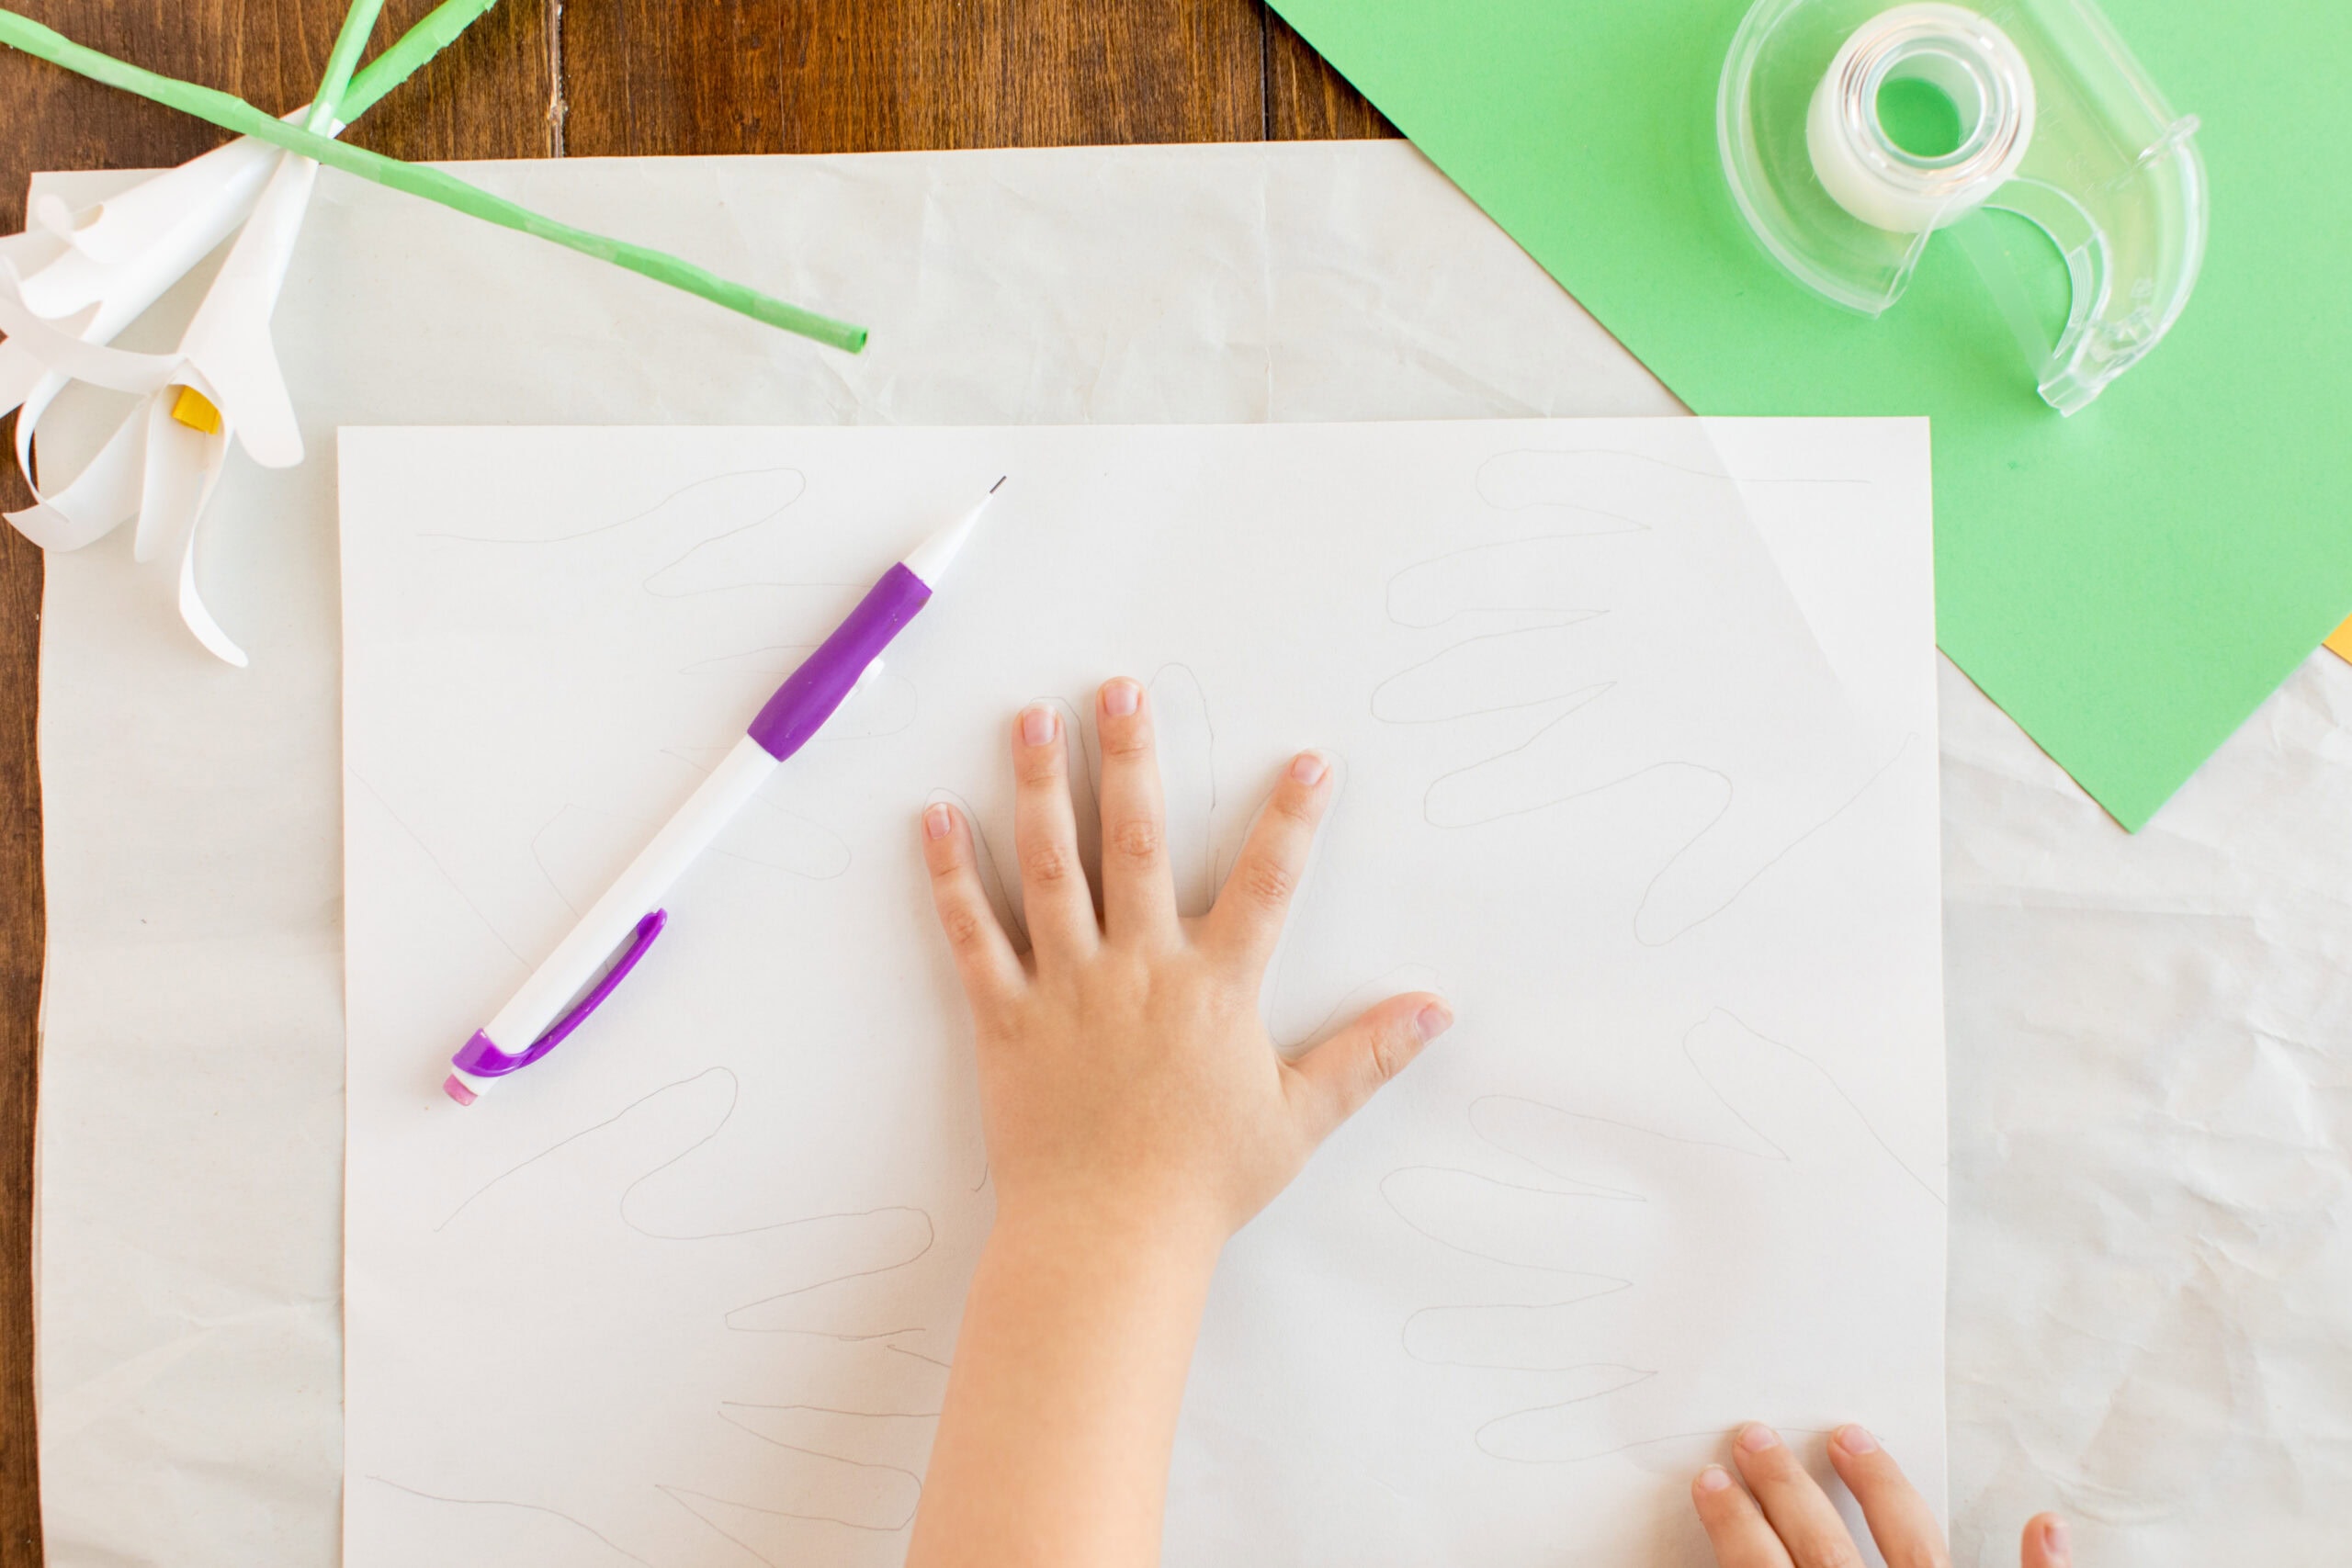
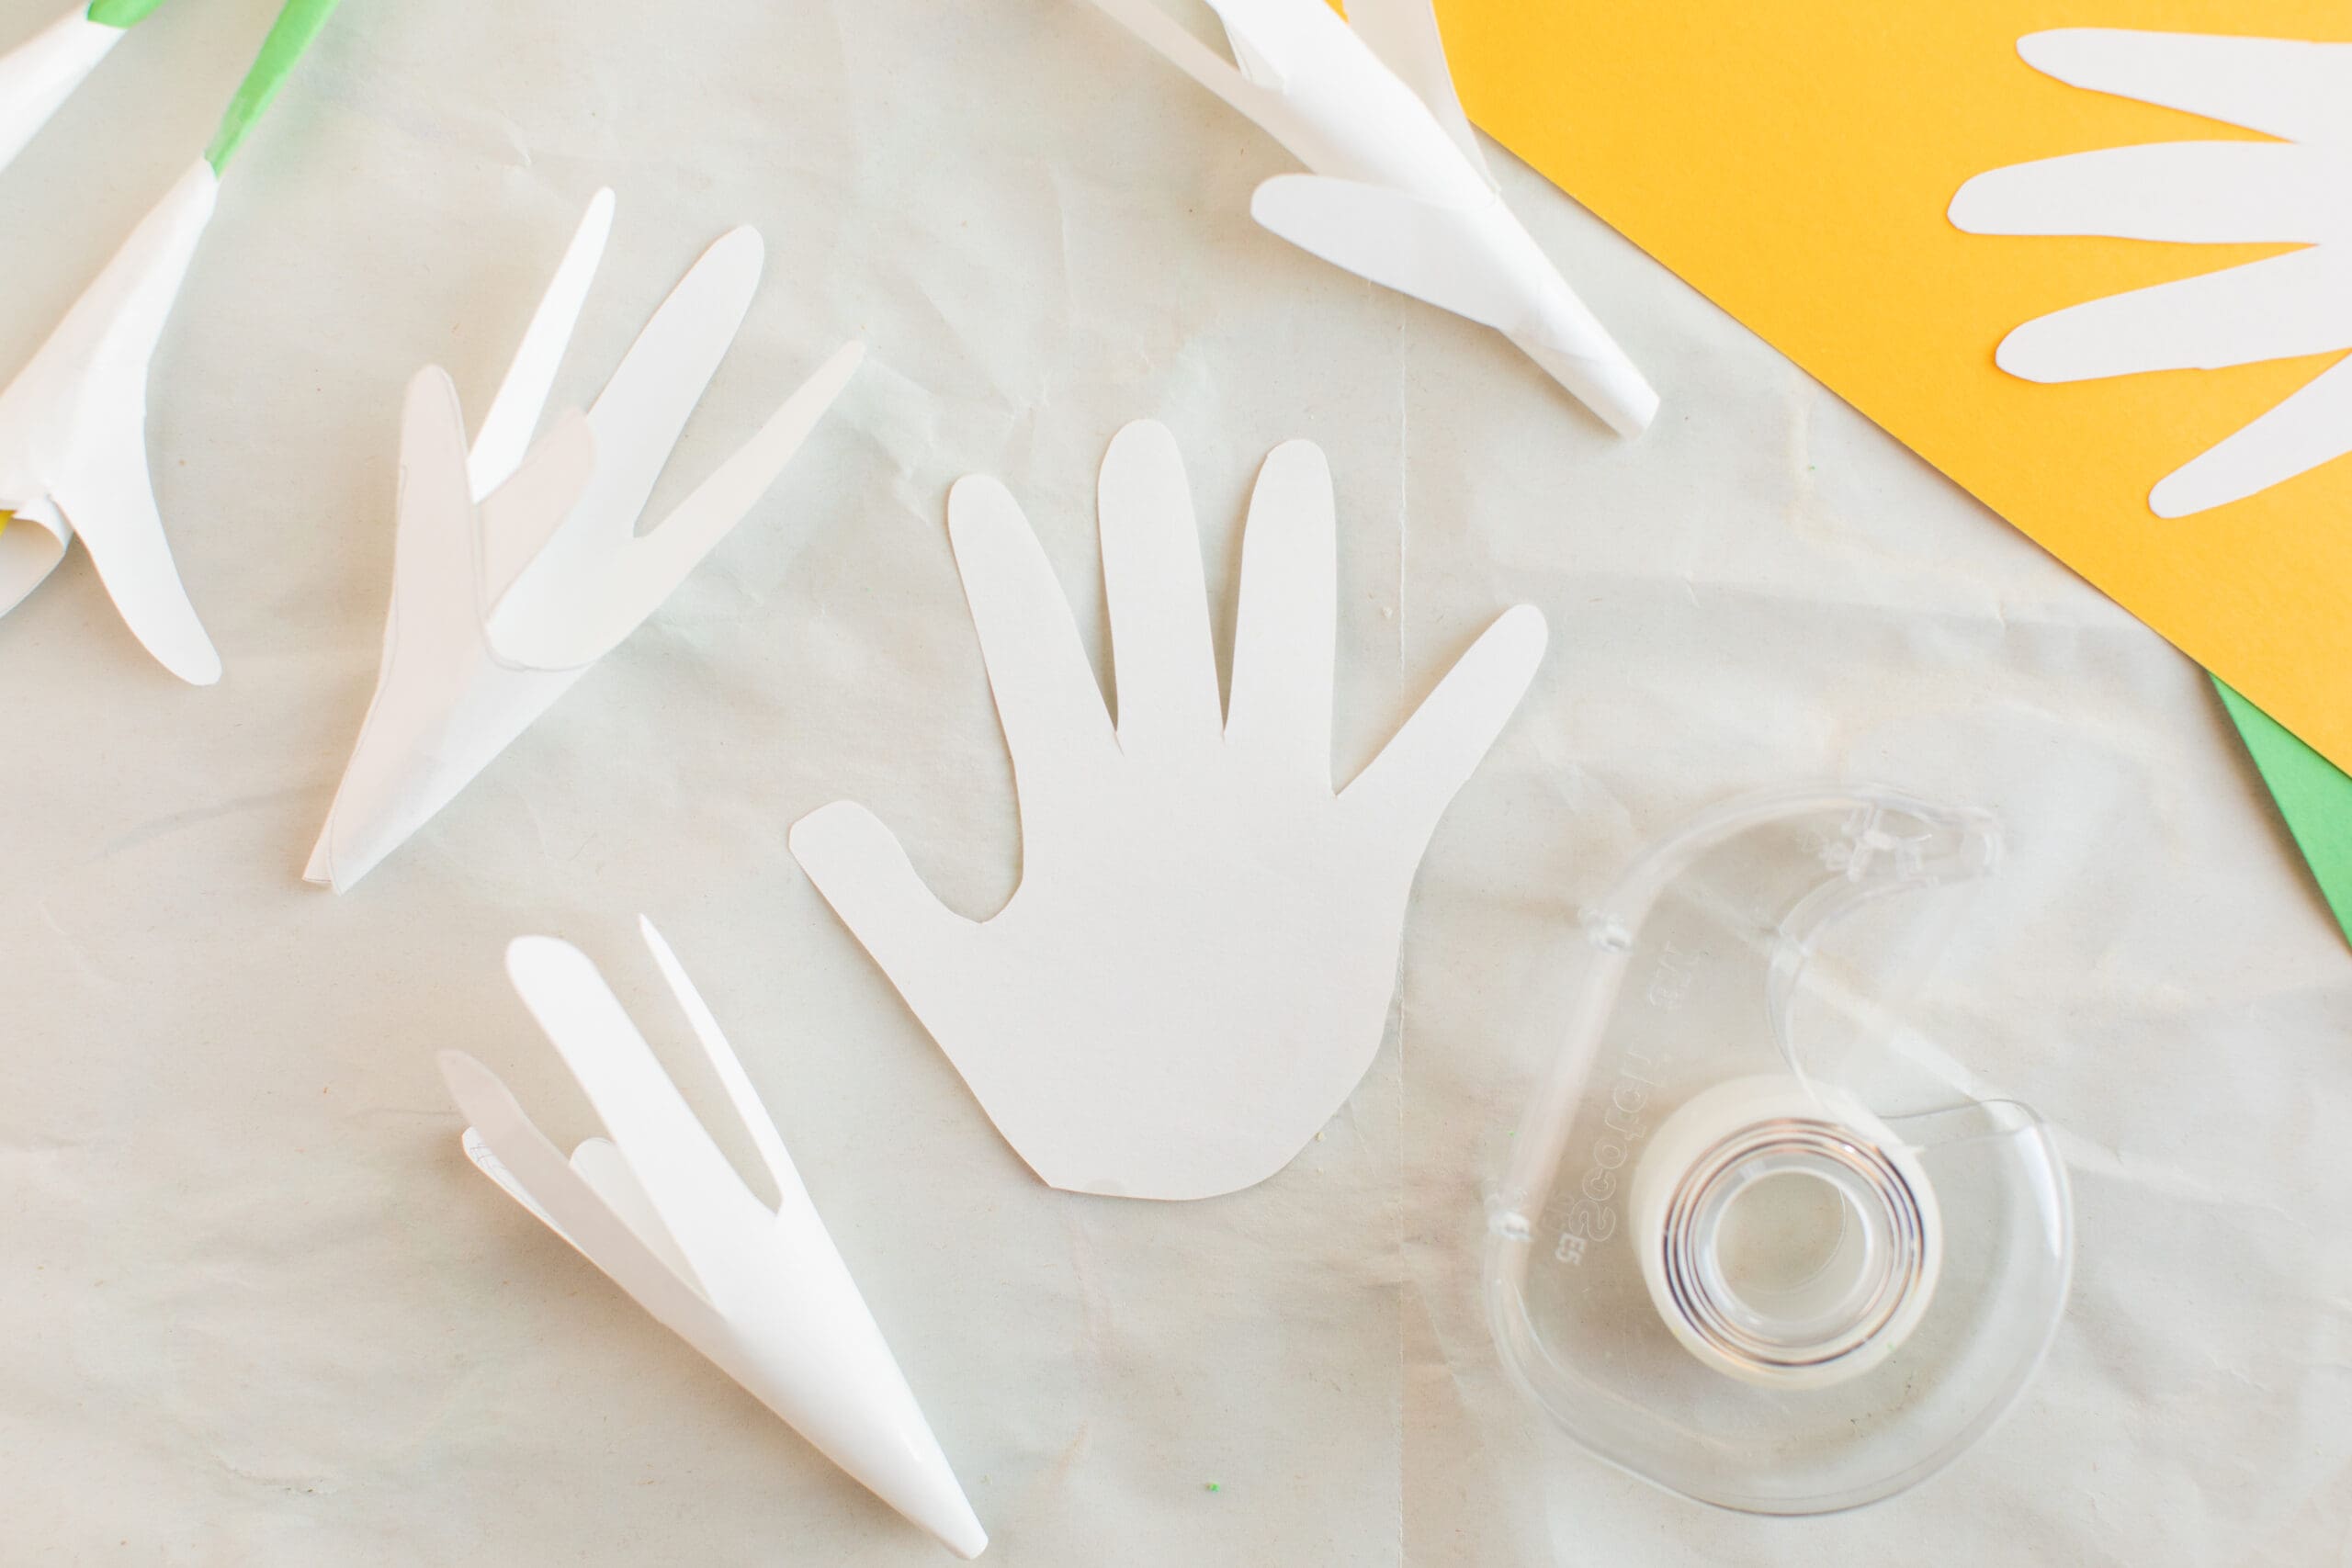
- Kids can trace their hand on the white construction paper and cut it out. Erase any pencil marks on the handprint.

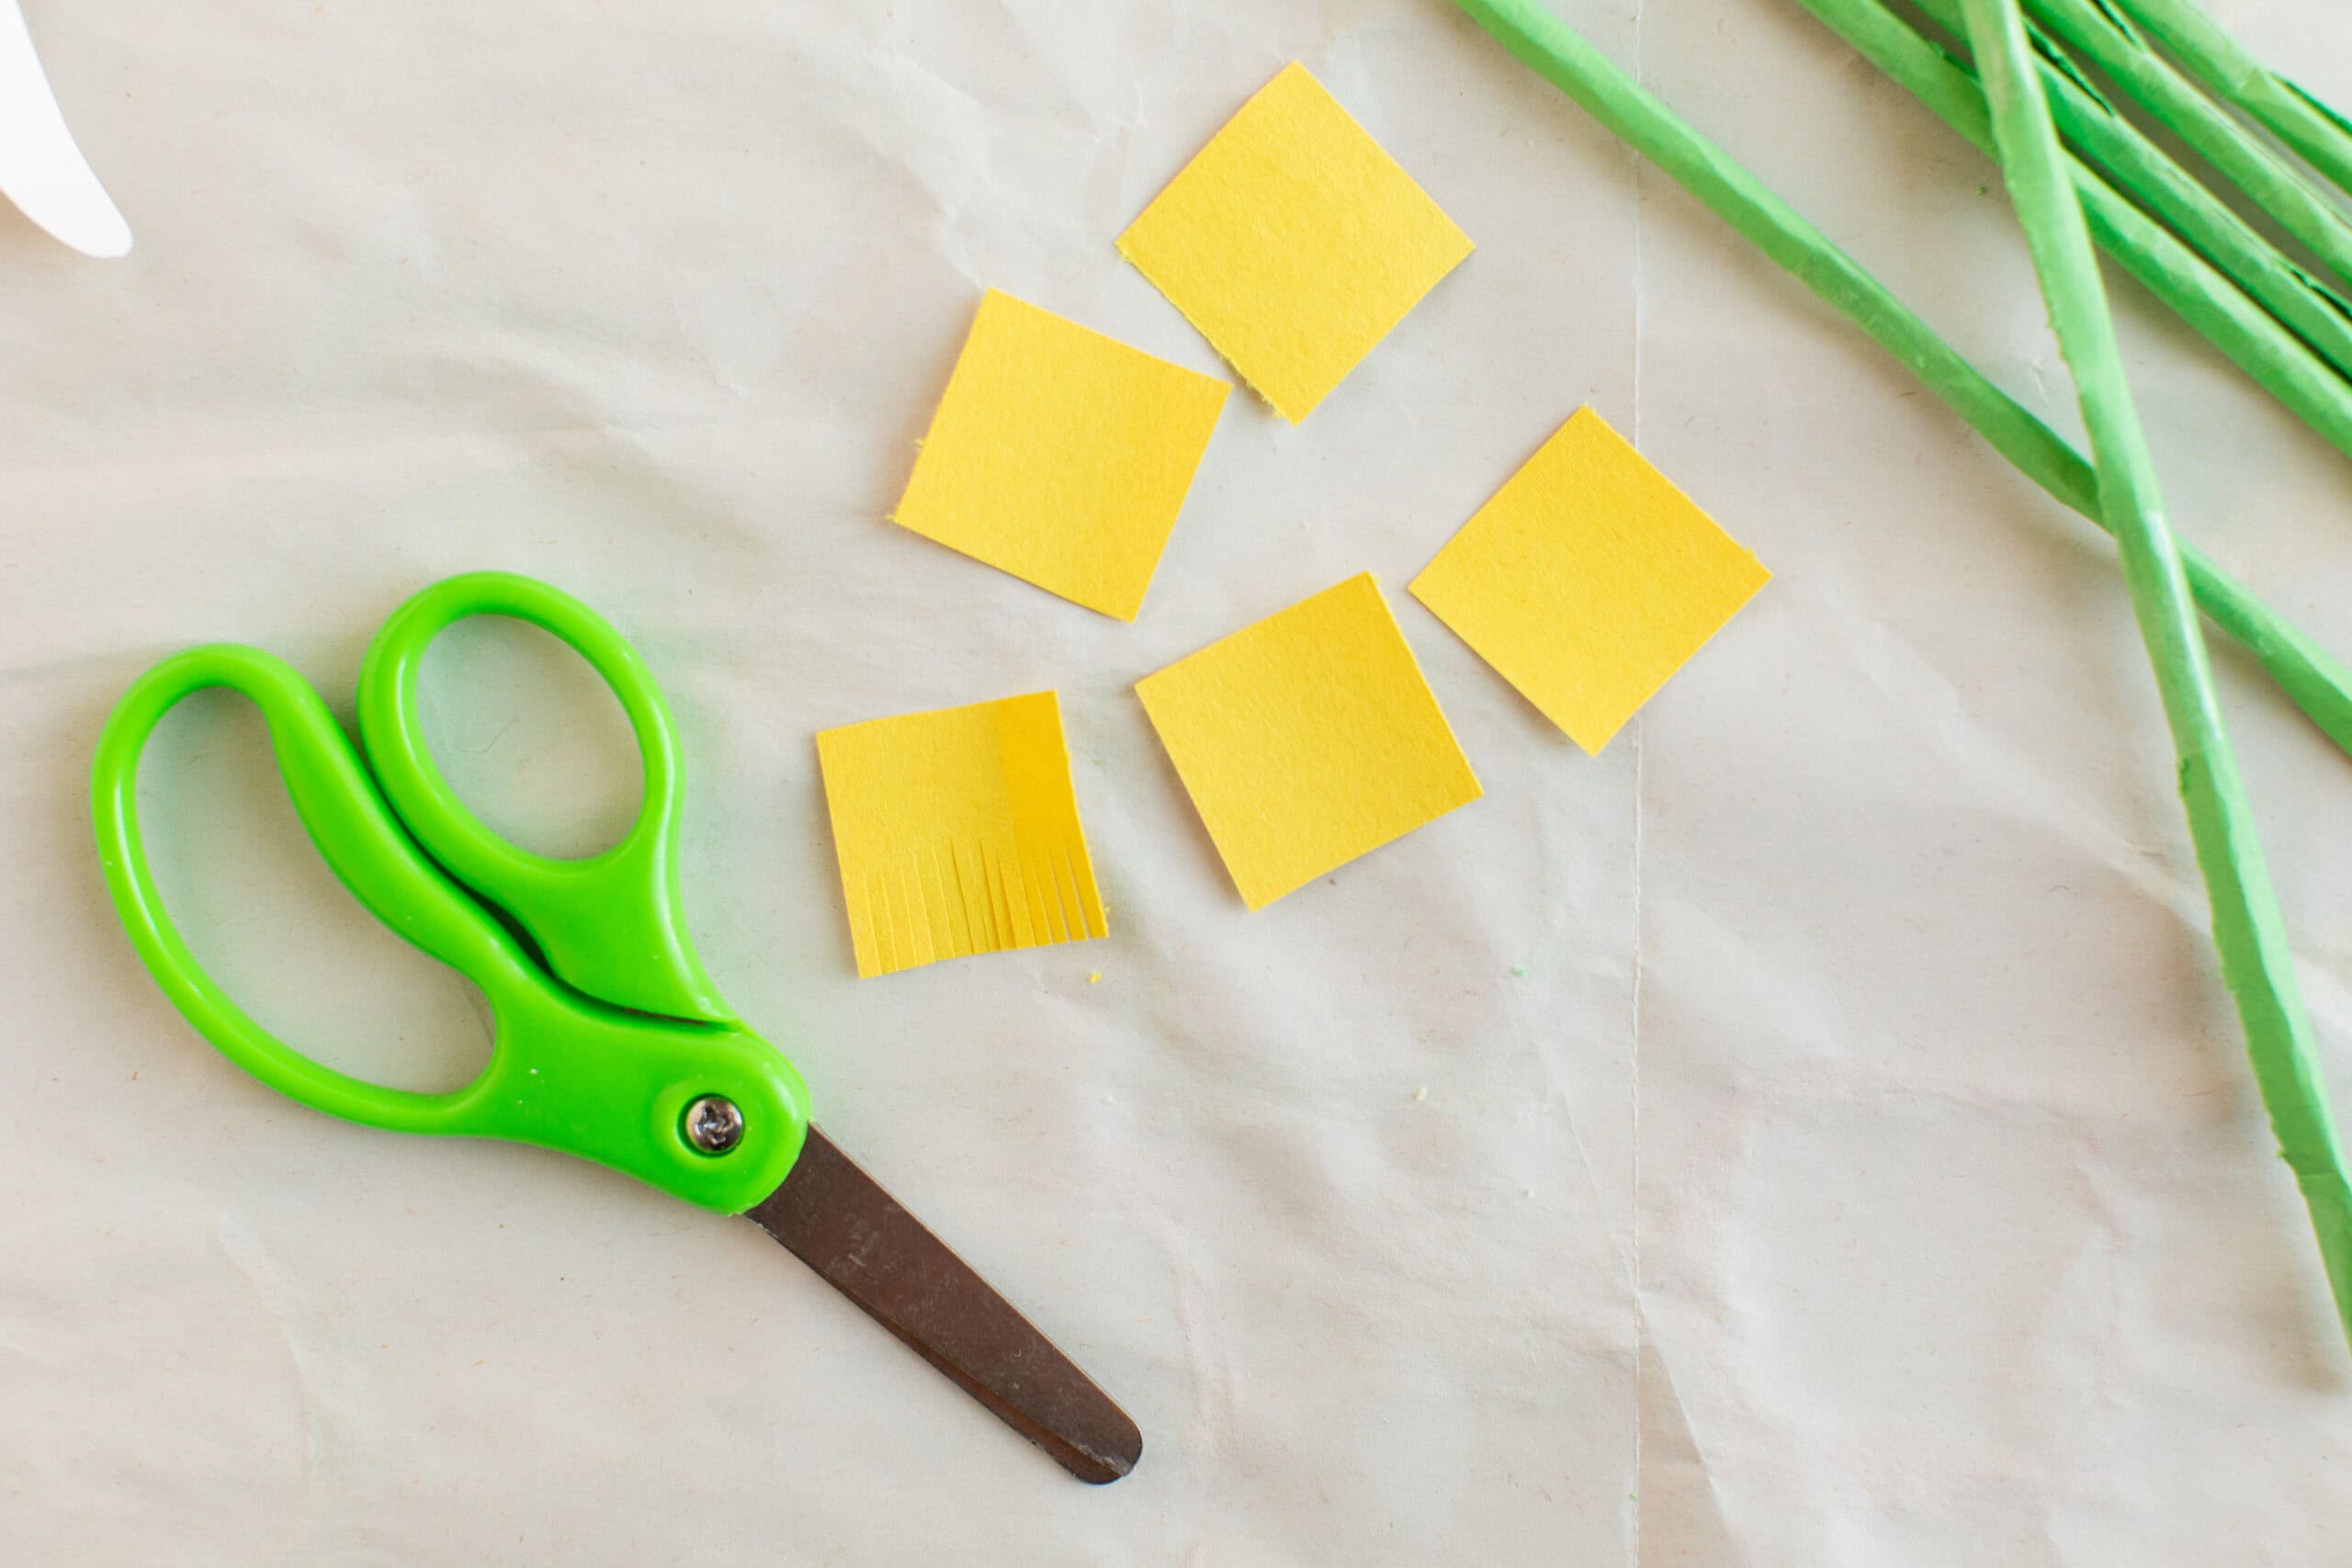
- Measure and cut the green construction paper, the yellow construction paper shape, and fringe ahead of time.
- Roll up the green paper strip to make the stem. Tape by each end and in the middle of the stem. Kids may need some help getting the rolling started so keep an eye on this step for helping.
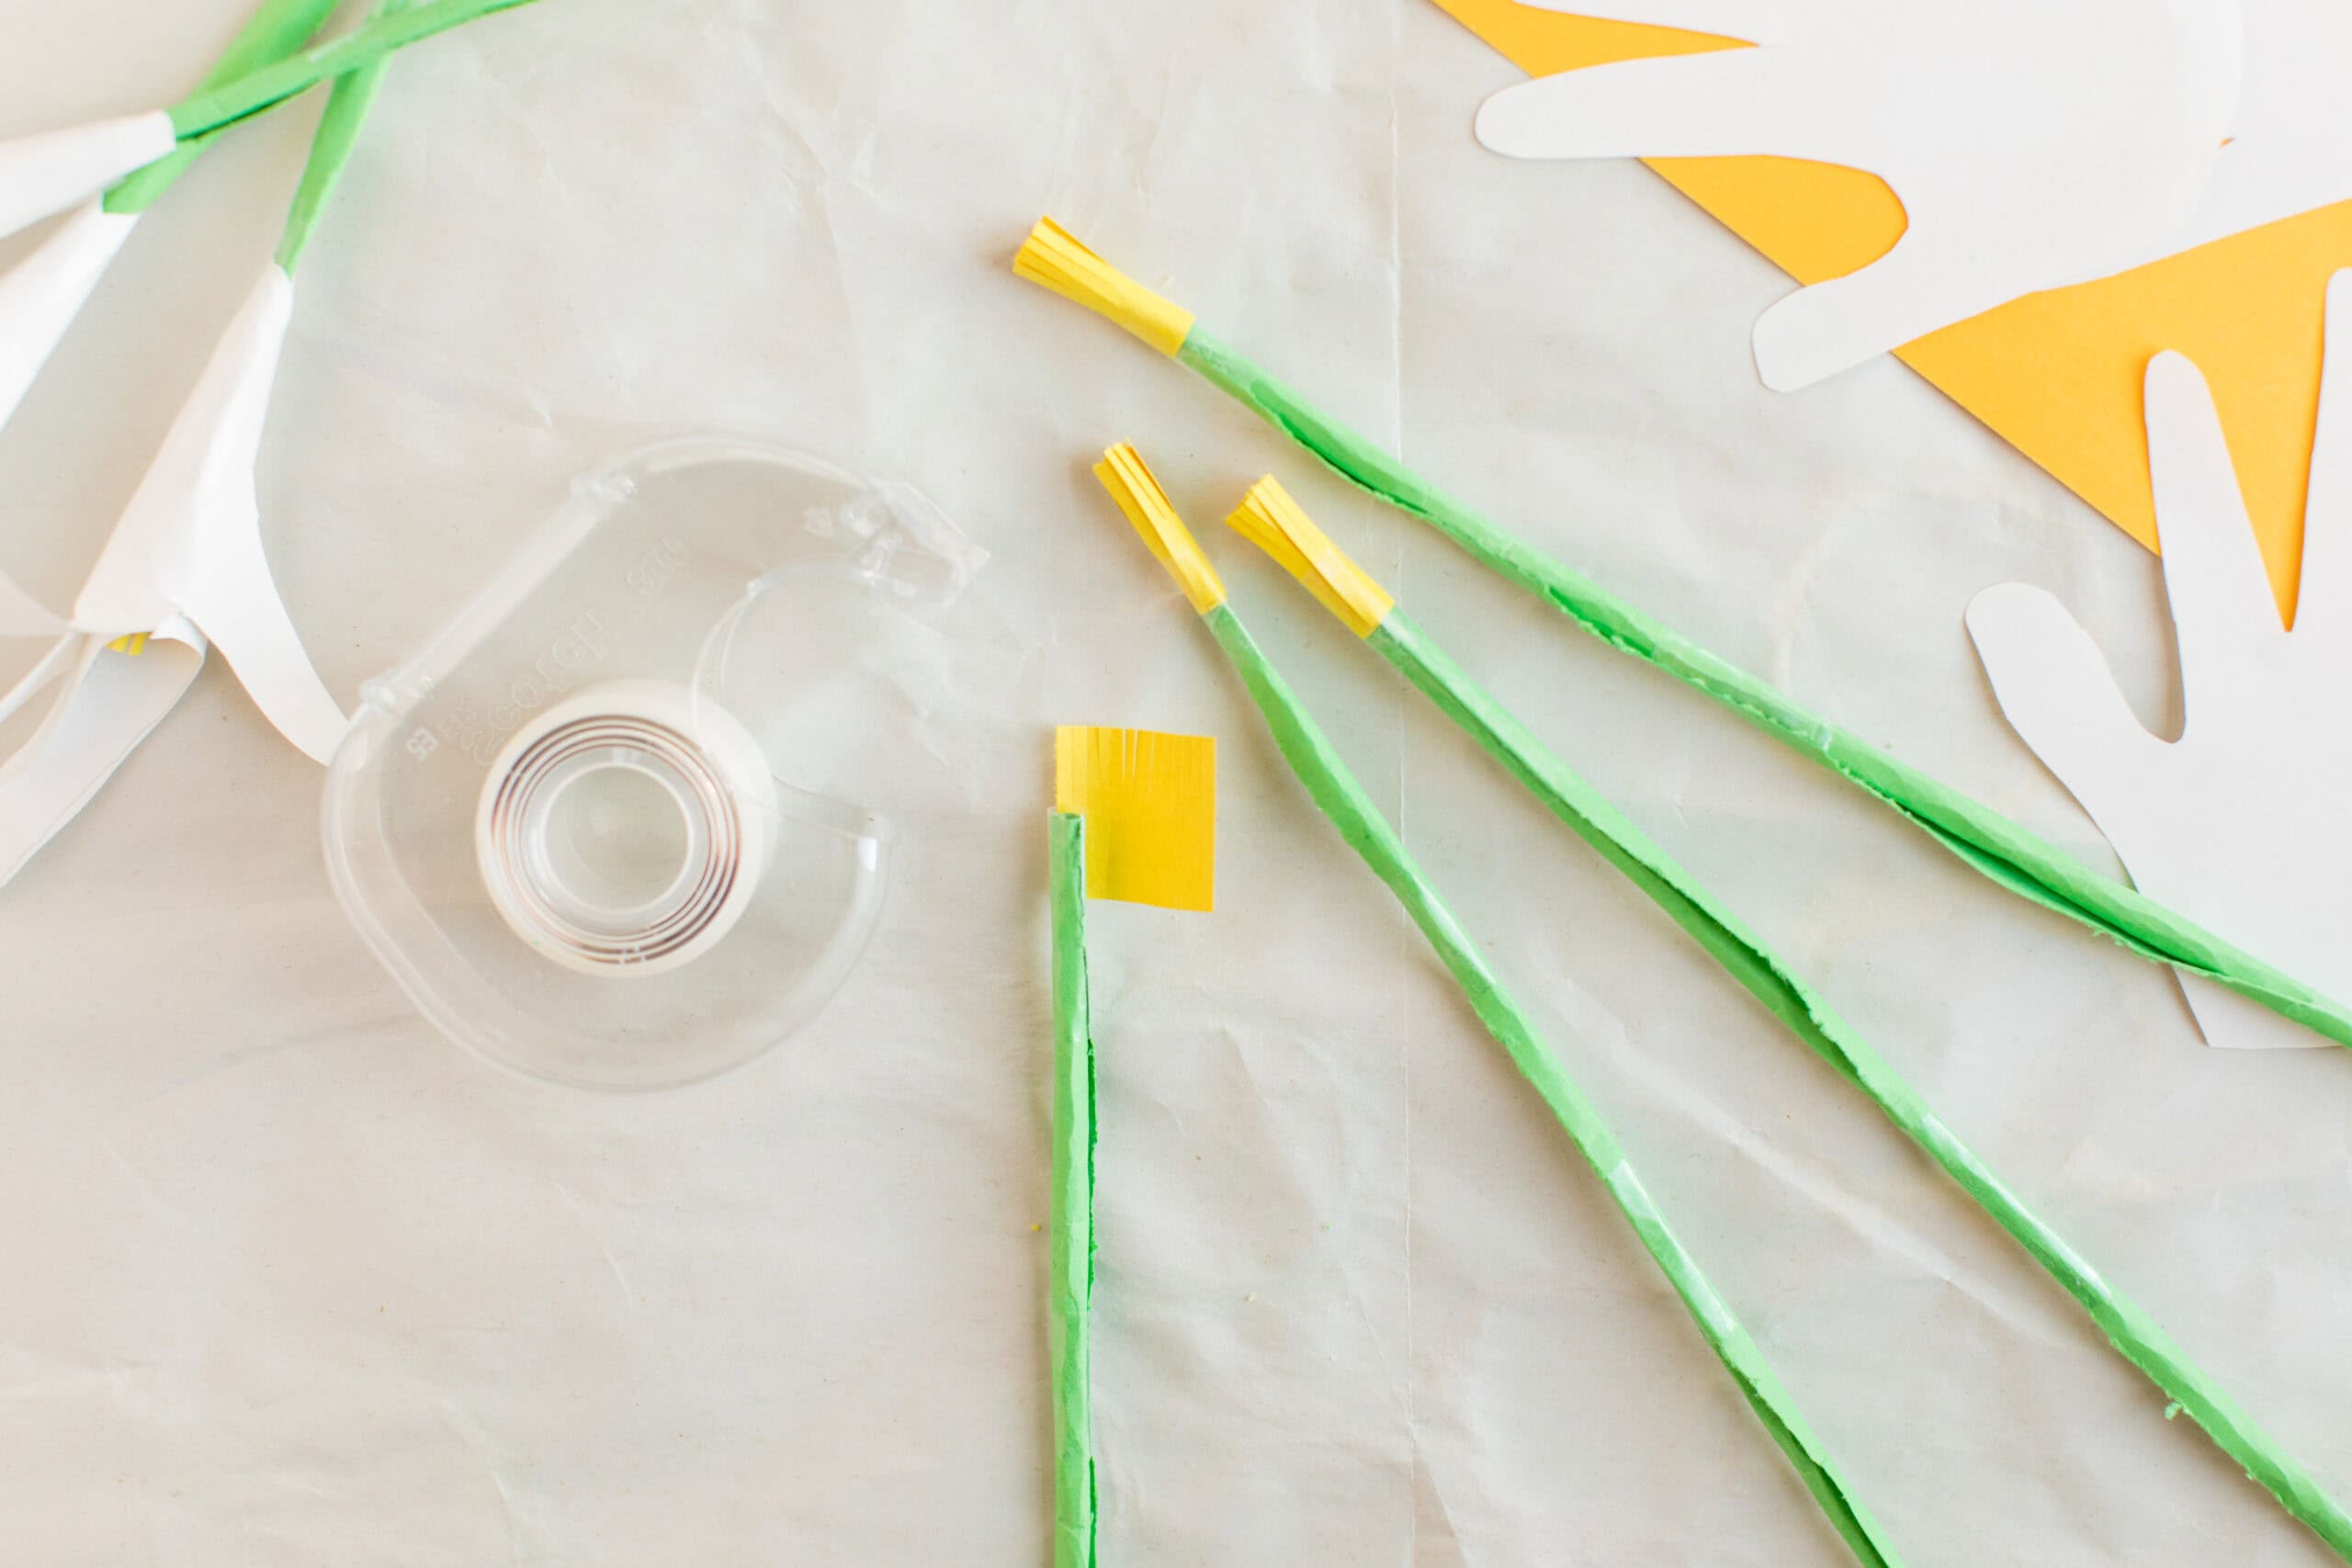
- Tightly roll the yellow fringed squares and tape to the end of the green stem with the fringe side facing outwards (away from the stem).
- Now tape down all edges of the green stem. You could use longer pieces of tape if that is easier. Roll the stem afterward to keep the shape.
- Take the handprint and curl the bottom into a cone shape, with a small opening (big enough to snugly slide the stem through) at the tip of the cone. Tape the cone together.
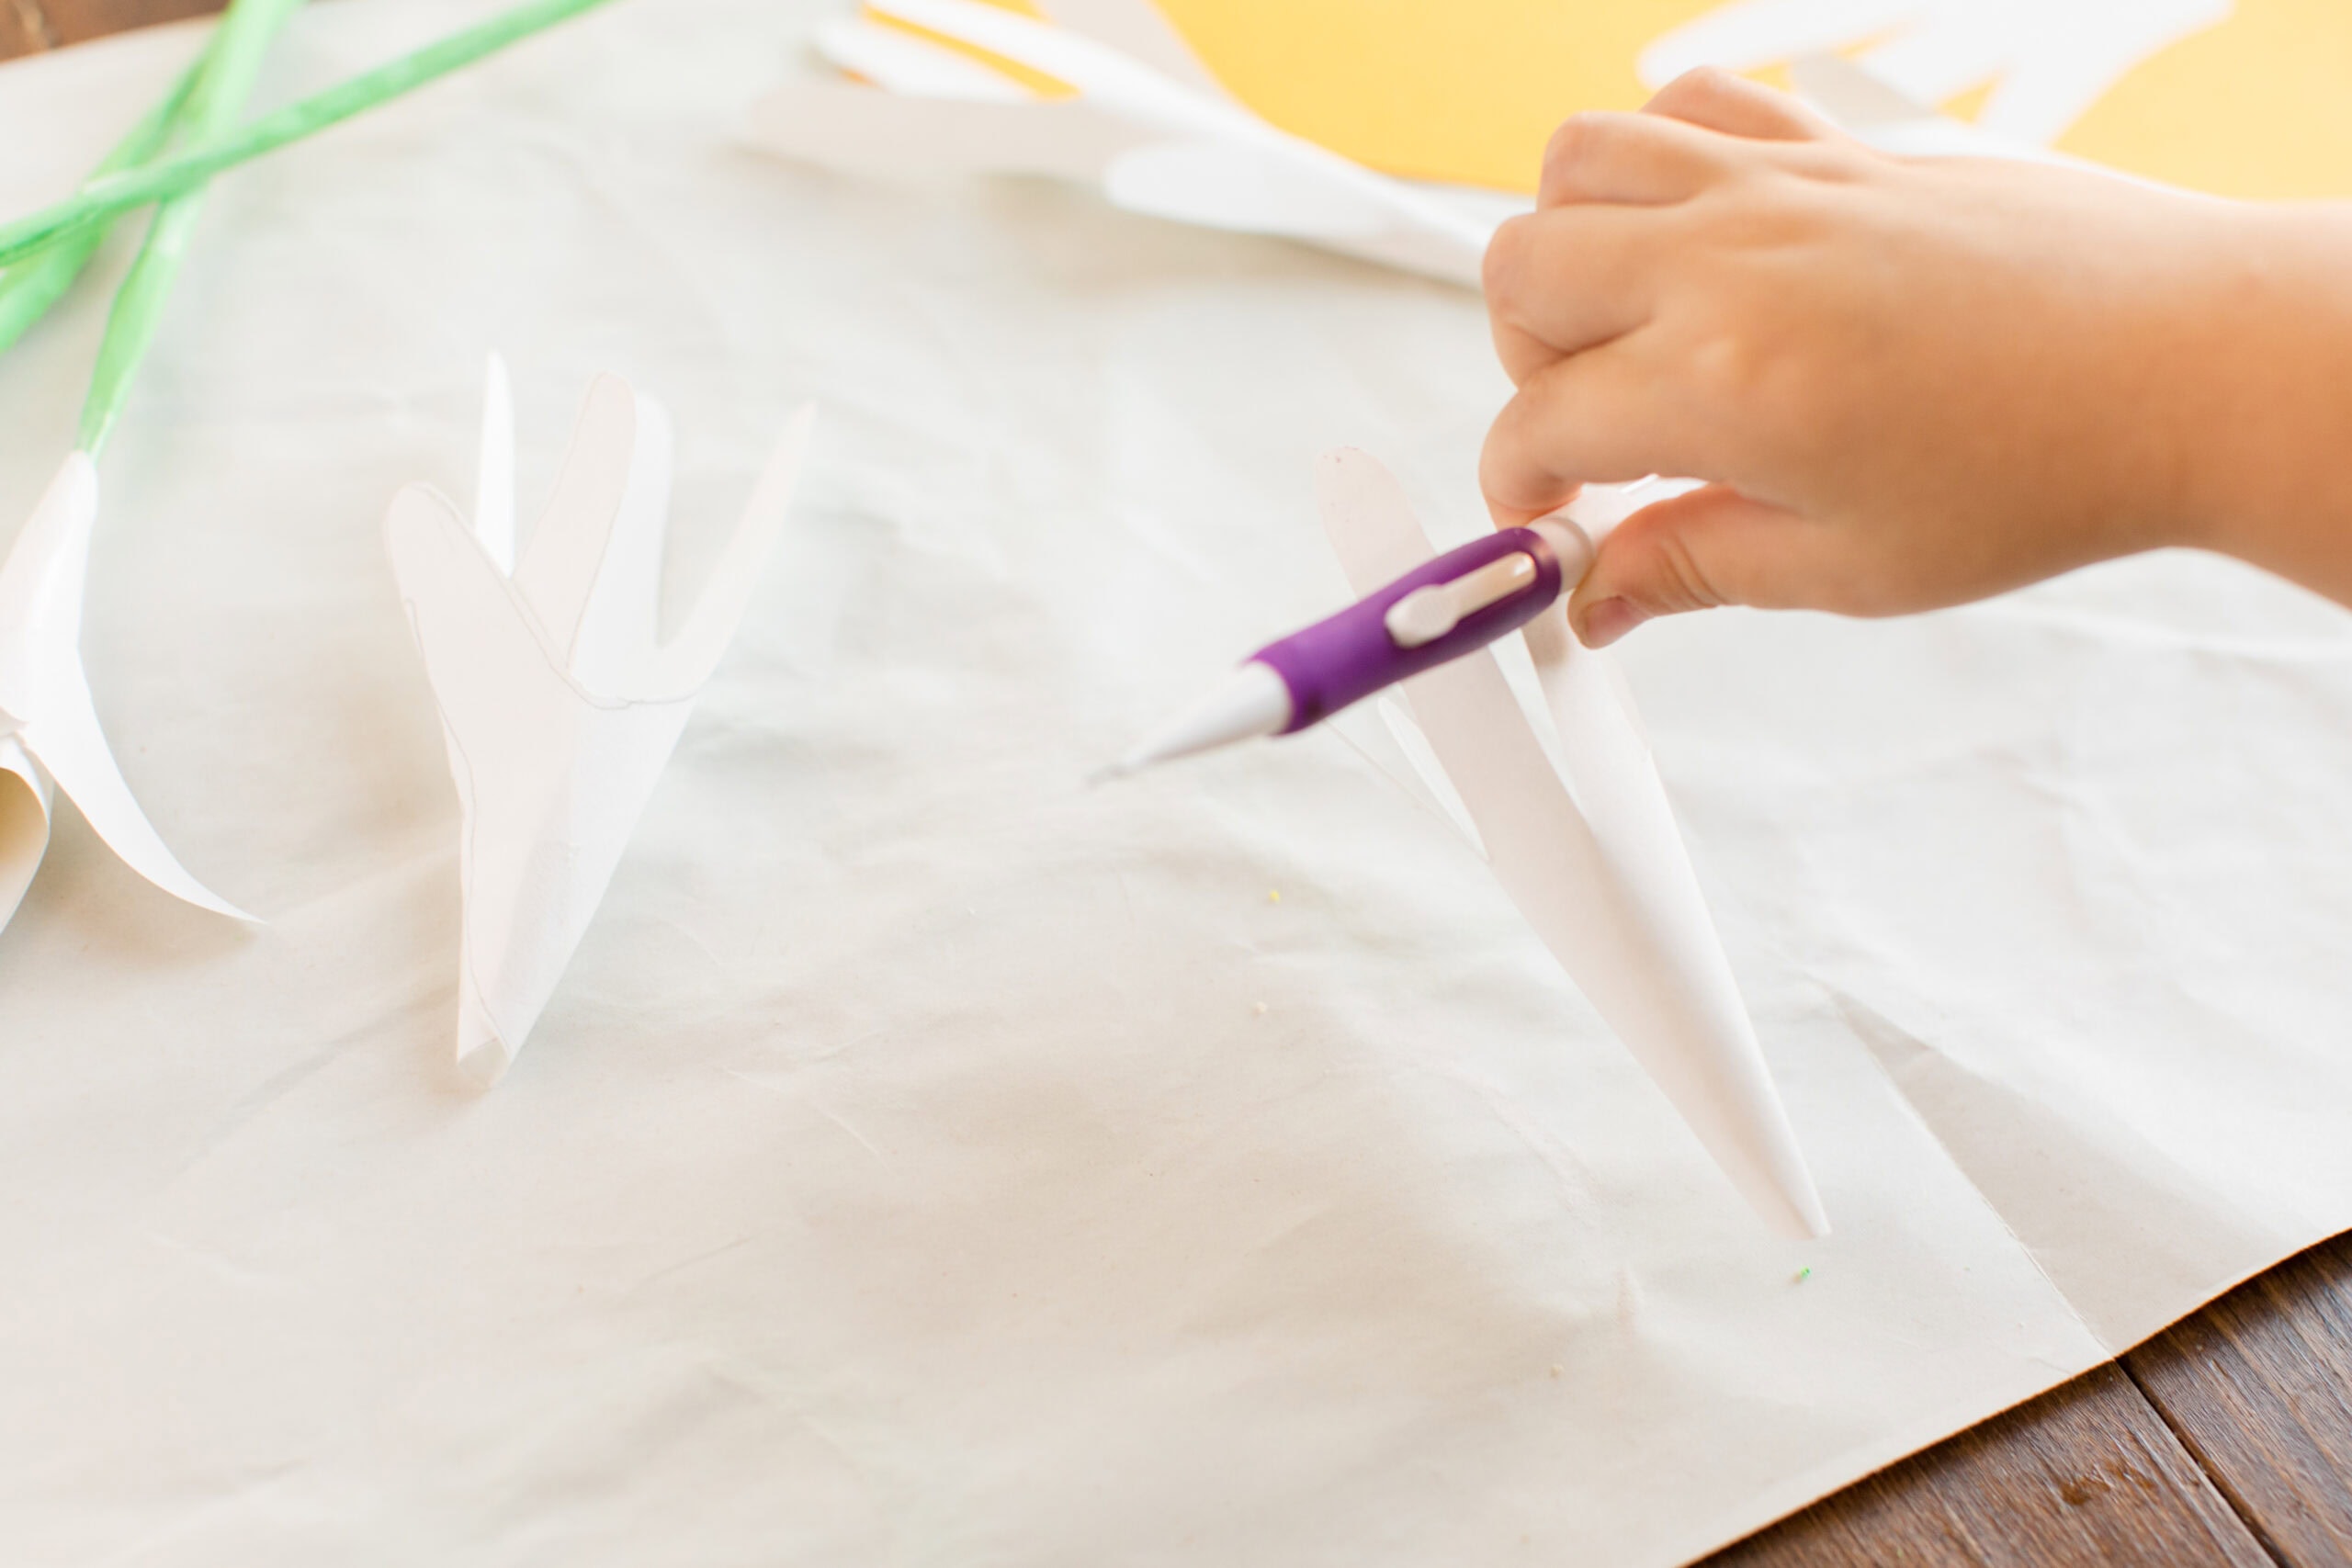
- Kids can use the side of the pencil or their fingers to gently curl the fingers of the handprint outwards to form into petals.
- Slide the stem through the cone of the handprint so that the yellow part is in the center of the handprint flower. Secure with a piece of tape around the cone base/stem.


Instructions for Handprint Easter Lily (using a chopstick as the stem)
- Kids can trace their hand on the white construction paper and cut out. Erase any pencil marks on the handprint.
- Measure and cut the green construction paper, the yellow construction paper shapes, and the fringe ahead of time.
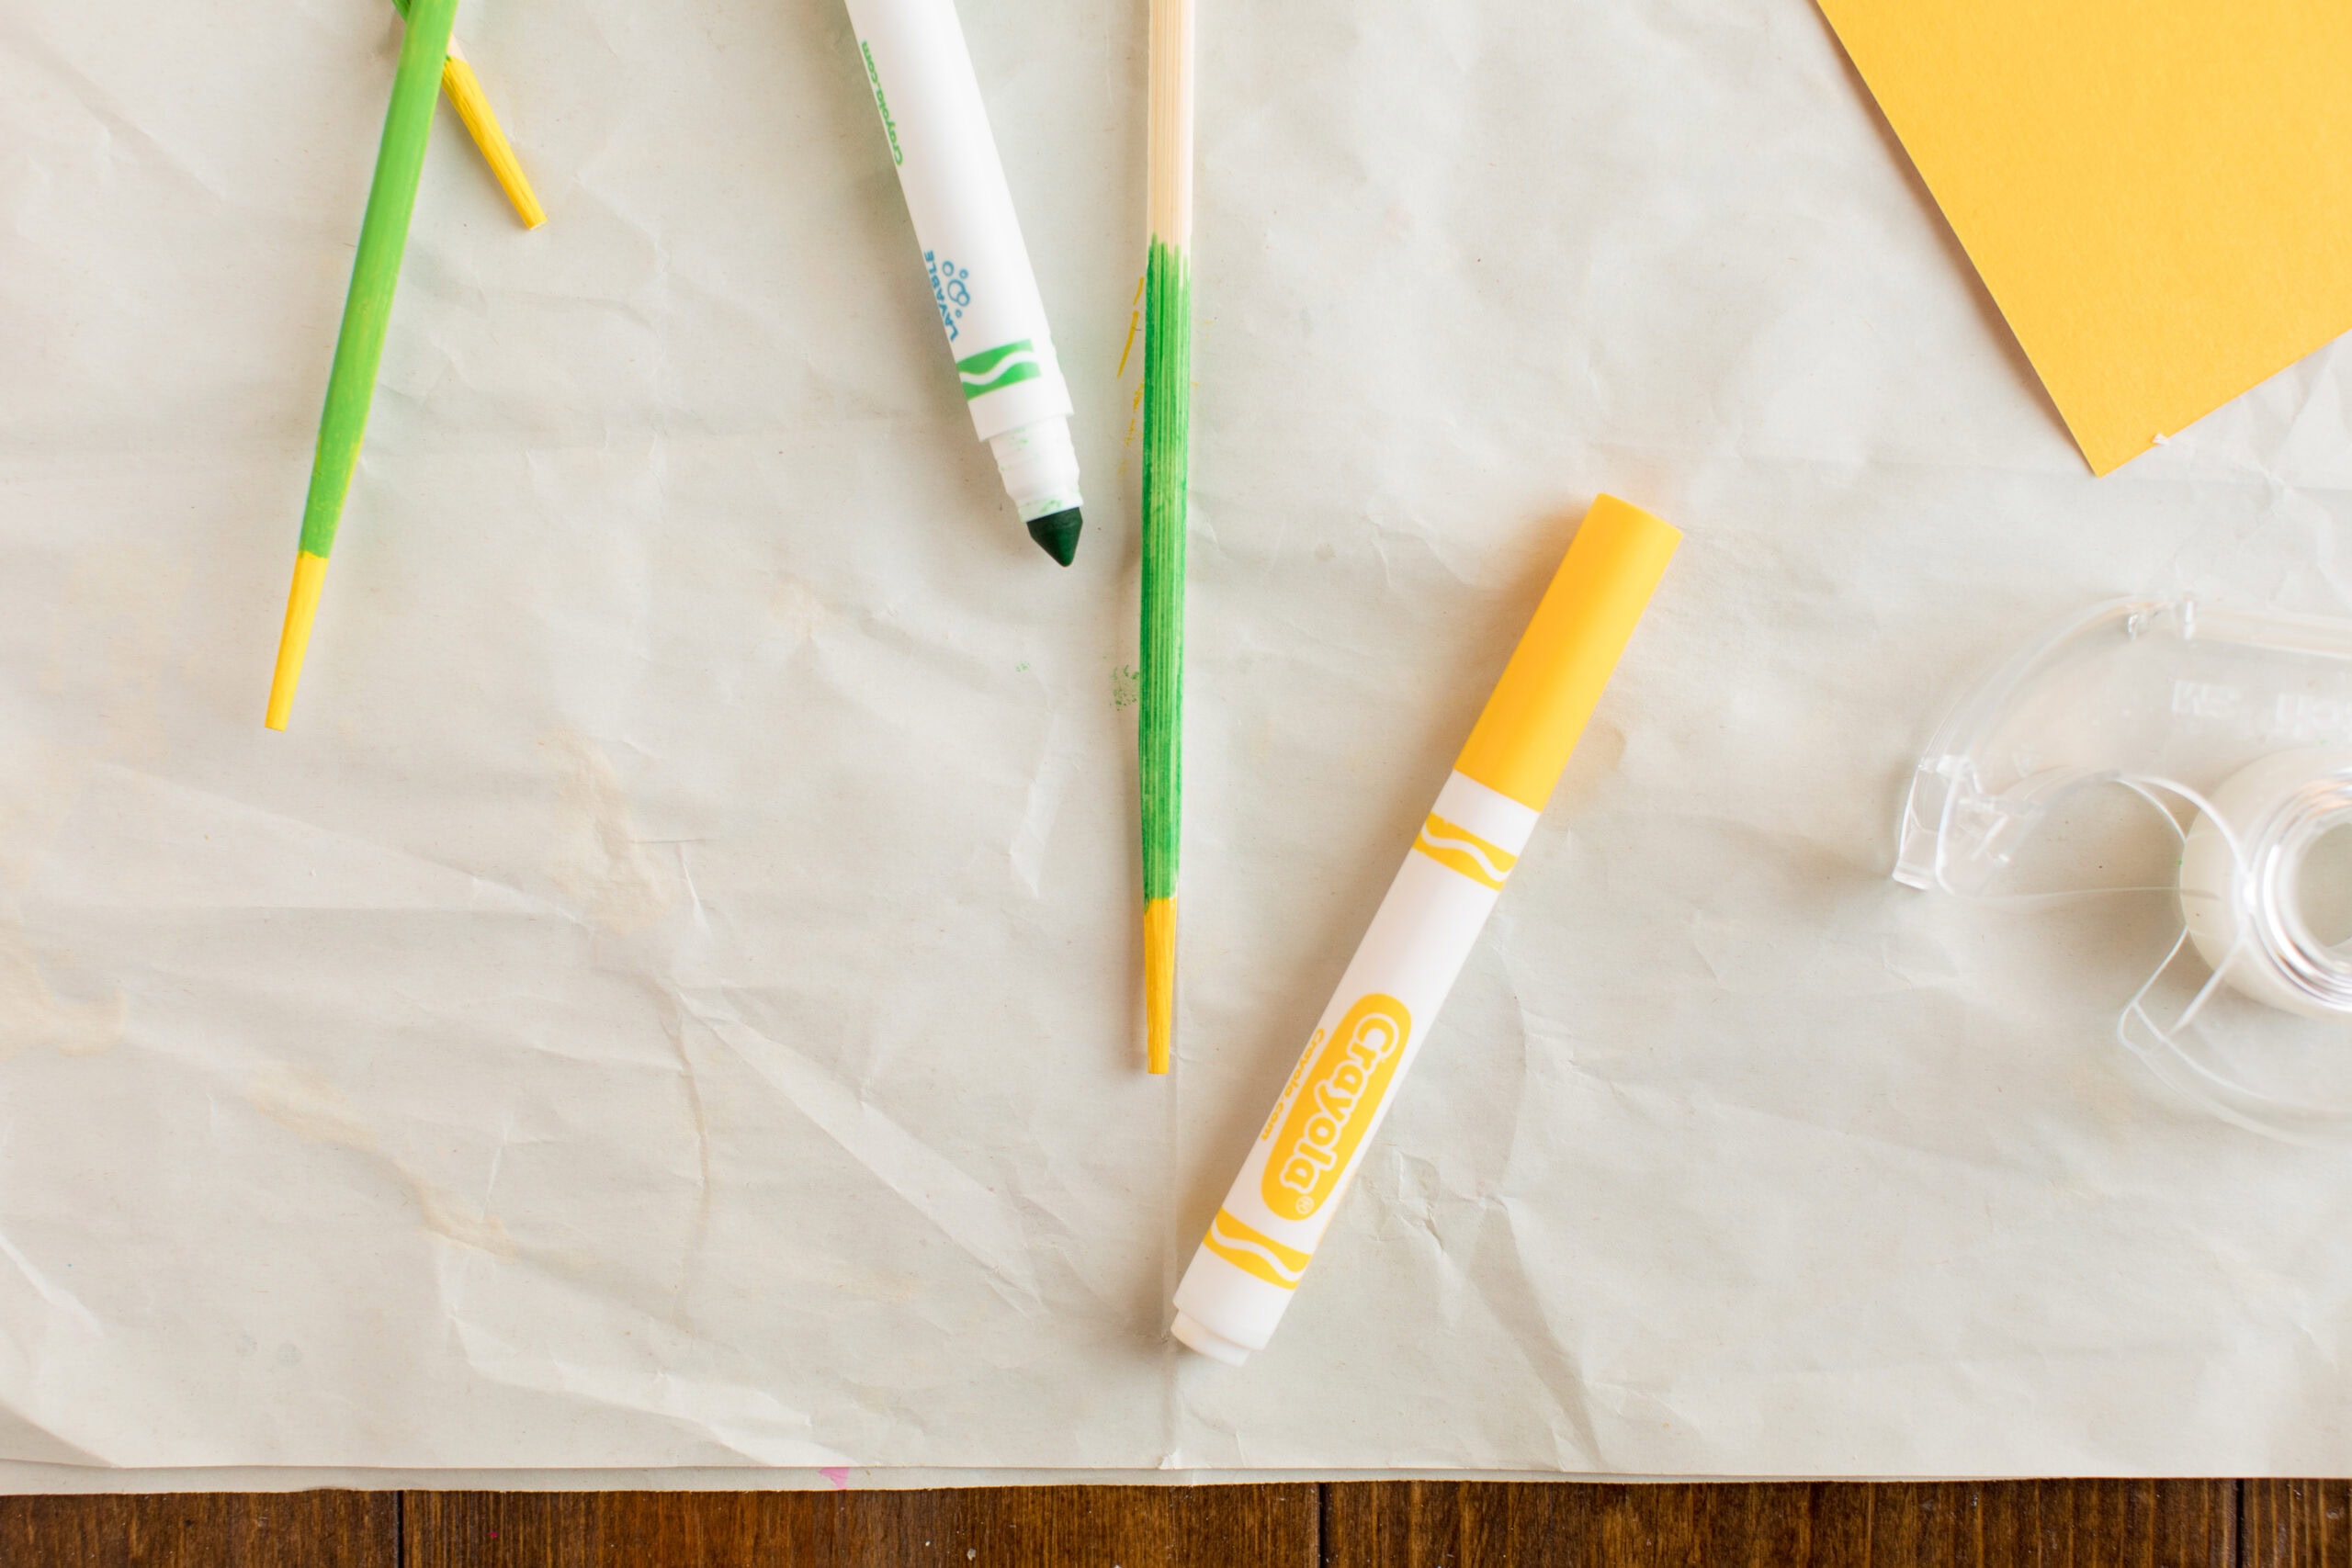
- Put the chopstick on a covered work surface. Use the yellow marker to color about 1” around one end and tip of the chopstick (if it has a tapered end, that is the end you want to be yellow).
- Use the green marker to color the rest of the chopstick green (rolling on a covered work surface makes it easier to color).
- Roll the yellow paper around the yellow end of the chopstick so that the fringe is on top and secure the roll with tape.
- Take the handprint and curl the bottom into a cone shape, with a small opening (big enough to snugly slide the chopstick through) at the tip of the cone. Tape the cone together.
- With the green end of the chopstick, slide the chopstick down through the center of the cone. Secure with a piece of tape around the cone base/chopstick .
- Kids can use the side of the pencil or their fingers to gently curl the fingers of the handprint outwards to form into petals.

More ways to use this project
These paper lilies make a great decoration for a spring or Easter table! They also make a sweet bouquet tied with a ribbon for someone special on Mother’s Day.
To round out this project, around Easter time, take a “field trip” to a local home supply store or florist to find the Easter Lilies! Look at how bright white the flowers are, and how deep green the leaves are. Have kids (and you) smell the fragrance! If you happen to have lilies outside in your gardens, have the kids look for those oranges, pinks, and other colors blooming in the summer. Have kids grab a magnifying glass and look up close at these beautiful flowers in bloom!
More Flower Tutorials
- Make flower magnets out of recycled denim.
- Here’s a cute bouquet of fingerprint flowers!
- Grown-ups will love our tropical paper flowers tutorial.
More Easter Projects
- Easter Play Dough
- Cardboard Tube Lambs
- Printable Easter Basket Tags
- 10 Tips for Coloring Eggs with Toddlers
- Handprint Lamb for Easter
- Easter Egg Wreath

Handprint Easter Lily
Supplies
With a Construction Paper Stem
- 9"x1” strip green construction paper
- 1"x1" square yellow construction paper
- 1 piece white construction paper
- Invisible tape
With a Chopstick Stem
- 1 Green marker
- 1 Yellow marker
- 1 Wooden chopstick with tapered end preferred
- 1"x1" square yellow construction paper
- 1 piece white construction paper
- invisible tape
Craft tools
- Pencil
- Ruler
- Tablecloth or newspaper
Instructions
With a Construction Paper Stem
- Kids can trace their hand on the white construction paper and cut out. Erase any pencil marks on the handprint.
- Measure and cut the green construction paper, the yellow construction paper shapes, and fringe ahead of time.
- Roll up the green paper strip to make the stem. Tape by each end and in the middle of the stem. Kids may need some help getting the rolling started so keep an eye on this step.
- Tightly roll the yellow fringed squares and tape to the end of the green stem with the fringe side facing outwards (away from the stem).
- Now tape down all edges of the green stem. You could use longer pieces of tape if that is easier. Roll the stem afterwards to keep the shape.
- Take the handprint and curl the bottom into a cone shape, with a small opening (big enough to snugly slide the stem through) at the tip of the cone. Tape the cone together.
- Kids can use the side of the pencil or their fingers to gently curl the fingers of the handprint outwards to form into petals.
- Slide the stem through the cone of the handprint so that the yellow part is in the center of the handprint flower. Secure with a piece of tape around the cone base/stem.
With a Chopstick Stem
- Kids can trace their hand on the white construction paper and cut out. Erase any pencil marks on the handprint.
- Kids can measure and cut the green construction paper, the yellow construction paper shapes, and fringe ahead of time.
- Put the chop stick on a covered work surface. Use the yellow marker to color about 1” around 1 end and tip of the chopstick (if it has a tapered end, that is the end you want to be yellow).
- Use the green marker to color the rest of the chopstick green (rolling on a covered work surface makes it easier to color).
- Roll the yellow paper around the yellow end of the chopstick so that the fringe is on top and secure the roll with tape
- Take the handprint and curl the bottom into a cone shape, with a small opening (big enough to snugly slide the chopstick through) at the tip of the cone. Tape the cone together.
- With green end of chopstick, slide chopstick down through center of cone. Secure with a piece of tape around the cone base/chopstick .
- Kids can use the side of the pencil or their fingers to gently curl the fingers of the handprint outwards to form into petals.
Expert Tips & FAQs
- Age Level: 4-8 years old but older kids may also like this project too!
- Mess Factor: Minimal. Paper cutting and possible coloring with markers
- Time to Complete: 10-15 minutes per flower, depending on how much kids do independently
- Cost estimate: price-per-project ranges between 10-25 cents depending on the supplies you have on hand.
- Construction paper is really the best paper for this project. If you don’t have any, you could use printer paper but it maybe a little harder to work with as it is thin and may rip. Card stock is not recommended as it is too thick.
- Depending on the size of handprint, you can easily get 3-4 (or more) handprints out of 1 sheet of construction paper. Enough to make a nice bouquet!
If you are working with younger kids, be ready to help as needed with cutting and taping the pieces together. - Kids may need help tracing their hands on the white construction paper.
If you are working with a group of kids, it maybe helpful if you manage the dispensing of tape pieces as they are needed. Or tear off a bunch and have them ready to go.
This post originally appeared here on March 4th, 2020.
- Star Suncatchers - June 19, 2026
- DIY Garden Stepping Stones - May 22, 2026
- How to Make Bath Bombs - May 5, 2026


Gerry says
I’m a great re-cycler..when i saw these lilies I thought “milk jugs”, dowels, green pop bottles.. They all came together to make the best looking Easter bouquets. I used all differnt size hands from family.. love your crafts!!