
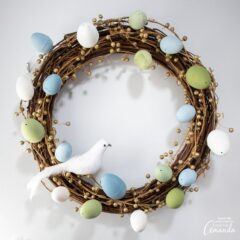
With pretty pastel colors and a natural grapevine wreath, this simple DIY Easter egg wreath idea is the perfect way to welcome spring. Use any leftover plastic eggs with our printable Easter Scavenger Hunt!

Easter Egg Wreath Tutorial
A pretty Easter egg wreath is the sweetest adornment for your front door. Easter is absolutely one of our favorite times of the year. Warmer spring days, a focus on growth and renewal and pretty pastel decor: what’s not to love!
Last year we made this simple bunny ear wreath and then a bunny garland for the fireplace mantle. But this year will be all about eggs and chicks and this simple Easter wreath idea will be the starting point!

Materials needed to make an Easter Egg Wreath
- 19″ grapevine wreath
- 16-18 plastic eggs in assorted sizes
- Chalky paints: we used DecoArt Americana Chalky Finish paint in Everlasting (white), Colonial (blue) and New Life (green)
- Paintbrushes
- Gold glitter decorative garland
- Floral wire
- Wire snippers
- Hot glue gun with clear craft glue sticks
- Bird (optional)

How to Make an Easter Egg Wreath
Prepare the Eggs
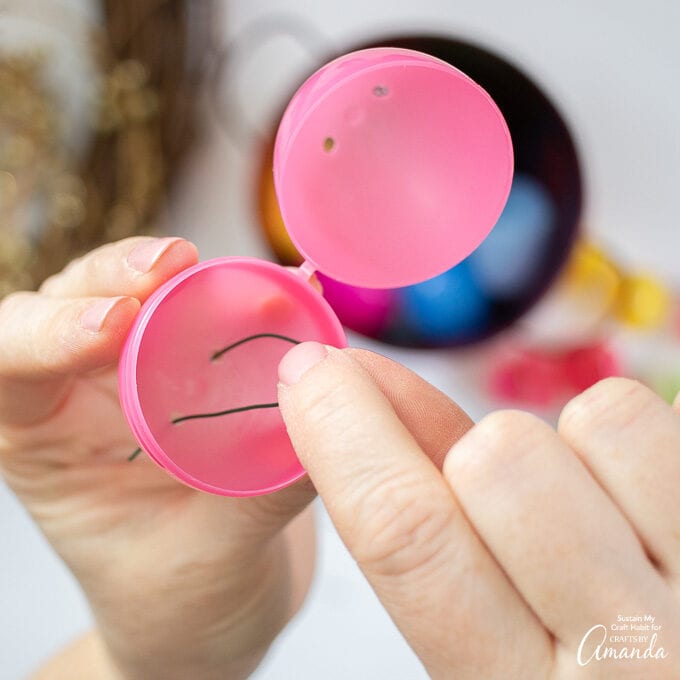
- Make sure the eggs are clean and dry.
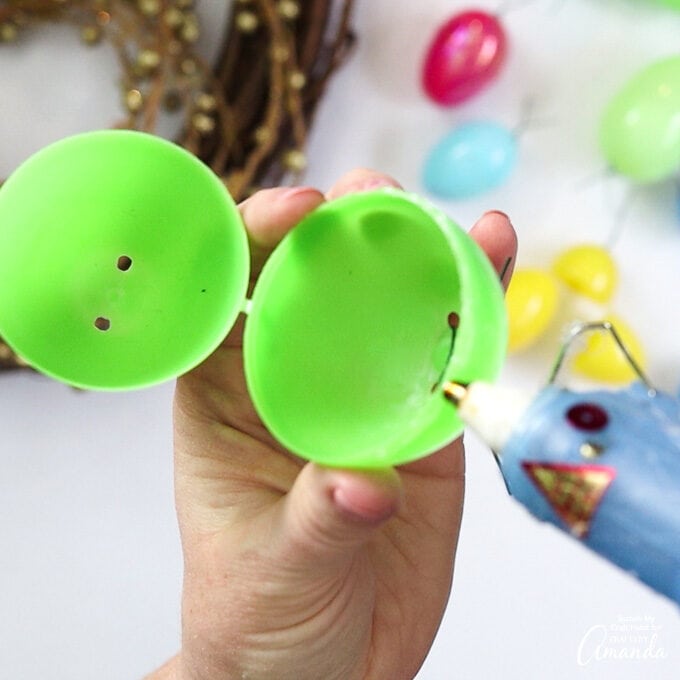
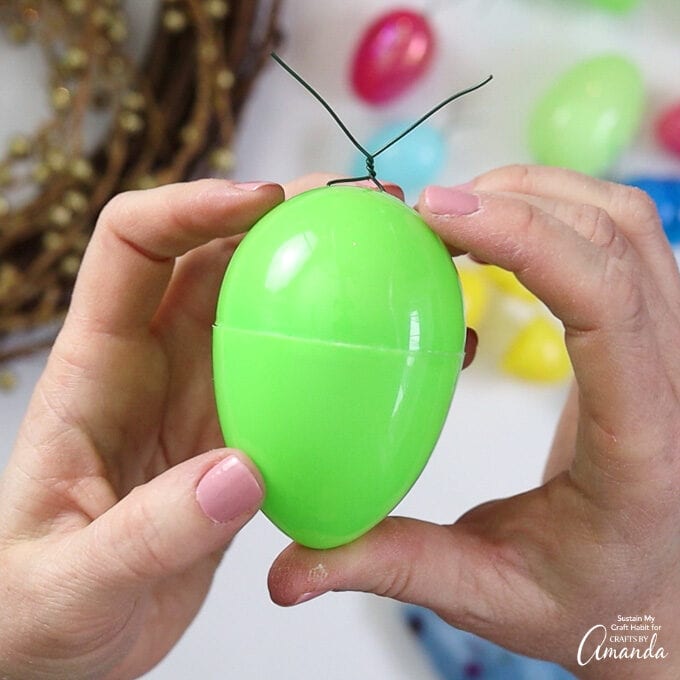
- Cut pieces of floral wire to 4″ long. Bend one piece of wire and thread through the bottom holes of the plastic egg. Twist the wire to secure in place. Repeat with all the eggs.
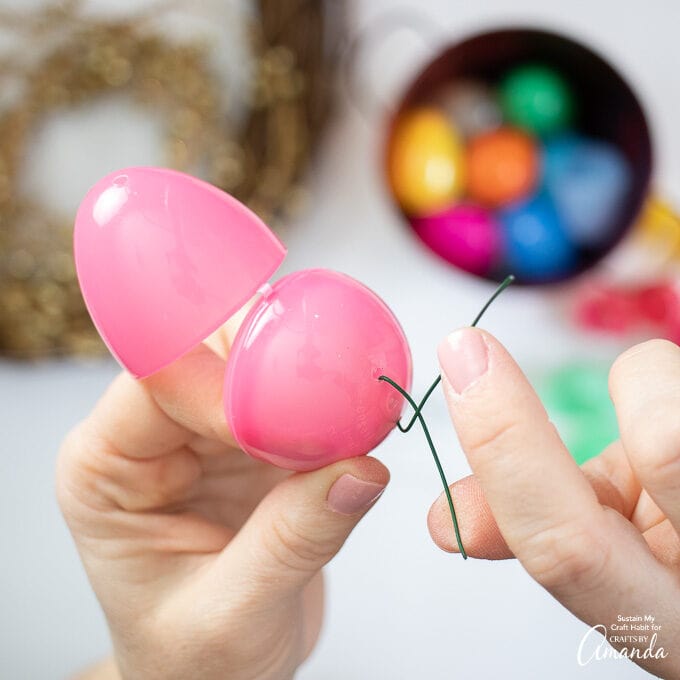
- Carefully glue the two pieces of the eggs together so that they stay closed.
- Mix the paints so that you have white, blue, light blue, green and light green.
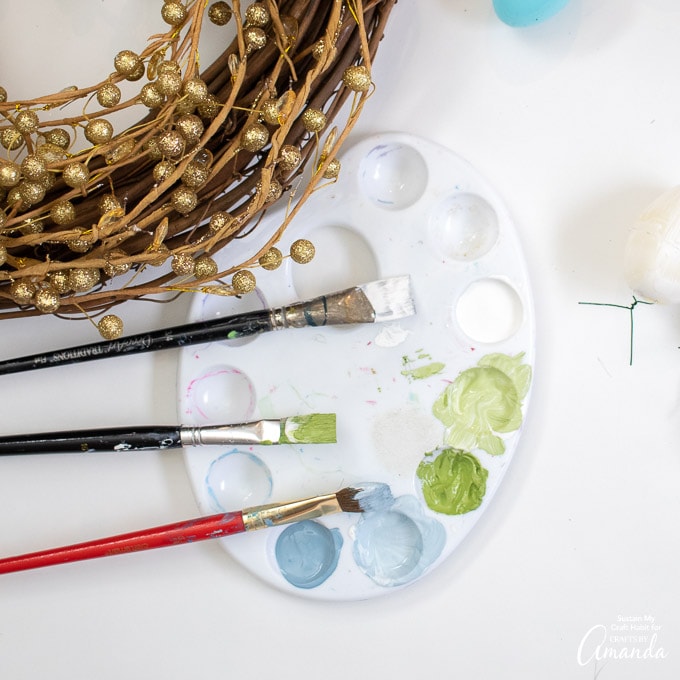
- Paint each egg with different colors of paint. set aside and let dry completely. One coat should be sufficient but paint a second coat if needed.

Assemble the Wreath
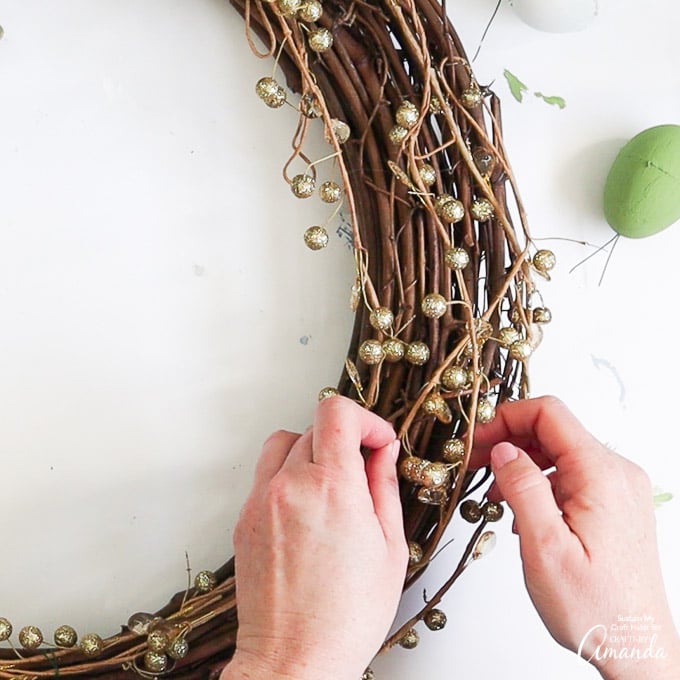
- If using it, attach the garland to the grapevine wreath using floral wire.
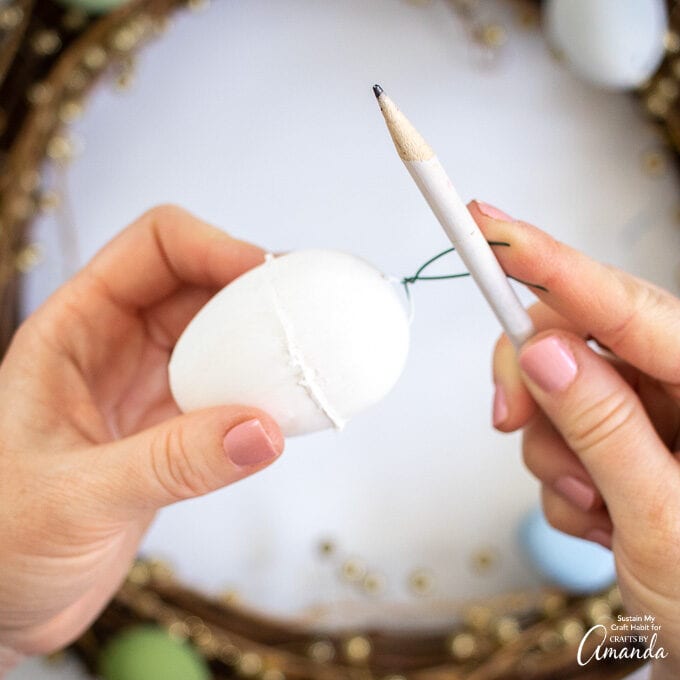
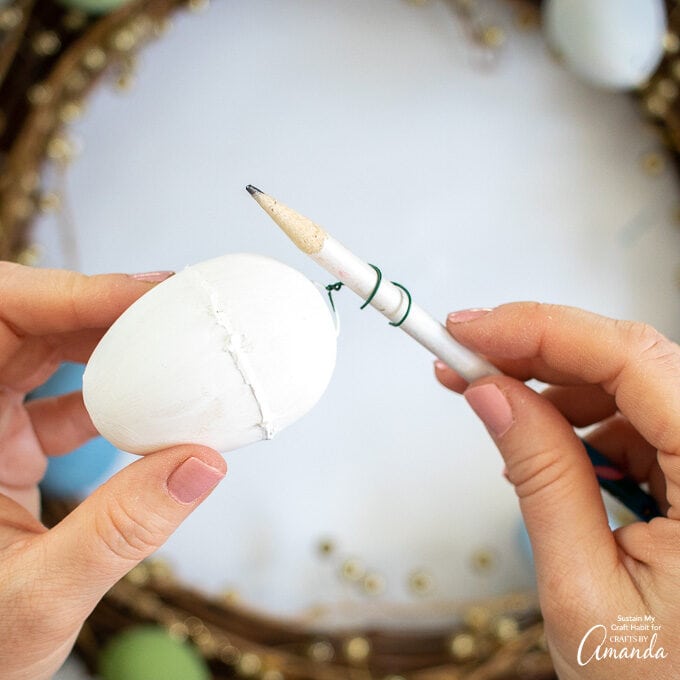
- Twist the wire tails from the eggs around a pencil to create a hook.
- Hook the wire into the branches of the wreath to hold it in place.
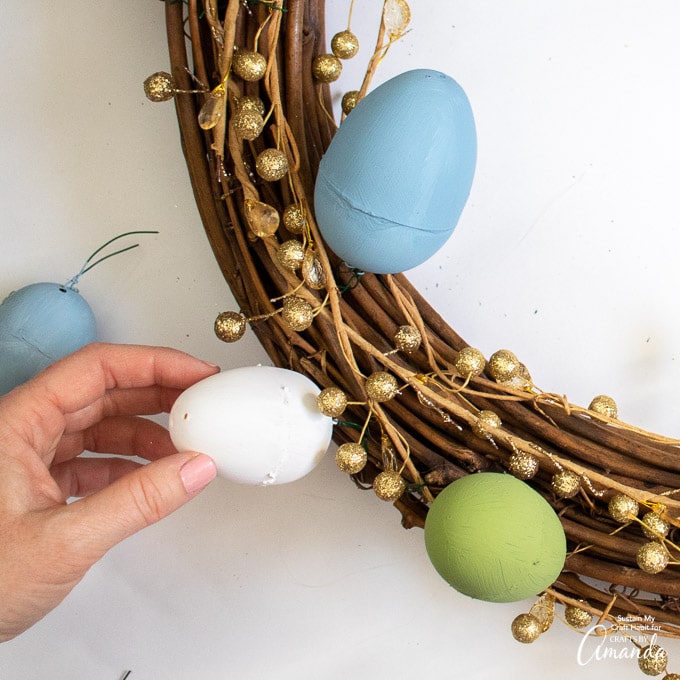
- If needed, add a bit of hot glue to hold the egg in place.

- Repeat with the rest of the eggs alternating colors and sizes as you go around the wreath. Try to have the eggs point in the same direction around the wreath for a cohesive look.

Finishing Touches
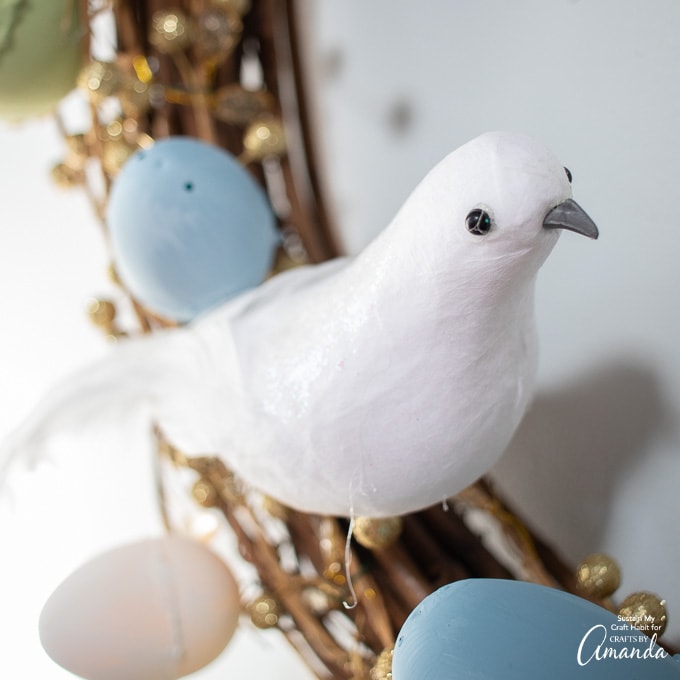
I think the wreath looks beautiful as is, but you could add a simple ribbon, some leaves or a phrase in the middle similar to our seashell wreath idea. I added a pretty white dove onto my Easter egg wreath.
One of the best parts of this wreath is that I used materials I already had at home. After Easter is done I may just remove the eggs and repurpose the wreath with a summertime theme.

Would you add anything else to this Easter egg wreath?
Check out these collections of beautiful DIY Spring Wreaths and Summer Wreaths for the upcoming seasons!
More Easter Craft Ideas
- Painted Rock Chicks
- Easter Bunny Mason Jars
- Washcloth Bunny and Chick
- Yarn Pom Pom Chicks
- 7 Cool Ways to Decorate Easter Eggs
- 10 Tips for Coloring Eggs with Toddlers
Easter Egg Wreath
Supplies
- 19 ” grapevine wreath
- 16-18 plastic eggs in assorted sizes
- Chalky paints: we used DecoArt Americana Chalky Finish paint in Everlasting (white), Colonial (blue) and New Life (green)
- Paintbrushes
- Gold glitter decorative garland
- Floral wire
- Wire snippers
- Hot glue gun with clear craft glue sticks
- Bird optional
Instructions
- Make sure the eggs are clean and dry.
- Cut pieces of floral wire to 4″ long. Bend one piece of wire and thread through the bottom holes of the plastic egg. Twist the wire to secure in place. Repeat with all the eggs.
- Carefully glue the two pieces of the eggs together so that they stay closed.
- Mix the paints so that you have white, blue, light blue, green and light green.
- Paint each egg with different colors of paint. Set aside and let dry completely.
- If using it, attach the garland to the grapevine wreath using floral wire.
- Twist the wire tails from the eggs around a pencil to create a hook.
- Hook the wire into the branches of the wreath to hold it in place.
- If needed, add a bit of hot glue to hold the egg in place.
- Repeat with the rest of the eggs alternating colors and sizes as you go around the wreath.
- Add a pretty bird if desired.
Video
This post originally appeared here on Mar 25, 2020.
- Pressed Flower Resin Magnets - May 26, 2026
- Pressed Flower Art - May 8, 2026
- DIY Easter Egg Wreath - March 20, 2026


Leave a Reply