
Last week I went to the flea market. I came across this brand new (in the shrink wrap) pair of plain tray tables, also known as breakfast in bed trays. They were marked as $8.00 but I picked them up for $5.00 for the pair. Hubby and I like to sit in bed at night and watch TV, sometimes I mess around on my laptop and he does word search puzzles. Laptops get hot on the bottom making your lap very uncomfortable, and doing puzzles on a pillow doesn’t work very well. So these tray tables were perfect, but were sporting a boring, ugly color.

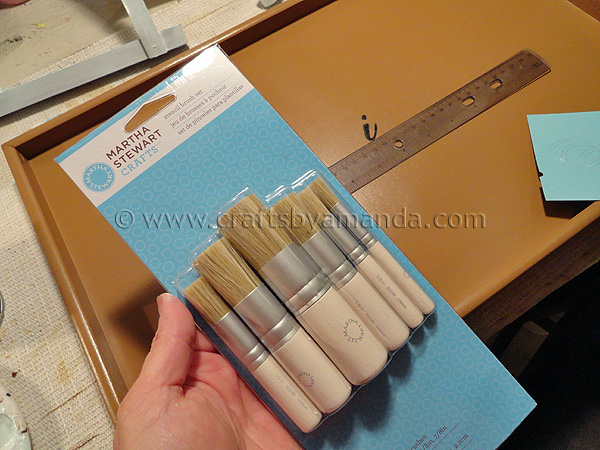
I told you last week about some cool new products I was able to test out from Plaid’s new line of Martha Stewart multi-surface paints and tools. These products are available exclusively from Michael’s craft stores and come in 160 colors with several different finishes and mediums to choose from. Last week I showed you my revamped bird feeder on which I used some of the cool stencils and tools I received.
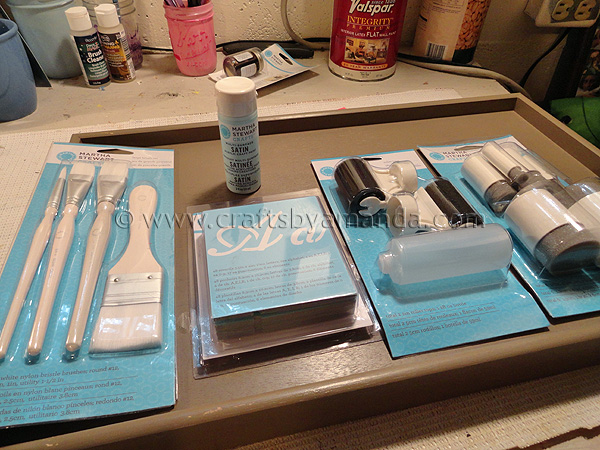
On these trays I tested out the roller tops, script font stencils, adhesive stencils, paintbrushes, stencil brushes, foam pouncers and Martha’s satin and pearl paints.
My favorite product so far has to be the adhesive stencils I used on this and my revamped bird feeder, they are awesome! ALL stencils should be adhesive, fabulous!
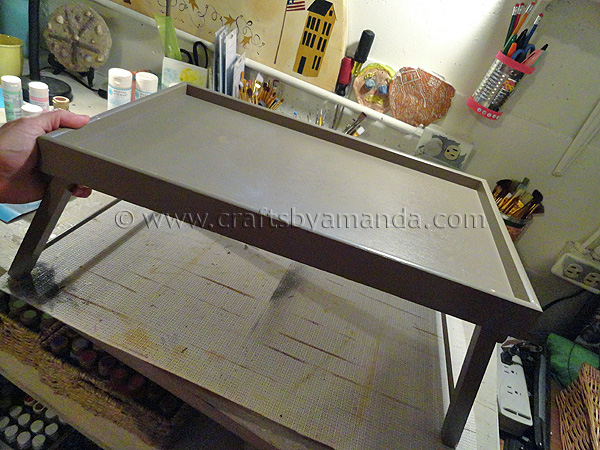
Here’s what it looked like when I started. Boring right? The paint finish was a thin coat of an olive drab grayish nastiness.
I removed the screws holding the legs on.
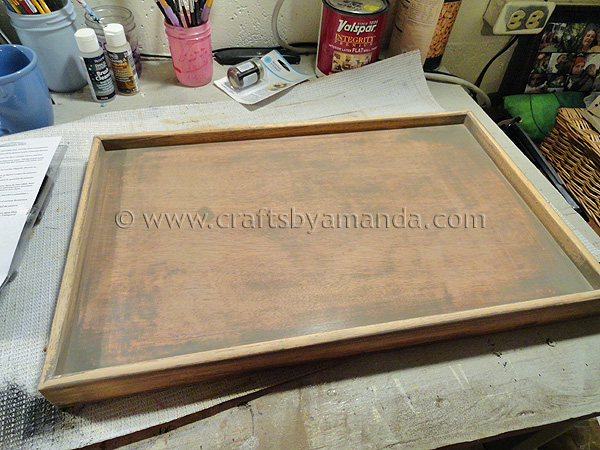
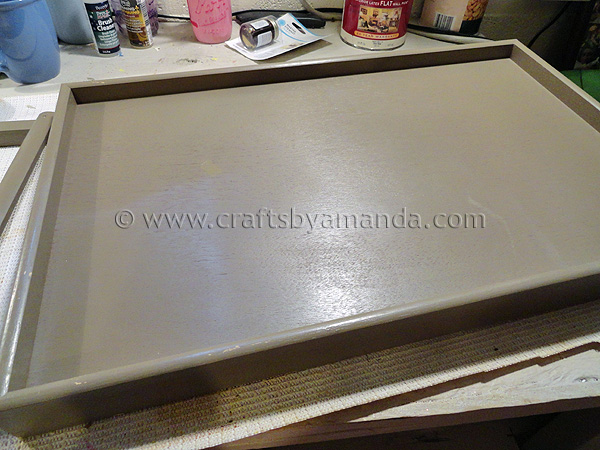
Then I started sanding just to remove any sealer and the paint pretty much came right off.

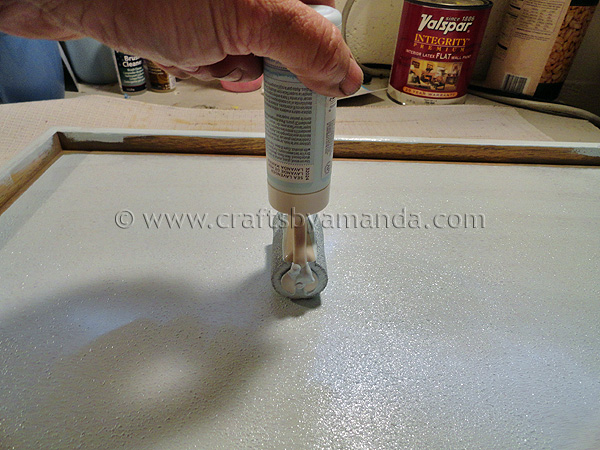
The cool thing about these roller tops is that you can attach them directly to the 2-ounce bottles of Martha Stewart paint, as I did here, or you can use the plastic bottle that it comes with. Just screw the roller onto the top of either bottle.
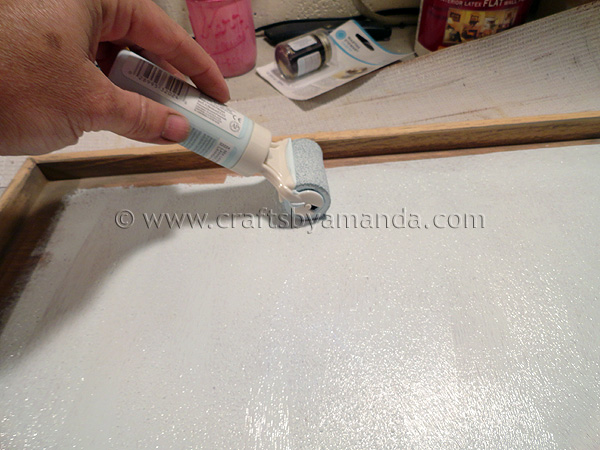
Gently squeeze the bottle to express some paint then begin rolling.
I found that holding the roller directly up and down worked best. This is a great way to add a first coat quickly.
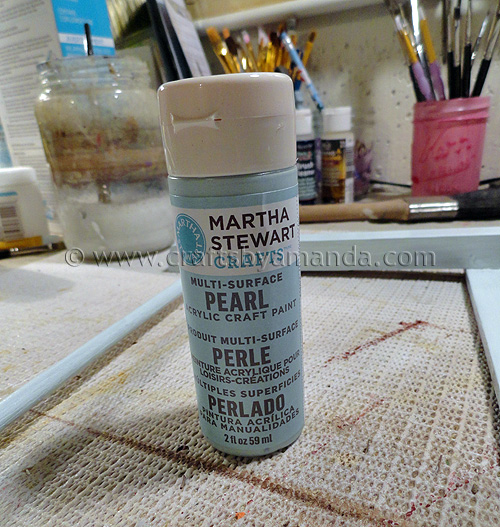
After letting the paint dry and adding a second coat of the satin i allowed that to dry as well. Then I used the pearl finish paint for the tray top and applied it with a paintbrush.
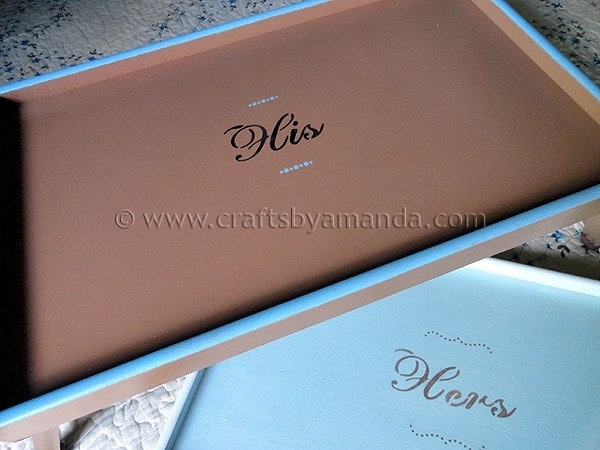
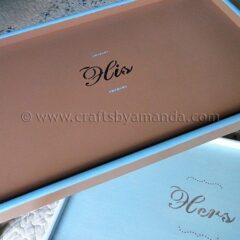
I chose darker colors for my husband’s tray. Our bedroom is tan with white trim and our colors are light blue with brown and tan accents. So with my tray being light blue, brown seemed to be a perfect choice for his. I used the script font stencils and the stencil brushes to add “His” and Hers”. Then I used the adhesive stencils to add the little accents around the wording.
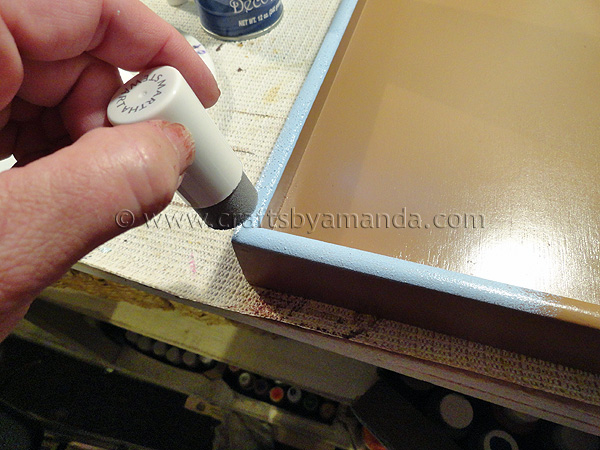
After finishing I felt that they needed just a little something else. So on hubby’s I found that the sponge pouncers were perfect for adding color to the rounded edges of the tray. Much easier than a paintbrush!
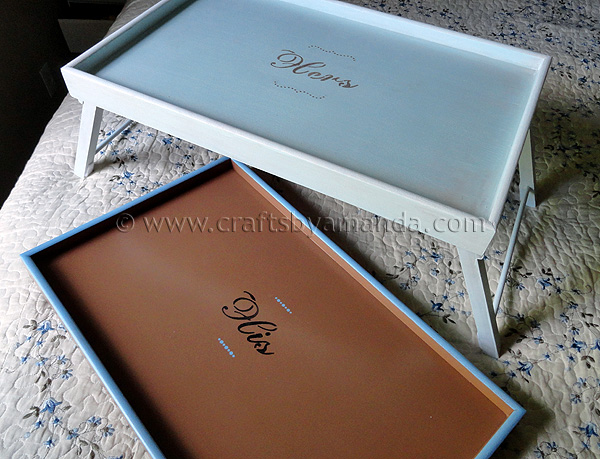
After everything had dried completely, I used a matte spray sealer to coat the trays a few times. We use these regularly and I’m really happy with how they turned out!

His and Hers Tray Tables
Supplies
- roller tops
- script font stencils
- adhesive stencils
- paintbrushes
- stencil brushes
- foam pouncers
- Martha’s satin and pearl paints
Instructions
- I removed the screws holding the legs on.
- Then I started sanding just to remove any sealer and the paint pretty much came right off.
- The cool thing about these roller tops is that you can attach them directly to the 2-ounce bottles of Martha Stewart paint, as I did here, or you can use the plastic bottle that it comes with. Just screw the roller onto the top of either bottle.
- Gently squeeze the bottle to express some paint then begin rolling.
- I found that holding the roller directly up and down worked best. This is a great way to add a first coat quickly.
- After letting the paint dry and adding a second coat of the satin i allowed that to dry as well. Then I used the pearl finish paint for the tray top and applied it with a paintbrush.
- I chose darker colors for my husband’s tray. I used the script font stencils and the stencil brushes to add “His” and Hers”. Then I used the adhesive stencils to add the little accents around the wording.
- After finishing I felt that they needed just a little something else. So on hubby’s I found that the sponge pouncers were perfect for adding color to the rounded edges of the tray. Much easier than a paintbrush!
- After everything had dried completely, I used a matte spray sealer to coat the trays a few times.
- Swirling Twirling Ladybugs - July 21, 2026
- Drip Tie Dye Backpack - July 17, 2026
- Mini Coastal Clay Houses - July 14, 2026


Money Saving Enthusiast says
I LOVE THIS!!! How special and practical!
(✽˘⌣˘✽)
Mod Podge Amy says
These are gorgeous – I love them. How simple and beautiful!
Lindsay says
Love this idea! I actually picked up some of Martha's new paint line this week!
I'd love for you to share this at Show & Share!
http://southernlovely.blogspot.com/2011/08/show-share-3.html
Kathryn Griffin says
Wow! Those are so cute! I've got to go get me some Martha stuff. Found you via Domestically Speaking. Pop on over for a visit when you get a moment. Tootles, Kathryn http://thededicatedhouse.blogspot.com/2011/08/little-goodwill-finds.html
Let's Lasso the Moon says
Love that you added the Michael's coupon right into the post. {brilliant}
Jennifer says
Those trays are great! Love how cute they are. Now I know I'm going to be on the lookout for some. :) Thanks for stopping by Amanda.
melany @ Project Anthologies says
I love those! We use trays around here a lot because we don't have a coffee table – just a huge ottoman. Something like this would be great in the living room too.
Katie says
Great job on your trays! I too loved the adhesive stencils. Makes stenciling so much easier!
MsJay says
Very nice trays. And love the MS tools, especially the roller. TFS.
Andréa Melo says
Beautiful!!! Look what I do with my tray table
http://casadedea.blogspot.com/2011/03/tem-que-ter-sua-cara.html
Michelle says
Great idea for bed trays. Love the his and hers. I can't wait to try the adhesive stencils.
gail says
woohoo! great project Amanda! Love the pricepoint! :)
I agree about the adhesive stencils! They make if so easy!
gail
Suzanne says
OK, I truly LOVE these. Both of my girls and their husbands need these. Now I need to get busy and get them made before Christmas! Great idea!!
Johnnie says
They turned out beautiful! I love the colors together. Now I am excited to try the adhesive stencils. Thanks!
Saved By Love Creations
Marilyn says
Great looking trays, and very thrifty.♥♫