
This post brought to you by Duck Brand. All opinions are 100% mine.
A few times per year I attend blogging conferences and always need business cards. I don’t even remember how many years ago I stopped carrying a purse. Now I carry my license and debit cards in my pocket or in a little miniature wallet just for cards.
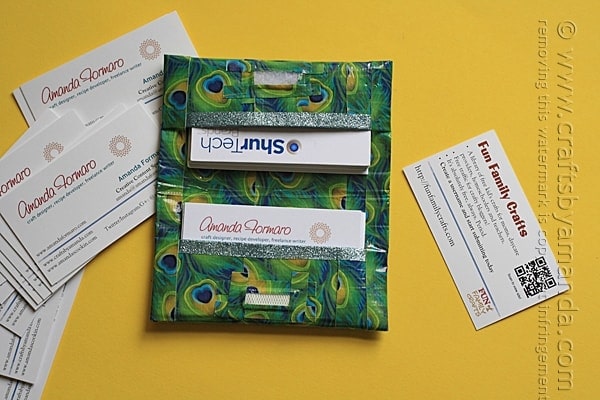
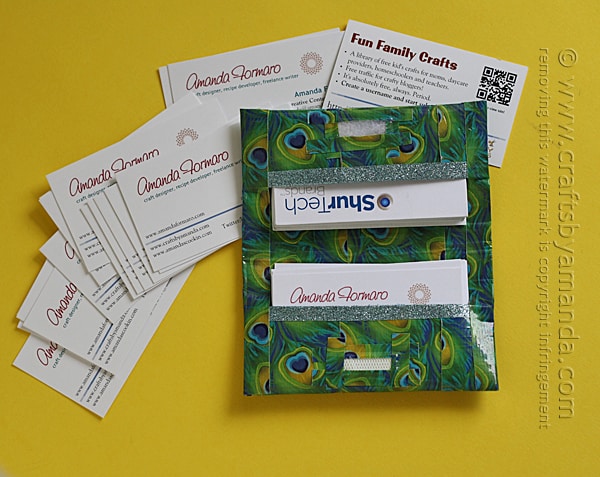
I’m headed to SNAP next month, which is a creative conference in Salt Lake. I decided I needed a business card holder to not only carry a stash of my cards, but also to collect cards from others.
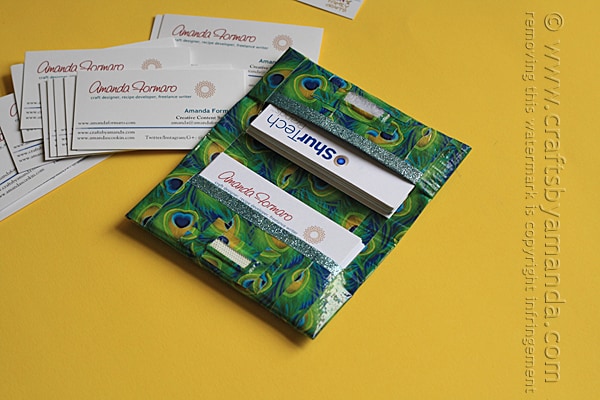
I have a duct tape wallet tutorial on this blog, but it wasn’t exactly what I was looking for. This card holder has two pockets, one for my cards and one for those that I collect. I love to go through other bloggers’ and brand business cards. Some of them are so creative!
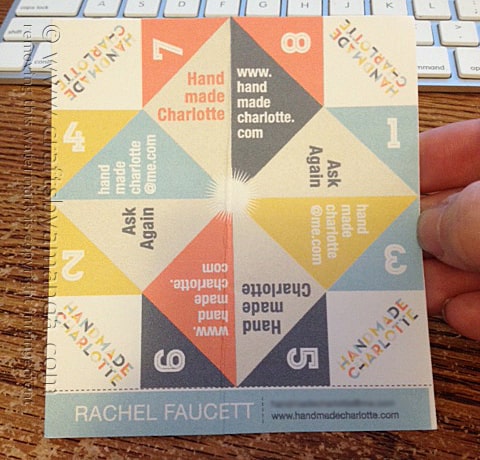
For example, Rachel Faucett from Handmade Charlotte gave me her business card at CHA in January. It wasn’t until I was going through all my cards at home that I realized that her business card was actually a cootie catcher just waiting to be folded and played with! Ha! Love it.
So to get ready for SNAP I decided to use this totally awesome peacock tape I found at Walmart, you might have seen it on Instagram a couple of months ago. I also used the Aqua and Silver glitter craft tape that Duck Brand® sells.
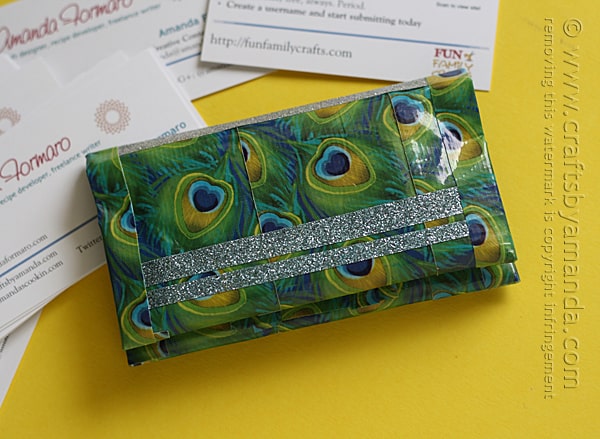
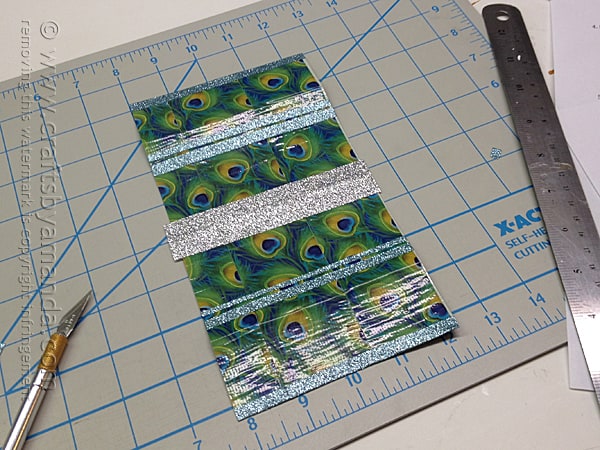
There are some awesome glitter tapes among the Duck Brand Craft Tapes. The glitter tape makes a great accent, but you can’t use it to stick to itself. In other words, you can stick it to other things, like lamp shades, books, frames, etc, but don’t try to make a wallet with it where you have to layer the tapes. As you can see above, it looks cool, but the glitter tape doesn’t stick very well to the glitter tape. It sticks, as you can see, but it keeps coming back up. I called the customer service number that is printed right inside the roll of tape. They told me that because of the texture of the glitter side, the adhesive on the tape is not meant to grab there. They are perfect for projects like I mentioned, or as an accent on traditional Duck Tape. The version above was my first attempt before I realized that it wouldn’t stay stuck. :) So glad they have the phone number in the roll!
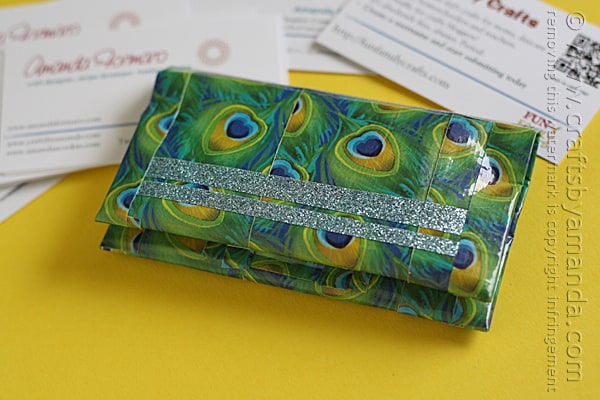
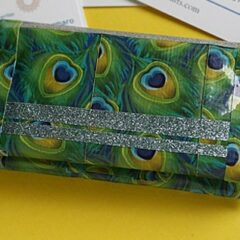
I really love the way this came out! I can’t wait to show it off at SNAP ;-) and any other conference I might attend this year. Here’s how I made it.
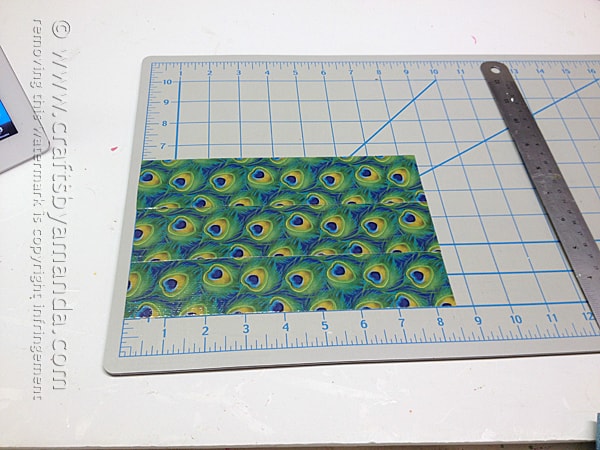
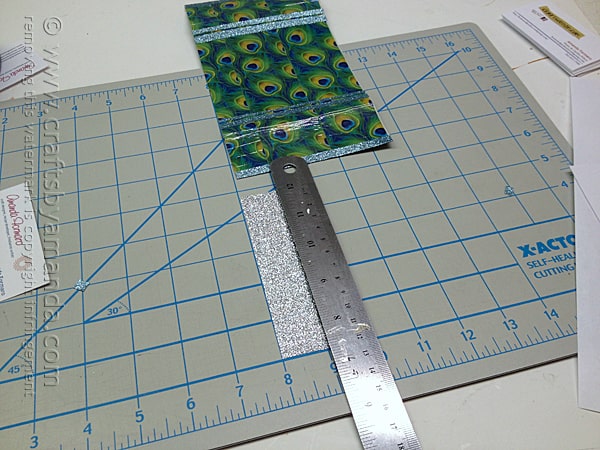
We need to make what is called a fabric sheet. It’s easiest if you use a cutting mat for this. Measure and cut an 8 1/2-inch piece of peacock tape. Measure and cut a second piece the same length and slightly overlap it on the long edge. Stick them together by pressing it with your fingers. Repeat for a fourth strip of tape.

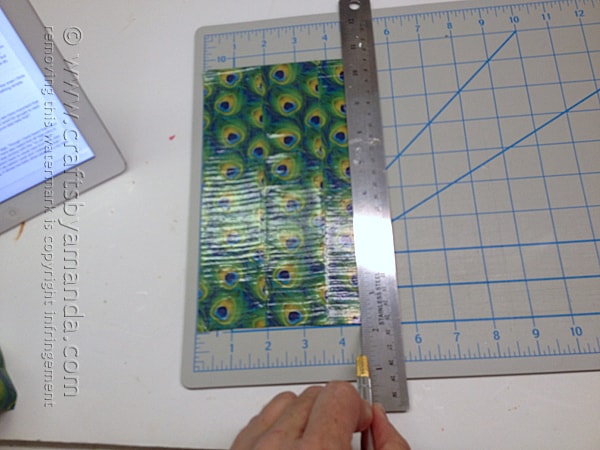
Use your craft knife to lift the corner of the bottom strip and peel it up and off of the cutting mat. Turn the sheet over so that it is sticky side up. Measure and cut another strip of peacock tape the same length as the previous three. Line up the edges with the bottom strip and stick it to the sheet. Repeat with two more strips to make the sheet complete.
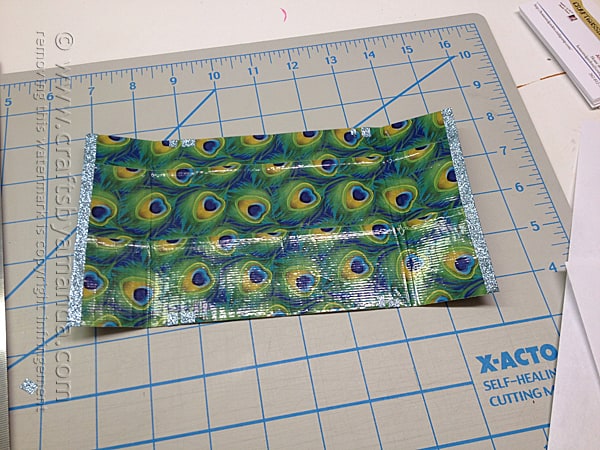
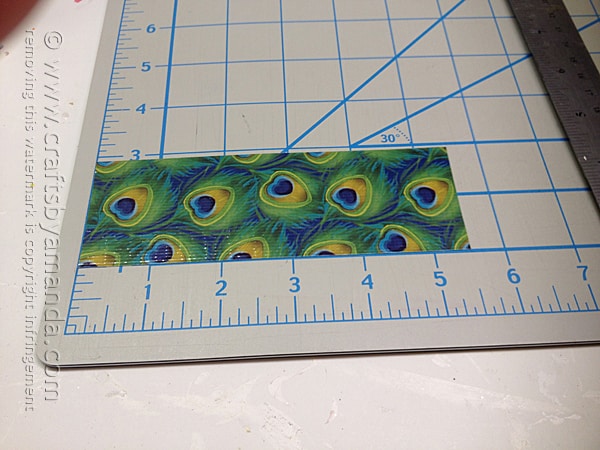
Trim the sheet to measure 4 1/2-inches x 8 1/4-inches.
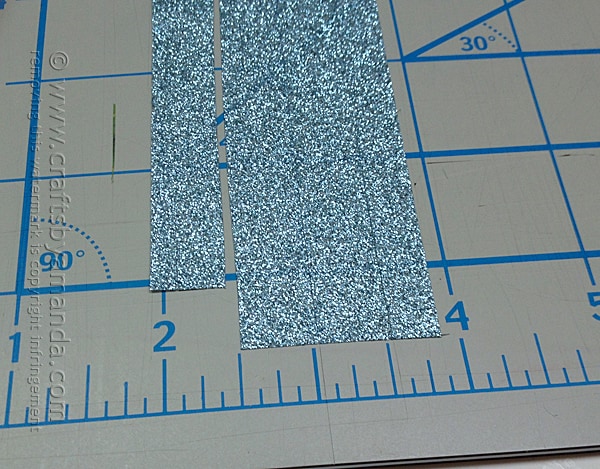
Measure and cut a 5-inch piece of Aqua glitter tape. Cut it into 1/4-inch strips (one will be a little smaller than the others).
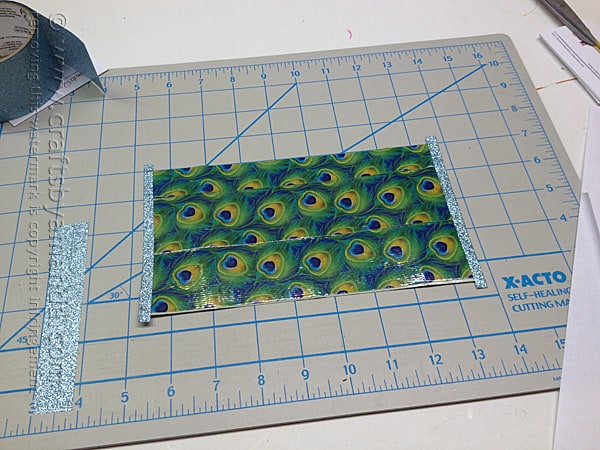
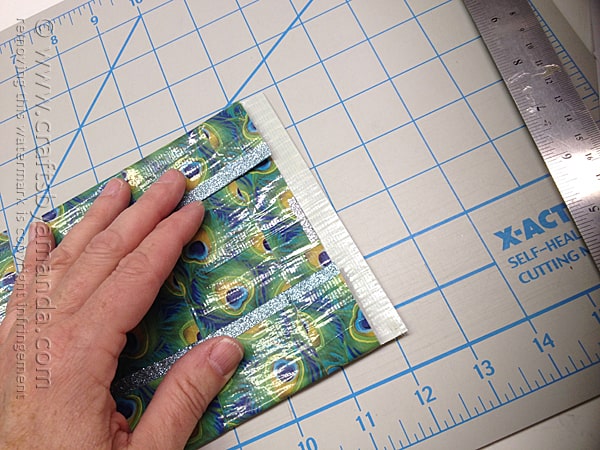
Use two of these strips to cover the short sides of the sheet. Equal amounts of tape should show on both sides, overlapping and creating a clean edge. Trim off the small overlapping edges.
To give this holder its shape, fold the sheet in half and crease it. Open it back up and fold each end up by 1 1/2-inches.
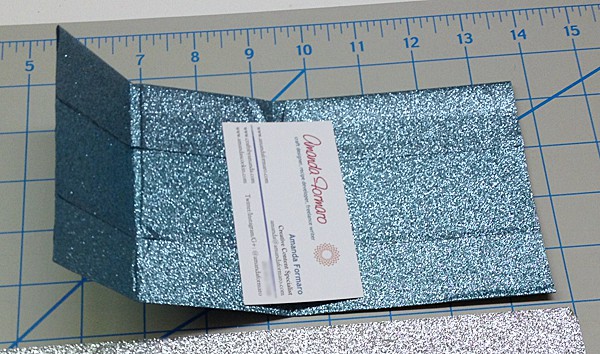
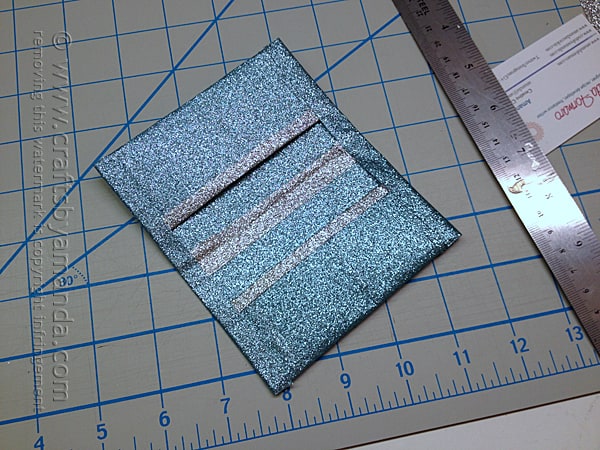
I hope this isn’t confusing. I apparently did not take a picture of this step with the peacock holder, but I did with the other one made from glitter tape. This kind of shows what I’m taking about. We are creating the pockets, which is just the sheet folded upward over the card.

Before we close it all up, we are going to add the glitter stripes. With the sheet folded, turn it over and stick two glitter strips across the sheet. The edges will fold over and won’t be seen because they will be inside the pockets.
Cut a strip of silver glitter tape, 4 1/2-inches long, then cut it in half lengthwise. The final strip will measure 1-inch x 4 1/2-inches.
Stick the silver glitter tape across the center crease of the sheet.
Measure and cut a 5 1/2-inch strip of peacock tape. Cut that strip in half lengthwise.
To close up and complete the holder, turn it over so that the pocket folds are facing up. Be sure that all the glitter strip ends have been folded over and pressed into place. Fold the pockets in place and seal the edges with one of the peacock strip halves. Repeat on the other side. The last step is to attach Velcro enclosures to keep the holder closed. I used self adhesive Velcro and it didn’t hold very well. Therefore I cut small strips of peacock tape and secured the Velcro in place and it worked like a charm!
Hope you enjoyed the project!
Peacock Duck Tape Business Card Holder
Supplies
- Peacock Duck Tape
- Glitter Duck Tape: Aqua and Silver
- 1 set Velcro enclosures
- Craft knife
- Cutting mat
Instructions
- We need to make what is called a fabric sheet. It's easiest if you use a cutting mat for this. Measure and cut an 8 1/2-inch piece of peacock tape. Measure and cut a second piece the same length and slightly overlap it on the long edge. Stick them together by pressing it with your fingers. Repeat for a fourth strip of tape.
- Use your craft knife to lift the corner of the bottom strip and peel it up and off of the cutting mat. Turn the sheet over so that it is sticky side up. Measure and cut another strip of peacock tape the same length as the previous three. Line up the edges with the bottom strip and stick it to the sheet. Repeat with two more strips to make the sheet complete.
- Trim the sheet to measure 4 1/2-inches x 8 1/4-inches.
- Measure and cut a 5-inch piece of Aqua glitter tape. Cut it into 1/4-inch strips (one will be a little smaller than the others).
- Use two of these strips to cover the short sides of the sheet. Equal amounts of tape should show on both sides, overlapping and creating a clean edge. Trim off the small overlapping edges.
- To give this holder its shape, fold the sheet in half and crease it. Open it back up and fold each end up by 1 1/2-inches.
- I hope this isn't confusing. I apparently did not take a picture of this step with the peacock holder, but I did with the other one made from glitter tape. This kind of shows what I'm taking about. We are creating the pockets, which is just the sheet folded upward over the card.
- Before we close it all up, we are going to add the glitter stripes. With the sheet folded, turn it over and stick two glitter strips across the sheet. The edges will fold over and won't be seen because they will be inside the pockets.
- Cut a strip of silver glitter tape, 4 1/2-inches long, then cut it in half lengthwise. The final strip will measure 1-inch x 4 1/2-inches.
- Stick the silver glitter tape across the center crease of the sheet.
- Measure and cut a 5 1/2-inch strip of peacock tape. Cut that strip in half lengthwise.
- To close up and complete the holder, turn it over so that the pocket folds are facing up. Be sure that all the glitter strip ends have been folded over and pressed into place. Fold the pockets in place and seal the edges with one of the peacock strip halves. Repeat on the other side. The last step is to attach Velcro enclosures to keep the holder closed. I used self adhesive Velcro and it didn't hold very well. Therefore I cut small strips of peacock tape and secured the Velcro in place and it worked like a charm!

- Swirling Twirling Ladybugs - July 21, 2026
- Drip Tie Dye Backpack - July 17, 2026
- Mini Coastal Clay Houses - July 14, 2026


Syl says
Never have seen duck tape in peacock. What a fashion statement. Great craft.
BTW, I’d been looking for adult crafts and finally found your site through countrychiccottage.net.
Amanda Formaro says
Great! Glad you found me :) I have a big section of adult crafts https://craftsbyamanda.com/category/craft-tutorials/adult-crafts/
Jerry E. Beuterbaugh says
“Crafts by Amanda” has been included in the Sites To See for this week. Be assured that I hope this helps to point many new visitors in your direction.
http://asthecrackerheadcrumbles.blogspot.com/2014/03/sites-to-see_28.html
Amanda Formaro says
Thanks for the feature!
Randi@Frugelegance says
Love this! I was so amazed the selection of duct tape designs during my last visit to Target. The sky is the limit with these great designs & your terrific card holders. And I love that this is a Frug-Elegant gift to give out too.
Amanda Formaro says
Thanks Randi! This was fun to make, I’ll probably do a checkbook holder next :)