• Home
  • About
    • About Crafts by Amanda
    • Visit Our Recipe Site
  • Work With Us
  • Join
    • Free Newsletters
    • Join our Facebook craft group
↑
  • Tutorials
    • Tutorial Index
    • Adult Crafts
    • Crafts for Kids
    • Crafts for Seniors
    • Recycled Crafts
    • Seasonal Crafts
    • Holiday Crafts
    • Free Printables
    • Craft Collections
  • Adult Crafts
    • Bath & Body
    • Beach Crafts
    • Clay Pot Crafts
    • Crafts for Seniors
    • Decoupage Crafts for Adults
    • DIY Gift ideas
    • Garden Crafts
    • Home Decor Projects
    • Kitchen Crafts
    • Light Bulb Crafts
    • Luminary Crafts
    • Mason Jar Crafts
    • Needlework
    • Photo Display Ideas
    • Recycled Crafts for Adults
    • Wearable Crafts for Adults
  • Crafts for Kids
    • Animal Crafts for Kids
    • Back to School Crafts
    • Beach Crafts for Kids
    • Camp Crafts
    • Cardboard Tube Crafts for Kids
    • Decoupage Crafts for Kids
    • Easy Crafts for Kids
    • Nature Crafts for Kids
    • Other Kid’s Crafts
    • Paper Plate Crafts for Kids
    • Recycled Crafts for Kids
    • Slimes, Doughs, & Clay
    • Wearable Crafts for Kids
  • Holiday Crafts
    • 4th of July Crafts
    • Christmas Crafts
    • DIY Gift ideas
    • Earth Day Crafts
    • Easter Crafts
    • Father’s Day Crafts
    • Halloween Crafts
    • Memorial Day Crafts
    • Mother’s Day Crafts
    • New Year’s
    • Other Holidays
    • Patriot Day Crafts
    • St. Patrick’s Day Crafts
    • Thanksgiving Crafts
    • Valentine’s Day Crafts
  • Seasonal Crafts
    • Winter Crafts
    • Spring Crafts
    • Summer Crafts
    • Fall Crafts
  • Skip to primary navigation
  • Skip to main content
  • Skip to primary sidebar
  • Skip to footer

Crafts by Amanda

crafts for adults and kid's crafts

  • Tutorials
    • Tutorial Index
    • Adult Crafts
    • Crafts for Kids
    • Crafts for Seniors
    • Recycled Crafts
    • Seasonal Crafts
    • Holiday Crafts
    • Free Printables
    • Craft Collections
  • Adult Crafts
    • Bath & Body
    • Beach Crafts
    • Clay Pot Crafts
    • Crafts for Seniors
    • Decoupage Crafts for Adults
    • DIY Gift ideas
    • Garden Crafts
    • Home Decor Projects
    • Kitchen Crafts
    • Light Bulb Crafts
    • Luminary Crafts
    • Mason Jar Crafts
    • Needlework
    • Photo Display Ideas
    • Recycled Crafts for Adults
    • Wearable Crafts for Adults
  • Crafts for Kids
    • Animal Crafts for Kids
    • Back to School Crafts
    • Beach Crafts for Kids
    • Camp Crafts
    • Cardboard Tube Crafts for Kids
    • Decoupage Crafts for Kids
    • Easy Crafts for Kids
    • Nature Crafts for Kids
    • Other Kid’s Crafts
    • Paper Plate Crafts for Kids
    • Recycled Crafts for Kids
    • Slimes, Doughs, & Clay
    • Wearable Crafts for Kids
  • Holiday Crafts
    • 4th of July Crafts
    • Christmas Crafts
    • DIY Gift ideas
    • Earth Day Crafts
    • Easter Crafts
    • Father’s Day Crafts
    • Halloween Crafts
    • Memorial Day Crafts
    • Mother’s Day Crafts
    • New Year’s
    • Other Holidays
    • Patriot Day Crafts
    • St. Patrick’s Day Crafts
    • Thanksgiving Crafts
    • Valentine’s Day Crafts
  • Seasonal Crafts
    • Winter Crafts
    • Spring Crafts
    • Summer Crafts
    • Fall Crafts
Craft Tutorials | Crafts for Kids | Easy Crafts for Kids | Plastic Lid Monsters

Plastic Lid Monsters

Author by Amanda Davis on September 28, 2011 Updated on October 4, 2020

5 from 7 votes
Jump to Project
Plastic Lid Monsters
493 shares
  • Share
  • Tweet
  • Flipboard
  • Email

Plastic Lid Monsters


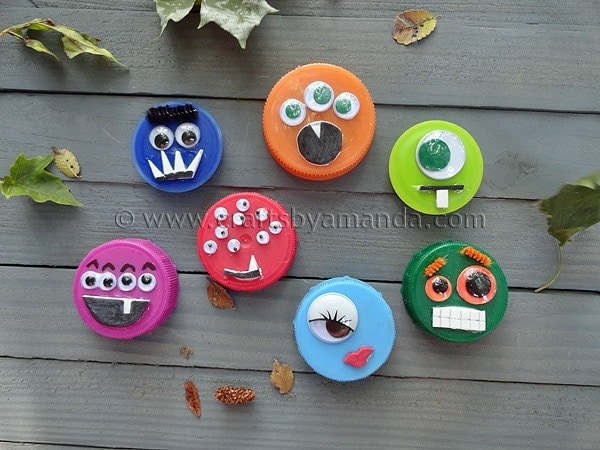
I love, love, love monsters! They are so fun and so dang cute, I mean really.. who could resist such cute faces?? Monsters are certainly great any time of the year, but with Halloween right around the corner this is a great craft to make with your kids. I try to make as many projects as I can using recycled materials, so using up several of my plastic lids made me smile.

You probably remember my plastic lid ladybugs, which were what inspired me to make these little cuties. Of course I’ve posted several monster crafts before, so if you are looking for more projects be sure to check out all my monster craft ideas.

Tip: Keep a container with a lid or a gallon zipper bag to collect plastic lids from milk jugs, orange juice cartons, and other juice containers. Then when it’s craft day, pour the lids out on the table and let the kids decorate them!
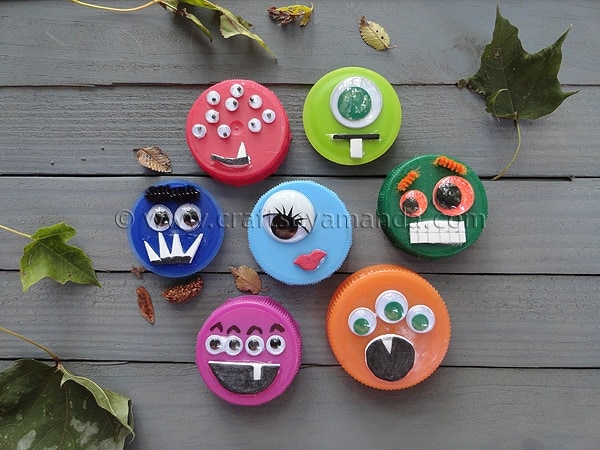
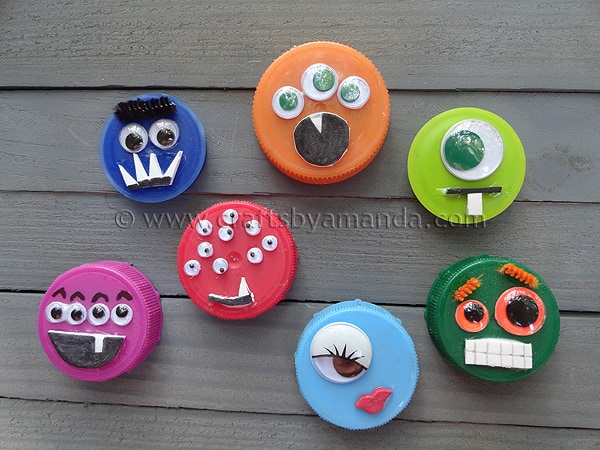
Plastic Lid MonstersI originally made these little monsters for ModernMom.com, they have a fun series called Wednesday Crafternoon. You can find me over their once a month. :)

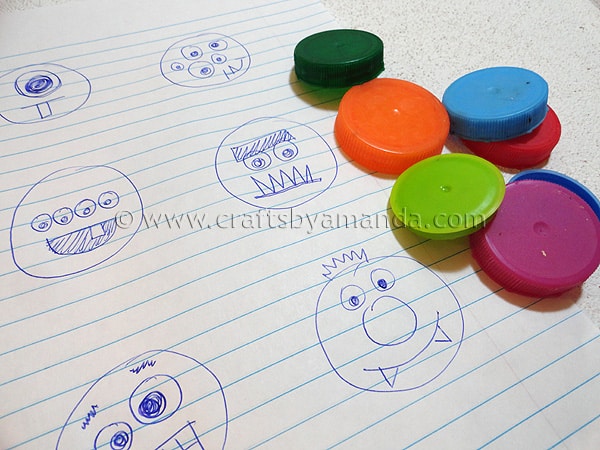
I started by sketching some faces, but you can work willy nilly if you want.

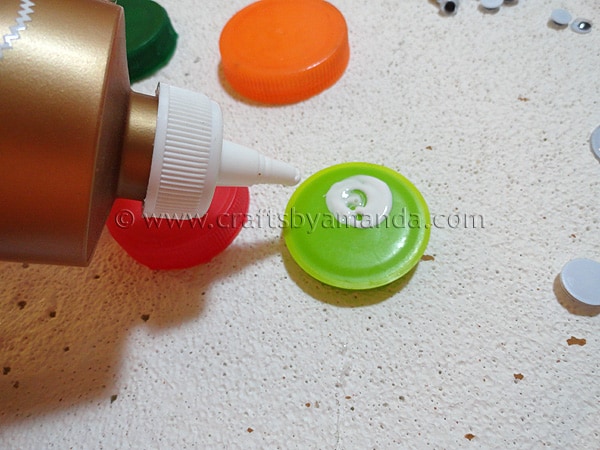
Add the eyes with some white glue first.

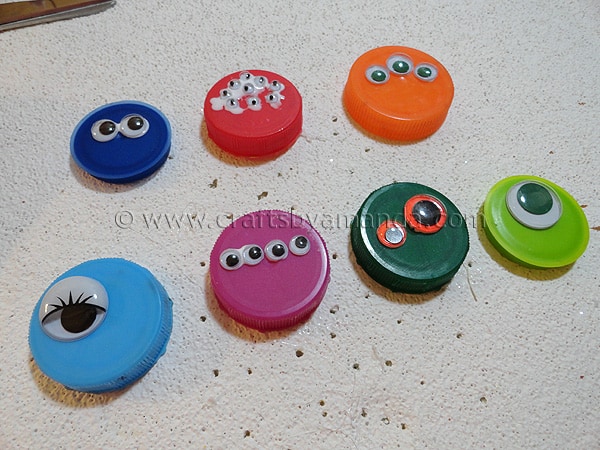
I have several kinds of googly eyes. Some girly ones with eyelashes, some with colored backgrounds, and some with colored pupils.

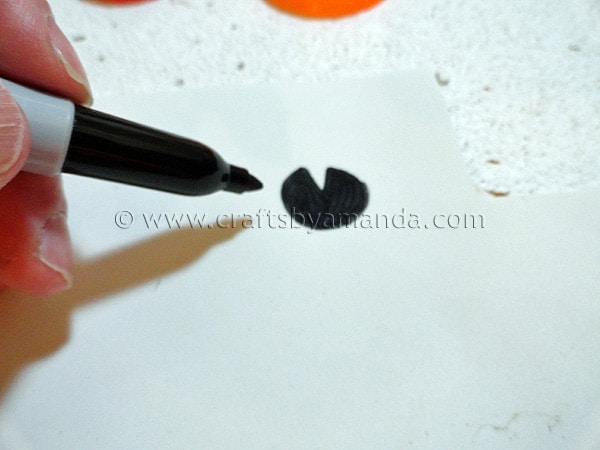
You can draw mouths on white craft foam, leaving the teeth areas white, then just cut them out and glue on.

Plastic Lid Monsters
Print Project
5 from 7 votes

Plastic Lid Monsters

Author: Amanda Formaro

Supplies

Supplies:

  • Plastic lids from milk and juice jugs
  • Googly eyes
  • Craft foam or construction paper
  • Chenille stems optional

Tools:

  • White craft glue
  • Black marker
  • Scissors

Instructions

  • To begin, you'll need your plastic lids and some monster face ideas! I drew a few on paper, but if your kids prefer, they can work off the cuff and create as they go. Just set the supplies in front of them and let them create.
  • Position the eyes first. Once you are happy with their placement, glue them in place.
  • Next create the mouths. You can cut them from craft foam or construction paper and use a black marker to help with lines and teeth.
  • Glue the foam features in place.
  • If you like, you can trim chenille stems into small eyebrows and glue them on as well.
  • For younger children simply glue on wiggle eyes and draw the mouths on with a marker and a white paint pen.

Expert Tips & FAQs

These make cute magnets too! Line the inside of the lid with some white glue then fill it with modeling clay. Use some instant grab glue to attach a circle of thin cardboard to the clay then attach a magnet.

Plastic Lid Monsters


');

  • Author
  • Recent Posts
Amanda Davis
Amanda Davis is the crafty, entrepreneurial mother of four children. She loves to bake, cook, make kid's crafts and create decorative items for her home. She is a crafting expert and guru in the kitchen and has appeared online and in print publications many times over the years.
Latest posts by Amanda Davis (see all)
  • Paper Plate Aquarium Craft - June 17, 2025
  • Patriotic Bandana Wreath - June 13, 2025
  • Ladybug Painted Rocks - June 10, 2025
493 shares
  • Share
  • Tweet
  • Flipboard
  • Email

Filed Under: Easy Crafts for Kids, Halloween Crafts, Other Kid's Crafts, Recycled Crafts for Kids Tagged With: halloween, holidays, kid's crafts, Monster Crafts, plastic lids, recycle, recycle crafts, recycled, recycled crafts

Reader Interactions

Free CraftsBy email every week

Latest crafts straight to your inbox!

Comments

  1. Teresa says

    March 14, 2013 at 3:15 pm

    Do you have a craft for the plastic lids from coffee creamer bottles?
    Thanks.

    Reply
    • Amanda Formaro says

      March 20, 2013 at 7:30 am

      I don’t have one specifically for creamer bottle lids, sorry!

      Reply
  2. Anna @ Bean Bug Crafts says

    October 17, 2012 at 4:52 am

    These are so cute and my little ones are loving working with googly eyes right now.

    Just wanted to let you know that I’ve included your Plastic Lid Monsters in my Halloween Kid Craft round-up. You can find the post here: http://beanbugcrafts.blogspot.com/2012/10/15-halloween-kid-crafts.html

    Thanks,
    Anna

    Reply
    • Amanda says

      October 19, 2012 at 12:11 pm

      Thanks for the feature!

      Reply
  3. jj says

    August 11, 2012 at 7:31 pm

    omg all these cute monsters to make i cant wait to do these projects with my kids great website :-) bookmarking this so i can come back soon

    Reply
    • Amanda says

      August 19, 2012 at 3:39 pm

      Thanks JJ!

      Reply
  4. Sunny (Dianna) says

    February 20, 2012 at 12:29 am

    Hi! How clever are you! love the rededicated milk lids and bread ties! D

    Reply
  5. Candy says

    October 26, 2011 at 6:57 pm

    Such a great idea and a wonderful use for all those leftover peanut butter lids! Thanks so much for sharing!

    Reply
  6. Rebel Crafter says

    October 26, 2011 at 5:49 pm

    My daughter is going to love this idea!

    Reply
  7. Vera says

    October 19, 2011 at 10:09 pm

    Cute! You could glue magnets inside the cap and have adorable fridge magnets!

    Reply
    • Amanda Formaro says

      October 20, 2011 at 7:40 pm

      Thanks Vera! There are actually instructions in the craft if you want to do that!

      Reply
  8. Tabitha says

    October 11, 2011 at 12:49 am

    Hey Amanda! My students made these this past week, and it was a blast! Thanks so much for sharing. Here’s the link to the blog post – Monster Caps in the Classroom

    I’d love for you to check it out! There were some creative ones!

    Reply
    • Amanda Formaro says

      October 11, 2011 at 9:03 pm

      Sooo fun! Thanks so much for sharing that!

      Reply
  9. Amy says

    October 8, 2011 at 6:57 pm

    These are fabulous! I would be so excited if you’d link them here:

    http://oneartmama.blogspot.com/2011/10/fall-craft-challenge-5-kids-craft-or.html

    Reply
  10. Jennie Larsen says

    October 8, 2011 at 3:16 pm

    GOOOOOD Morning this Saturday- I wanted to let you know that your “Talent” was featured over on COM today. xo-winks-jen

    Reply
    • Amanda Formaro says

      October 11, 2011 at 9:05 pm

      Thank you so much for the feature!

      Reply
  11. vivian thiele says

    October 7, 2011 at 10:40 pm

    How stinkin’ cute are these!!!!

    Reply
    • Amanda Formaro says

      October 8, 2011 at 2:59 am

      :)

      Reply
  12. Allison @ House of Hepworths says

    October 7, 2011 at 10:37 pm

    Hey! I featured this today! Check it out here.

    Grab a “featured” if you’d like.

    Have a great weekend!

    xoxo

    Allison @ House of Hepworths

    Reply
    • Amanda Formaro says

      October 8, 2011 at 2:59 am

      Thanks so much!

      Reply
  13. Natasha says

    October 5, 2011 at 2:30 pm

    love these sooooo much, can’t wait to make some. pinning these!

    would love it if you could share this on Serenity Saturday link party over at serenityyou.blogspot.com

    xx

    Reply
    • Amanda Formaro says

      October 7, 2011 at 1:50 pm

      Thanks Natasha!

      Reply
  14. Nikki says

    October 4, 2011 at 7:02 pm

    These are adorable. My dughter would love them! Would love it if you would stop by and share this at my linky party! http://everything-underthemoon.blogspot.com/2011/10/bedazzle-me-monday-2_02.html

    Have a great day!!

    Reply
  15. Erin @ His and Hers says

    October 1, 2011 at 1:19 pm

    Amanda, these are so clever and cute! What a great idea for reusing those lids, and I love the idea of using them for magnets, too.

    Vsiting from TT&J! :)

    Reply
    • Amanda Formaro says

      October 2, 2011 at 4:44 pm

      Thanks so much Erin :)

      Reply
  16. Candace Creations says

    October 1, 2011 at 5:59 am

    Love this! what a fantastic idea so creative and fun. Come link up to scrappy saturdays over at candacecreations.blogspot.com I’d love to see you there!

    Candace

    Reply
    • Amanda Formaro says

      October 2, 2011 at 4:44 pm

      Thanks Candace!

      Reply
  17. Tabitha says

    September 30, 2011 at 12:22 am

    Hey Amanda! I LOVE all your ideas, and most especially that so many involve recycling. Thank you so much for sharing. I’m a teacher and was wanting to create a graphing or some kind of math sheet to go along with this craft. Would it be okay to do that and share in a blog post that gives you credit and links back to this post? Thanks!

    Reply
    • Amanda Formaro says

      September 30, 2011 at 2:24 am

      Hi Tabitha, how fun, thanks for asking. Yes, and please do stop back by and let me know when you do so I can come take a look!

      Reply
  18. Mom to 2 Posh Lil Divas says

    September 29, 2011 at 12:12 pm

    OH, these are sooo fun! We have a monster theme coming up & I am saving this idea!!! Must start collecting bottle caps right away!

    Would love to have you share on the Sunday Showcase – it’s still open!

    Bern
    http://momto2poshlildivas.blogspot.com/search/label/Sunday%20Showcase

    Reply
  19. Kristi @ Creative Connections for Kids says

    September 29, 2011 at 12:03 pm

    Very cute. Wiggly eyes are wonderful! I’m pinning this. Thanks!

    Reply
    • Amanda Formaro says

      September 29, 2011 at 2:43 pm

      Thanks for the pin Kristi! Will checking out your site too, I also own Fun Family Crafts and am always looking for great ideas to feature ;)

      Reply
  20. Yadira says

    September 29, 2011 at 7:45 am

    Thanks for sharing this cute idea. Do you use the finished lids for anything in particular?

    I found this post through Whatever Goes Wednesday at Someday Crafts.

    Reply
    • Amanda Formaro says

      September 29, 2011 at 2:43 pm

      Hi Yadira – these can be made into fun magnets! See the notes in the printable version : )

      Reply
  21. Kami says

    September 29, 2011 at 3:36 am

    So cute! I love the girl kissing one! :)

    Reply
    • Amanda Formaro says

      September 29, 2011 at 2:44 pm

      Thanks Kami!

      Reply
  22. Holly says

    September 28, 2011 at 11:13 pm

    Hey there Amanda…ust finished making a candy corn pin sample for my after-school kids to make next week or perhaps the week after..they look so cute. The crazier the better I guess which brings me to your M O N S T E R S .bbboooooooooooooooooooooo,,,,real cute and yet so easy for the “angels” to make..thanks! Hve a great rest of the week! ~ Holly

    Reply
    • Amanda Formaro says

      September 29, 2011 at 2:44 pm

      Oh the candy corn project sounds so fun! Hope you enjoy making the monsters!

      Reply
  23. Bailey K. says

    September 28, 2011 at 5:35 pm

    wow, i love this so much! the monsters are the cutest. my niece would love these. totally going to make these with her soon!

    i would love for you to come link up this or any other amazing project at my creativity party going on right now!

    letbirdzfly.blogspot.com

    thanks so much for sharing!

    Reply
  24. Lindy@ItsyBitsyPaper says

    September 28, 2011 at 4:10 pm

    Love! I’d be thrilled if you’d link up to my Wickedly Creative Halloween Ideas Party.

    http://www.itsybitsypaperblog.com/2011/09/wickedly-creative-halloween-ideas-linky.html

    Reply
  25. Pamela says

    September 28, 2011 at 3:26 pm

    This is such a great idea. I am going to start collecting lids today, so my boys can make there own monsters. I am just in love with this craft.

    Reply
    • Amanda Formaro says

      September 29, 2011 at 2:45 pm

      How fun, hope you have a blast!

      Reply
  26. Amy says

    September 28, 2011 at 2:04 pm

    These are too fun! What a great idea…and thrifty too. :) My son loooves monsters. We made a monster mirror last week and monster pillows yesterday. He would love this project!

    amy
    oneartmama.blogspot.com

    Reply
    • Amanda Formaro says

      September 29, 2011 at 2:46 pm

      Aren’t monsters the funnest?? Thanks Amy!

      Reply
  27. maggy, red ted art says

    September 28, 2011 at 1:12 pm

    Oooh I love these and so would my son! They would make great fridge magnets too!

    Thank you for sharing on Kids Get Crafty!

    Maggy

    Reply
    • Amanda Formaro says

      September 29, 2011 at 2:49 pm

      Thanks Maggy! Yes there are instructions to make them into magnets in the notes of the printable version :)

      Reply
  28. Stephanie says

    September 28, 2011 at 1:07 pm

    These are super cute! What a great way to reuse lids!

    Reply
    • Amanda Formaro says

      September 28, 2011 at 1:46 pm

      Thanks Stephanie!

      Reply
  29. Katie from Sew Woodsy says

    September 28, 2011 at 12:48 pm

    These are too cute and very creative!

    Reply
    • Amanda Formaro says

      September 28, 2011 at 1:46 pm

      Thank you so much Katie!

      Reply
  30. Emma @sciencesparks says

    September 28, 2011 at 12:35 pm

    WOW!! I love those! Such a simple idea, but so effective. xx

    Reply
    • Amanda Formaro says

      September 28, 2011 at 1:47 pm

      Thanks Emma, glad you like them!

      Reply
  31. Melissa @The Chocolate Muffin Tree says

    September 28, 2011 at 12:31 pm

    Why didn’t I think of this? I have so many lids! Another wonderful idea!

    Reply
    • Amanda Formaro says

      September 28, 2011 at 1:47 pm

      Thanks so much Melissa!

      Reply
5 from 7 votes (1 rating without comment)

Leave a Reply Cancel reply

Your email address will not be published. Required fields are marked *

Rate This Project


The maximum upload file size: 640 MB. You can upload: image, video. Links to YouTube, Facebook, Twitter and other services inserted in the comment text will be automatically embedded. Drop files here

Primary Sidebar

Hi! I’m Amanda and I’m the founder and head designer of Crafts by Amanda. I have spent over 25 years creating projects to share, but it’s not just me anymore! It’s turned into a complete family affair. Come and meet the Creative Team!

Free CraftsBy email every week

Latest crafts straight to your inbox!

All Time Favorites

Learn to make these adorable ladybug painted rocks. use special outdoor paint for this adorable garden craft so you can keep garden ladybugs all summer!

Ladybug Painted Rocks…

These colorful little ladybug painted rocks are the ... Go To project

snowy pinecone candle jar luminaries

Winter Luminaries: Snowy Pinecone…

Make pretty winter luminaries that appear to be covered ... Go To project

Make this wonderful deco mesh pumpkin wreath to hang on your door this fall!

Deco Mesh Pumpkin Wreath…

Adorn your door this fall with a pretty deco mesh ... Go To project

Reuse those empty prescription pill bottles in all sorts of ways. From organizing to making cookies. Yes, cookies! See how to use your empty pill bottles!

20 Uses for Prescription Pill…

You've been collecting prescription pill bottles for ... Go To project

Meet the Family

Amanda

Founder and Designer

Kristen

Editorial Manager

Lindsay

Social Media Manager

As seen on:

Footer

Favorites

  • Jar Photo Frames
  • No-Sew Roman Shade
  • Paper Flowers
  • How to Make a Scrunchie
  • Mermaid Slime

About

  • Home
  • Meet the Creative Team
  • Work with Us
  • Privacy Policy
  • Accessibility
  • Contact Us

Images/text copyright Amanda Formaro 2020. To feature a post from Crafts by Amanda, you may use one photo credited and linked back directly to the project post.

Free CraftsBy email every week

Latest crafts straight to your inbox!

Copyright ©2025, Crafts by Amanda. All Rights Reserved.
Design by Pixel Me Designs

Rate This Tutorial

Your vote:


To share a photo with your comment click here!

A rating is required
A name is required
An email is required

Recipe Ratings without Comment

Something went wrong. Please try again.