
If you’ve been searching for a new budget-friendly, DIY jewelry idea, then popsicle stick bracelets are for you! You can personalize this fun and easy craft with any paper design you like, or make this a kid-friendly project, and let kids decorate the shaped bracelets with paint.

Popsicle Stick Bracelets
I’m in love with these popsicle stick bracelets, it’s one of my favorite crafts for kids! You can pick up a bunch of craft sticks at the store for just a few dollars and dress them up any way you like. Instead of using decorative paper and Modge Podge to create your bracelet, try fabric or paint.
Opt for the jumbo popsicle sticks, which are six-inches long. Shaping the sticks in mini mason jars made the perfect size bracelets for my wrists. You may want to use a measuring tape to be sure the vessel you use to shape the popsicle sticks works for your (or a kid’s) wrist.

What You Need for Popsicle Stick Bracelets

- jumbo popsicle sticks (6-inches long)
- tongs
- mini (8-ounce) mason jars or comparable drinking glasses
- decorative paper
- pencil
- scissors
- mod podge
- paint brush
How to Make Popsicle Stick Bracelets
- First, prepare the paper you will later use to decorate your popsicle sticks. Trace a stick on the back of patterned paper with the pencil. Cut out the shapes and set aside.
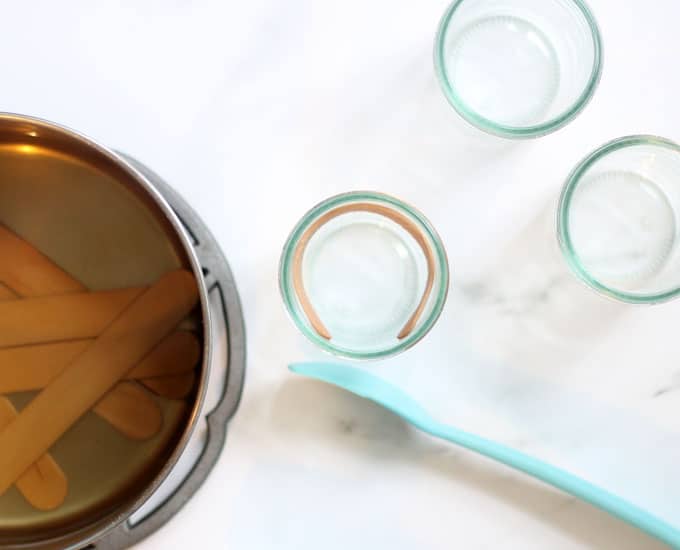
- Next, prepare your popsicle stick bracelets. Place about eight craft sticks in a saucepan of water. Be sure to add plenty of water, as a significant amount will evaporate while boiling. Bring the saucepan of water to a boil. Boil the sticks for 30 minutes.
- Let the sticks sit in the hot water for an additional 15 minutes. Use tongs to remove a stick. Wood does not conduct heat well, so the stick should be easy to handle, but if you find the stick too hot, please use caution and let it cool slightly, or use a towel or gloves to protect your hands.
- Shape the stick into a circle inside a mason jar, positioned at the top of the jar. Let the sticks dry overnight. Note you will likely have one or two sticks break, so just be sure to boil a couple extra.

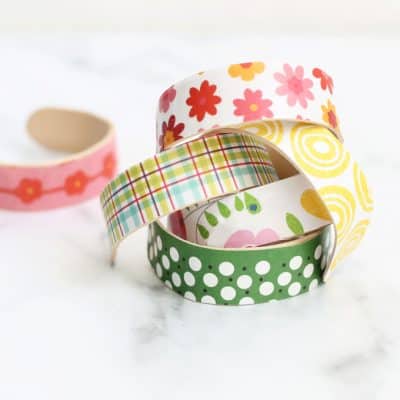
- When the sticks are fully dry and ready to decorate, brush a thin layer of Modge Podge over the outside of the bracelet. Carefully attach one of the paper shapes and smooth. Apply a coat of Modge Podge to the top of the paper. Let dry and apply one to two more coats.

Popsicle stick bracelets are easy to make, inexpensive, and versatile, and a great DIY jewelry craft for grown-ups, kids, and oooh, better yet.. a tween or teen birthday party idea!
If you like this craft idea, check out this no-sew T-shirt bracelet. Find more jewelry ideas in this roundup of 40 crafts for grown-ups, too.
More Jewelry Crafts
- Recycled Denim Beaded Bracelet
- Recycled T-Shirt Bracelets
- Flower T-Shirt Rings
- Safety Pin Bracelets
- Denim Beaded Ring
- Wooden Bead Flower Bracelets
- Dangled Antique Button Earrings
Popsicle Stick Bracelets
Supplies
- jumbo popsicle sticks 6-inches long
- tongs
- mini 8-ounce mason jars or comparable drinking glasses
- decorative paper
- pencil
- scissors
- modge podge
- paint brush
Instructions
- First, prepare the paper you will later use to decorate your popsicle sticks. Trace a stick on the back of patterned paper with the pencil. Cut out the shapes and set aside.
- Next, prepare your popsicle stick bracelets. Place about eight craft sticks in a sauce pan of water. Be sure to add plenty of water, as a significant amount will evaporate while boiling. Bring the sauce pan of water to a boil. Boil the sticks for 30 minutes. Let the sticks sit in the hot water for an additional 15 minutes. Use tongs to remove a stick. Wood does not conduct heat well, so the stick should be easy to handle, but if you find the stick too hot, please use caution and let it cool slightly, or use a towel or gloves to protect your hands. Shape the stick into a circle inside a mason jar, positioned at the top of the jar. Let the sticks dry overnight. Note you will likely have one or two sticks break, so just be sure to boil a couple extra.
- When the sticks are fully dry and ready to decorate, brush a thin layer of Modge Podge over the outside of the bracelet. Carefully attach one of the paper shapes and smooth. Apply a coat of Modge Podge to the top of the paper. Let dry and apply one to two more coats.
This post originally appeared here on May 7, 2018.

- Paper Plate Watermelon Suncatchers - July 7, 2026
- Mason Jar Lid Snowman - January 2, 2026
- Popsicle Stick Bracelets - August 19, 2025


Ina Nienaber says
Wow! wow! Wow!! I’ve got a lot of very poor kids (some of them mentally poor as well) in my Sunday School class. This is an easy project for them and I believe everybody can follow this with a little help from me. Thank you so much Meaghan! I look forward in exploring everything you have posted. Be blessed! Ina
Amanda Formaro says
Wonderful! Thanks so much for leaving such a kind comment, hope you have fun!
Chachi says
What does poor have to do with anything?
Kids Crafts by Three Sisters says
This is one of our favorite things to do! Great post.