
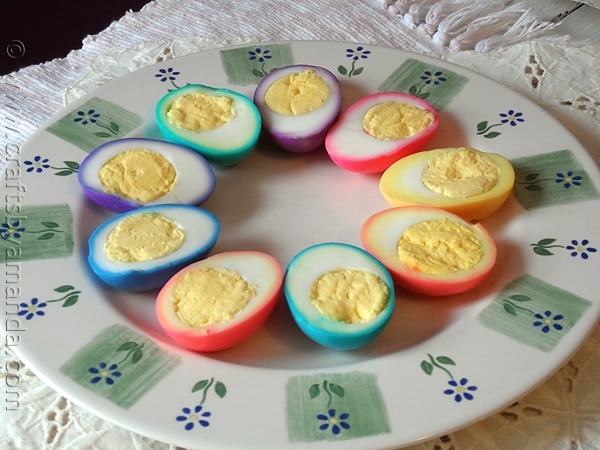
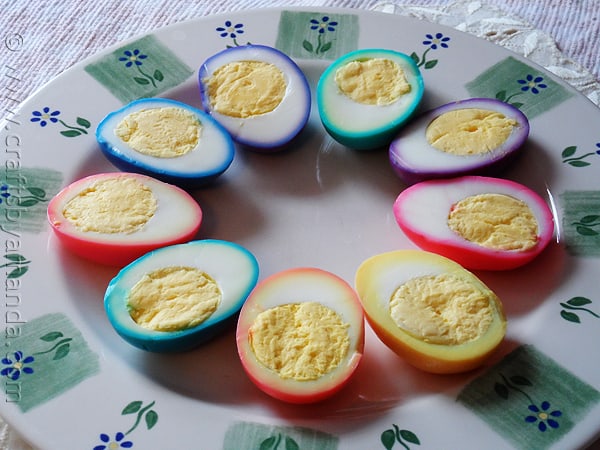
Usually when you think of colored Easter eggs, it involves boiling them first and then dyeing the outer shells. Of course, once you peel the eggs, the fun is gone and you are left with a plain white boiled egg. This year, peel the eggs first and then dye them to create a rainbow of colored Easter eggs that kids and adults will love!

I originally made these pretty eggs for my Chicago Tribune column. I’ve actually been wanting to experiment with these for a while after trying pickled beet eggs.
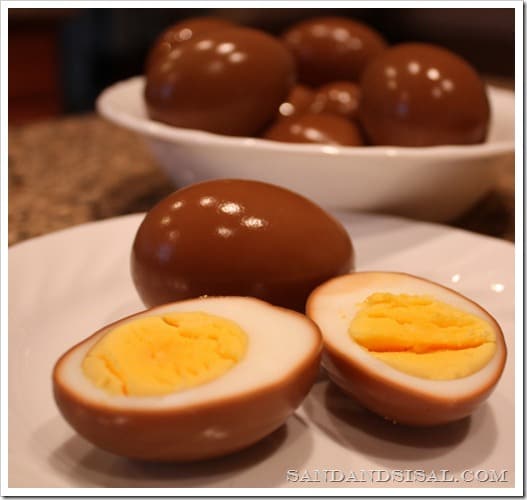
I also write articles for Home Made Simple and they needed a picked beet egg recipe. When you make them, you peel them first and soak them in a colored water and vinegar mixture that is a deep purple, made so by the beets. I loved the idea of creating the same beautiful ring around my eggs, but wanted to do it with different colors. I wasn’t really sure if regular food coloring would do the trick.
I searched, but never really found anything quite like it. I came across several posts where the boiled eggs are cut in half, yolks are carefully removed, and the whites are soaked to make the entire yolk a solid color. While I had the idea already in my head and wanted to try it, it was when I saw Kim’s football eggs that I knew it would work.
This method does not require vinegar, nor does it require gel/paste food coloring. You can use simple liquid food coloring for this. The colored Easter eggs you see in this post were made with regular liquid food coloring. You can certainly use paste/gel food coloring as well, but it’s more trouble trying to get the gel to dissolve in the water, and the color is no more vibrant than my method. Trust me, I tried several different ways and went through 3 dozen eggs to get the desired results!
Ready?
First off, cook your eggs and peel them right away. I have found that the best way is to place the eggs in a saucepan, cover with water and bring to a boil. Boil for 3 minutes, turn off heat, cover and let stand for 12 minutes. Remove the lid and run TEPID water over them for several minutes to cool them off. I don’t use cold water because it tends to “tighten” the shell around the cooked egg, whereas tepid water does not. Peel right away, but don’t cut the eggs.
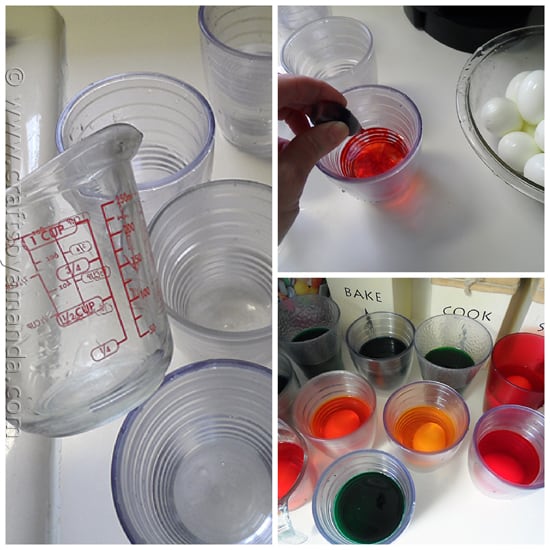
You will need a mug or short drinking glass for each color you wish to use. You can follow color mixing suggestions on the back of your food coloring box, or use the suggestions below. You can also make your own, just keep in mind you will need 20 drops of food coloring to 1/2 cup cold water:
Color variations:
Follow the suggestions below or mix up your own. And of course, use the colors on their own for the basic colors (red, blue, green, yellow).
Orange: 17 drops yellow, 3 drops red
Purple: 15 drops blue, 5 drops red
Grape: 12 drops blue, 8 drops red
Teal: 15 drops green, 5 drops blue
Pink berry: 14 drops red, 6 drops blue
Yellow-green: 14 drops green, 6 drops yellow
Drop an egg into each cup and let sit for two hours. You can place them in the refrigerator if you like.
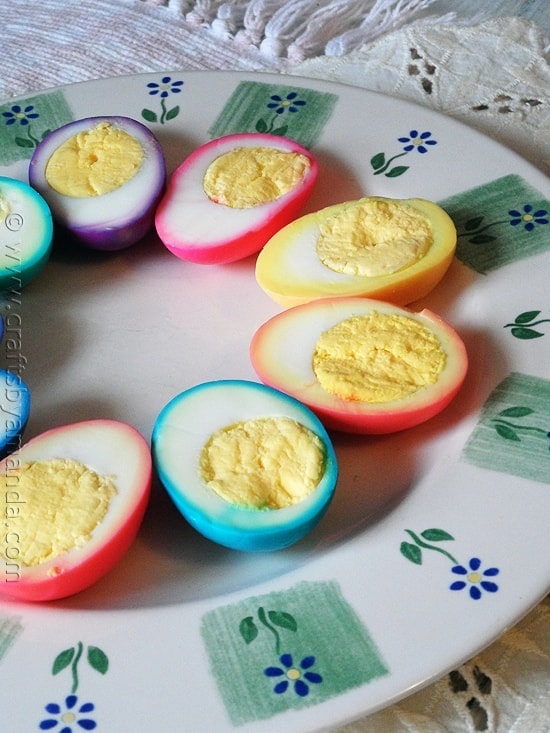
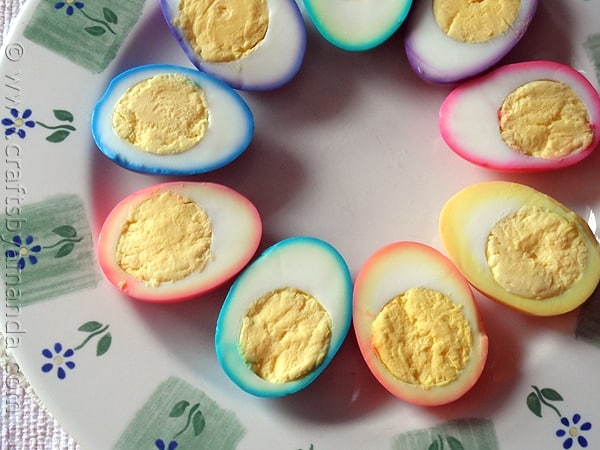
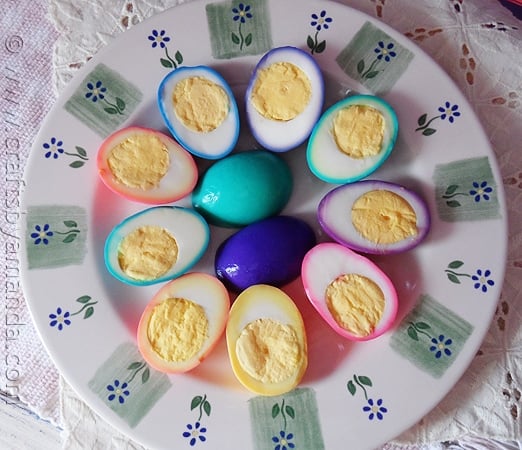
Remove the egg from the colored water and rinse it off. Now you can slice it in half to reveal the beautiful rings around the whites of the cooked egg!
And, just in case you are wondering how these would look at deviled eggs or egg salad… :)

Rainbow Colored Easter Eggs
Supplies
- Food coloring
- Eggs
- Water
- Cups or mugs
Instructions
- Place eggs in a saucepan and cover with water. Once water comes to a boil, continue to boil for 3 minutes then remove from heat and cover the pan. Let sit, covered and undisturbed for 12 minutes. Run tepid (not cold) water over the eggs until they can be handled. Cold water can make the eggs tighten and harder to peel. Peel shells off the eggs.
- Mix 20 drops of food coloring with ½ cup water in a mug or small cup. Place egg into colored water and allow them to sit for two hours. Remove eggs from the colored water and rinse well. Slice in half to reveal the beautiful rings around the whites of the cooked egg!
Expert Tips & FAQs
A package of food coloring comes with red, green, blue and yellow. Below are some combinations you can try to make different shades: Orange = 17 yellow, 3 red
Purple = 15 blue, 5 red
Teal = 15 green, 5 blue
Pink Berry = 14 red, 6 blue
Yellow Green = 14 green, 6 yellow
- Mini Coastal Clay Houses - July 14, 2026
- DIY Mosquito Repellent Candles - July 10, 2026
- Mason Jar Solar Lights - July 3, 2026


Christine Kelly says
I followed the directions just as you said the only color that turned out was the purple. The teal and berry pink was nothing ! No color.
Amanda Davis says
I’m sorry you had trouble! And you let them sit for 2 hours in the color?
Melanie Slater says
wondering what you mixed in with the yolks?, im doing a unicorn themed party for my daughter, and thought egg mayo sandwiches would be fun in colours, but saw your pick of the coloured eggs salad and thought i could do that as the filling, just need to know what you used? was it mayo? x
Amanda Formaro says
Yes just mayo! :)
belinda oliver says
I love your color’s, will use some of them for my Woodstock Party this July 2015. I wanted to let you know, I make these every holiday, (green n red) Christmas, Purple Yellow n Pink(Easter) ETC. However, I shell the egg, cut it in half, remove the yolk, dip the whole halves, then fill with Deviled Egg filling! I live for food coloring,LOL
Amanda Formaro says
Hi Belinda! Yes, I’ve seen that method before :) Cool!
Melrose says
Coloring went well but not peeling tho did just you instructed. Made no difference the eggs did not peel good at all.
kelli says
Can you soak more than one egg if you are making a lot for a party? I was going to only do two colors red and green.
Amanda Formaro says
Hi Kelli. Yes, that should be fine, you might want to increase the food coloring a little bit, maybe a drop or two!
Jen says
I want to do 18 eggs ideally in one large bowl. Any suggestions on how much water and how much food coloring to use?
Amanda Formaro says
Hi Jen. The instructions call for 20 drops of food coloring to 1/2 cup cold water. So I would just say follow that formula and use enough water to cover the eggs completely :)
Ann Barlow says
A couple of things: We cut the eggs and took the yolks out before we colored them so there would not be a white top. We also used koolaide to color them because it makes way brighter colors (works for unpeeled eggs also)… Just use 2/3 cup room temperature water to a packet of dry (not sugarless) koolaid powder. You DO NOT need to let them sit in this solution for 2 hours. It will color quickly and brightly.
Amanda Formaro says
Hi Ann :) Yes, taking the yolks out first is a method that’s been around for a while. I wanted them to still be while and have bright colored rims. That’s why I did mine this way instead. I have heard about the Kool Aid method, very cool. Doesn’t it make them taste unusual though? Hope you had a great Easter!
Ellen says
Fun!! The kids will love this! TFS
daniel says
I’m trying this out now. Do I ommit the food coloring instruction of using vinegar (just use water??)
thanks
Amanda Formaro says
Yes, just water :) Just follow the instructions as written in the post and you’ll be fine!
Victoria says
Such a cool idea! I’m always stuck with a bunch of eggs that nobody wants to eat when easter is over.
I’m sure if I prepare them this way they’ll be delicious and festive deviled eggs! (and no leftovers)
thanks for the idea!
Charlotte O'Bryan says
Tried these today with grand-daughter. Turned out beautifully except it took forever for the eggs to dry after using the food color. Even 5 hours later the dye was coming off on the serving plate. What did we do wrong, any suggestions?
Amanda Formaro says
I’m not sure Charlotte, I didn’t have that problem :-( I drained my on paper towels if that helps!
Donnmaria says
I’m glad you sent me this. It will definitely be something differerent for my grandkids this year. I think this will be a nice surprise. I raise chickens and can tell them the chicken laid these eggs special just for Easter. lol!
Angie @ Big Bear's Wife says
They turned out so cute!!! YAY!!!
Diane says
The eggs look so pretty. Going to try the eggs with my grandson Aidan. Bet he would like them too. It’s so different and pretty.
Onalee says
Those are incredible and perfect for the Easter table. I can see doing this with appropriate colors for each holiday in the upcoming year! Thank-you so much for your instructions!
Lana @ Never Enough Thyme says
Now that’s different! And soooo pretty!
jessica@fourgenerationsoneroof says
I love eggs this way :)
Shannon @Fox Hollow Cottage says
Love them! These are the cutest deviled eggs. Adorable :)))
Kim @ Sand & Sisal says
Thanks for the shout out! Your rainbow eggs look fun to eat!