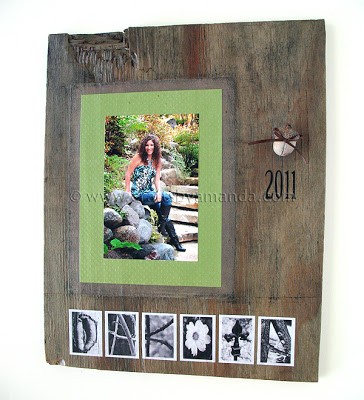
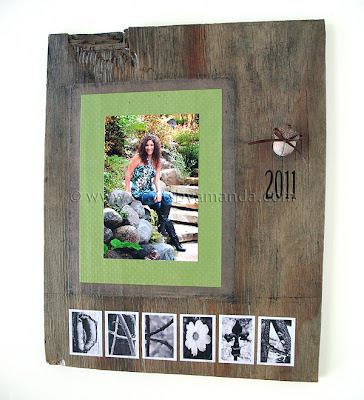
My daughter is a Junior in high school this year, but my best friend’s daughter is a Senior. I wanted to create a gift for her that would be special and beautiful and be cherished forever. Senior pictures have changed so much over the years. They are truly beautiful portraits that need to be displayed in a unique way. I did this one with decoupage.
Now let me tell you about the project that I did. I can’t wait to make more, I have so many ideas swirling through my head! When my daughter saw the finished project, she swooned over it and asked if I would make one for her Senior pictures next year. :)
I’m afraid I didn’t take any step by step photos this time, but I can tell you what I did.
Senior Portrait Photo Display
Instructions
- The only thing I did was give the wood a couple coats of light stain and wiped the excess off.
- First I painted an even layer of decoupage medium (I used DecoArt’s new Decoupage) onto the back of the green card stock and attached it to the brown, making sure it was straight and there were no air bubbles.
- Then I did the same thing with the photo, again making sure there were no bubbles after pressing it onto the green card stock. I allowed those to dry for a good half an hour before moving on.
- I printed my alphabet letters onto regular printer paper, reducing the size to 30%. After printing, I gave both sides of the paper a good coating of acrylic sealer spray (I used Americana) and allowed that to dry. This seals the paper and won’t let any of your ink bleed when you add the decoupage medium. I used a ruler to figure out where to place the letter, then painted an even layer on the back of each letter and gently but firmly rubbed them and pressed them in to place. I let that dry for half an hour.
- Meanwhile, I used my Silhouette to create a stencil for the “2011”. I used stencil paint since it’s much thicker than regular acrylic paint and much less likely to seep under your stencil. I used Decoart’s black Stencil Paint and a stiff paintbrush to apply the numbers. When stenciling,you load your brush then blot on a paper towel to remove as much excess paint as you can. You almost want it to be dry, but have enough paint to actually apply to your surface.
- Next I applied the photo that I attached to the matte earlier onto the actual board using the same method. Apply an even coat of decoupage medium to the back of brown paper and press firmly to apply it to the board. I let that dry for half an hour.
- Next I used a large soft paintbrush to apply a generous (but not dripping) coat of decoupage over the entire surface, including the sides. That I allowed to dry overnight, but truly it only needs a few hours.
- Lastly I hammered a sawtooth hanger to the back of the board and used Gorilla super glue to attach the acorn to the board above the stenciled numbers. I embellished the acorn with a piece of ribbon.
Did you enjoy this post? Why not subscribe to my feed, or better yet, to my free newsletter – Foodie in the Craftroom, which provides not only crafts but recipes from my other blog, Amanda’s Cookin’ as well!
- Scratch Off Valentine Gift Certificates - January 28, 2025
- 30+ Organization Ideas and Tips - January 14, 2025
- Makeover: Plastic Storage Drawers - January 3, 2025


Kim says
Do you do special orders??? :)
Amanda Formaro says
I used to Kim, but not anymore. Sorry!
Cheryl S. says
Love it! Where did you get the photographic letters?
Amanda says
Hi Cheryl! It says in the second paragraph of the post, there’s a link there. Here it is! http://www.buyalphabetphotos.com/
Jen says
I love it! What a creative memory for whoever you make it for.
Alison @ mommadidit.blogspot.com says
What a beautiful way to present such a special occasion! Love it!
Nikki says
Really nice idea, it looks like the kind of thing you would buy in an expensive gift shop.
Kim B says
great project idea
kayla says
Very cute project for graduation!!