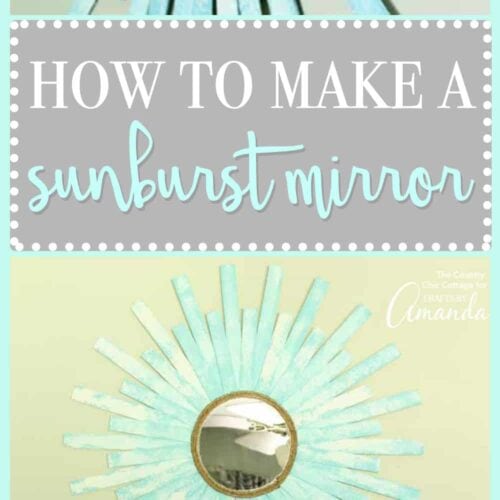
I love a good coastal themed craft and this DIY sunburst mirror surely lives up to it’s potential. This coastal wall art uses only a few supplies and makes a beautiful statement piece that will be ready in no time.
Don’t you think this sunburst mirror would compliment these beach signs hanging in a coastal themed bathroom or room? Pick the colors that will work best with your home’s decor and get started on this awesome mirror today!

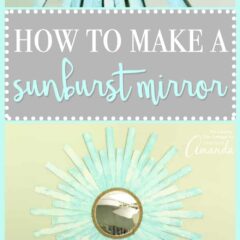
Beach Sunburst Mirror
Don’t you just love sunburst mirrors? They add elegance to any room, and there are so many different crafty ways to create them. This particular sunburst mirror requires few tools and is easier than you would imagine!
The detail on this coastal sunburst mirror is achieved by creating “peaks and valleys” with a palette knife. Find out more below!
Related: Want more ideas for your coastal decor? Try this DIY beach themed wreath or this beach themed shadowbox.

Supplies to make a starburst mirror:
- Wood shims in two lengths (available at your local home improvement store)
- Mirror
- Wood plate (approximately the size of your mirror)
- Coastal Paint
- Palette knives
- Rope
- Hot glue and glue gun

How to make a sunburst mirror:
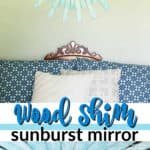
- Start by painting your wood shims with the coastal paint. That texture is achieved through the thickness of this paint. Apply the teal color first with a palette knife. Lift slightly with the back of your knife on the surface to create peaks and valleys. Set aside and allow to dry.
- Once almost dry, smear on white paint with a palette knife. Do not cover all of the teal with the white. Leave gaps in the paint.
- Again you will want to lift with the back of the palette knife to create those peaks and valleys. Set aside and allow to dry completely.

- Repeat for as many shims as you need to go around your mirror. Dry fit everything together to ensure that you have painted enough.
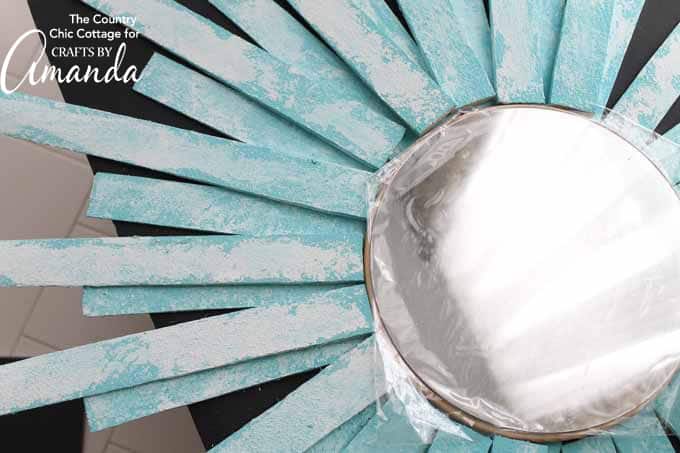
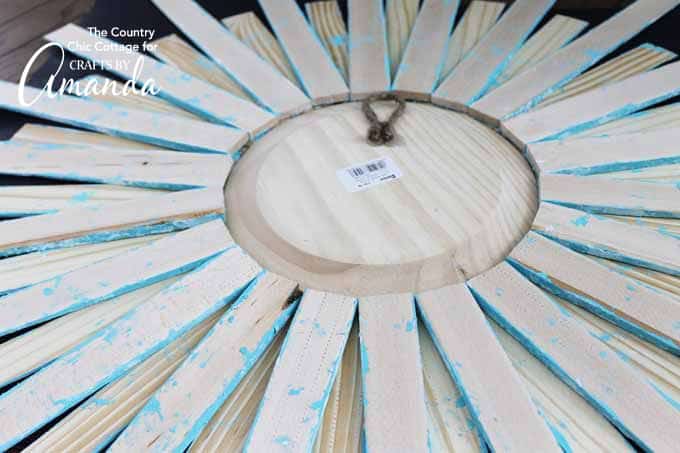
- Once everything is completely dry, start with the shorter shims and turn everything over to the back side. Use hot glue to secure the shims around the outer edge of the plate.
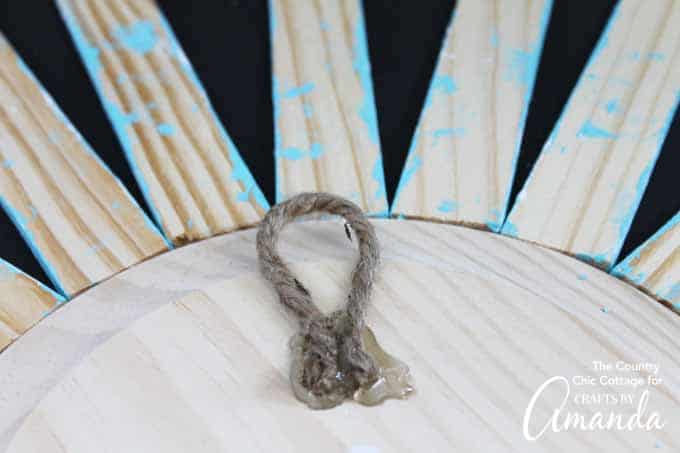
- You will also want to add a short piece of rope as a hook to the back of your project.
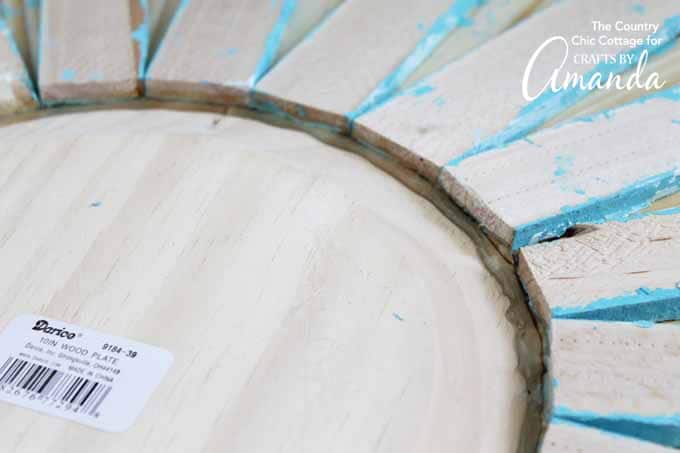
- Add the longer shims to the mirror in each gap created by the shorter shims. Again use hot glue to secure.
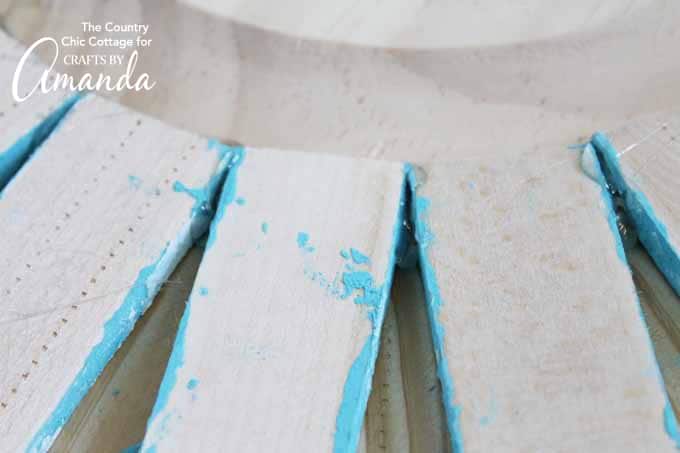
- Use extra glue to secure everything into place. I went all the way around the inside edge.
- I also added hot glue between each of the longer shims as shown below.
- Once your hot glue has cooled, flip your project around to the front.

- Hot glue your mirror into place and start adding rope around the outer edge.

Add as much rope as you’d like and your pretty sunburst mirror is ready to hang in your home!

You will love this inexpensive project and how great it looks in your home. Grab your supplies and get started on your own version. Experiment with the coastal paint on a few extra shims to get the hang of the product and creating the peaks and valleys we talked about.
For another similar beach inspired craft, be sure to check out this beach flag made from paint sticks! A cheap DIY home decor project that looks great in a coastal themed bathroom, bedroom, or home! For more rustic elegance you’ll want to see how to make a burlap wreath. This wreath adds a lovely touch of charm to your front door!
Beach Starburst Mirror
Supplies
- Wood shims in two lengths available at your local home improvement store
- Mirror
- Wood plate approximately the size of your mirror
- Coastal Paint
- Palette knives
- Rope
- Hot glue and glue gun
Instructions
- Start by painting your wood shims with the coastal paint. That texture is achieved through the thickness of this paint. Apply the teal first with a palette knife. Lift slightly with the back of the knife on the surface to create peaks and valleys. Set aside and allow to dry.
- Once almost dry, smear on white with a palette knife. Do not cover all of the teal with the white. Leave gaps in the paint
- Again you will want to lift with the back of the palette knife to create those peaks and valleys. Set aside and allow to dry completely.
- Repeat for as many shims as you need to go around your mirror. Dry fit everything together to ensure that you have painted enough.
- Once everything is completely dry, start with the shorter shims and turn everything over to the back side. Use hot glue to secure the shims around the outer edge of the plate.
- You will also want to add a short piece of rope as a hook to the back of your project.
- Add the longer shims to the mirror in each gap created by the shorter shims. Again use hot glue to secure.
- Use extra glue to secure everything into place. I went all the way around the inside edge.
- I also added hot glue between each of the longer shims.
- Once your hot glue has cooled, flip your project around to the front.
- Hot glue your mirror into place and start adding rope around the outer edge.
- Add as much rope as you like and then your beach starburst mirror is ready to hang in your home!
This post originally appeared here on Jul 12, 2017.
- Mason Jar Bird Feeder - January 9, 2026
- Fall Mason Jars - September 16, 2025
- Burlap Stenciled Pillow Covers - May 16, 2025


Lisa says
if I did, I’d do exactly what you have done. They are so fun and such a great pop of color against the white walls. And if you get bored, you can just rip it off and start over! Visiting from Redo It Yourself Inspiration party.
Jessi @ Practically Functional says
I love this mirror Angie! And the color is perfect!
I just wanted to let you know that you were featured as a Rockstar at last week’s Creativity Unleashed party! Congrats, and thanks for sharing at our party! http://www.practicallyfunctional.com/creativity-unleashed-183
Kathleen Rupp says
That is adorable! definitely caught my eye at the linky party! Thanks so much for the great tutorial. Glad I found your site.
Kathleen Rupp says
Sorry …didn’t see the rating I was supposed to fill out until I clicked post comment!
w says
I’ve been wanting to make one of these for a while now for my Florida beach condo. But I love the paint technique you used. Just love it!!! Thanks for sharing.
Rebecca says
What a great idea! Thank you for sharing!
Julie says
So pretty, I love that textures paint effect.