
Each year around early November we start thinking about all of the things we are thankful for. Teaching kids about being thankful (and reminding adults!) is an easy task when you have something fun and interactive like this thankful tree you can make at home. It’s a fun and easy craft for kids and makes a great conversation starter for Thanksgiving family get-togethers.
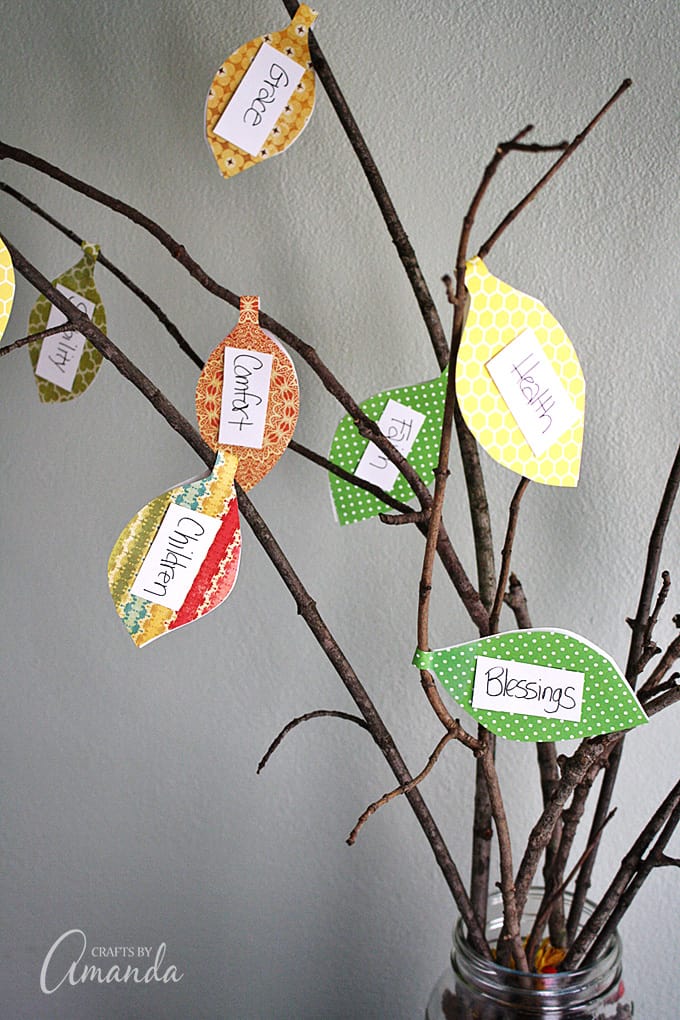
Make a Thankful Tree
Making a thankful tree during the Thanksgiving season is easy to do and makes a great project to involve the kids in. Your thankful tree also serves as lovely decor for your home during the holidays.
RELATED: Dress up your Thanksgiving Table with these super easy Painted Acorns!

Fall is a great time to enjoy the outdoors before the snow begins to fly. So get the kids and head outside to collect fallen branches and pinecones to make this project.
Supplies you will need:
- Large mason jar
- Pinecones
- Dried flowers, foliage or other floral sprigs
- Faux berries
- Branches
- Scrapbook paper
- White card stock
- Fine tip pen
- Clear tape

Drop a couple of large pinecones into the jar. Arrange branches in the jar until you are happy with how it looks.

Fill gaps in between the pinecones and branches by dropping faux berries and dried florals into the jar.

When you are happy with the arrangement you can begin making the leaves.

Fold scrapbook paper in half. Beginning at the folded edge, cut out a simple leaf shape, creating a small tab at the fold to hang the leaf from.
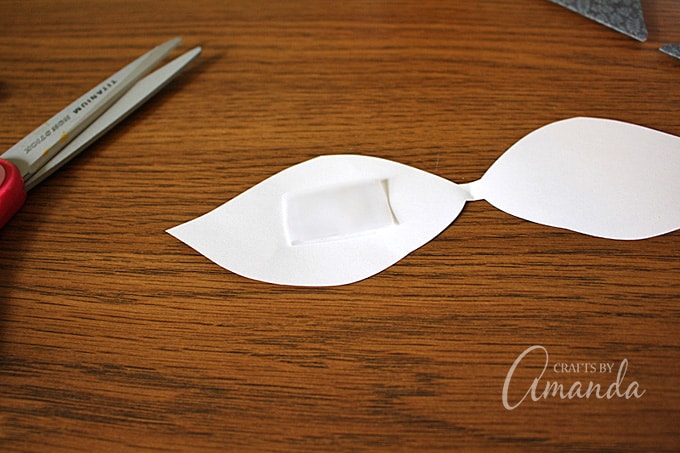
Roll a piece of tape, sticky side out, and place it on one side of the leaf on the back side of the paper.

Place the “tab” of the leaf on the branch and stick the two sides of the leaf together with the tape.

Cut cardstock into rectangles that will fit onto your leaf shapes. Use a fine tip pen to write words that remind us of what we are thankful for.

Stick the white cardstock words to the leaves.
Here are some more thankful ideas you can make:
- Meal Time Thankful Notes – Beauty Through Imperfection
- Thankful Printable Cards – Shabby Creek Cottage
- Thankful Jar – Smashed Peas and Carrots
Don’t miss our entire Thanksgiving craft ideas section where you’ll find fun ideas like these construction paper tee pees and this deco mesh pumpkin wreath. Happy Thanksgiving!

Thankful Tree for Thanksgiving
Supplies
- Large mason jar
- Pinecones
- Dried flowers foliage or other floral sprigs
- Faux berries
- Branches
- Scrapbook paper
- White card stock
- Fine tip pen
- Clear tape
Instructions
- Drop a couple of large pinecones into the jar. Arrange branches in the jar until you are happy with how it looks.
- Fill gaps in between the pinecones and branches by dropping faux berries and dried florals into the jar.
- When you are happy with the arrangement you can begin making the leaves.
- Fold scrapbook paper in half. Beginning at the folded edge, cut out a simple leaf shape, creating a small tab at the fold to hang the leaf from.
- Roll a piece of tape, sticky side out, and place it on one side of the leaf on the back side of the paper.
- Place the “tab” of the leaf on the branch and stick the two sides of the leaf together with the tape.
- Cut cardstock into rectangles that will fit onto your leaf shapes. Use a fine tip pen to write words that remind us of what we are thankful for.
- Stick the white cardstock words to the leaves.

- DIY Mosquito Repellent Candles - July 10, 2026
- Mason Jar Solar Lights - July 3, 2026
- Patriotic Pinwheels - June 23, 2026


Tia says
Very Creative! I’ll try this with my residents for a fall project.
Diana Lopes says
What a creative idea! This thankful tree looks super adorable and lovely. Thanks for sharing the details!
Amanda Formaro says
Thank you, Diana! :)