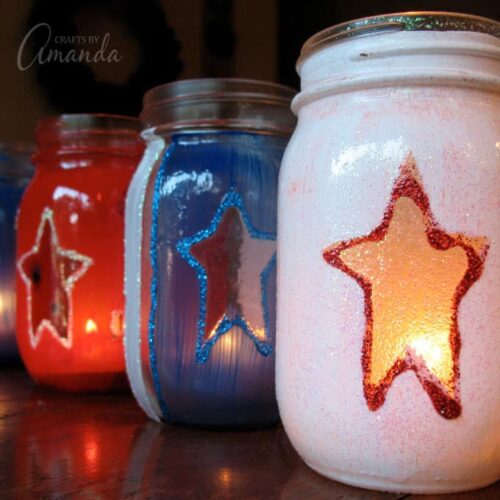

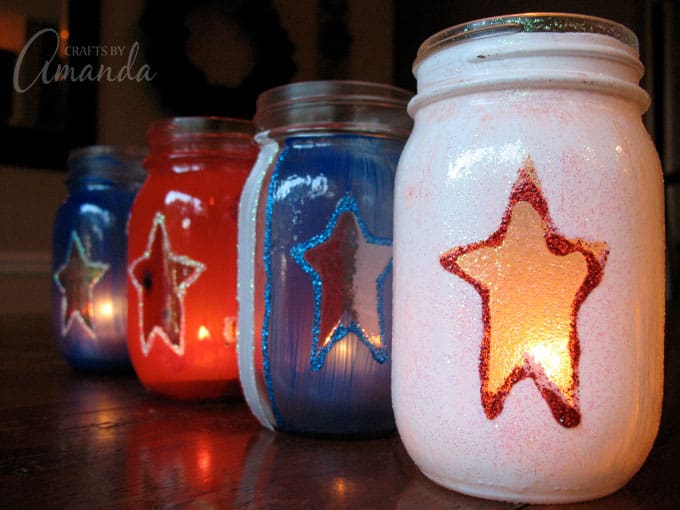
Light up your outdoor (or indoor) space with these patriotic 4th of July luminaries. Perfect for Memorial Day, Independence Day, Patriot’s Day or for showing your pride all year round. Add citronella tealights for extra protection against mosquitos if you’re using them outdoors.
While we’re talking about the 4th of July, these pretty painted mason jar drinking glasses would be perfect for your picnic table!
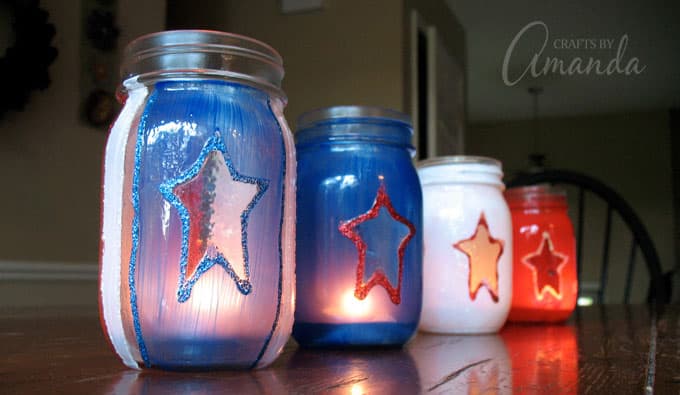
4th of July Luminaries
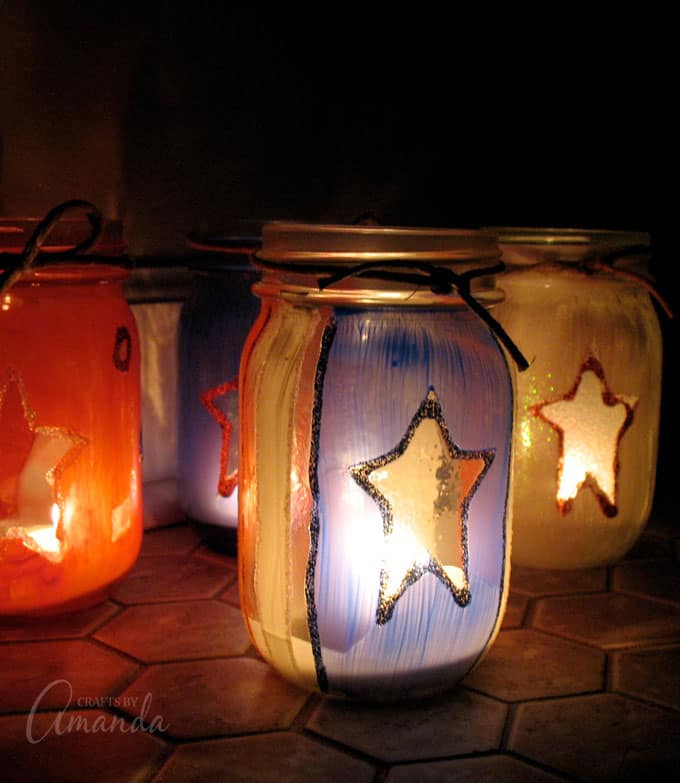
I made these luminaries today to celebrate the 4th of July. These would work great for Memorial Day and Patriot’s Day as well, or just any time you want to show your patriotic spirit. I’ll be displaying them on my Independence Day table and will light them up as we sit around the campfire. They will make a great addition to your patio or deck!
You can use these luminaries as utensil holders like we did with our Patriotic Luminaries as well! And if you are looking for more ways to decorate for the holiday, check out these 16+ DIY July 4th Wreaths.
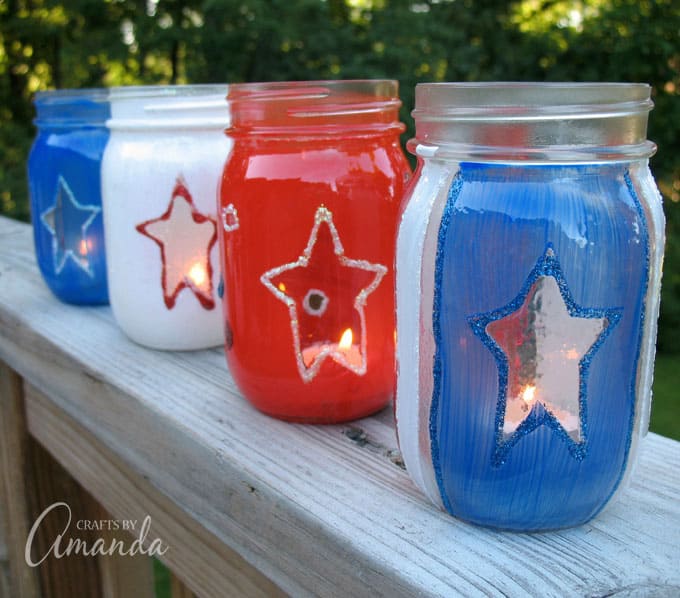
You could use any type of glass jar that you want. I used these 4 canning jars I had left over from making homemade cherry pie filling. Mmm! I’m a little late on the holiday bandwagon, but I fit them in when I can! Hope everyone has a wonderful 4th!
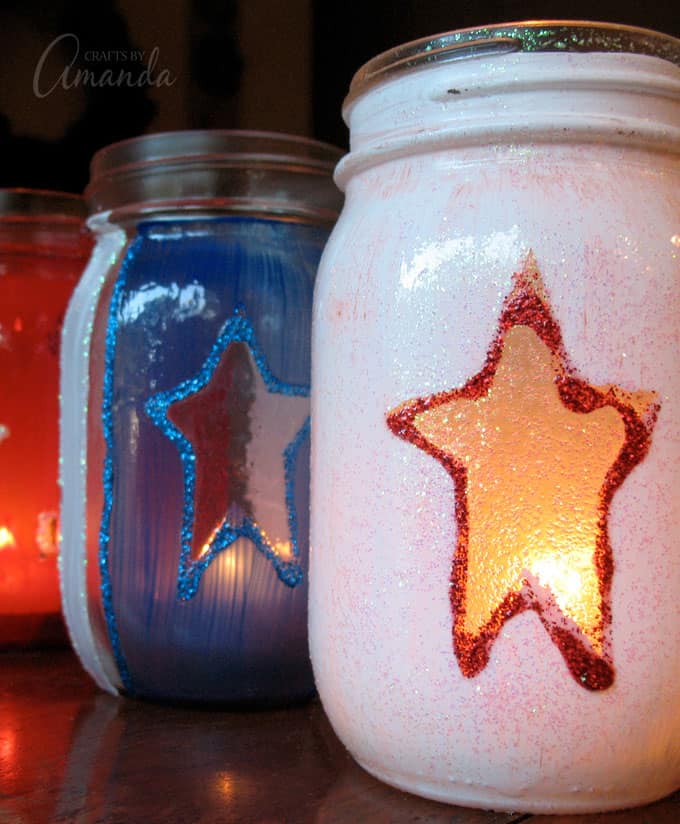
My notes: I got “lucky” enough to get a batch of crappy red paint. How I managed to pick that bottle out of all the bottles on the shelf I will never know. However, since I did grab a bottle of bad paint, that caused the paint to peel up with the Contact paper (didn’t happen with the other colors, and I’ve had trouble with this paint on other projects too, booooo hiss!), and so that’s where the idea came from to use the glitter glue. It was a cover up job! ;)
To make These 4th of July Luminaries you will need the following supplies:
- Glass jars
- Red, white and blue acrylic paint
- White piece of paper
- Black Sharpie
- Contact paper
- Paintbrush
- Clear gloss sealer spray
- Twine
Draw a star on a piece of paper. Place the drawing underneath a piece of Contact paper. Trace the star onto the Contact paper, one for each jar.

Cut the star out and peel off the backing. Place the star onto the jar and press to make sure that there are no air bubbles and that all corners are pressed down.

Paint jar with one coat of acrylic paint and let dry completely.

Make sure the paint is dry before peeling the contact paper off. Pipe glitter glue around the star and let dry several hours. Spray with gloss sealer and let dry. Give the jar two more coats of sealer spray, allowing it to dry for 20 minutes between coats. Tie twine around the rim of each jar.
Variations: Use thin strips of Contact paper to create stripes, or small squares on your jar. Another option is to coat your jar with white glitter glue before spraying with sealer. I did 4 stars on one jar, stripes on another, and little squares on another.
More from me you might like:
- Fireworks Coffee Filter Flowers
- Americana Painted Jars
- Halloween Painted Jar Luminaries
- Ghost Luminaries for Halloween
Some ideas I like from the web:
- Patriotic Water Bracelets – from FamilyCorner.com
- Fourth of July Finger Puppets – from Craft Jr.
- Patriotic Summer Fan – from Making Friends
- Independence Day Crafts on About.com

4th of July Luminaries
Supplies
- Glass jars
- Red white and blue acrylic paint
- White piece of paper
- Black Sharpie
- Contact paper
- Paintbrush
- Clear gloss sealer spray
- Twine
Instructions
- Draw a star on a piece of paper. Place the drawing underneath a piece of Contact paper. Trace the star onto the Contact paper, one for each jar.
- Cut the star out and peel off the backing. Place the star onto the jar and press to make sure that there are no air bubbles and that all corners are pressed down.
- Paint jar with one coat of acrylic paint and let dry completely.
- Make sure the paint is dry before peeling the contact paper off. Pipe glitter glue around the star and let dry several hours. Spray with gloss sealer and let dry. Give the jar two more coats of sealer spray, allowing it to dry for 20 minutes between coats. Tie twine around the rim of each jar.
- Swirling Twirling Ladybugs - July 21, 2026
- Drip Tie Dye Backpack - July 17, 2026
- Mini Coastal Clay Houses - July 14, 2026


Kristy says
These are STUNNING and are the perfect thing for my Fourth of July BBQ. I think they’ll make the table complete. For the other ways I’m decorating/serving food and drinks I wrote my own post. It can be found here: https://www.twofunnygirls.com/blog/2019/06/07/throw-a-festive-fourth-of-july-bbq/ if you want to check it out!
Peggy says
I love this so much, I’ve featured this one too. here http://diycraftyprojects.com/2012/06/50-happy-4th-of-july-craft-ideas-diycraftyprojects-com.html . Please stop by when you get a chance & grab a “I’ve been featured” button from the side bar. You can put it in this post, side bar or both. Thanks so much :)
Mod Podge Amy says
These are great Amanda! SO cute!
Leslie says
I have so many tea lights, this would be a fantastic way to use some of them!
Terra says
Cute idea!
RedTedArt says
Just stopping by to tell you that I LOVE this post and that I featured it in a special "Royal Get Crafty" :-)
http://www.redtedart.com/2011/04/15/royal-get-crafty-special-edition/
Maggy
Amanda says
Yes you could, good point!
DarcyinVA says
You can reuse the red and white ones for Christmas.
Amy Bowman says
this is great! cant wait to experiment with this idea…featured you today at "AP Tuesdays" thanks so much for linking up
Jerri says
Oh how fun! These look really neat!
Thanks for linking up with me for Friday Favorites!
Alison says
O my goodness, you totally read my mind!! I attempted spray painting some baby food jars and left some vinyl stars on them… but I wasn't thrilled with how it turned out. Yours are FANTASTIC! Thanks for sharing!
~Alison
Amber says
Very cool, I've been collecting jars myself what a fun use for them.
Lori says
Great, festive candle holders! Linked after you at Naps on the Porch.
Teresa @ Grammy Girlfriend says
I am for sure doing these next year…love them…Have a HAPPY Fourth. Celebrate America!
http://grammyababychangeseverything.blogspot.com
check out the Giveaway at A Baby Changes Everything ..drawing Monday night
Threeundertwo says
This is a great idea! Thanks so much for linking up to Finished for Friday.
Life in Rehab says
Very cute! I can see these in my future.
2forgetful says
These look great and fairly simple to make. Thanks for all of the great craft ideas. Your tutorials are excellent.
Amanda@The Hand Me Down House says
Oh cute! They turned out WONDERFUL! Great tutorial, too! :)
Sue Sparks says
These look so fantastic! Love 'em!
M.O.T.B says
These look great! Why is it everything you touch turns out fabulous!!!!!
Tiffiny Felix says
I love these…the contact paper is so clever! :)