
One day while surfing around I found some awesome looking luminaries on grandinroad’s website. When they were they were $99.00, now they are $129! Ouch. I wanted to see if I could make something similar using my Silhouette machine and good ole paper grocery bags. This was a fun addition to my Halloween decor and would make a great entrance for a Pumpkin Painting Party!
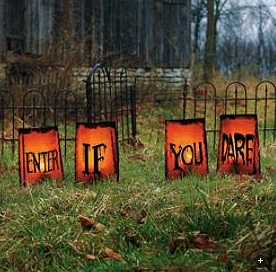
My inspiration: from grandinroad
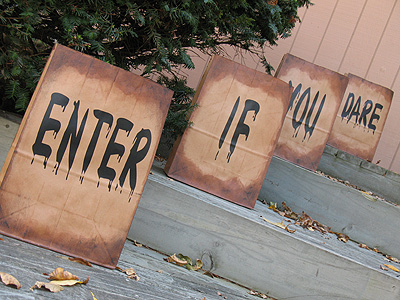
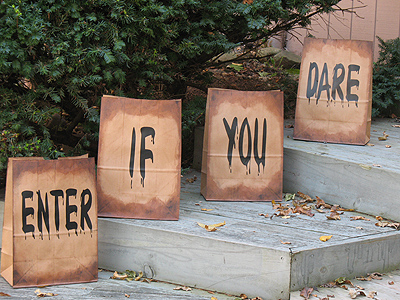
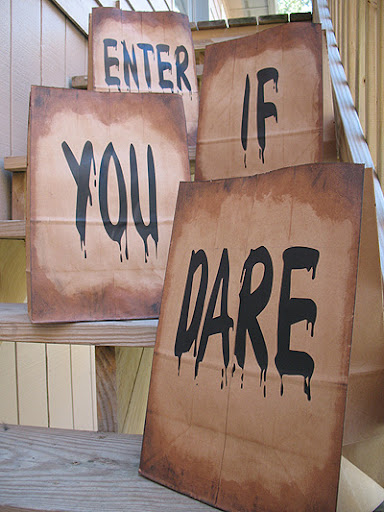
They came out pretty cool I think.
The only thing that honked me off was the seam line that goes up the center of the bag. When the light is on inside the bag you can see the seam, ugh. You’re probably thinking “Duh, why didn’t you use the front of the bag where there’s no seam?” Well, because the grocery store logo was plastered all over the front :-P
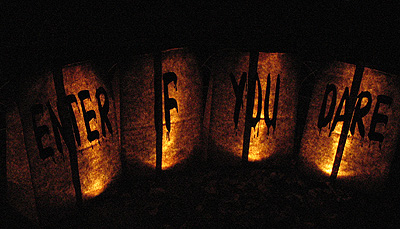
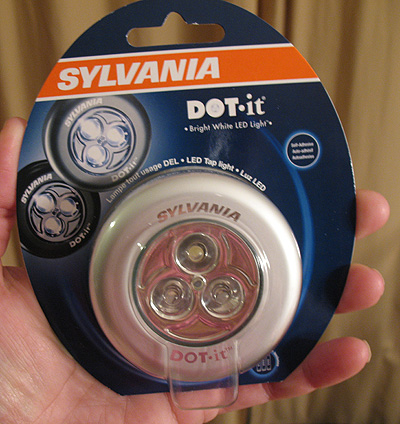
The other issue I had was that it was hard to find anything bright enough to actually illuminate these bags! Who know grocery bags would be so impenetrable! I ended up going to Home Depot and buying four of these bad boys ($7 each):
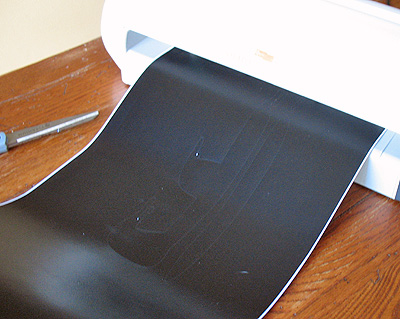
I found some cool Halloween fonts that look like blood, though I couldn’t find the one that grandinroad used. I printed them on black vinyl and stuck them to the bags.
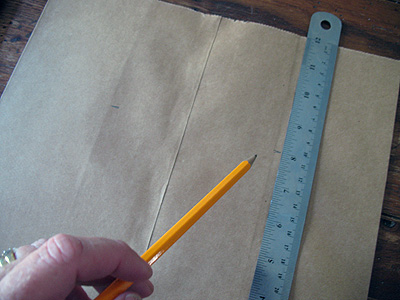
Then I measured where I wanted my fonts to be and marked with a pencil.
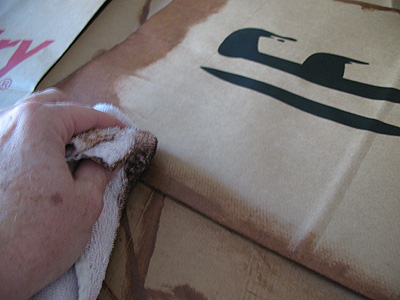
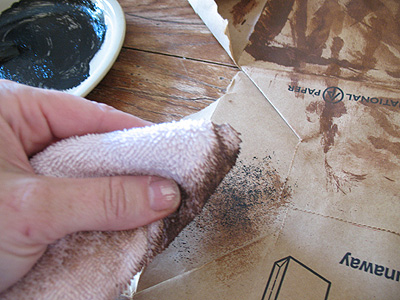
After applying the vinyl to the bags, I used antiquing gel to stain the outer edges of the bags.

Using a rag to wipe off the excess and smear it around a bit.

Then I mixed some black paint in with the stain…
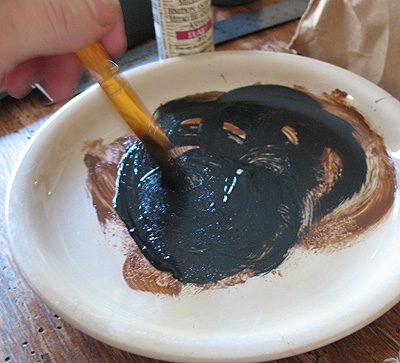
Then blotted it on with a rag, darkening some of the edges.

Then they were done!
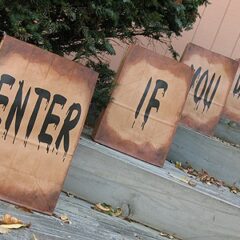
After putting the lights in, I did fold down the tops of the bags to keep as much light inside as possible.
Big Paper Bag Luminaries
Supplies
- paper bags
- Sylvania Dot It lights
- vinyl
- ruler
- pencil
- rag
- black paint
- Halloween fonts
Instructions
- I printed them on black vinyl and stuck them to the bags.
- Then I measured where I wanted my fonts to be and marked with a pencil.
- After applying the vinyl to the bags, I used antiquing gel to stain the outer edges of the bags.
- Using a rag to wipe off the excess and smear it around a bit.
- Then I mixed some black paint in with the stain…
- Then blotted it on with a rag, darkening some of the edges.
- After putting the lights in, I did fold down the tops of the bags to keep as much light inside as possible.

- Patriotic Pinwheels - June 23, 2026
- Fingerprint Daddy & Me Coffee Mug - June 12, 2026
- Patriotic Bandana Wreath - June 9, 2026


Anna Etemadi says
Great job! I liked grandin roads too. How about plain white or orange gift bags from the dollar store? Might take some hunting for the colors but hopefully no seams.
jules says
I love this idea, you should’ve flipped the bag inside out so no seam issue or ads!
Amanda says
There are seams on the inside as well unfortunately. :(
Crystal Hayward says
I’m not sure if they are still made but use to the large grocery bags were 2 plly and you could take the inside one out and it had no writing on it.
Julie says
Love this! I’m sure trick or treaters will get a kick out of it. And it looks so easy.
Amanda Formaro says
Thanks Julie!
Amanda says
Thank you Laurie! I hope you'll let me see if you make them next year! :)
laurie says
I saw those too and thought about making them, I think you did a much better job than I would have and now I plan to copy you next year! Thanks!
Amanda says
Thanks so much everyone! :)
heidi says
Pretty cool! (visiting here from "My Romantic Home's Friday post)
Heidi
Natasha says
What a brilliant idea. Your version is heaps better than the original. Great job!
Best wishes,
Natasha.
~ ~ Ahrisha ~ ~ says
Amazing! Yours are better than the originals.
~ ~Ahrisha~ ~
mustard seed memories says
I love these! They are super fun and I am tucking the idea away for next year!
Cierra Larsen says
Hey there! Im your newest follower! Follow me back at http://craftycierra.blogspot.com/ Make sure to check out my halloween giveaway! Let me know if you are interested in doing a swap with me! Thanks!
/Cierra
[email protected]
Deanna Jane (cullenkidsmum) says
Very cute, they look great!
Amanda says
Thanks sara! Yes, watch out for those Thanksgiving crafts! LOL!
Thanks everyone!
Catch A Falling Star says
Way cute!
Thanks for sharing!
she wears flowers says
I love these!
Sew says
OMG! These are amazing! Please make sure you stop by SewWoodsy.blogspot.com to link these up & enter in a chance to win some spray blood!!!
creativejewishmom/sara says
great project as always, and thanks so very much for being a regular on Craft schooling Sunday, I really appreciate it and look forward to seeing what you've been up to! all the best and have a great Halloween….then I guess we'll be seeing a whole lot of turkeys and Indians from you?
Amanda says
Thanks everyone! Thank you for the featured Stephanie and Patty!
Corinna says
These are fabulous!
Madigan at madiganmade says
Just darling! Love the idea of using the dot-its, too.
Courtney {a thoughtful place} says
Those are adorable. i don't think the line takes away from them at all. Super cute!
Jenglamgirl says
WOW love them! well done, super cute!
Laura says
How cute!
This week is my blog anniversary and I'm hosting a week's worth of great giveaways. Feel free to stop by if you'd like!
Nike@ChooseToThrive says
These turned out great! Love it.
Patty says
I love this! I am featuring you on my blog this week! Can I use some of the pics on your blog as part of your feature?
Email me at [email protected]
You have great ideas!
Stephanie Lynn @Under the Table and Dreaming says
Amanda, These are super cool! Love them glowing. I'll be adding this idea to next years list – TFS! I'll be featuring this today – stop by and grab a featured button if you like. Thanks so much for linking to the Sunday Showcase – I greatly appreciate it. Hope you have a wonderful week! ~ Stephanie Lynn
PriceLess Digi Designs says
These are really cute! Even with the seem!!
http://www.itsapricelesslife.blogspot.com
Amanda says
Thanks Trisha and Becca!!
Becca says
What a fun project !! You did a great job !! *Becca*
Trisha says
I have seen these on Grandin Road and thought they were so awesome but not worth the price! These are great!
Amanda says
Thank you ladies!
tishA says
Love these! Great Job!!
Cindy says
i think that is a fabulous redo. i love expensive inspiration to cheap dyi….great job!!
Amanda says
You guys rock, thanks so much for your great comments!
Kristin @ Daydream Designs says
I LOVE this idea! I was going to make some luminaries for our Halloween party next weekend and I just found my inspiration! Thanks for sharing!
Its So Very Cheri says
What a darling project.
I would love to have you enter this on my party at ItsSoVeryCheri.com and then over at our other site theDIYClub.com We have a weekly DIY Living party over there.
Cheri
Lorie says
So cute (as always!) I am having a fun time trying to guess which project on CWTS is yours! I can't wait to see if I am right! ;D
Hello! says
this is a great idea! i love it! thanks for sharing!!!
Kristyn says
Love this! Thanks for sharing!!! :)
Jenn says
Those look amazing! Great job!!
[email protected] says
They came out super cool! And I love how easy they are. Thanks so much for this, I'll be linking.
smilemonsters says
I think they look pretty awesome.
Jo @ http://smilemonsters.blogspot.com
brandy-son Zen master flash says
Those are super cool! I mean it. I am going to have to make them when I have a house some day! I found you via Be Different Act Normal and will def be following.
♥Fran♥ says
WOW…pretty cool ur blog,tHE halloween hand print Ghoul Banner and the Jack O'Lantern TV
are just awesome,love it!Gongratz!
allison @ itstoilegood.blogspot.com says
totally awesome! love how some simple and affordable supplies can make such a fabulous project!
Jennifer @ Muse Lodge says
These are really awesome! They look just like your inspiration.
Michele Pacey says
pretty cool looking Amanda! and such a simple concept (which is the best kind of craft)!