
Back in October my daughter found a pretty dreamcatcher on Pinterest that was made from a doily, embroidery hoop and lace. There was no tutorial, just an image that had been uploaded. She showed me the picture and asked if I would help her make one for her apartment. Luckily a friend of mine had a great big embroidery hoop and I had a big doily in my food props.
(In case you’re wondering what I mean by food props; I’m referring to the dishes, napkins and cutlery that I use for food photos on my recipe blog, Amanda’s Cookin’.)
If you have smaller doilies on hand, you can use them to make adorable doily tea light holders which are great for weddings or adding a touch of soft elegance to your home. I’ve also made this fun Embroidery Hoop Rainbow Button Tree, which is fun craft for adults and kids.
Since this was before I moved into my studio, we went down to my basement craft room and got to work. This was really easy to put together and the results are quite beautiful!
I’m just now finally posting it because I wasn’t happy with the photos I took back in October. My daughter was supposed to snap a few when she hung it in her apartment. It was only a couple months later that she moved back home. The dreamcatcher didn’t go with the decor in her new room at my house, so I hung it in my room for a while.
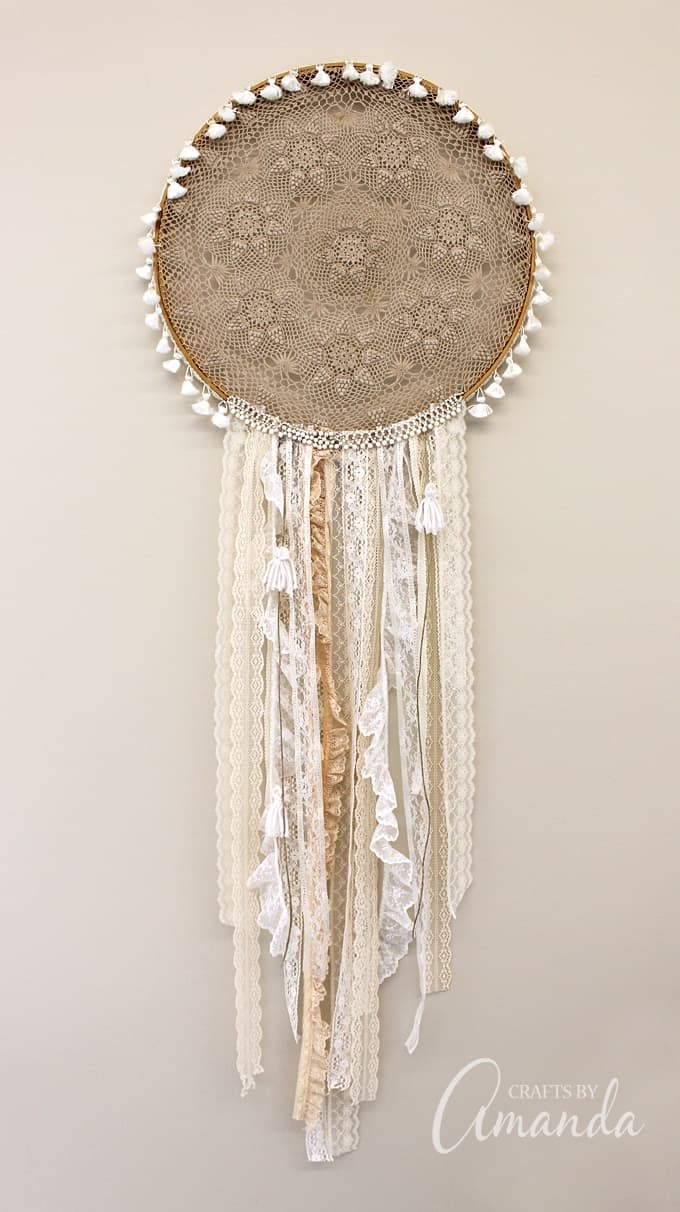
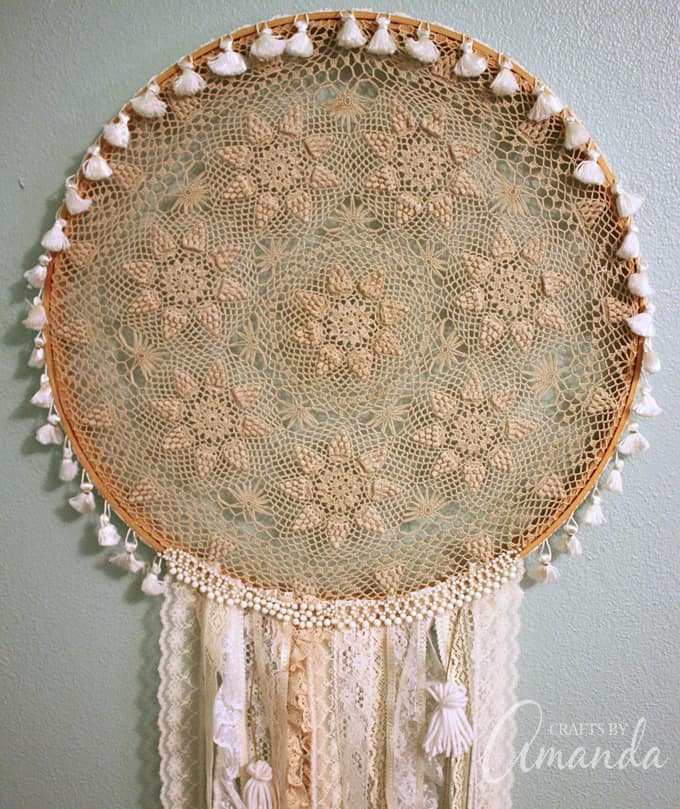
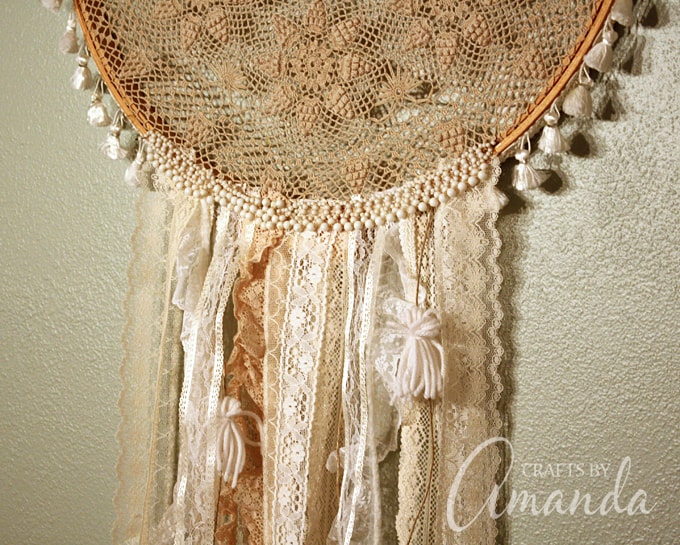
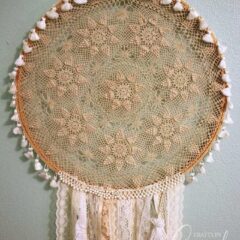
Boho Chic Doily Dreamcatcher
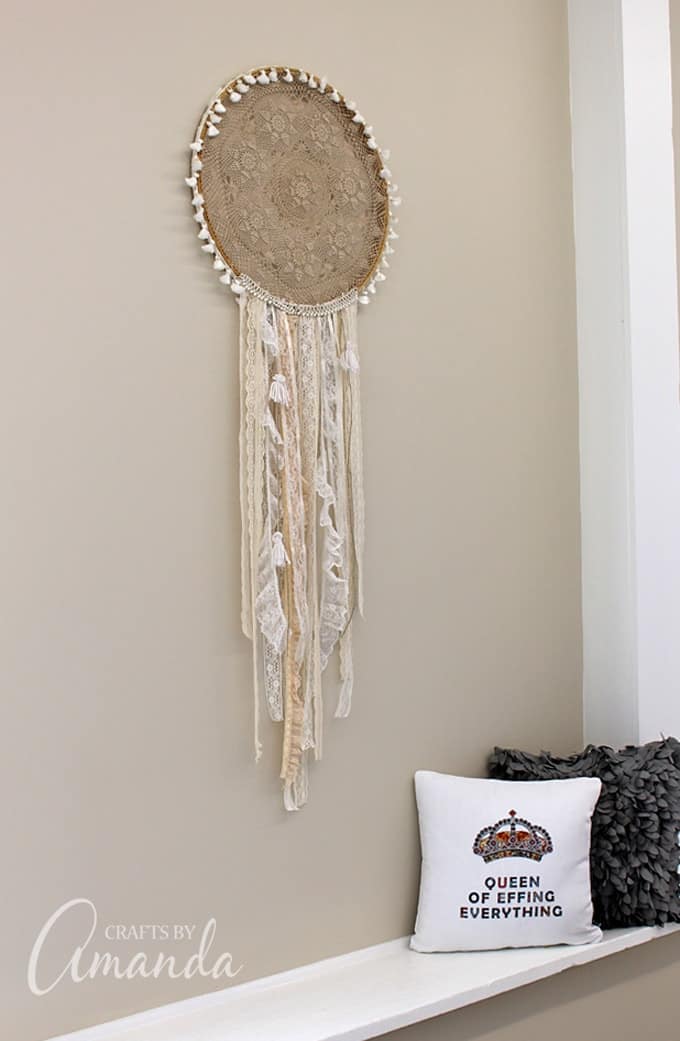
Today I brought it to my studio with the intention of taking some pictures and taking it back home. To be honest I didn’t really think it would blend well here either. After all, the colors in my studio are bright and cheerful whereas the dreamcatcher is more Bohemian in nature with a certain vintage flair.
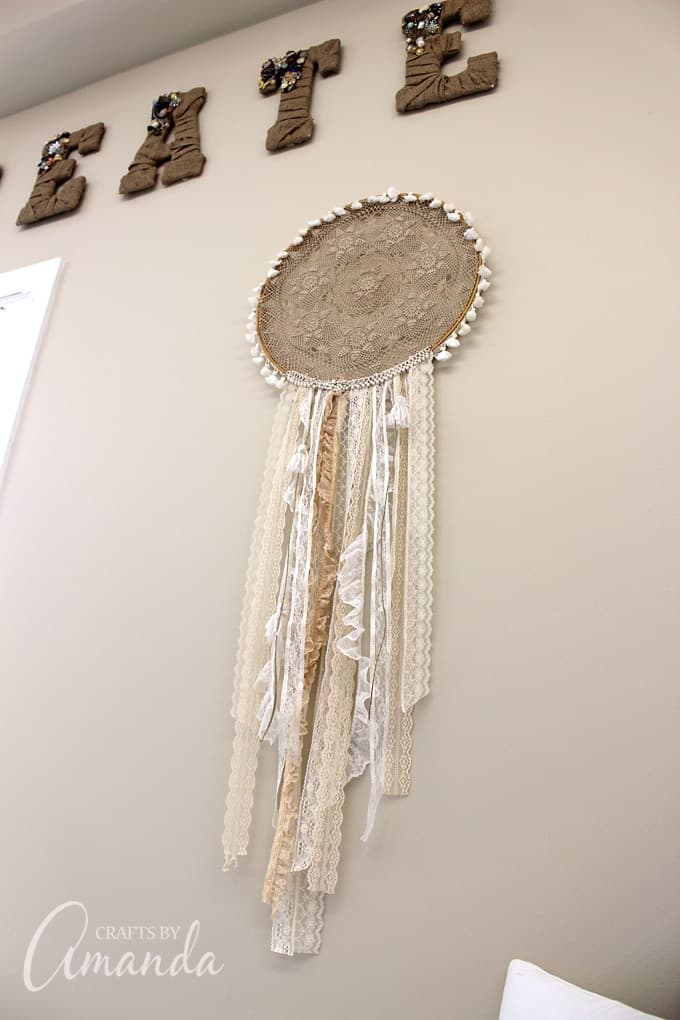
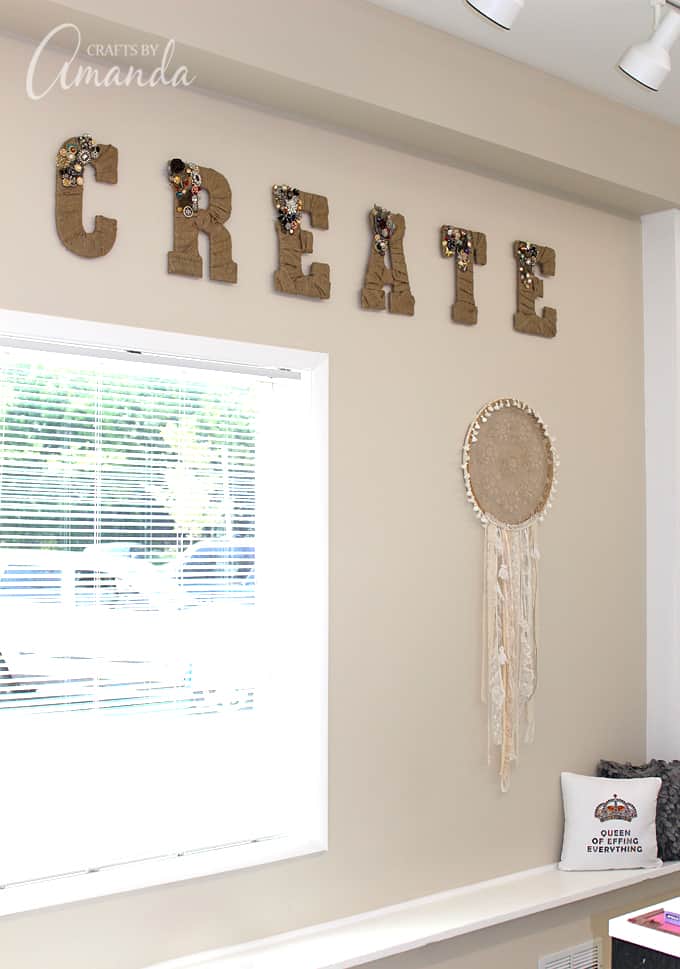
Once I got it here though, I didn’t want to take it home. I thought of maybe adding some colorful beads to brighten it up, but once I held it up to the wall with my burlap wall letters it was a perfect fit as is!
So let’s make one shall we?
Note: some links below are affiliate links. That means if you happen to buy something, a small percentage of that sale goes back into this site, which enables me to continue to bring you free tutorials such as this one. So, thanks!
As always, a full printable supply list and instructions are at the end of this post.
For this project you will need the following supplies:
- Embroidery hoop (mine is 18-inches in diameter)
- Doily (should be an inch or two smaller than the hoop)
- Lace ribbon
- Tassel fringe
- Beads or pearls
- Yarn
- Twine
- Scissors
- Hot glue gun
Optional tools:
- Thumbtack
- Foam core board or cork board
- Glue gun finger caps
I suggest using a piece of foam core or cork, something that a thumb tack can be pushed into. This is handy for holding your doily in place while you work.
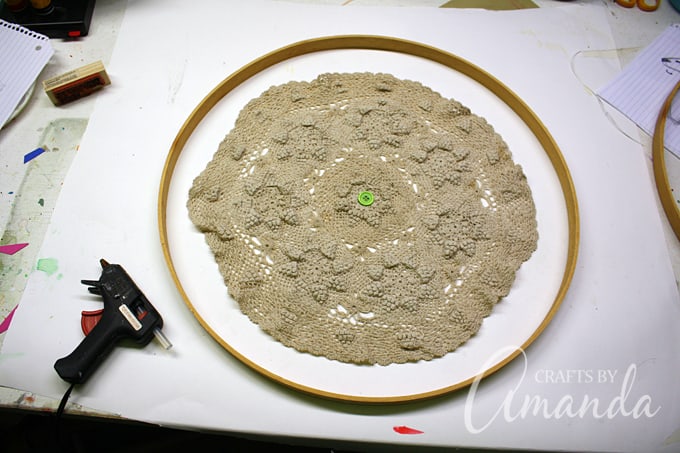
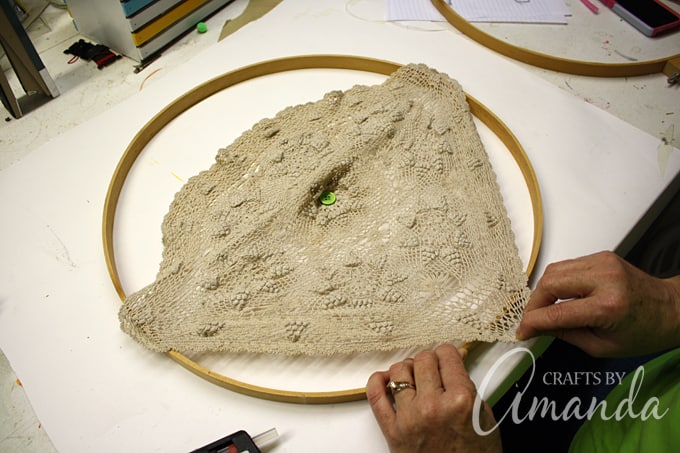
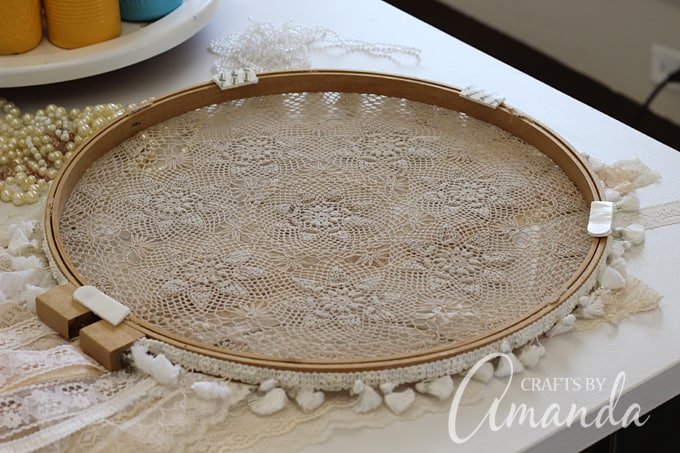
Place doily in the center of the core board and push thumb tack into the center (mine is a button thumb tack, not just a button). Place the embroidery hoop over the top of the doily so it’s in the center.
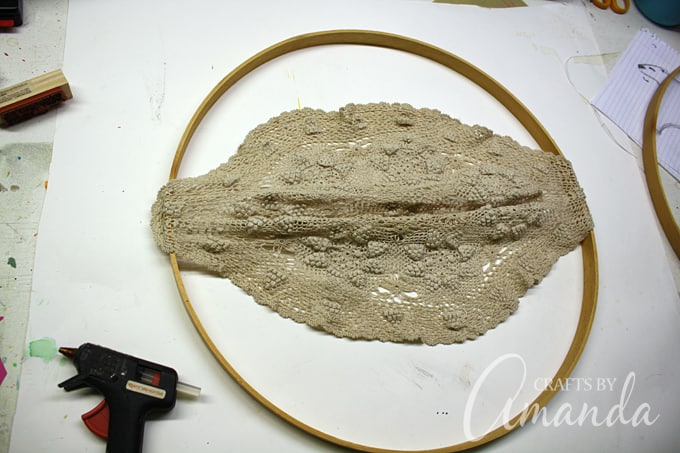
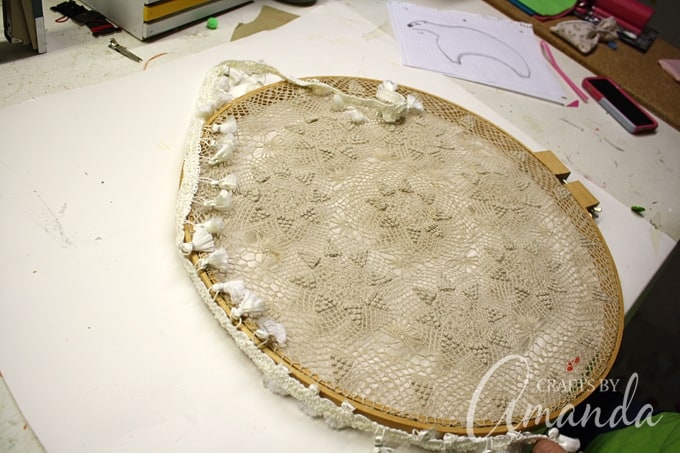
Gently stretch the doily to the left and the right and glue over the edges of the embroidery hoop.
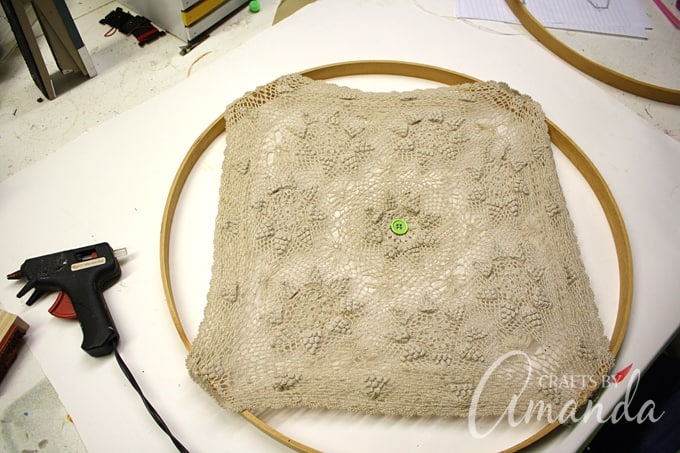
Now stretch the top and bottom in the same fashion so that you have glued the top, bottom and both sides.
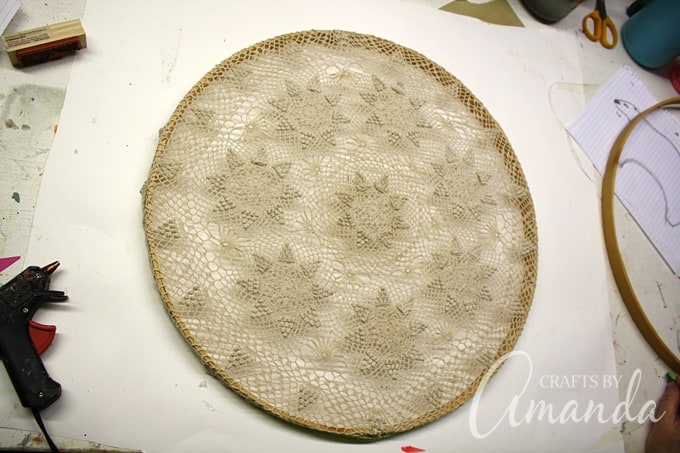
Continue stretching the rest of the doily over the embroidery hoop edges until it is completely covered. Remove the thumb tack.
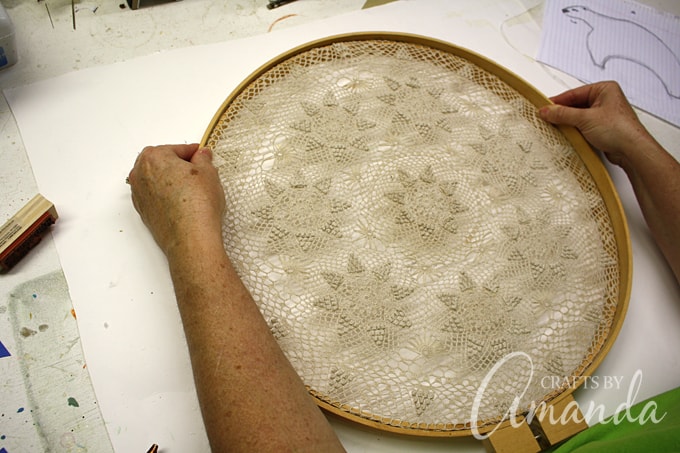
Place the outer ring of the embroidery hoop over the inner hoop/doily and tighten.
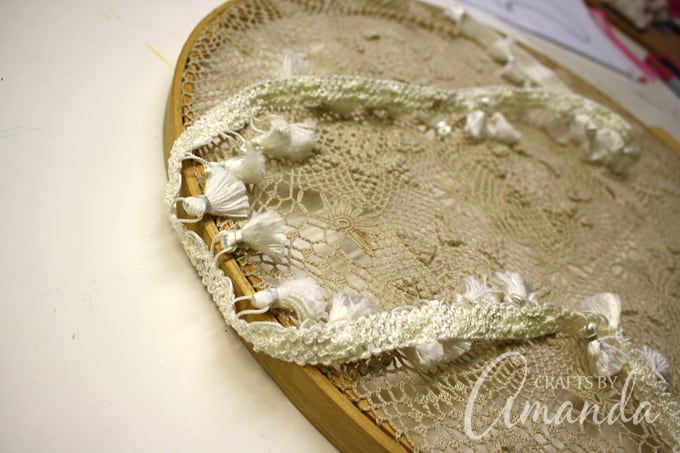
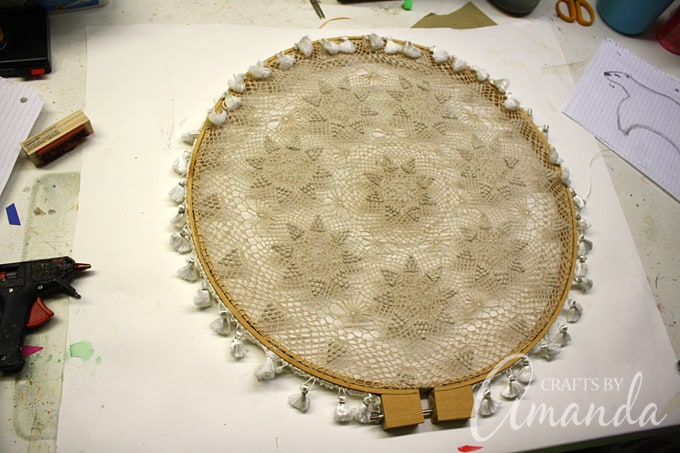
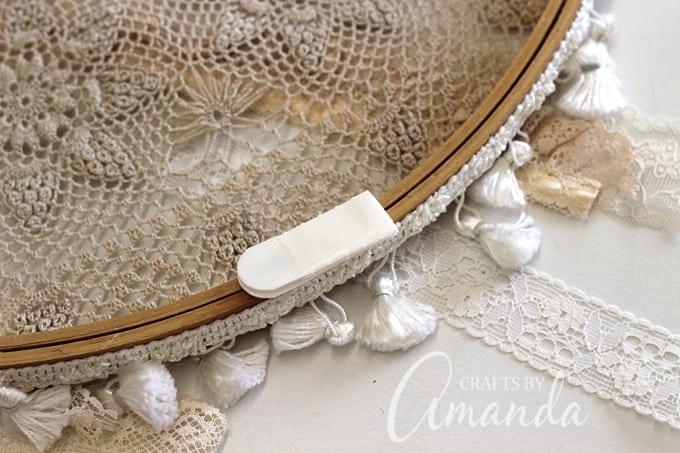
Choose lace, or in my case some tassel fringe, and glue it around the outer edge of the embroidery hoop.
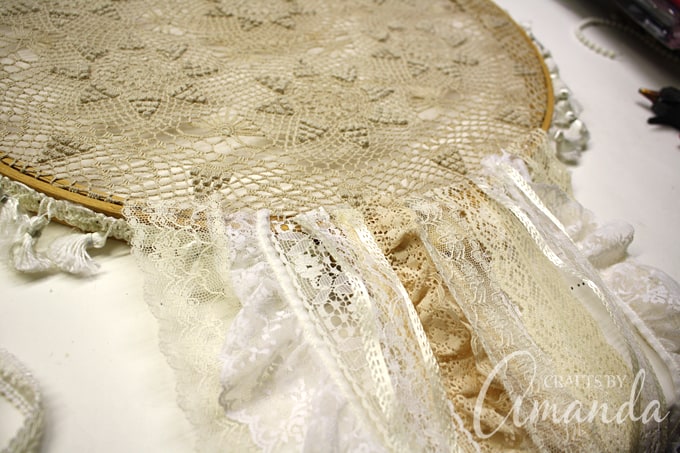
Cut lace ribbon into different lengths. Glue strips of lace ribbon from the bottom of the dreamcatcher.
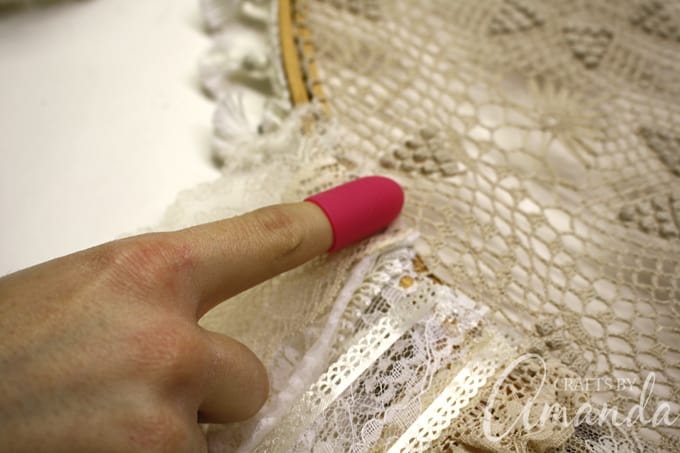
Using finger caps will protect your fingers from hot glue burns. Use them to glue the ribbon in place and hold it in place until it dries.
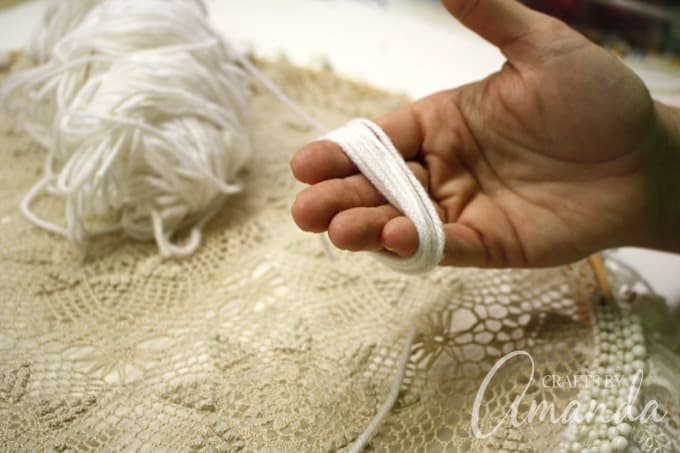
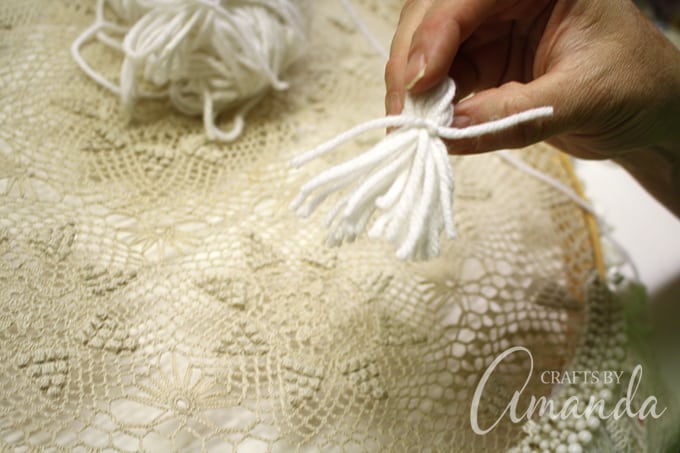
To make tassels, wrap yarn around four fingers several times.
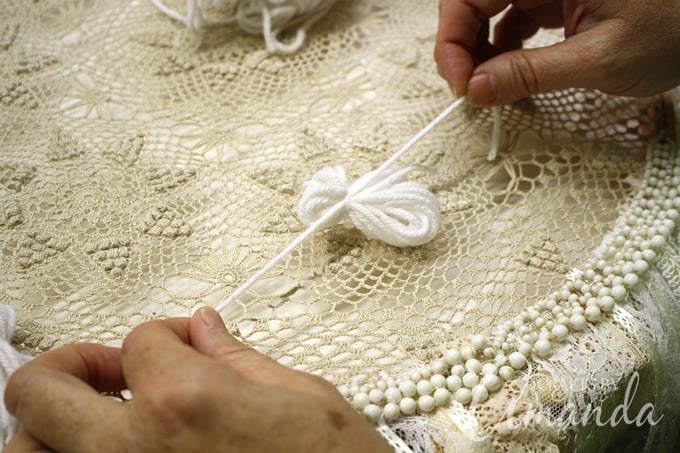
Slide it off your hand and tie a piece of yarn around the bunch.
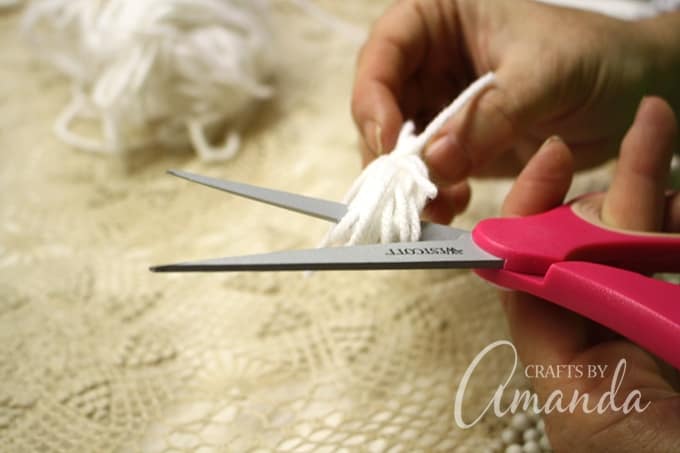
Cut through one side of the loop to crate the fringed tassel.
Tie the tassel to a piece of twine and glue in in place with the lace ribbon.
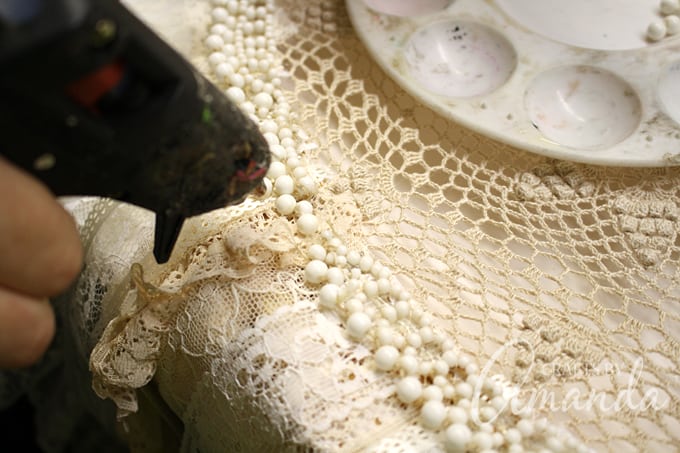
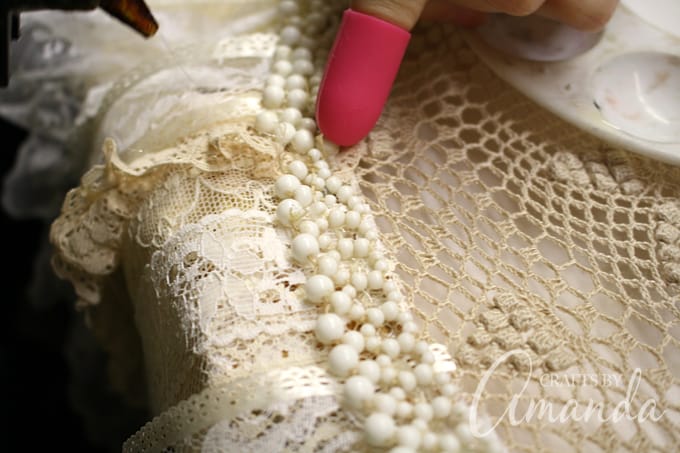
Glue beads or pearls over the ribbon edges along the bottom of the hoop.
I used Command Strips to hang mine, but you can also hang it on a nail.
I hope you enjoyed this project and it inspires you to create something!
Here’s more you might like:
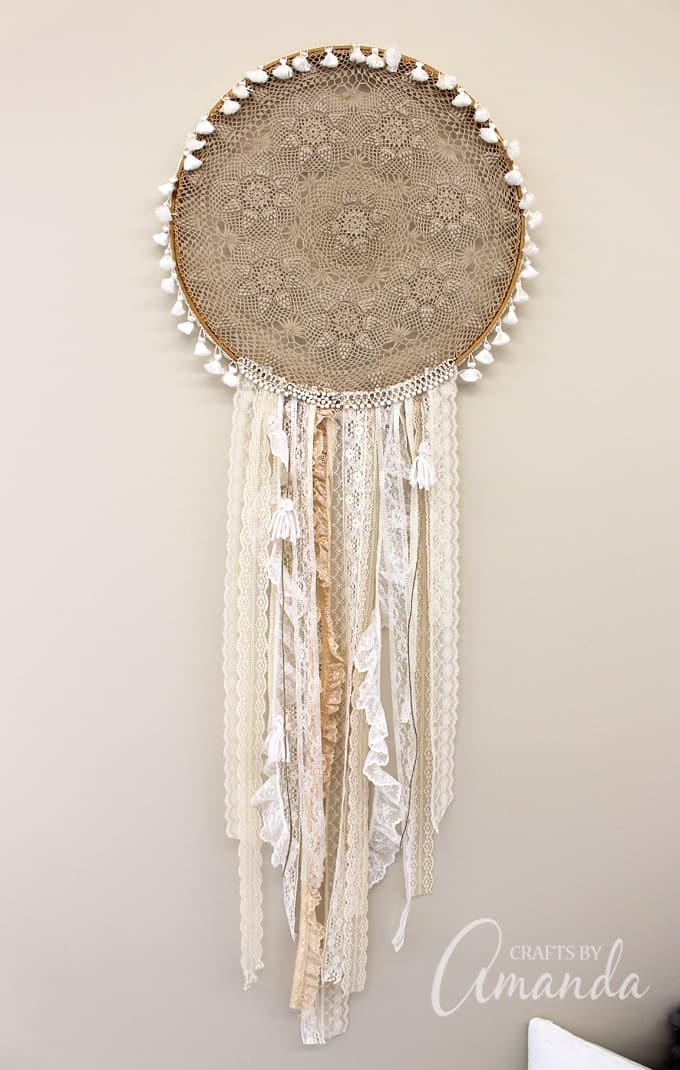
Boho Chic Doily Dreamcatcher
Supplies
- Embroidery hoop mine is 18-inches in diameter
- Doily should be an inch or two smaller than the hoop
- Lace ribbon
- Beads or pearls
- Yarn
- Twine
- Scissors
- Hot glue gun
Optional tools:
- Thumbtack
- Foam core board or cork board
- Glue gun finger caps
Instructions
- I suggest using a piece of foam core or cork, something that a thumb tack can be pushed into. This is handy for holding your doily in place while you work.
- Place doily in the center of the core board and push thumb tack into the center (mine is a button thumb tack, not just a button). Place the embroidery hoop over the top of the doily so it’s in the center.
- Gently stretch the doily to the left and the right and glue over the edges of the embroidery hoop.
- Now stretch the top and bottom in the same fashion so that you have glued the top, bottom and both sides.
- Continue stretching the rest of the doily over the embroidery hoop edges until it is completely covered. Remove the thumb tack.
- Place the outer ring of the embroidery hoop over the inner hoop/doily and tighten.
- Choose lace, or in my case some tassel fringe, and glue it around the outer edge of the embroidery hoop.
- Cut lace ribbon into different lengths. Glue strips of lace ribbon from the bottom of the dreamcatcher.
- Using finger caps will protect your fingers from hot glue burns. Use them to glue the ribbon in place and hold it in place until it dries.
- To make tassels, wrap yarn around four fingers several times.
- Slide it off your hand and tie a piece of yarn around the bunch.
- Cut through one side of the loop to crate the fringed tassel.
- Tie the tassel to a piece of twine and glue in in place with the lace ribbon.
- Glue beads or pearls over the ribbon edges along the bottom of the hoop.
- Hang with command strips or by hanging on a nail.
- Tie Dye Beach Towels - July 24, 2026
- Swirling Twirling Ladybugs - July 21, 2026
- Drip Tie Dye Backpack - July 17, 2026


Jo says
Hey Amanda!
What a FANTASTIC project! Your dreamcatcher is right up my alley! I love vintage and shabby chic décor so when I saw this, I was swooning! I appreciate it that you not only took the time to give us the directions but that you also have the photos to go along as a visual. I am definitely going to make this. Thank you so much!
Hugs,
Jo
xox
♥ Jo’s Scrap Shack ♥
Amanda Formaro says
Thank you Jo! I hope you enjoy making yours. I just LOVE crafting, it gives me such joy :)