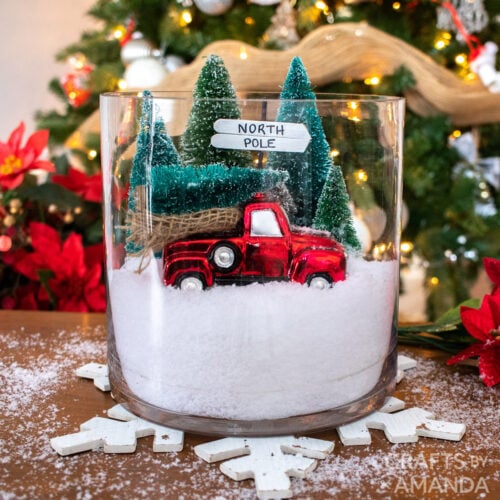
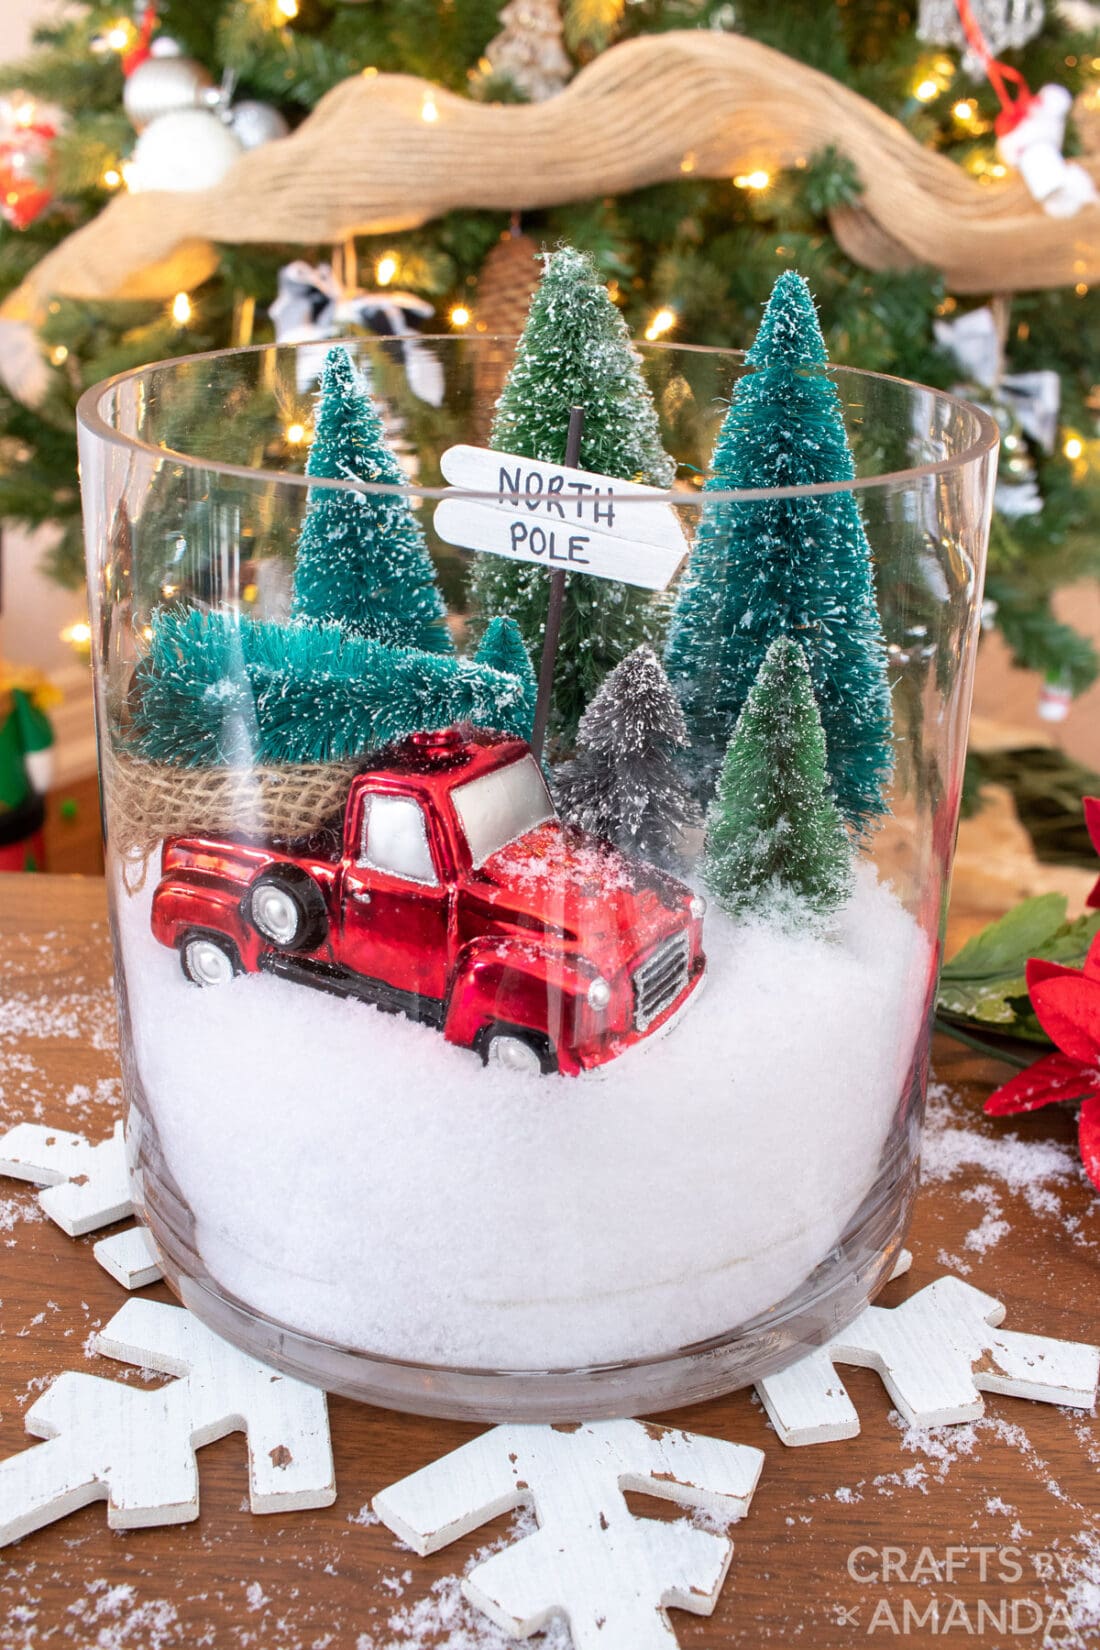
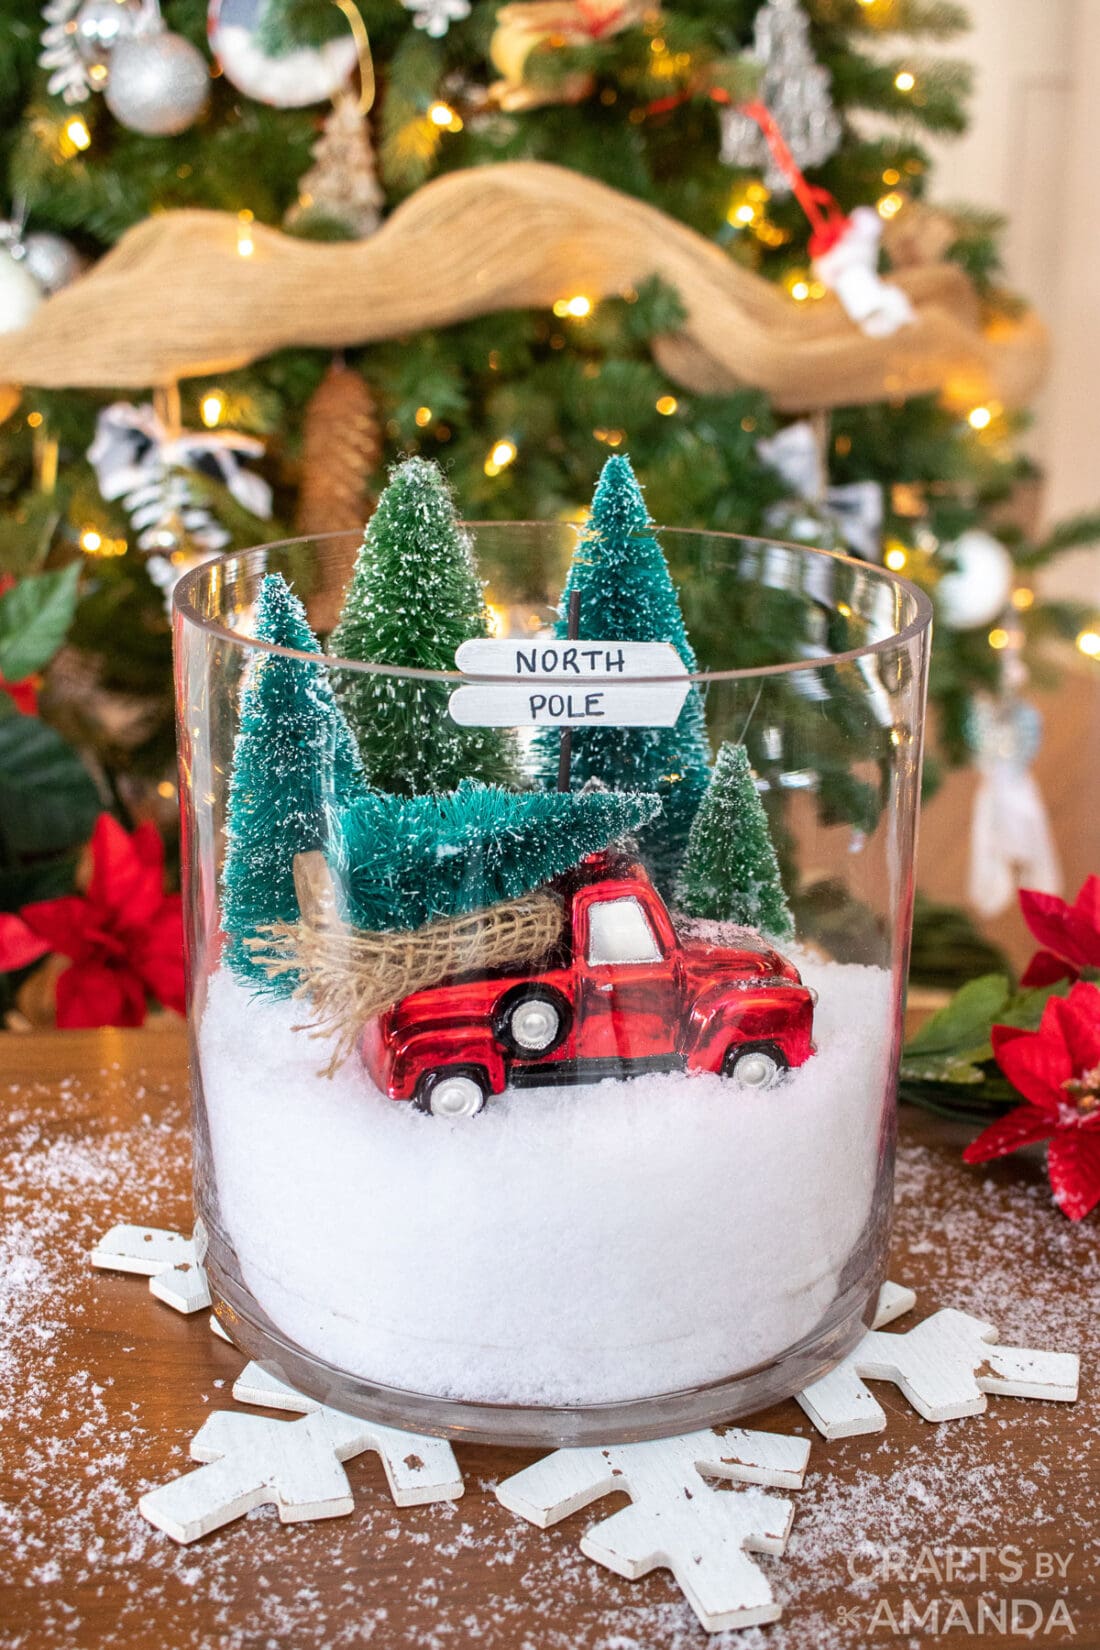
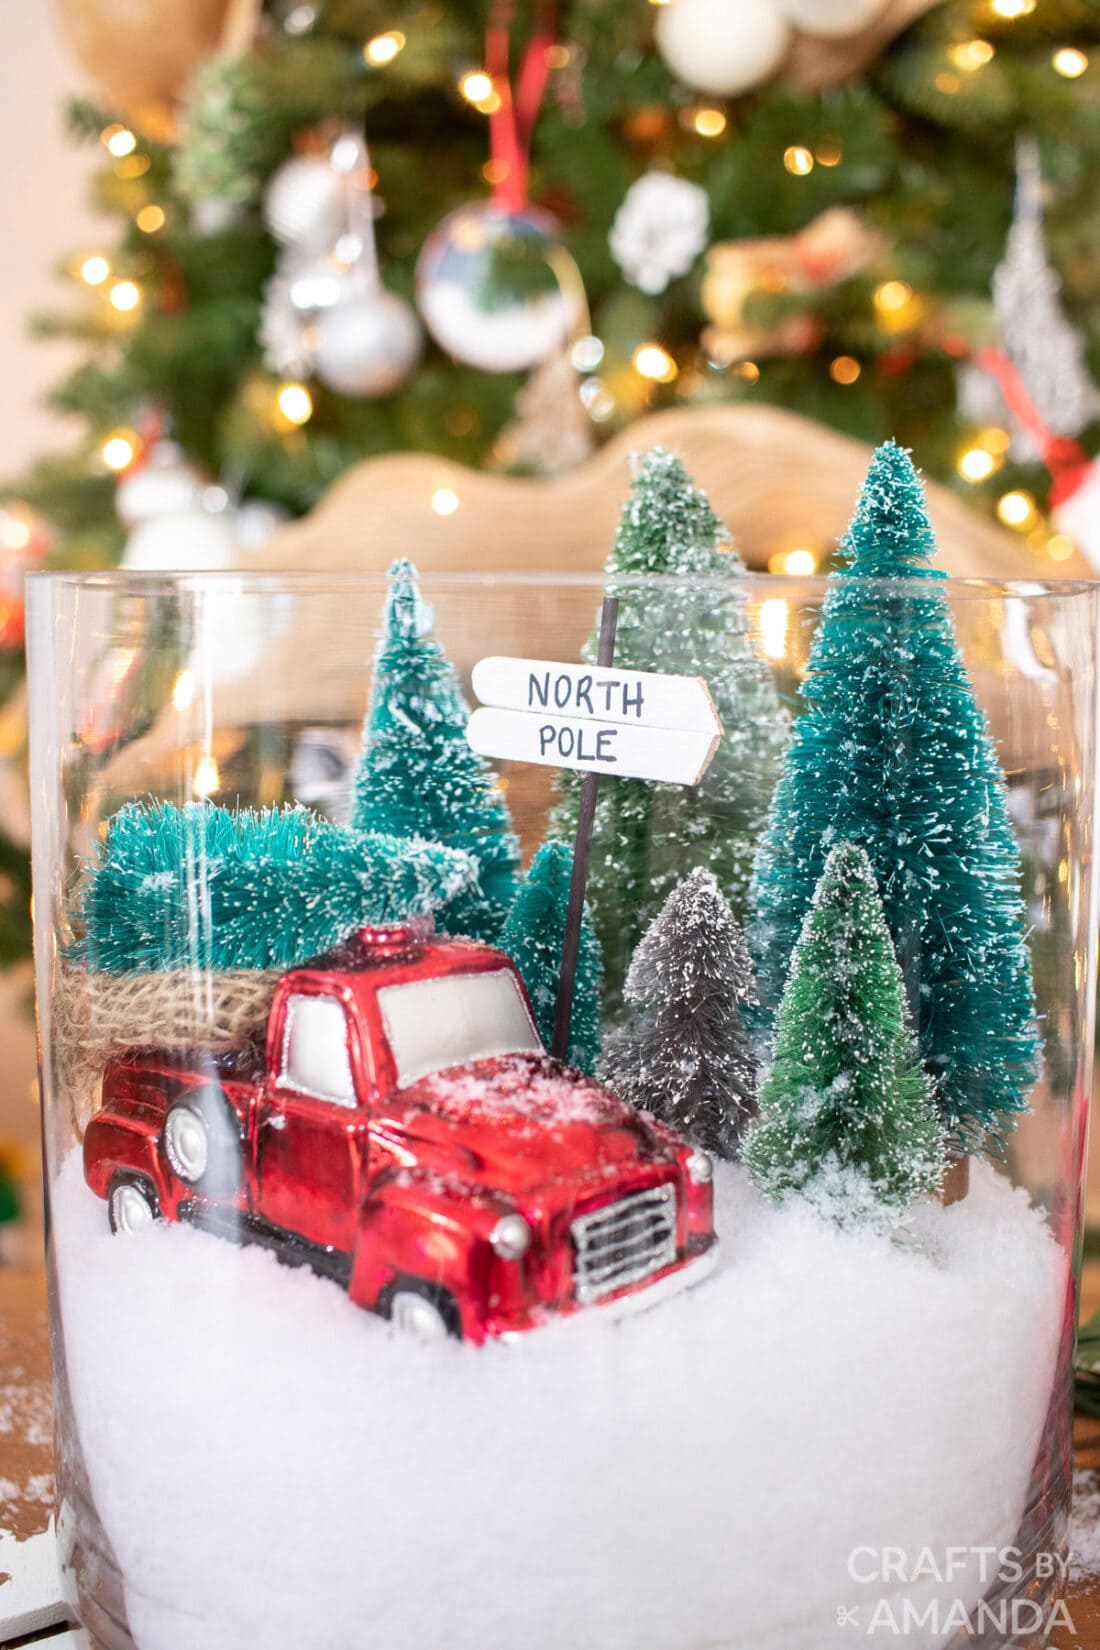
Creating your own Christmas decor, like this beautiful Christmas terrarium, is fun, satisfying, and a great way to add a little holiday cheer to your home.
Why we love this project
There’s nothing quite like a gift made from the heart. While this Christmas terrarium is definitely a great gift idea, it’s also a beautiful way to dress up your own home for the holidays.
Helpful Project Information:
- Age Level: 10 and up
- Mess Factor: Medium
- Level of Difficulty: Easy
- Time to Complete: Less than 45 minutes
- Cost Estimate: Less than $15.00
Craft supplies you will need
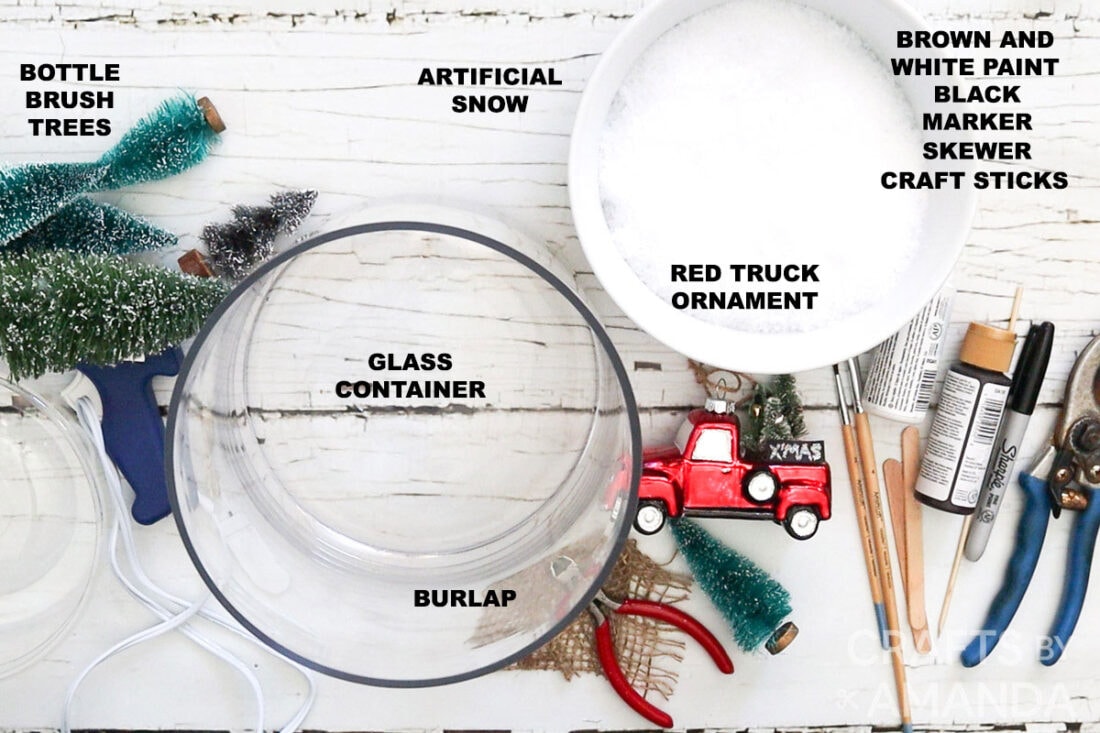
Get full list of supplies and directions in the printable version at the end of this post.
How to Make a Christmas Terrarium
These step by step photos and instructions are here to help you visualize how to make this project. Please scroll down to simply print out the instructions!
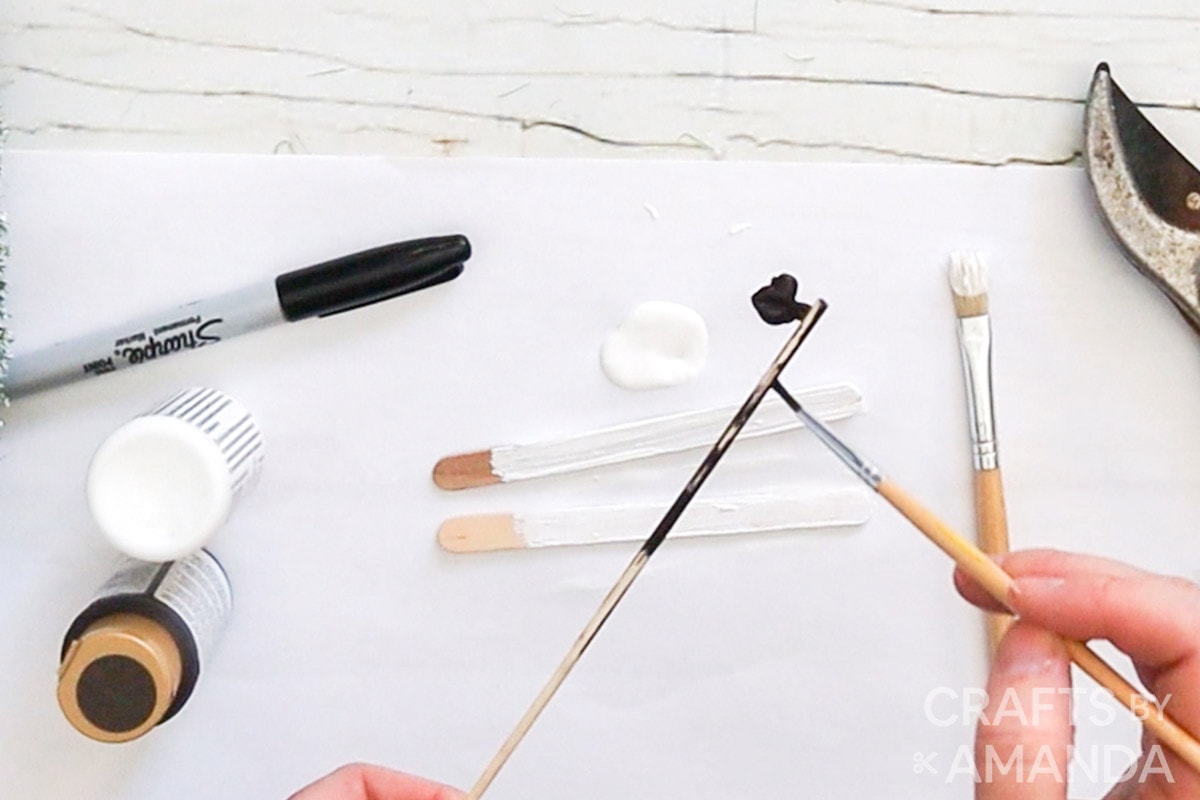
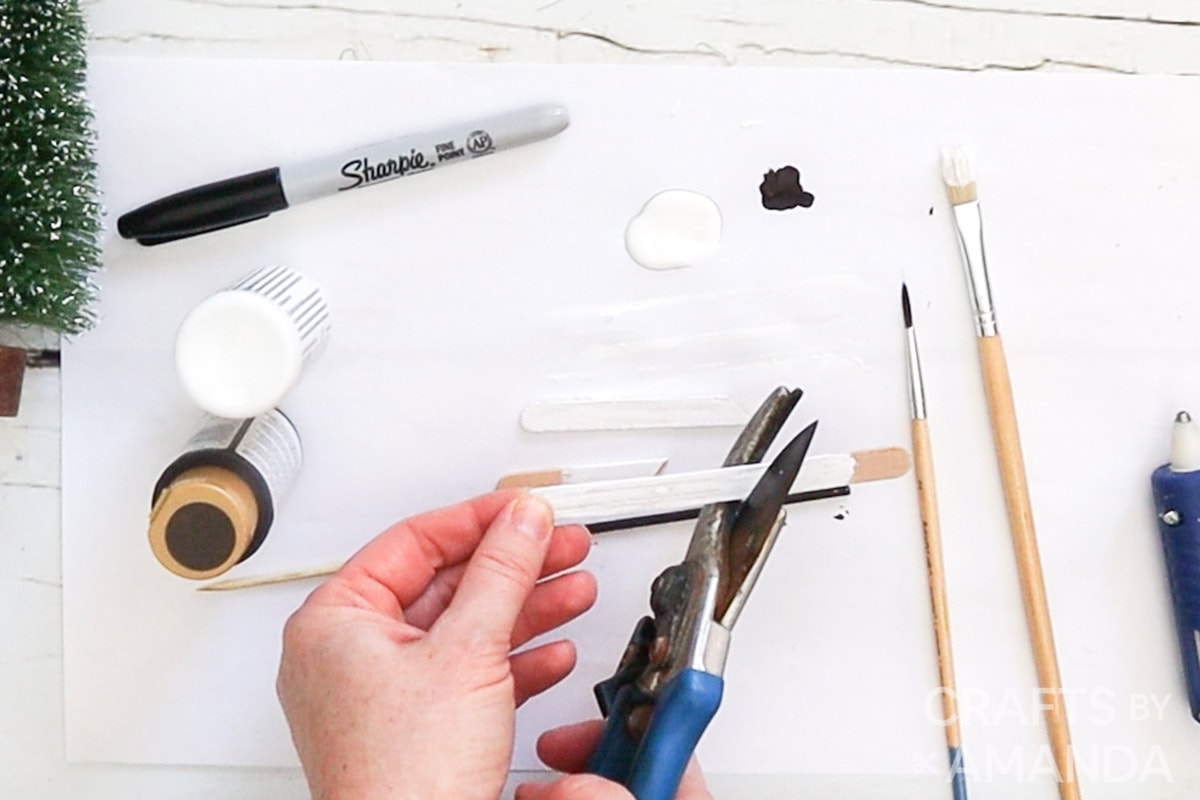
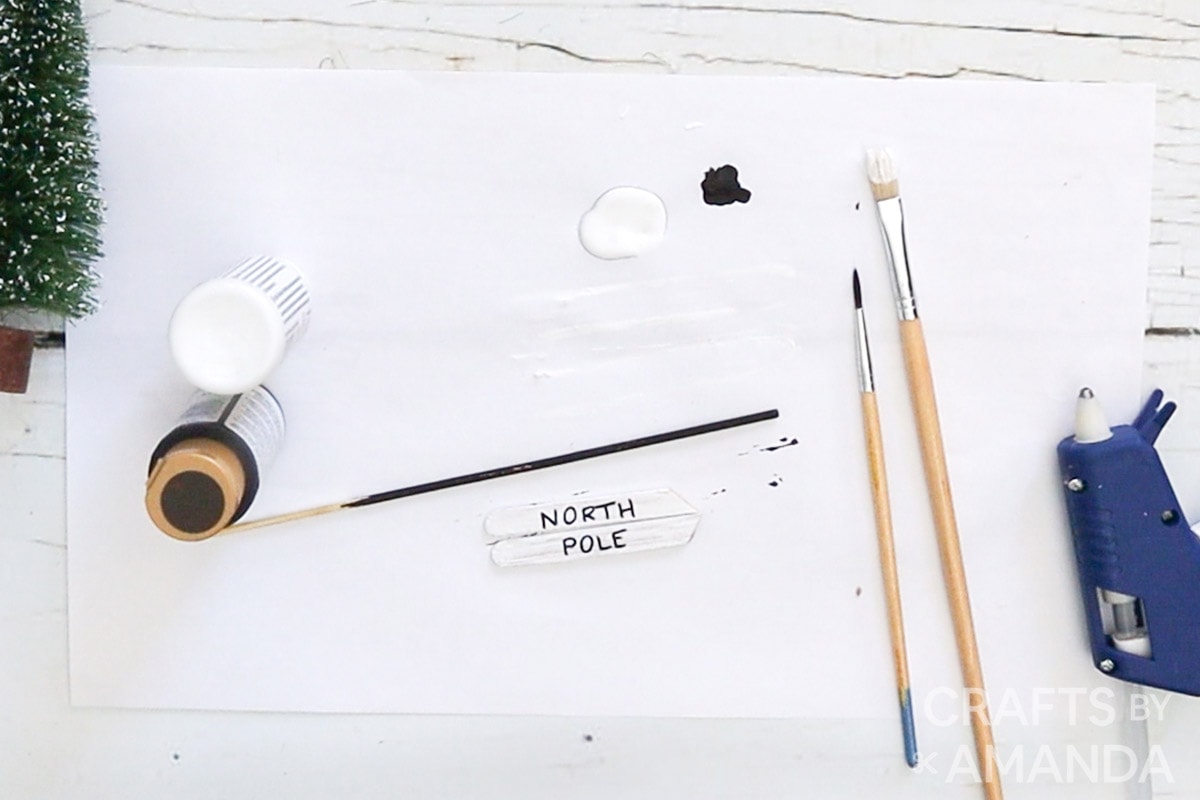
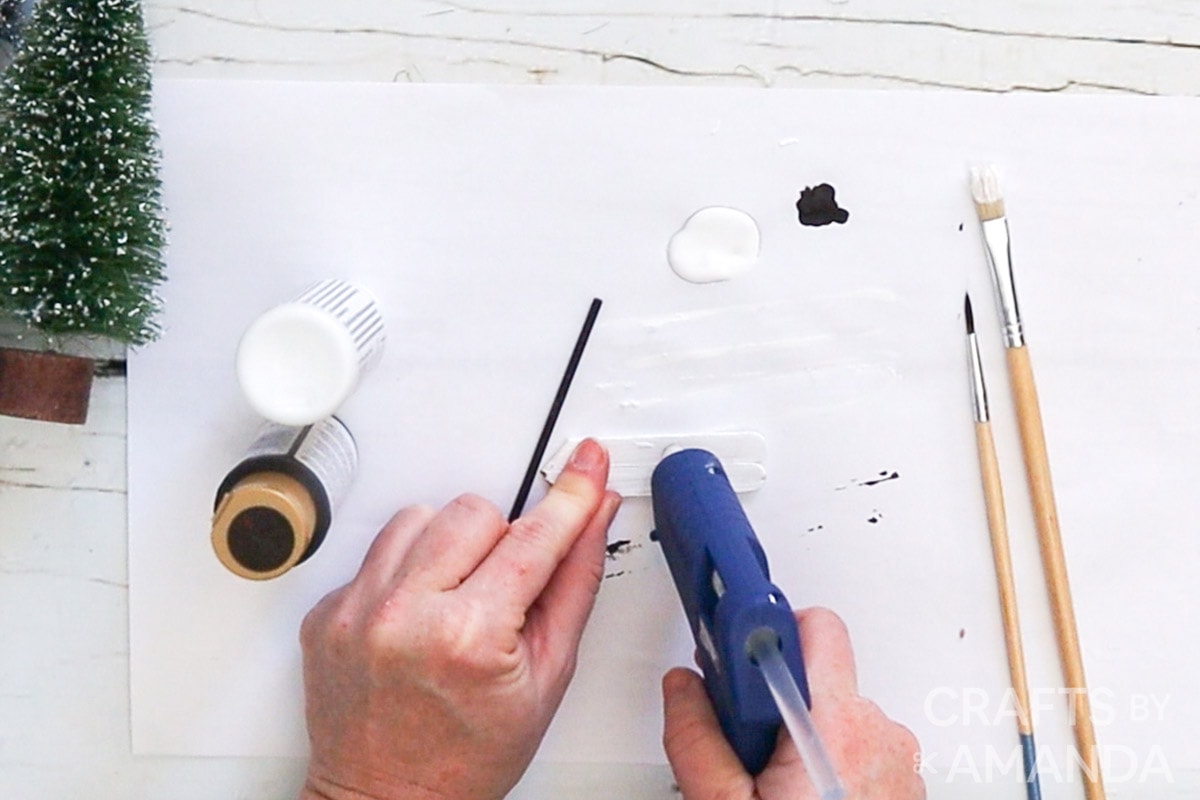
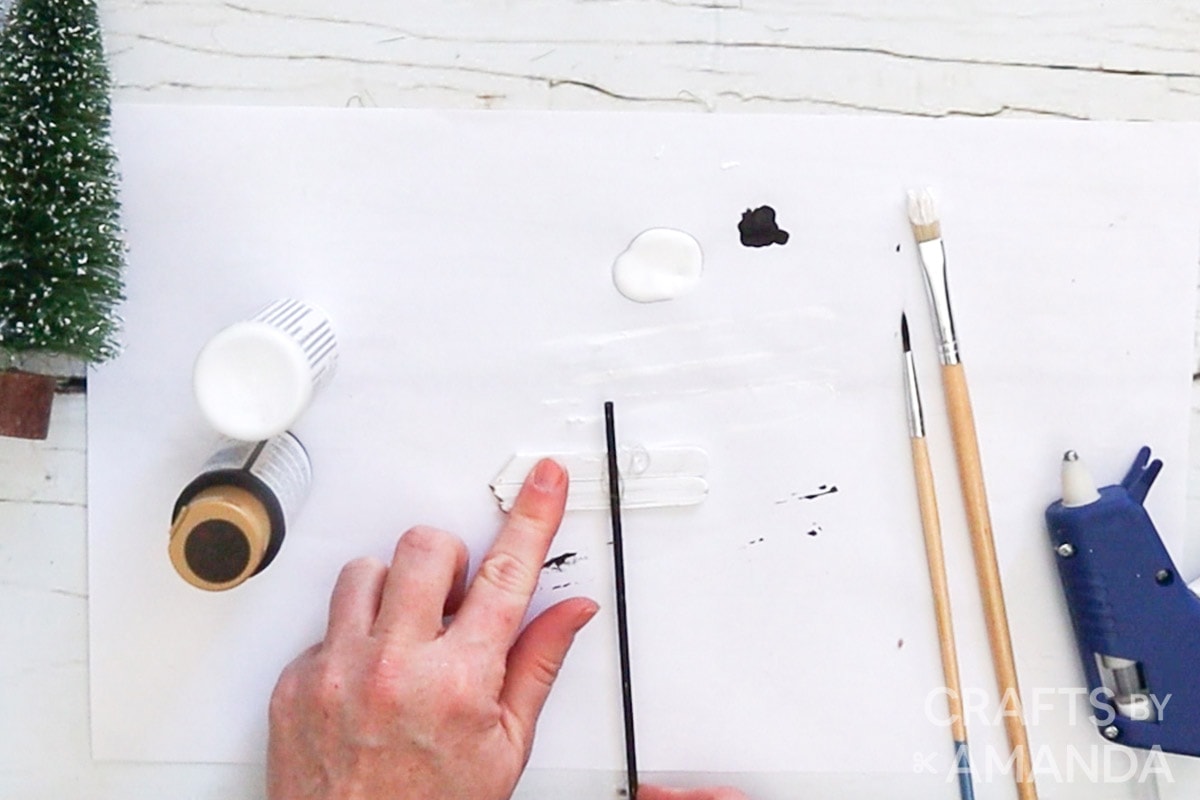
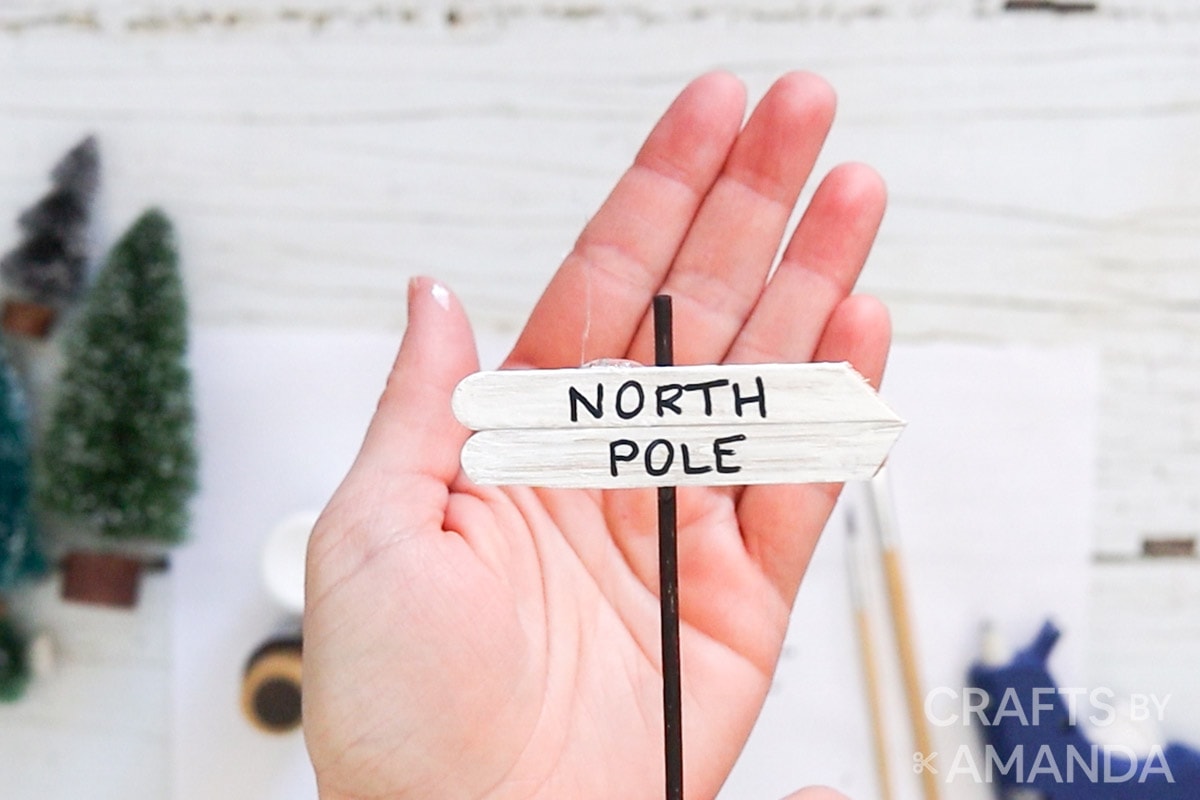
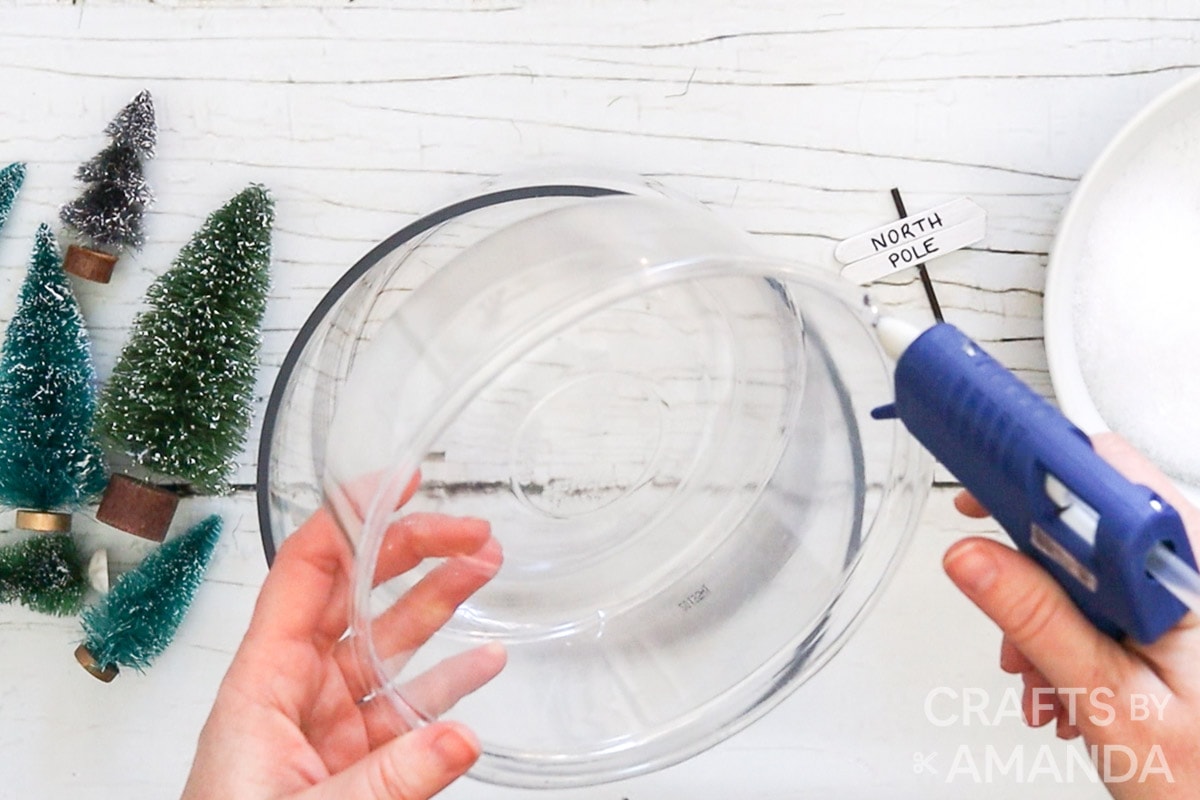
Preparing the North Pole Sign
- Paint the surface of the popsicle sticks in white acrylic paint and leave them to dry fully. Paint the surface of the wooden skewer in brown acrylic paint.

- Once dry, cut the popsicle sticks to 2” long, with one end cut on a diagonal.
- Place them on a flat surface side by side and using a black marker, print the words “NORTH POLE” onto the painted sticks.
- Turn them with the wrong side up and using a hot glue gun, glue the painted wooden skewer perpendicular to the craft sticks forming a miniature sign.
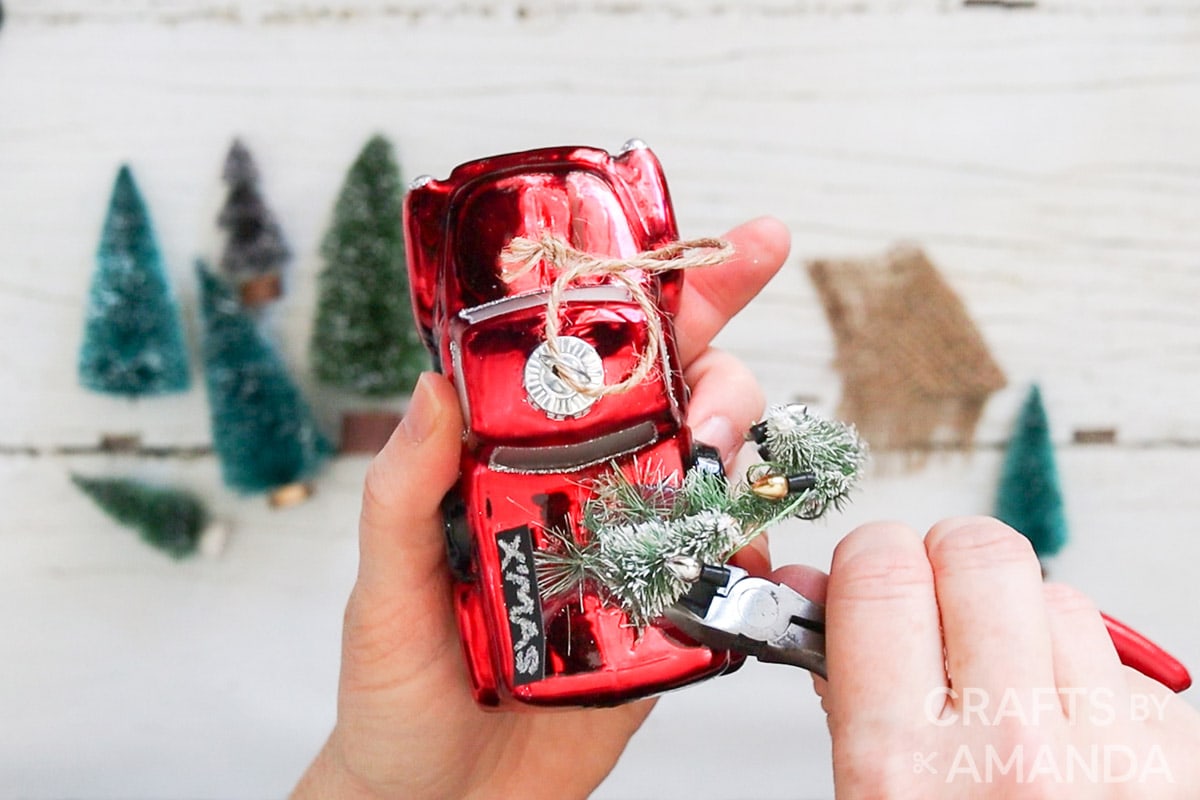
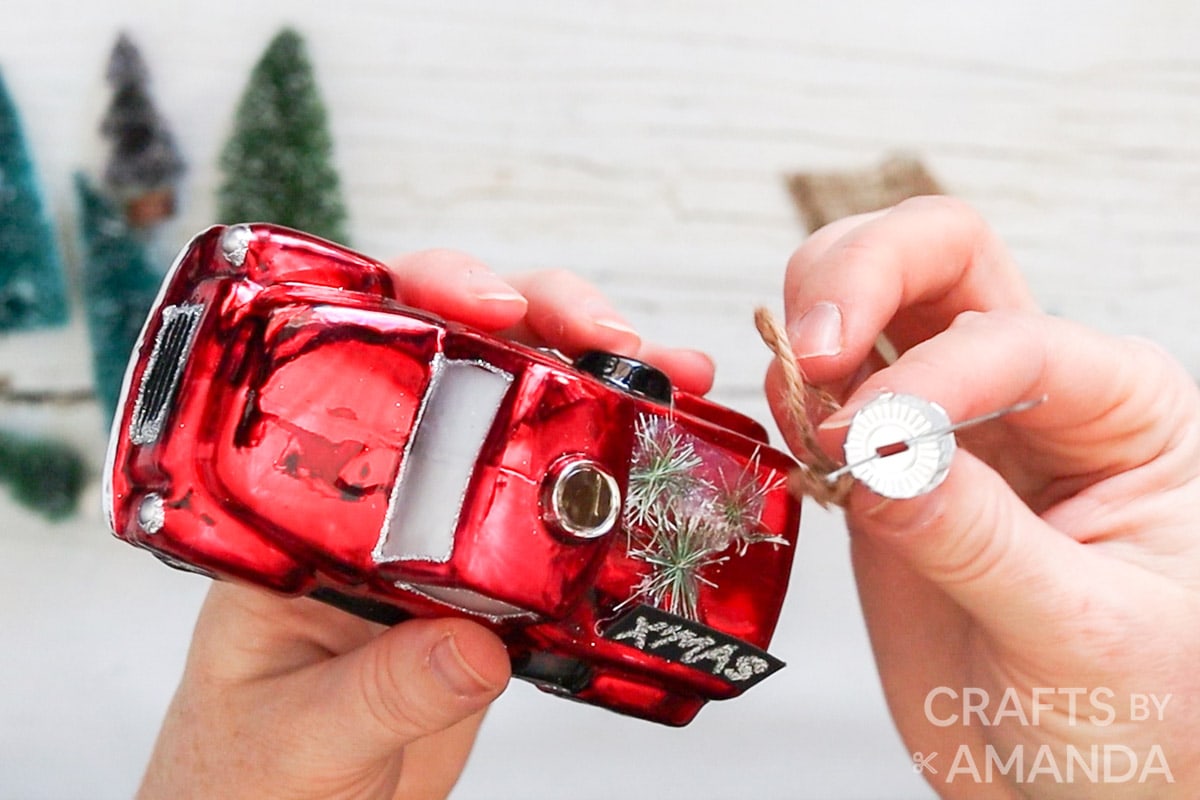
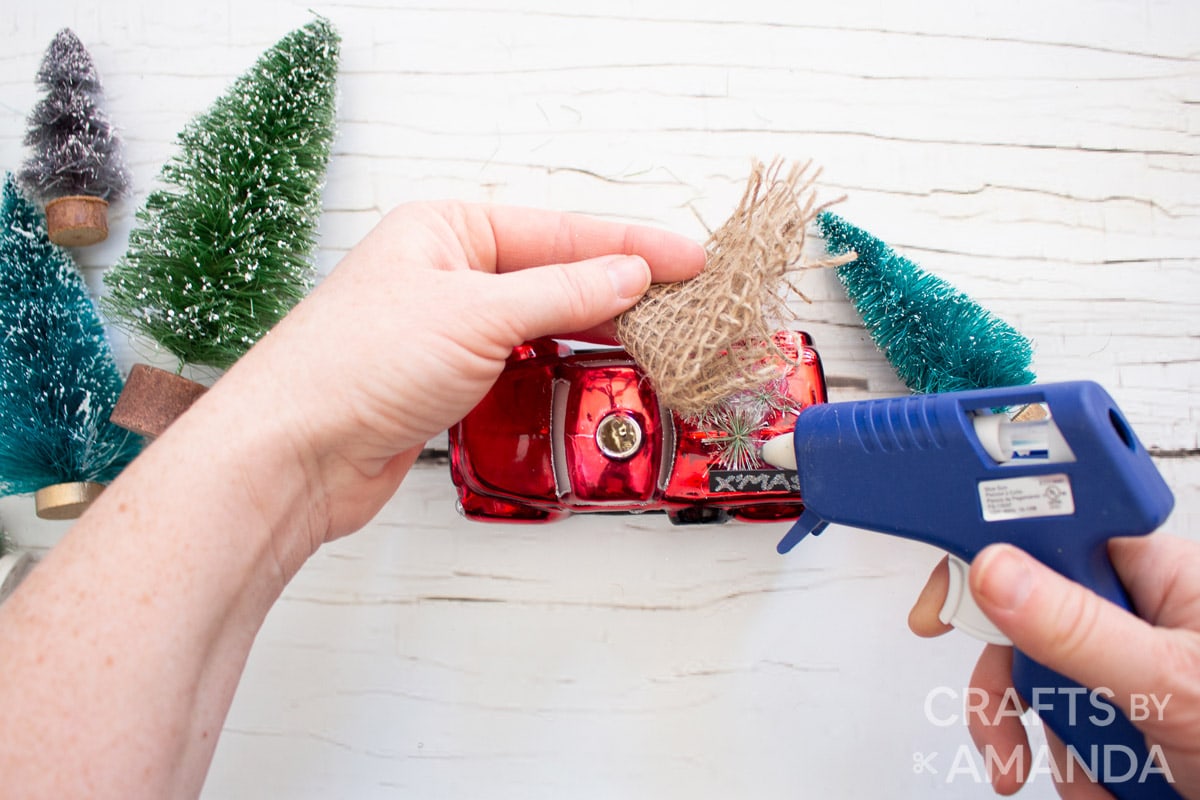
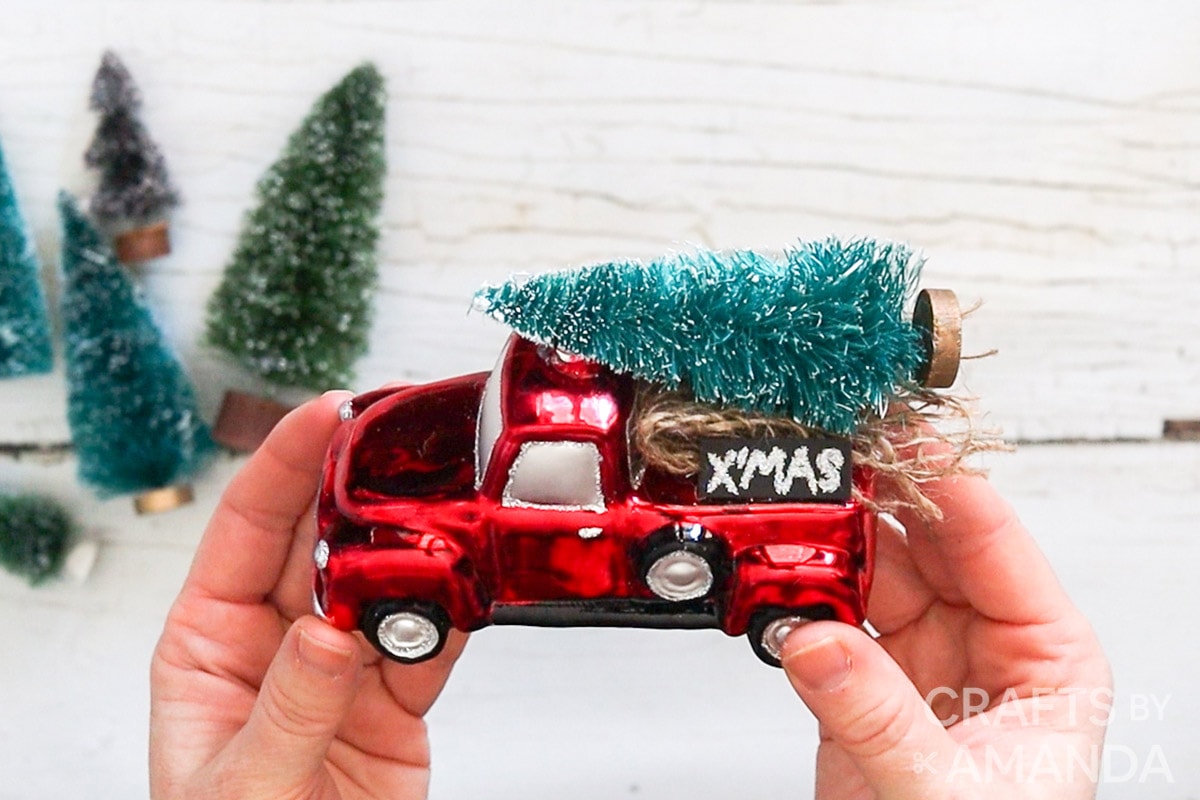
Preparing the Red Truck
- If you’re using a red truck ornament, remove the ornament cap from the top. Additionally, if your red truck has other embellishments that don’t suit the terrarium, carefully remove them and put them aside. In our case, we removed mini Christmas trees using a pair of wire cutters.
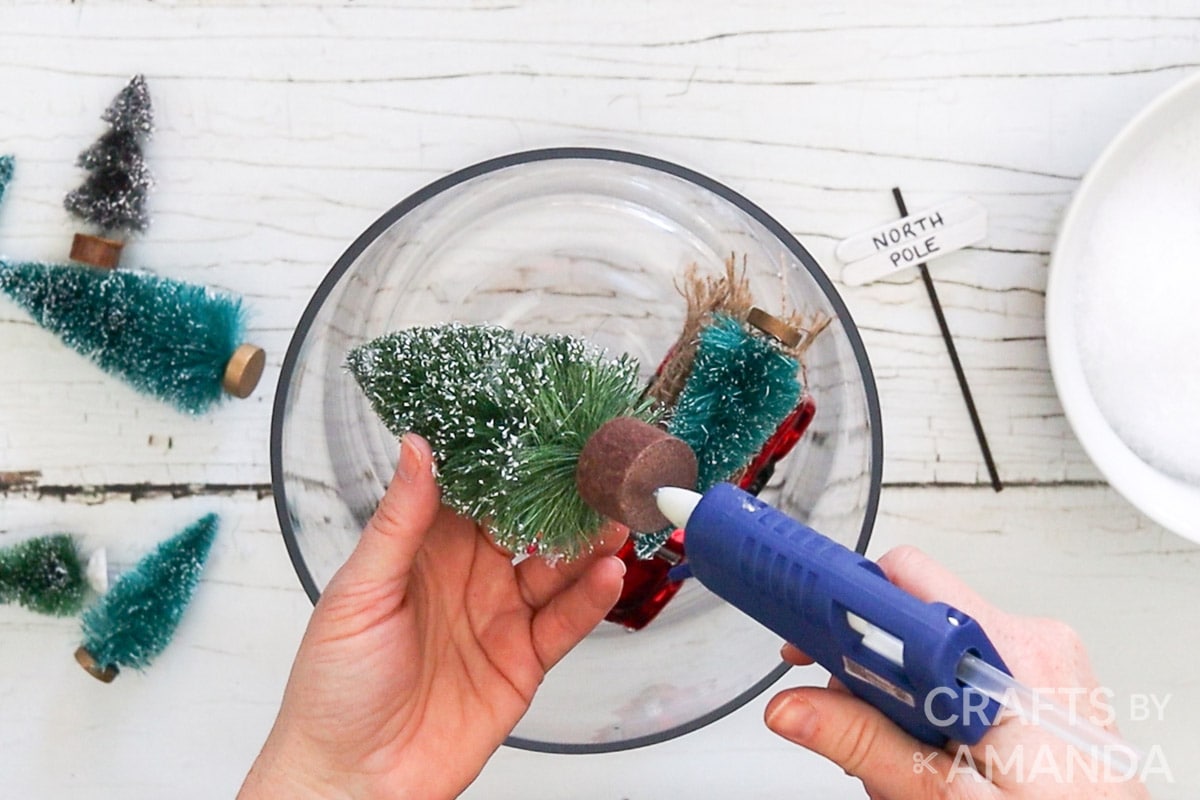
- Next, fold a small piece of burlap and glue it to the back of the red truck and then glue a medium-sized bottle brush tree to the back of the red truck.
Assembling the Terrarium
- Apply a dab of glue to the rim of the plastic container and press the container with the rim side down into the center of the vase. This container will be used as a riser to glue all the accessories onto.
- Place the red truck inside the vase and leave it to rest on top of the plastic riser, do not glue the truck.
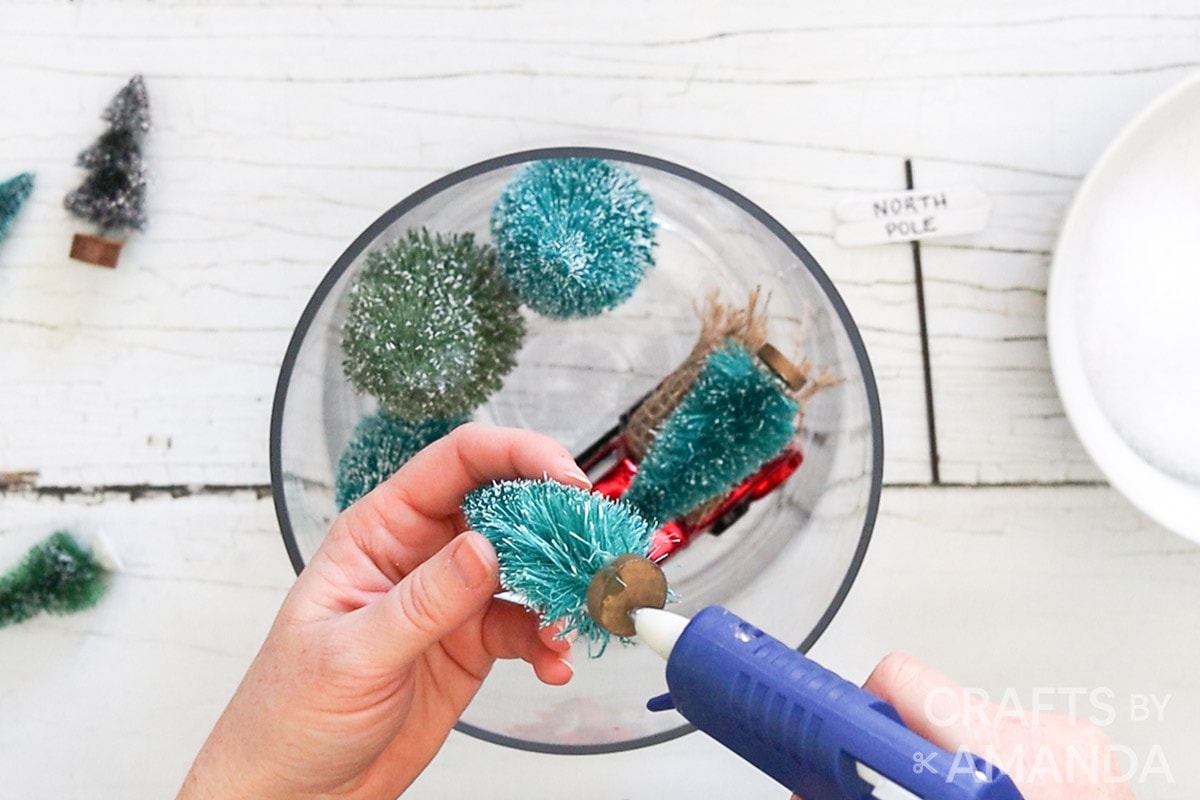
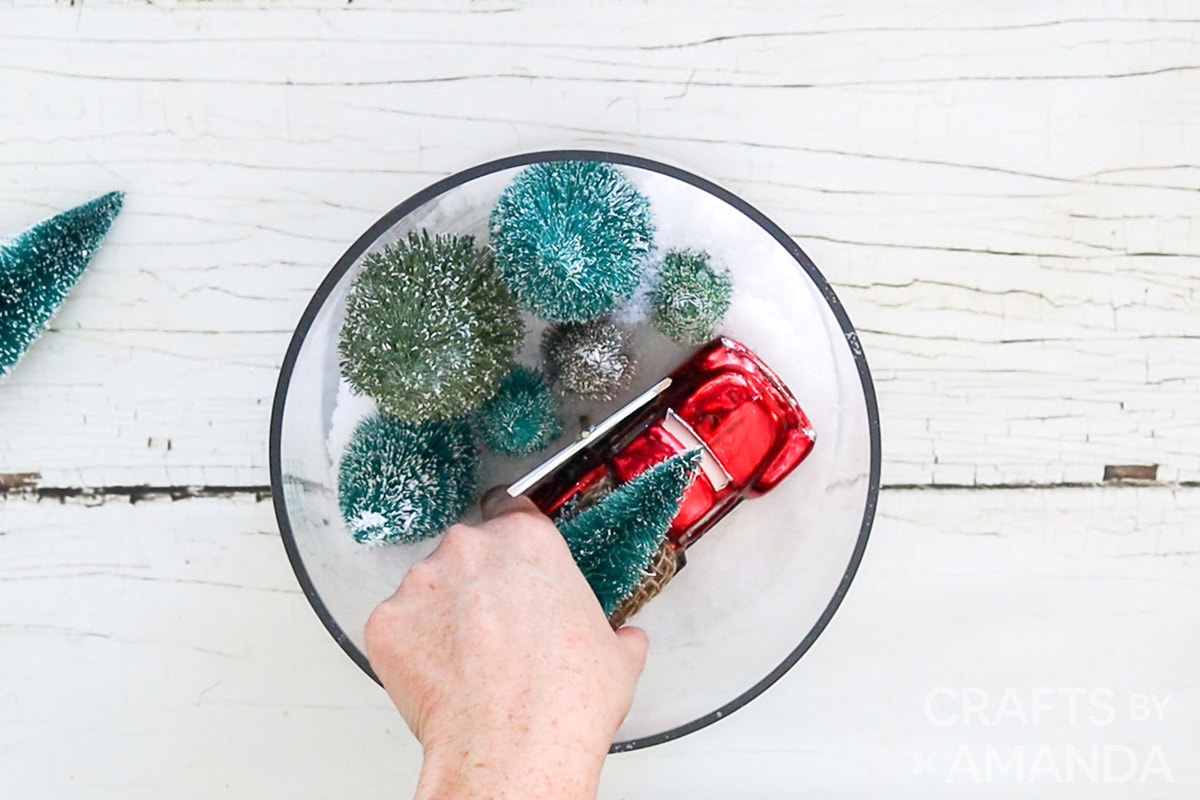
- Starting with the largest bottle brush tree, add glue to the bottom and press it in place inside the vase on top of the plastic container.
- Add the rest of the bottle brush trees with the largest trees at the far back.
- Remove the red truck.
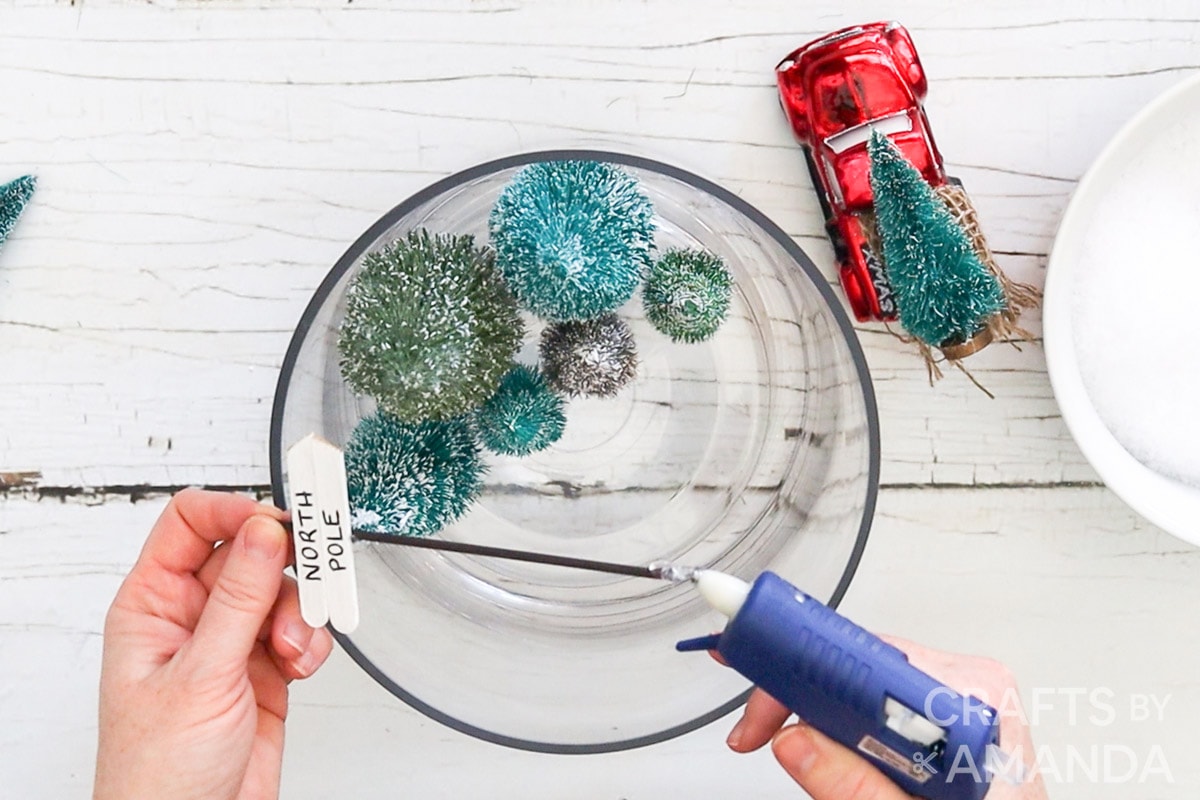
- Next, glue the bottom of the North Pole sign and stick it in place in front of the bottle brush trees. Hold it in place until the glue sets and the sign stays upright.
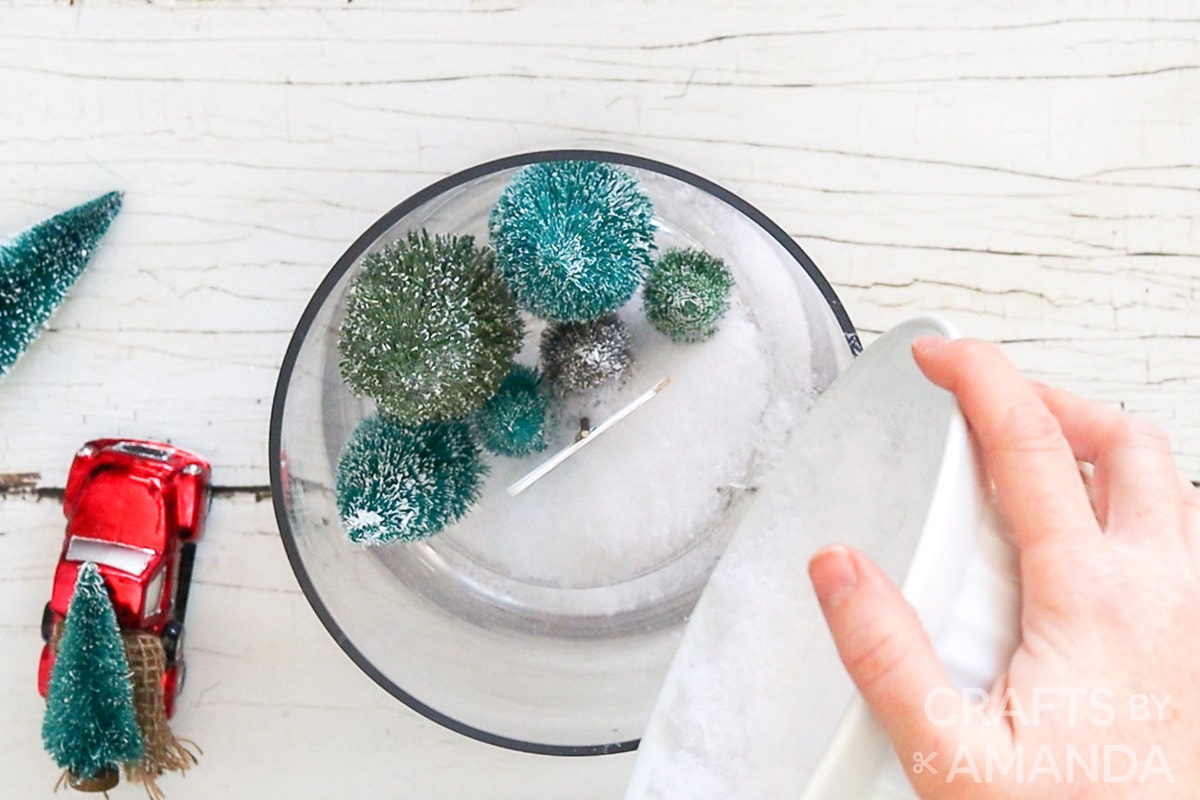
- Add the artificial snow into the vase covering the plastic container completely. Use your fingers to move the snow around if needed so that the gap between the container and the vase is filled.
- Place the red truck back inside the vase to rest on top of the snow. Add twinkle lights if desired.
Frequently Asked Questions
To store this so you can display it year after year, first remove the truck and wrap in tissue paper. Next, carefully tip the container over another (empty) container or a zipper gallon sized plastic bag. Empty out as much of the faux snow as possible and seal the bag or container. Lastly, wrap the container (keeping the trees inside of it) in bubble wrap. Store everything together for next year!
Expert Crafting Tips
While we love the red truck theme, you can use any theme you like. Ideas include trees with presents and a Santa Claus, or a scene of deer in the forest. Whatever you like.
You too can easily make a Christmas terrarium to display on your mantle, as a centerpiece for your holiday table, or to give as a gift!
More Christmas Decor Ideas
- Snowman Hat Centerpiece
- Waterless Snow Globes
- Mason Jar Lid Snowman
- Christmas Village Shadowbox
- 30 DIY Christmas Wreaths
- Winter Greenery Embroidery Hoop Wreath
I love to create and share my projects with you! I know it’s hard to remember to come back and search, so I’ve made it easy for you with my weekly newsletter! You can subscribe for free and I’ll send you fun crafts and delicious recipes every week right to your email.

Christmas Terrarium
Supplies
- Large cylinder glass vase 8” high x 8” wide – similar to this one
- Empty plastic container that fits inside the cylinder vase approx. 2” high and 6” wide (to act as the riser for the terrarium)
- 2 cups artificial snow or as needed
- Green bottle brush Christmas trees in a variety of sizes ranging from 3 1⁄2” to 6 1⁄2” tall
- Red truck ornament 3” long (similar to this one)
- 2 popsicle craft sticks
- 1 wooden skewer
- Acrylic paint in white and brown
- Burlap approx. 2”x2”
Craft tools
- Paint brushes, fine tip
- Black permanent marker (medium tip)
- Hot glue gun and clear glue sticks
- Gardening shears and wire cutter (optional)
Instructions
Preparing the North Pole Sign
- Paint the surface of the popsicle sticks in white acrylic paint and leave them to dry fully. Paint the surface of the wooden skewer in brown acrylic paint.
- Once dry, cut the popsicle sticks to 2” long, with one end cut on diagonal.
- Place them on a flat surface side by side and using a black marker, print the words “NORTH POLE” on to the painted sticks.
- Turn them with the wrong side up and using a hot glue gun, glue the painted wooden skewer perpendicular to the craft sticks forming a miniature sign.
Preparing the Red Truck
- If you’re using a red truck ornament, remove the ornament cap from the top. Additionally, if your red truck has other embellishments that don’t suit the terrarium, carefully remove them and put them aside. In our case, we removed mini Christmas trees using a pair of wire cutters.
- Next, fold a small piece of burlap and glue it to the back of the red truck and then glue a medium sized bottle brush tree to the back of the red truck.
Assembling the Terrarium
- Apply a dab of glue to the rim of the plastic container and press the container with the rim side down into the center of the vase. This container will be used to glue all the accessories on to.
- Place the red truck inside the vase and leave it to rest on top of the plastic riser, do not glue the truck.
- Starting with the largest bottle brush tree, add glue to the bottom and press it in place inside the vase on top of the plastic container.
- Add the rest of the bottle brush trees with the largest trees at the far back.
- Remove the red truck.
- Next, glue the bottom of the North Pole sign and stick it in place in front of the bottle brush trees. Hold it in place until the glue sets and the sign stays upright.
- Add the artificial snow into the vase covering the plastic container completely. Use your fingers to move the snow around if needed so that the gap between the container and the vase is filled.
- Place the red truck back inside the vase to rest on top of the snow. Add twinkle lights if desired.
Video
Expert Tips & FAQs
- To store this so you can display it year after year, first remove the truck and wrap in tissue paper. Next, carefully tip the container over another (empty) container or a zipper gallon sized plastic bag. Empty out as much of the faux snow as possible and seal the bag or container. Lastly, wrap the container (keeping the trees inside of it) in bubble wrap. Store everything together for next year!
This post originally appeared here on December 11, 2020.
- Patriotic Pinwheels - June 23, 2026
- Fingerprint Daddy & Me Coffee Mug - June 12, 2026
- Patriotic Bandana Wreath - June 9, 2026


Leave a Reply