• Home
  • About
    • About Crafts by Amanda
    • Visit Our Recipe Site
  • Work With Us
  • Join
    • Free Newsletters
    • Join our Facebook craft group
↑
  • Tutorials
    • Tutorial Index
    • Adult Crafts
    • Crafts for Kids
    • Crafts for Seniors
    • Recycled Crafts
    • Seasonal Crafts
    • Holiday Crafts
    • Free Printables
    • Craft Collections
  • Adult Crafts
    • Bath & Body
    • Beach Crafts
    • Clay Pot Crafts
    • Crafts for Seniors
    • Decoupage Crafts for Adults
    • DIY Gift ideas
    • Garden Crafts
    • Home Decor Projects
    • Kitchen Crafts
    • Light Bulb Crafts
    • Luminary Crafts
    • Mason Jar Crafts
    • Needlework
    • Photo Display Ideas
    • Recycled Crafts for Adults
    • Wearable Crafts for Adults
  • Crafts for Kids
    • Animal Crafts for Kids
    • Back to School Crafts
    • Beach Crafts for Kids
    • Camp Crafts
    • Cardboard Tube Crafts for Kids
    • Decoupage Crafts for Kids
    • Easy Crafts for Kids
    • Nature Crafts for Kids
    • Other Kid’s Crafts
    • Paper Plate Crafts for Kids
    • Recycled Crafts for Kids
    • Slimes, Doughs, & Clay
    • Wearable Crafts for Kids
  • Holiday Crafts
    • 4th of July Crafts
    • Christmas Crafts
    • DIY Gift ideas
    • Earth Day Crafts
    • Easter Crafts
    • Father’s Day Crafts
    • Halloween Crafts
    • Memorial Day Crafts
    • Mother’s Day Crafts
    • New Year’s
    • Other Holidays
    • Patriot Day Crafts
    • St. Patrick’s Day Crafts
    • Thanksgiving Crafts
    • Valentine’s Day Crafts
  • Seasonal Crafts
    • Winter Crafts
    • Spring Crafts
    • Summer Crafts
    • Fall Crafts
  • Home
  • About
    • About Crafts by Amanda
    • Visit Our Recipe Site
  • Work With Us
  • Join
    • Free Newsletters
    • Join our Facebook craft group
  • Skip to primary navigation
  • Skip to main content
  • Skip to primary sidebar
  • Skip to footer

Crafts by Amanda

crafts for adults and kid's crafts

  • Tutorials
    • Tutorial Index
    • Adult Crafts
    • Crafts for Kids
    • Crafts for Seniors
    • Recycled Crafts
    • Seasonal Crafts
    • Holiday Crafts
    • Free Printables
    • Craft Collections
  • Adult Crafts
    • Bath & Body
    • Beach Crafts
    • Clay Pot Crafts
    • Crafts for Seniors
    • Decoupage Crafts for Adults
    • DIY Gift ideas
    • Garden Crafts
    • Home Decor Projects
    • Kitchen Crafts
    • Light Bulb Crafts
    • Luminary Crafts
    • Mason Jar Crafts
    • Needlework
    • Photo Display Ideas
    • Recycled Crafts for Adults
    • Wearable Crafts for Adults
  • Crafts for Kids
    • Animal Crafts for Kids
    • Back to School Crafts
    • Beach Crafts for Kids
    • Camp Crafts
    • Cardboard Tube Crafts for Kids
    • Decoupage Crafts for Kids
    • Easy Crafts for Kids
    • Nature Crafts for Kids
    • Other Kid’s Crafts
    • Paper Plate Crafts for Kids
    • Recycled Crafts for Kids
    • Slimes, Doughs, & Clay
    • Wearable Crafts for Kids
  • Holiday Crafts
    • 4th of July Crafts
    • Christmas Crafts
    • DIY Gift ideas
    • Earth Day Crafts
    • Easter Crafts
    • Father’s Day Crafts
    • Halloween Crafts
    • Memorial Day Crafts
    • Mother’s Day Crafts
    • New Year’s
    • Other Holidays
    • Patriot Day Crafts
    • St. Patrick’s Day Crafts
    • Thanksgiving Crafts
    • Valentine’s Day Crafts
  • Seasonal Crafts
    • Winter Crafts
    • Spring Crafts
    • Summer Crafts
    • Fall Crafts
Craft Tutorials | Adult Crafts | Home Decor Projects | Farmhouse Memo Board
Home Decor Projects

Farmhouse Memo Board

Author by Jane and Sonja on April 28, 2019 Updated on December 6, 2020

5 from 2 votes
Create your own farmhouse inspired diy memo board for displaying your to-do lists as well as your favorite photos and inspirational quotes.
Jump to Project
Create your own farmhouse inspired DIY memo board for displaying your to-do lists as well as your favorite photos and inspirational quotes.
190 shares
  • Share
  • Tweet
  • Flipboard
  • Email
farmhouse memo board pin image

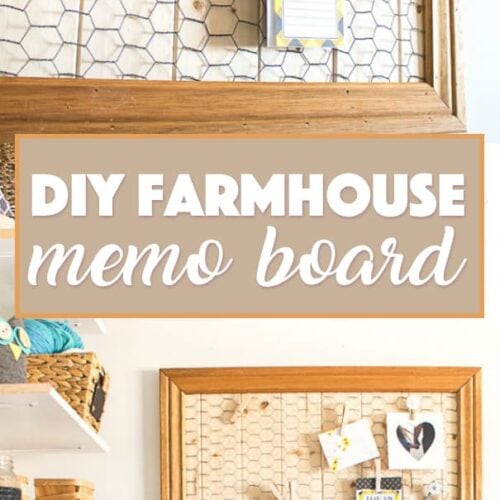
Hi friends! I’m excited to share this DIY memo board with you today as it’s a project that’s been on my to-do list for quite some time. Inspired by the farmhouse trend, I used some scrap wood and chicken wire netting to create this stylish, yet practical pinboard.

Memo board hanging on wall with paper and clips attached


Farmhouse Inspired DIY Memo Board

We love using materials that are available to us and this memo board was a great way to use up some scrap wood pieces. Scrap wood is great to repurpose into something you can use around the home, like these adorable scrap wood frames or this reversible scarecrow snowman sign.

We actually also used some of this particular wood for a coastal farmhouse sign for our cottage bedroom.

For the memo board, I decided to leave the wood in a natural finish. However, you could easily paint or stain the pine boards (we have a natural coffee wood stain on our blog) or baseboard trim in a color of your choosing.  The pine boards resemble shiplap, which would also look amazing with a simple whitewash finish.

Memo board using scrap wood pieces and chicken wire

I’ve used these fun DIY decorative clothespins to display my to-do lists, favorite photos, and inspiring quotes. Guess I can now cross “DIY memo board” off that to-do list. I’ve hung my DIY memo board in my craft room close to my upcycled cookie sheet magnetic board.

Materials Needed to make your own DIY memo board:

  • Solid wood V-groove pine boards, 5/16” thick x 3 1/2” wide
  • Miter saw
  • Chicken wire netting
  • Wire snippers
  • Scrap baseboard trim, 2 ¼” wide
  • Gloves
  • Sandpaper
  • Wood glue
  • Measuring tape, pencil
  • Nail gun
  • Industrial staple gun


Instructions for making your own farmhouse-inspired DIY memo board:

Preparing the materials:

Mark the pine boards at 24” long. With a miter saw, carefully cut each pine board into 8 even length pieces measuring 24” long.

pine board pieces

Using a wire cutter, cut the chicken wire so it measures 28” wide by 24” long.

stapling chicken wire

Measure and mark 2 pieces of baseboard trim to 28” long with the ends at a 45 degree angle. Repeat with two more pieces of trim to 24” long at a 45 degree angle.

scrap wood pieces

Assembling the materials:

Working on a flat surface, lay the cut pine boards side by side. Run a bead of wood glue along the long edge of the tongue side of the pine board. Slide the pieces together. Wipe away excess glue.

using wood glue to connect pieces of wood

Continue until all 8 pieces are glued together with the end evenly lined up.

building base of farmhouse inspired memo board

Lay the cut chicken wire net over the top of the glued pine boards and staple in place around the perimeter.

Place one long cut baseboard on top of the assembled pine boards and chicken wire and nail into place.

measuring lengths for scrap wood frame

Align the next baseboard with the secured baseboard and nail in place.

adding scrap wood to base of memo board

Align the next baseboard with the secured baseboard and nail in place. Continue working around the memo board until finished.

chicken wire on scrap wood frame

Attach the hardware to the back side.

attaching wire to bolt

I love how this memo board turned out and am wondering where I kept all these items before!

scrap wood memo board on wall

For another creative way to display your photos check out this rustic wood frame idea as well as these other helpful organization ideas. 

How do you keep your craft or office space organized? One way to keep our bathroom organized is by creating this DIY mason jar bathroom organizer, it’s great for keeping your toothbrush, cotton balls, q-tips, or anything else in for out-of-the-way storage. Be sure to check out even more adult crafts on the blog for more inspiration!


Create your own farmhouse inspired DIY memo board for displaying your to-do lists as well as your favorite photos and inspirational quotes.
Print Project
5 from 2 votes

Farmhouse Inspired DIY Memo Board

Create your own farmhouse inspired diy memo board for displaying your to-do lists as well as your favorite photos and inspirational quotes.
Author: Jane & Sonja

Supplies

  • Solid wood V-groove pine boards 5/16” thick x 3 1/2” wide
  • Miter saw
  • Chicken wire netting
  • Wire snippers
  • Scrap baseboard trim 2 ¼” wide
  • Gloves
  • Sand paper
  • Wood glue
  • Measuring tape pencil
  • Nail gun
  • Industrial staple gun

Instructions

  • Preparing the materials:
  • Mark the pine boards at 24” long. With a miter saw, carefully cut each fence board into 8 even length pieces measuring 24” long.
  • Using a wire cutter, cut the chicken wire so it measures 28” wide by 24” long.
  • Measure and mark 2 pieces of baseboard trim to 28” long with the ends at a 45 degree angle. Repeat with two more pieces of trim to 24” long at a 45 degree angle.
  • Assembling the materials:
  • Working on a flat surface, lay the cut pine boards in a row budding each piece tightly up to the next piece. Run a bead of wood glue along the long edge of the board and then slide the pieces together. Wipe away excess glue.
  • Lay the cut chicken wire net over top of the glued pine boards and staple in place around the perimeter.
  • Place one long cut baseboard on top of the assembled pine boards and chicken wire and nail into place. Align the next baseboard with the secured baseboard and nail in place. Continue working around the memo board until finished.

Video

This post originally appeared here on Apr 24, 2018.

  • Author
  • Recent Posts
Follow Along
Jane and Sonja
Bloggers at Sustain My Craft Habit
Jane and Sonja are sisters, moms and lifelong craft addicts both living near Toronto, Canada with their families. They share their love of creativity, nature and coastal craft and DIY ideas on their blog Sustain My Craft Habit.
Follow Along
Latest posts by Jane and Sonja (see all)
  • Sea Glass Christmas Tree - November 18, 2025
  • Halloween Ribbon Wreath - October 3, 2025
  • Vacation Photo Jar - July 25, 2025
190 shares
  • Share
  • Tweet
  • Flipboard
  • Email

Filed Under: DIY Gift ideas, Home Decor Projects, Photo Display Ideas Tagged With: adult crafts, diy, farmhouse, organization

Reader Interactions

Free CraftsBy email every week

Latest crafts straight to your inbox!

5 from 2 votes (2 ratings without comment)

Leave a Reply Cancel reply

Your email address will not be published. Required fields are marked *

Rate This Project


The maximum upload file size: 640 MB. You can upload: image, video. Links to YouTube, Facebook, Twitter and other services inserted in the comment text will be automatically embedded. Drop files here

Primary Sidebar

Hi! I’m Amanda and I’m the founder and head designer of Crafts by Amanda. I have spent over 25 years creating projects to share, but it’s not just me anymore! It’s turned into a complete family affair. Come and meet the Creative Team!

Free CraftsBy email every week

Latest crafts straight to your inbox!

All Time Favorites

snowy pinecone candle jar luminaries

Winter Luminaries: Snowy Pinecone…

Make pretty winter luminaries that appear to be covered ... Go To project

Make this wonderful deco mesh pumpkin wreath to hang on your door this fall!

Deco Mesh Pumpkin Wreath…

Adorn your door this fall with a pretty deco mesh ... Go To project

Learn to make these adorable ladybug painted rocks. use special outdoor paint for this adorable garden craft so you can keep garden ladybugs all summer!

Ladybug Painted Rocks…

These colorful little ladybug painted rocks are the ... Go To project

Reuse those empty prescription pill bottles in all sorts of ways. From organizing to making cookies. Yes, cookies! See how to use your empty pill bottles!

20 Uses for Prescription Pill…

You've been collecting prescription pill bottles for ... Go To project

Meet the Family

Amanda

Founder and Designer

Kristen

Editorial Manager

Lindsay

Social Media Manager

As seen on:

Footer

Favorites

  • Jar Photo Frames
  • No-Sew Roman Shade
  • Paper Flowers
  • How to Make a Scrunchie
  • Mermaid Slime

About

  • Home
  • Meet the Creative Team
  • Work with Us
  • Privacy Policy
  • Accessibility
  • Contact Us

Images/text copyright Amanda Davis 2025. To feature a post from Crafts by Amanda, you may use one photo credited and linked back directly to the project post.

Free CraftsBy email every week

Latest crafts straight to your inbox!

Copyright ©2026, Crafts by Amanda. All Rights Reserved.
Design by Pixel Me Designs

Rate This Tutorial

Your vote:


To share a photo with your comment click here!

A rating is required
A name is required
An email is required

Recipe Ratings without Comment

Something went wrong. Please try again.