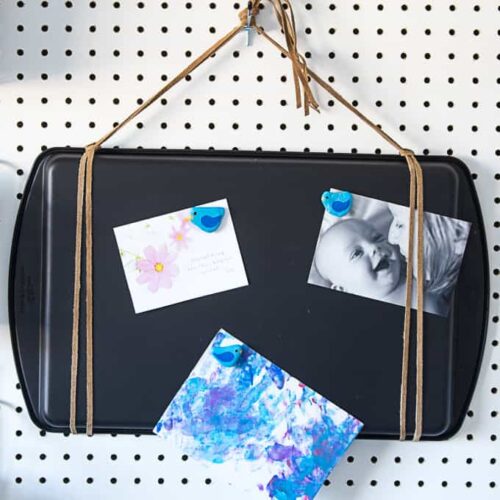
I literally pulled this old cookie sheet out of my recycling bin having had no more use for it. Repurposing old kitchen items is a great way to add character to your space, all while saving money. Similar to this Chalkboard Menu that was made from an old cutting board, our purpose for this baking sheet is the same. No longer usable for baking cookies, we decided to turn it into a cookie sheet magnetic board for my craft room!

Cookie Sheet Magnetic Board
With some leftover spray paint and leather strapping from my sewing pile, I happily transformed this cookie sheet into a practical and stylish magnetic board.
As for these adorable bird magnets made from painted rocks, you can get the tutorial here.

What you’ll need to make this magnetic board:
- Cookie Sheet
- Rust-oleum Painter’s Touch spray paint, in matte black (or any color of your choosing)
- Scissors
- Leather straps or ribbon

Instructions for making a cookie sheet magnetic board:
Properly clean and dry your baking sheet. Scrub away as much leftover caked-on grease as possible so you’re left with a smooth surface on your cookie sheet.
In a well-ventilated area and with the surface protected, spray paint one side of the baking sheet at a time. Follow the manufacturer’s instructions on the spray paint can for best results.


Repeat on the opposite side. Leave to dry for 24 hours before proceeding to next step.
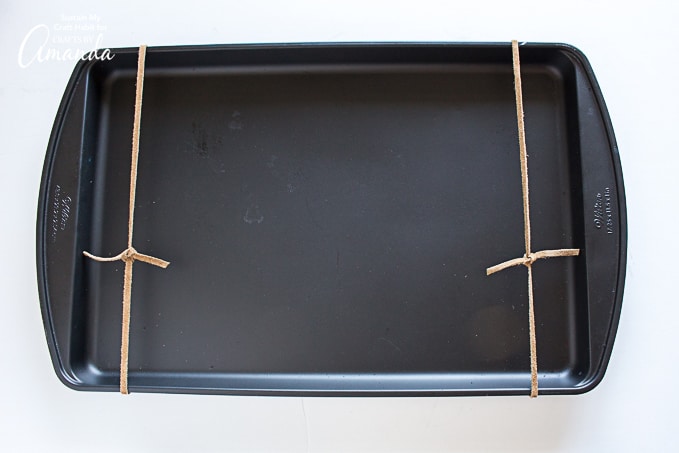
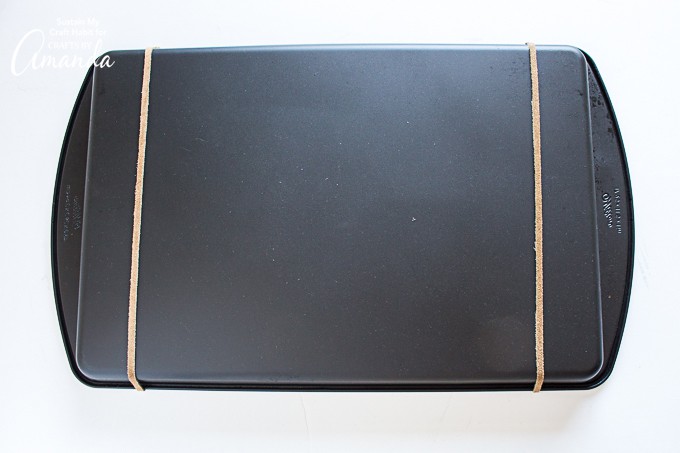
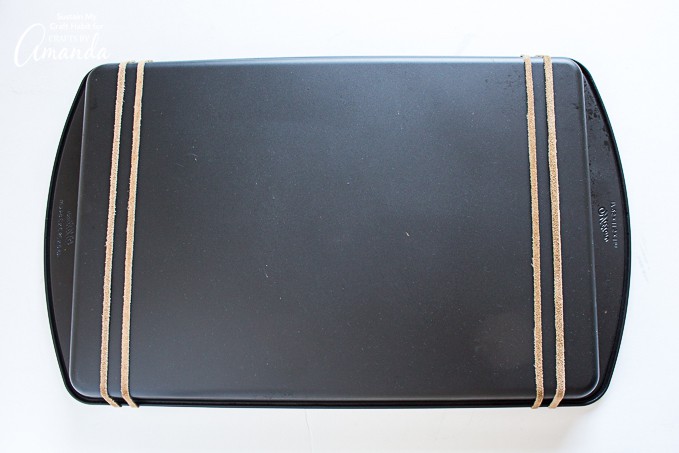
You can use either side of the cookie sheet for this magnetic board. I chose to use to underside since it had the smoother surface.

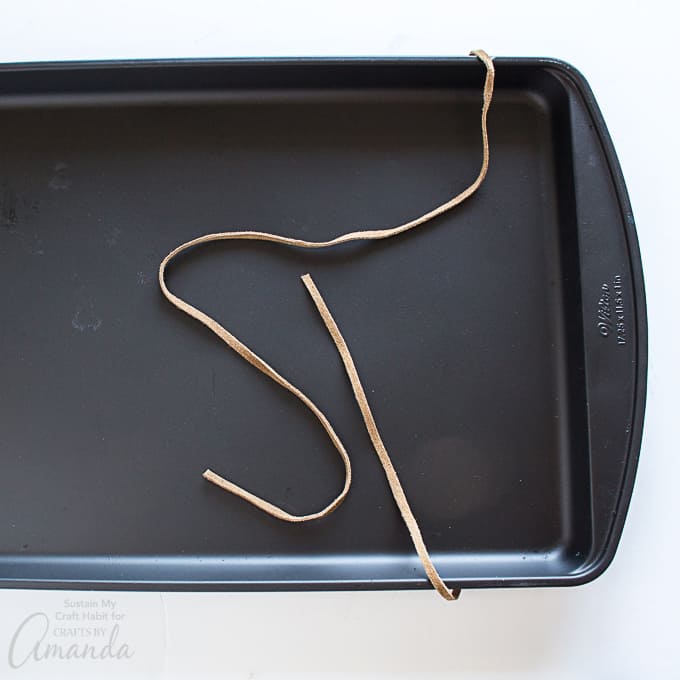
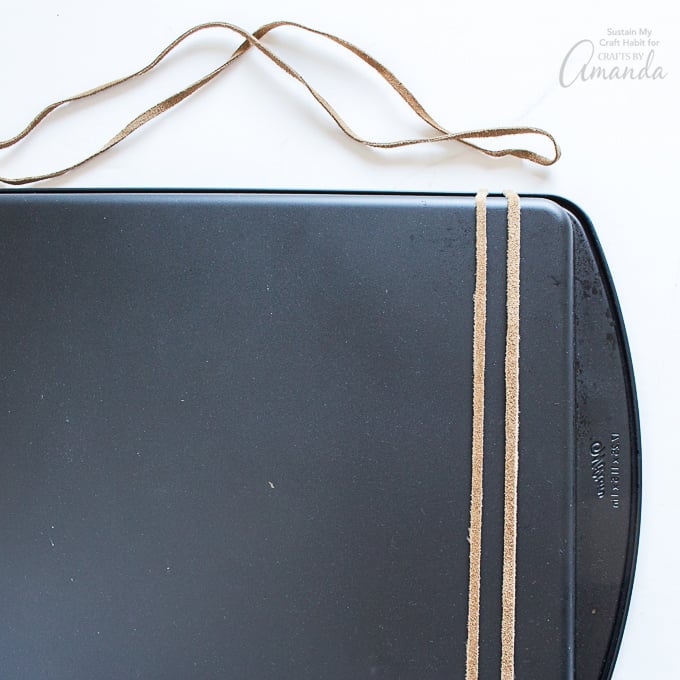
Once fully cured, cut leather straps (or ribbon) twice the width of the baking sheet plus an additional few inches for tieing.

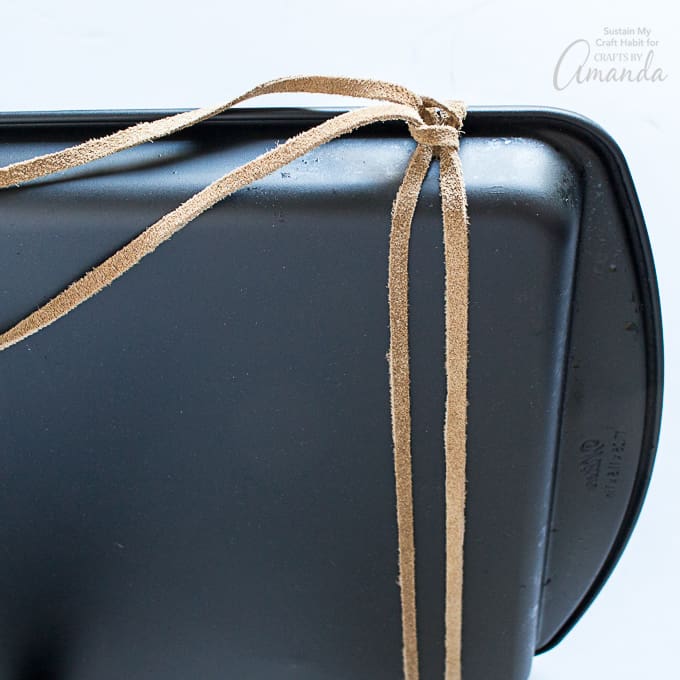
Wrap the strap around one end of the baking sheet as shown with the “wrong side” of the cookie sheet facing upwards. Securely knot the strap in place and trim away the excess length.
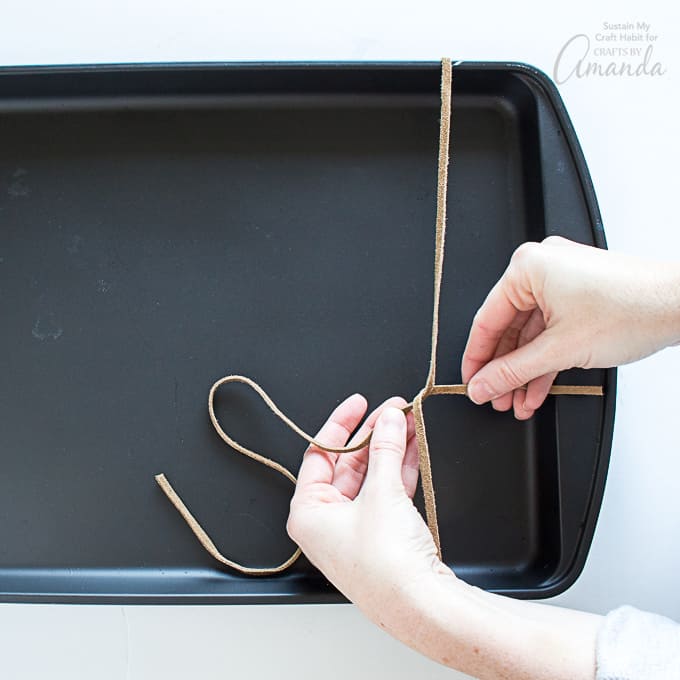
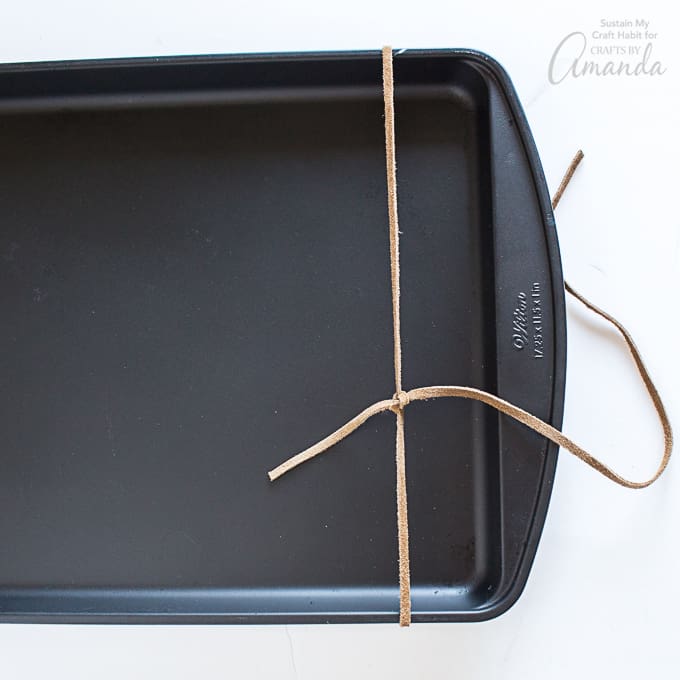
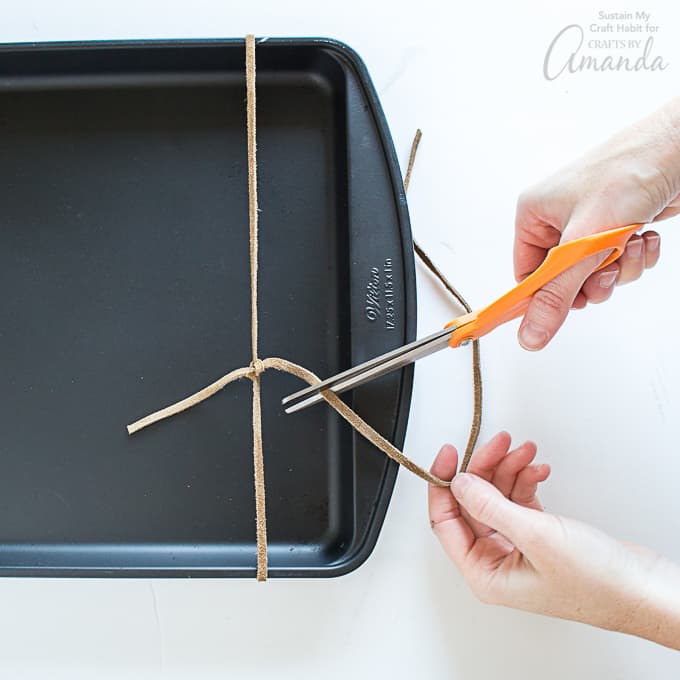
Repeat on the opposite side.
-

- View from bottom
-

- View from top
For decorative purposes, you can tie an extra row of leather strapping like I’ve done here or leave it as is.
-
- View from bottom
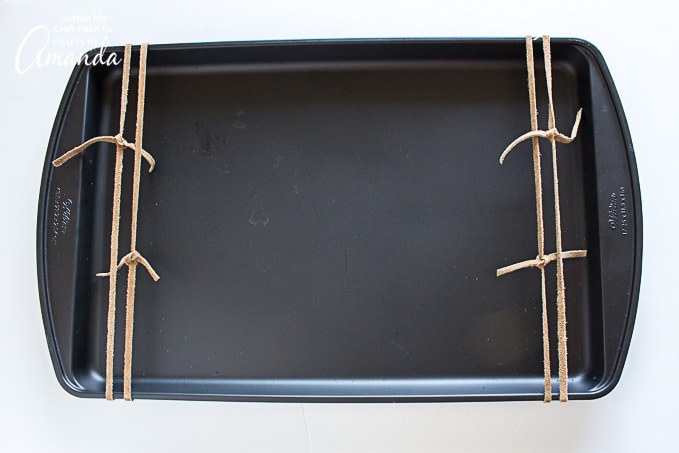
-
- View from top
Cut two pieces of leather strapping (or ribbon) approx. 36” long each. Fold each piece in half forming a loop in the middle. Thread the loop underneath the tied strapping and pull the ends through the loop fully.
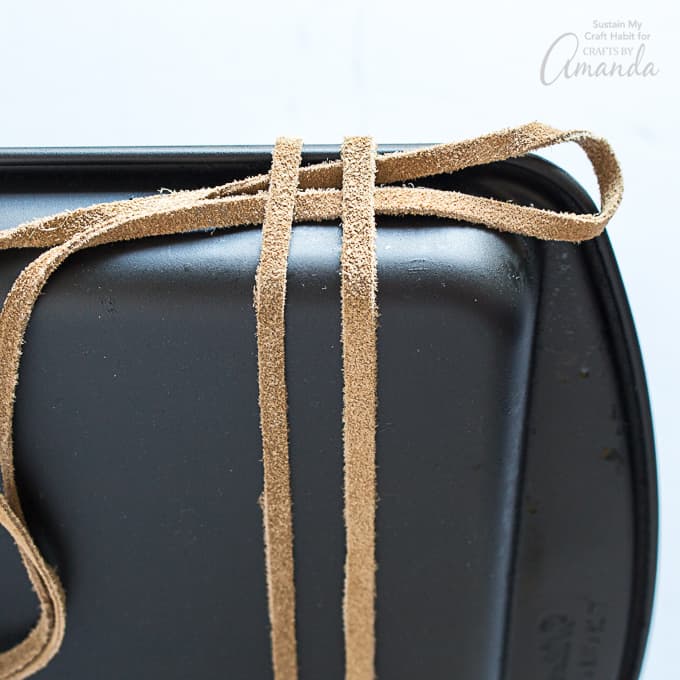
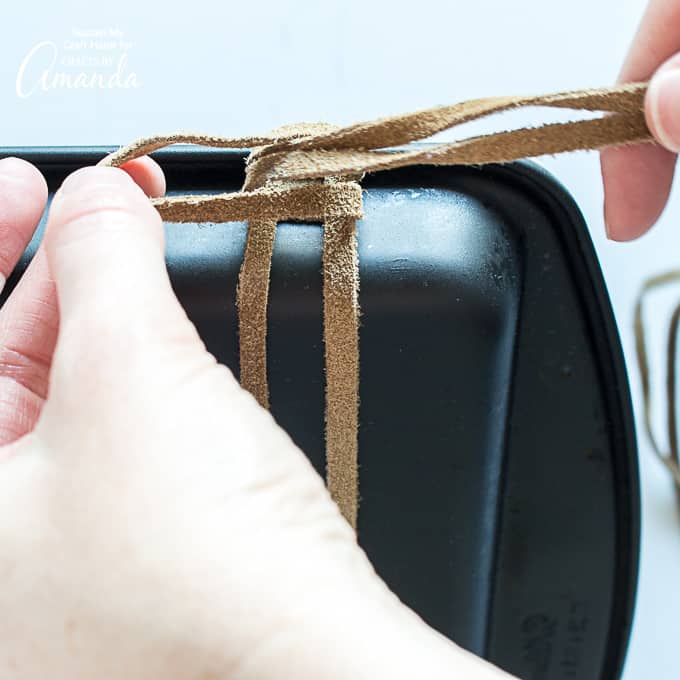
Repeat on the other side.

Tie the two ends together to form a triangle ripe hanging.

And there you have it, the cookie sheet magnetic board is ready for hanging and displaying photos, cards, to-do lists, etc.
What creative ways have you repurposed items from your home?

Another fun way to use an old (or cheap) baking sheet would be to transform it into a DIY Colorform Magnetic Dress Tray! This idea is great for keeping little ones busy. Or if you’re looking for more cute photo display ideas, this Corkboard Wall Letter is great for pinning recipes, photos, and sticky notes to (and it’s so easy!)
For a more advanced (but worth it) project for hanging papers or photos to is this DIY Farmhouse Display Board. This memo board adds a touch of farmhouse feel to your space!

Cookie Sheet Magnetic Board
Supplies
- Cookie sheet
- Rust-Oleum Painter's Touch Spray Paint in matte black or color of your choice
- Scissors
- Leather straps or ribbon
Instructions
- Properly clean and dry your baking sheet. Scrub away as much leftover caked-on grease as possible so you’re left with a smooth surface on your cookie sheet.
- In a well-ventilated area and with the surface protected, spray paint one side of the baking sheet at a time. Follow the manufacturer’s instructions on the spray paint can for best results.
- Repeat on the opposite side. Leave to dry for 24 hours before proceeding to next step.
- You can use either side of the cookie sheet for this magnetic board. I chose to use to underside since it had the smoother surface.
- Once fully cured, cut leather straps (or ribbon) twice the width of the baking sheet plus an additional few inches for tieing.
- Wrap the strap around one end of the baking sheet as shown with the “wrong side” of the cookie sheet facing upwards. Securely knot the strap in place and trim away the excess length.
- Repeat on the opposite side.
- For decorative purposes, you can tie an extra row of leather strapping or leave it as is.
- Cut two pieces of leather strapping (or ribbon) approx. 36” long each. Fold each piece in half forming a loop in the middle. Thread the loop underneath the tied strapping and pull the ends through the loop fully.
- Repeat on the other side.
- Tie the two ends together to form a triangle ripe hanging.

This post was originally published on this blog on Mar 21, 2018.
- Pressed Flower Resin Magnets - May 26, 2026
- Pressed Flower Art - May 8, 2026
- DIY Easter Egg Wreath - March 20, 2026


Jennifer Ann Talwar says
I work at Wilton and will be sharing this clever idea!!
Amanda Formaro says
Wonderful, thanks!