The possibilities are endless when you begin creating with Crayola’s Glitter Dots and Sparkle Station. Today, we designed adorable glitter star ornaments and we know your kids will have a blast making them too! We’re excited to partner with Crayola once again this holiday season to share this fun tutorial!

Star Ornaments For Kids
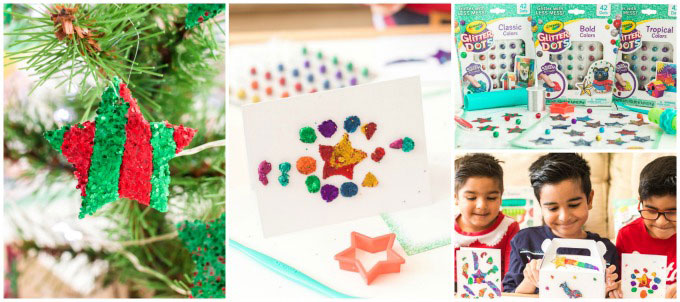
Kids can have fun squishing, rolling, molding, and cutting their glitter infused creations with way less mess than traditional glitter! The glitter dots have a special coating so the glitter stays on the dot and not all over your hands and floor. The Glitter Dot Sparkle Station includes tools and supplies for hours of crafting fun!
We made 3 different Christmas Star ornaments using the tools and techniques from the kit as well as a trinket box and greeting cards. Glitter Dots make personalizing art for kids more fun and fabulous!

Supplies You Will Need
- Crayola Glitter Dots Sparkle Station Kit
- Child safe needle
- Fishing line/metallic thread
- Your child’s imagination!

These glitter star ornaments are a fun Christmas craft for kids. With Crayola Glitter Dots Sparkle Station’s 13 different color options, they can create whatever pattern and color combination their little hearts desire!

How To Make Glitter Star Ornaments
Glitter Dots: Tropical Mermaid Star Ornaments:
- Place Glitter Dots Work Mat (From your Sparkle Station) on your work surface
- Take one of each color from the Glitter Dots Tropical Colors collection.
- Using the craft tool divide each dot in half.
- Combine all colors and squish together, until you reach the desired effect.
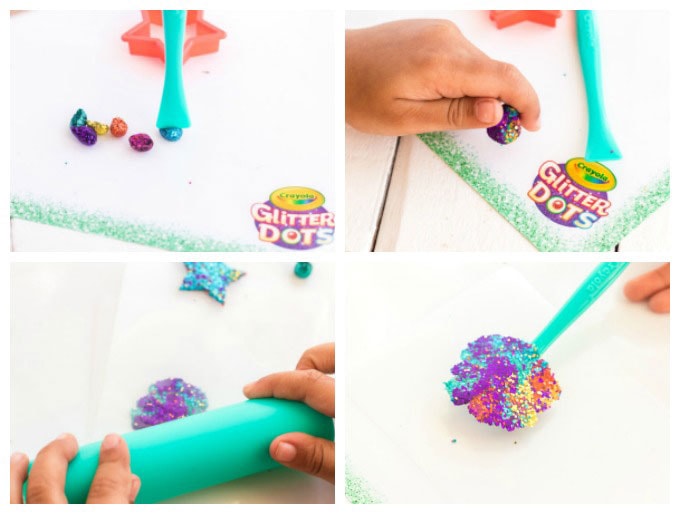
- Place the combined Glitter Dots between the 2 clear roller sheets. Press down and roll with roller tool to the thickness of a quarter.
- Transfer rolled out glitter dots to work mat with craft tool.
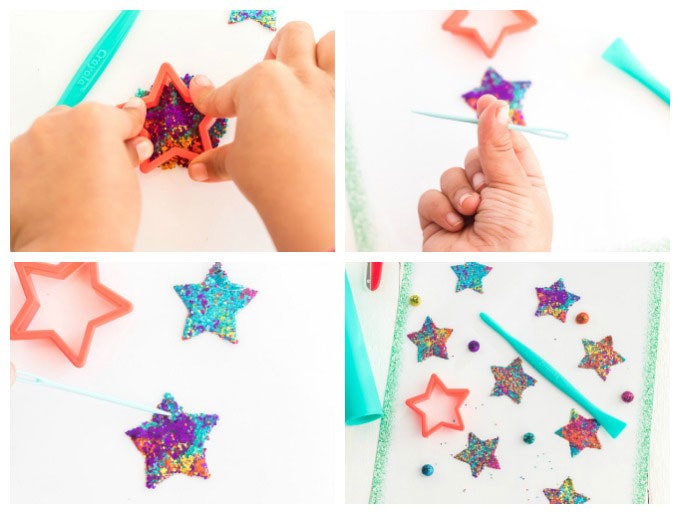
- Use the Star-shaped cutter to cut out the star shape and the craft tool to release the shape.
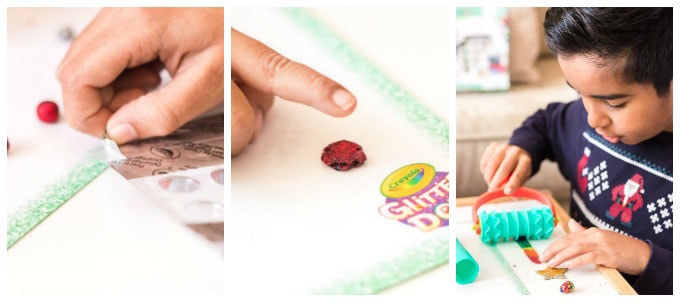
- Use a plastic needle to create a hole at the top of the ornament.
- Repeat steps with remaining glitter dots and remnants.
- Allow starts to dry for 1 hour.
- When dry thread star with metallic thread and tie with a knot to secure! Enjoy using these to decorate your Christmas tree or gift packages!
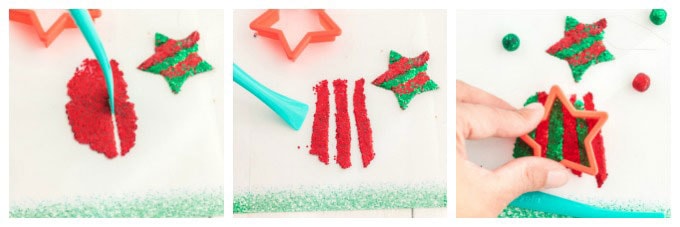
Glitter Dots: Candy Strip Star Ornaments
- Place Glitter Dots Work Mat (From your Sparkle Station) on your work surface
- Take 2 red dots and 2 green dots from the Glitter Dots Classic Colors collection.
- Combine and squish both red dots and set aside and repeat with green dots.
- Place the red Glitter Dots between the 2 clear roller sheets. Press down and roll with roller tool to the thickness of a quarter. Set aside. Repeat with green Glitter Dots.
- Transfer rolled out glitter dots to work mat with craft tool.
- Use the craft tool to cut both colors into stripes.
- Arrange the red and green stripes in an alternating pattern on the work mat.
- Use the Star-shaped cutter to cut out the star shape and the craft tool to release the shape.
- Use a plastic needle to create a hole at the top of the ornament.
- Repeat steps with remaining glitter dots and remnants.
- Allow starts to dry for 1 hour.
- When dry thread star with metallic thread and tie with a knot to secure! Enjoy using these to decorate your Christmas tree or gift packages!
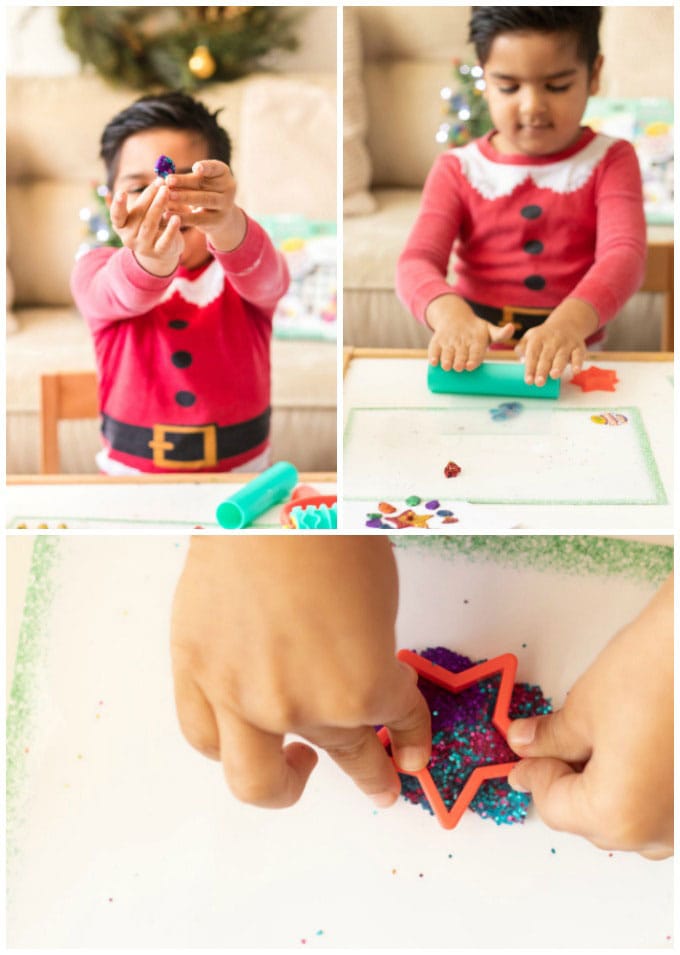
Glitter Dots: Swirly Sparkly Star Ornaments
- Place Glitter Dots Work Mat (From your Sparkle Station) on your work surface
- Take 3 silver dots and 3 blue dots from the Glitter Dots Bold Colors collection.
- Combine and squish 2 silver dots and set aside and repeat with 2 blue dots. Combine remaining blue and silver dot.
- Place the silver Glitter Dots between the 2 clear roller sheets. Press down and roll with roller tool to the thickness of a quarter. Set aside. Repeat with blue Glitter Dots. Then repeat with the blue and silver combination.
- Transfer rolled out glitter dots to work mat with craft tool.

- Take hand roller and attach swirly cutting wheels to the middle of the roller.
- Take each strip of glitter and cut into swirl shape with the hand roller. Set each strip aside.
- Link up the swirled edges of each strip with the blue-silver combination in the middle.
- Use the Star-shaped cutter to cut out the star shape and the craft tool to release the shape.
- Use a plastic needle to create a hole at the top of the ornament.
- Repeat steps with remaining glitter dots and remnants.
- Allow starts to dry for 1 hour.
- When dry thread star with metallic thread and tie with a knot to secure! Enjoy using these to decorate your Christmas tree or gift packages!
Other fun ways to use the Glitter Station Ornaments
There are lots and lots of ways to use this fun product. Your kids are going to LOVE it! Here’s a list of just a few!
- Use your ornament as a gift topper. When you give the gift to your recipient, the topper doubles as an ornament to hang on their tree!
- Create Christmas cards by attaching the stars to colored cardstock. Great for birthday and holidays!
- Use any leftover glitter dots to decorate the tips of your Christmas tree
- Hang from a windshield mirror
- Use a sticky back to cling onto a windows
- Create a garland using the glitter star ornaments
- Use as a topper for a mini Christmas

We hope these Crayola Glitter Dots Sparkle Station star ornaments bring you inspiration this holiday season! We had so much fun creating them and decorating the tree with a memory we will remember forever. There’s nothing sweeter than a homemade ornament to cherish for years to come.
More Fun Ornaments for Kids
- Melted Crayon Ornaments – using paper plates, old crayons and Crayola’s Crayon Melter you can make these fun, colorful ornaments!
- Let It Snow Scrabble Tile Ornament – our most popular DIY Christmas ornament on the blog for a good reason. A handful of supplies and your names or favorite saying is all it takes to make this fun Christmas tree decoration.
- Faux Stained Glass Paper Snowflakes – this paper snowflake doubles as an ornament and suncatcher!
- DIY Mosquito Repellent Candles - July 10, 2026
- Mason Jar Solar Lights - July 3, 2026
- Patriotic Pinwheels - June 23, 2026


Amy says
These are so fun! Will be making them with my kids this year. thanks!
Beth K. says
Those Glitter Dots are so cool! I love how you used them to create ornaments. This is such a fun project for kids.
Angie says
This is so cute! I love the red and green one!
April Woods says
how fun! my daughter will love this! :-D