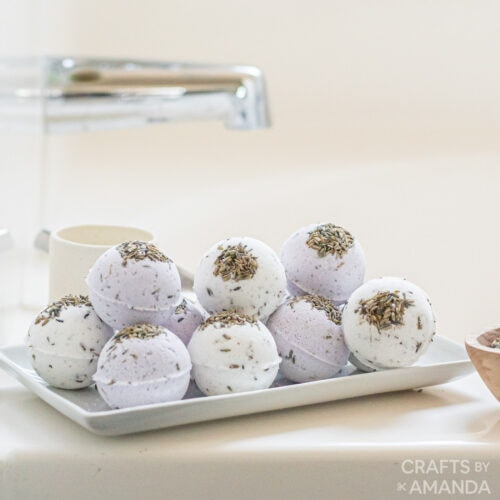

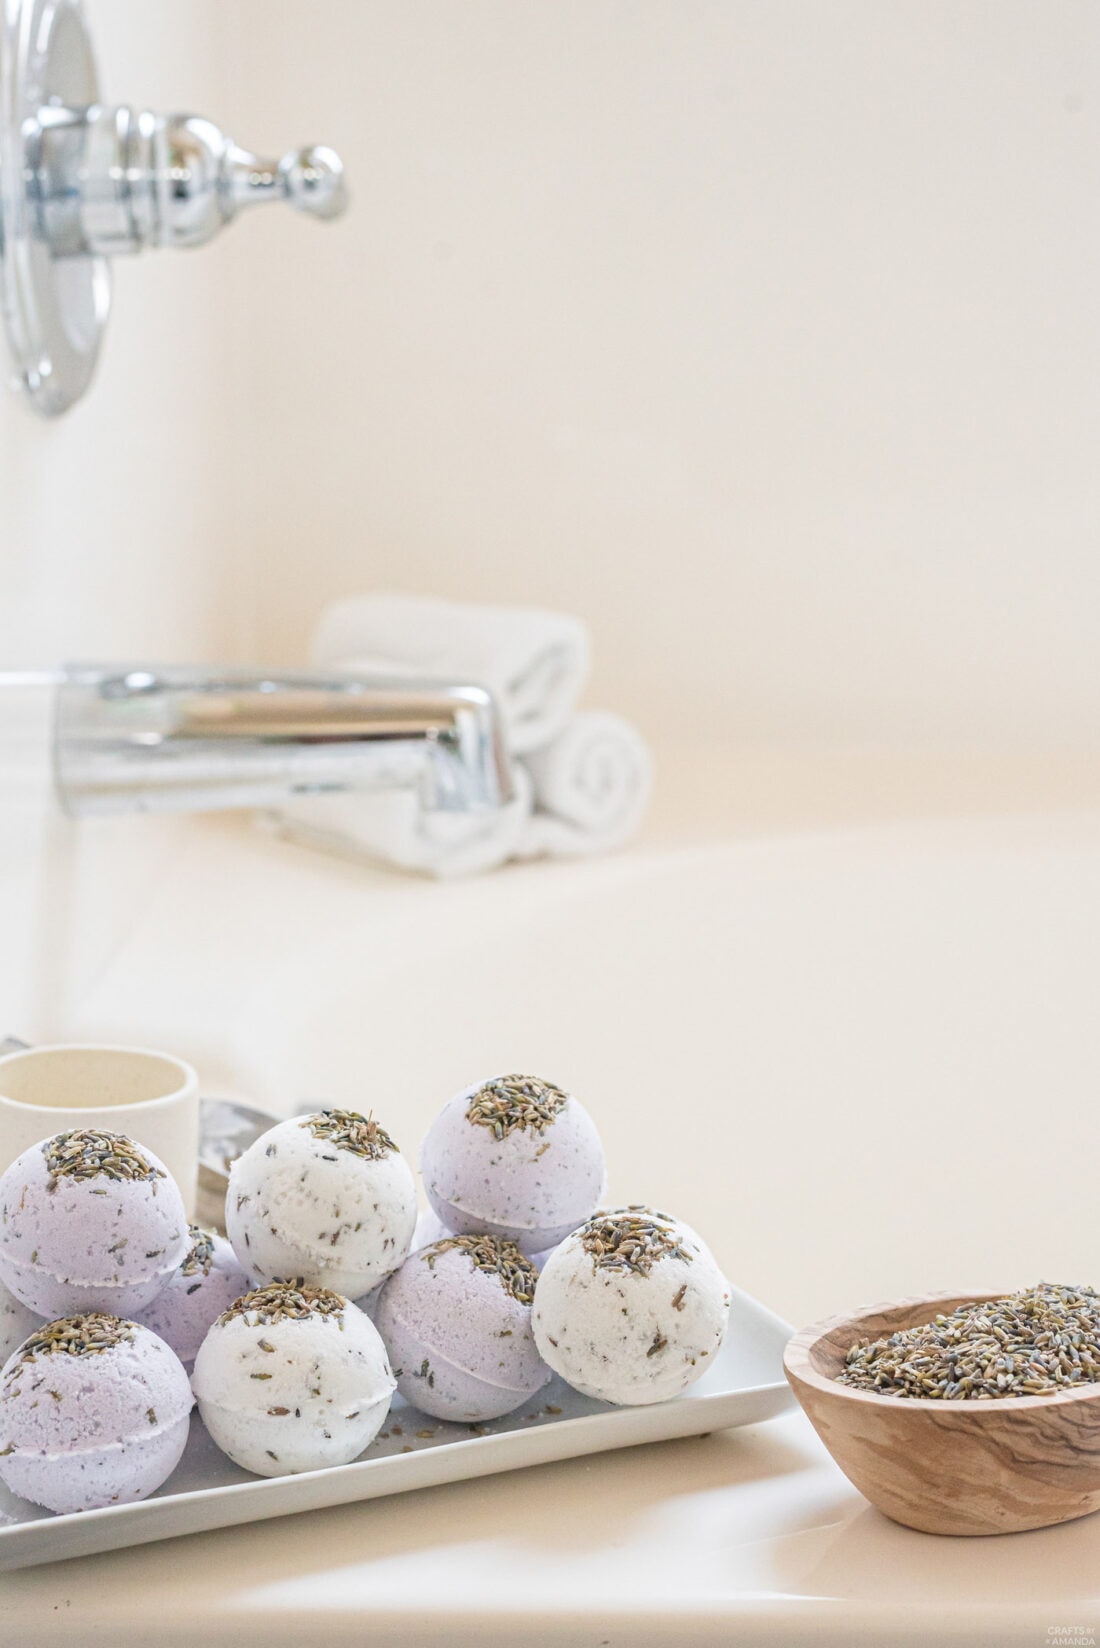
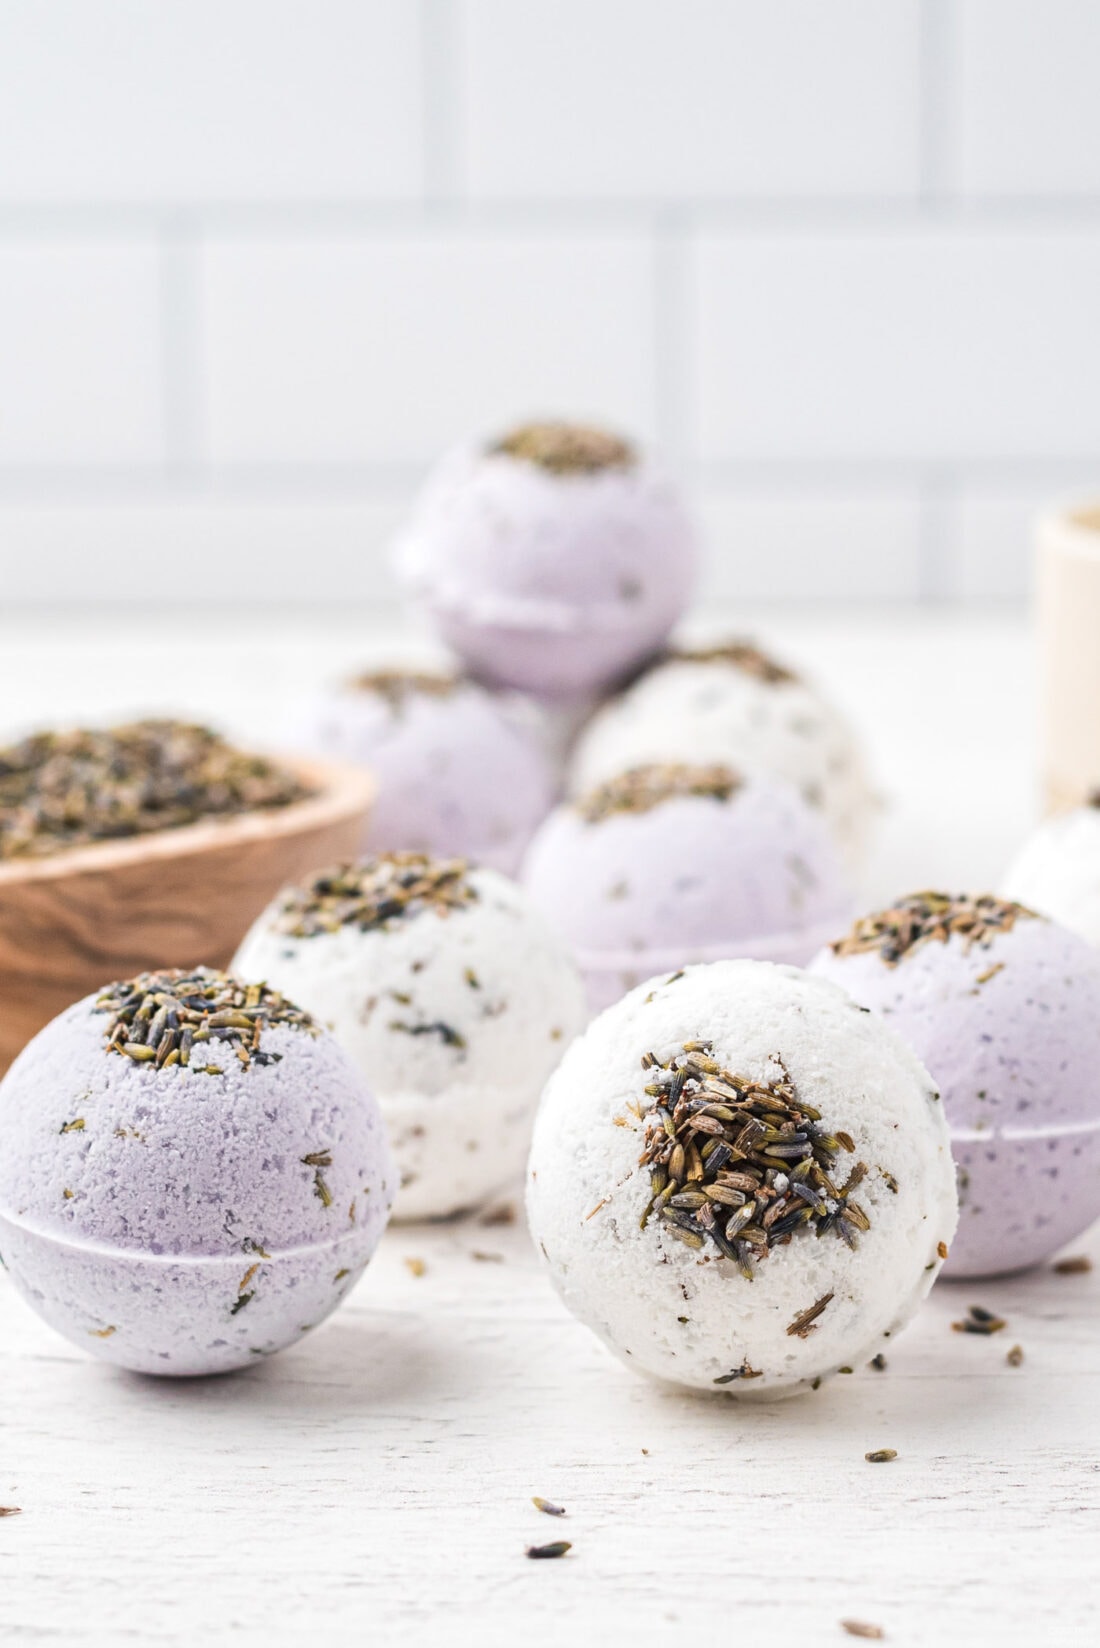
Pop a lavender bath bomb into the bathtub to fizzle and dissipate, filling the room with the soothing and relaxing scent of lavender.
Why we love this project
Today, we chose Lavender scented bath bombs because it’s simply our favorite scent. It makes for the perfect way to unwind after a long day, and you’ll come out of the tub smelling fresh and feeling at peace.
We’ve been stockpiling lavender bath and body projects, our Lavender Soap, Lavender Sugar Scrub, and Lavender Candles would make the best DIY gift basket when paired with these bath bombs!
Helpful Project Information:
- Age Level: 6 and up
- Mess Factor: Medium
- Level of Difficulty: Easy
- Time to Complete: Less than 30 minutes
- Cost Estimate: Less than $5.00
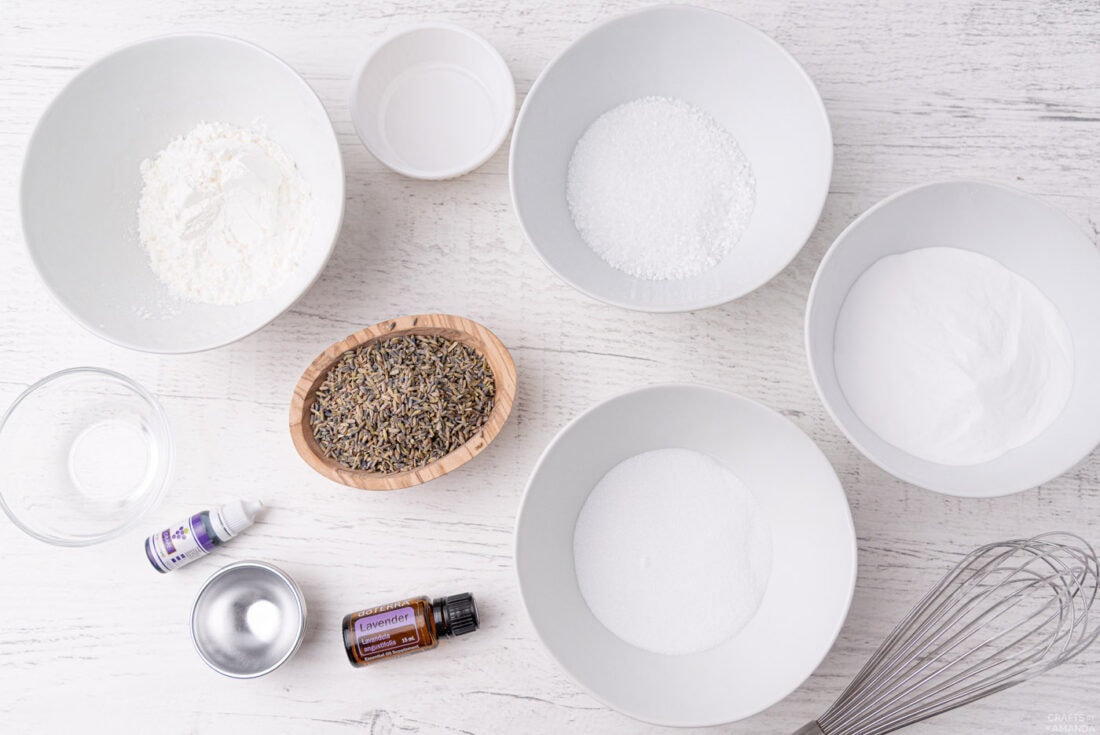
Craft supplies you will need
How to Make Lavender Bath Bombs
These step by step photos and instructions are here to help you visualize how to make this project. Please scroll down to simply print out the instructions!
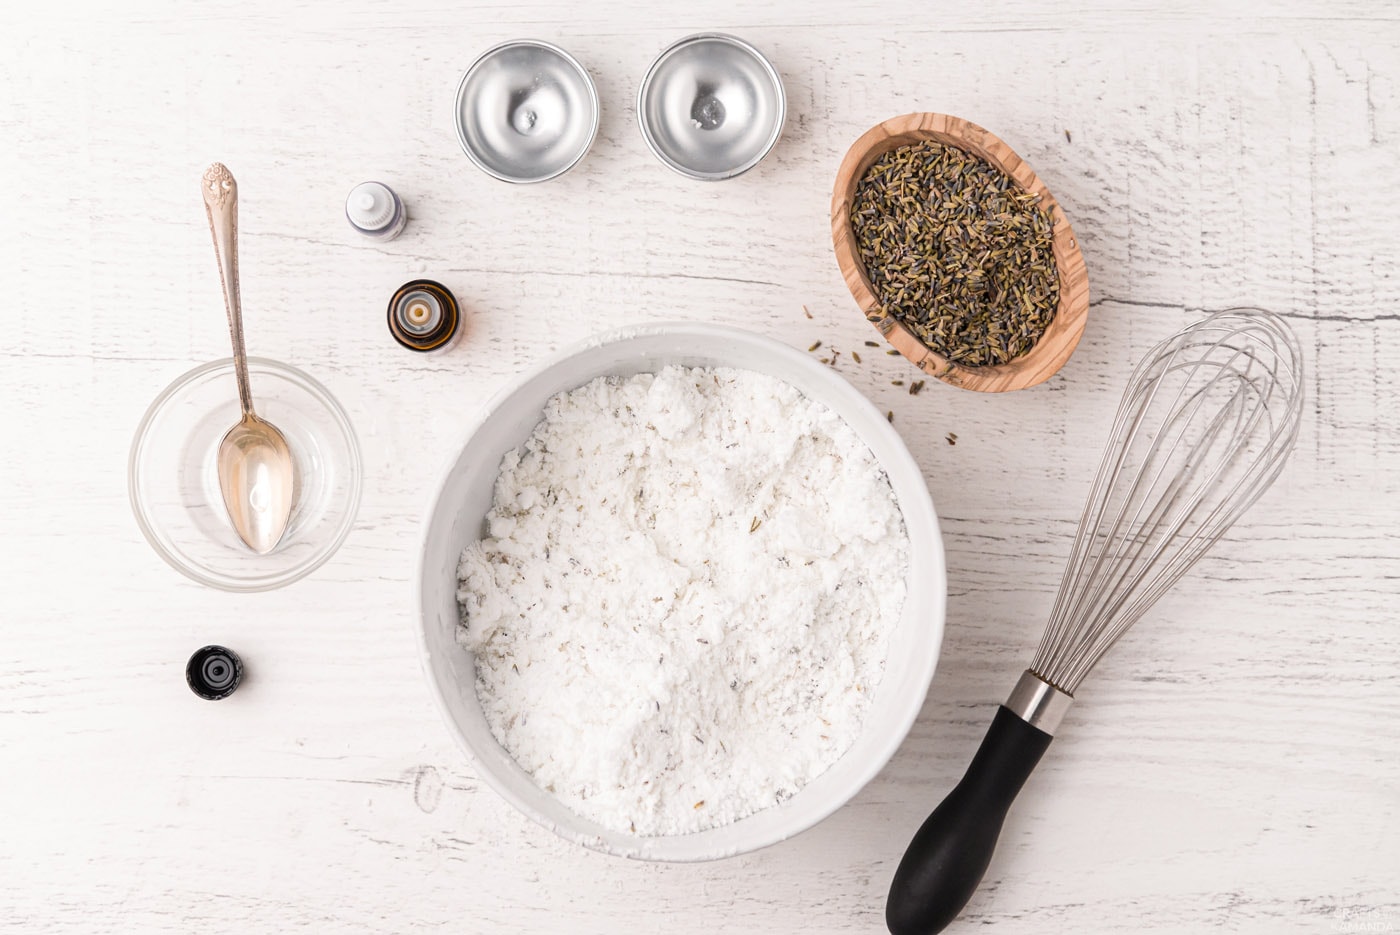
- Combine the baking soda, citric acid, Epsom salt, dried lavender, and cornstarch in a medium-sized bowl.

- Use a whisk or fork to stir together and remove any lumps.
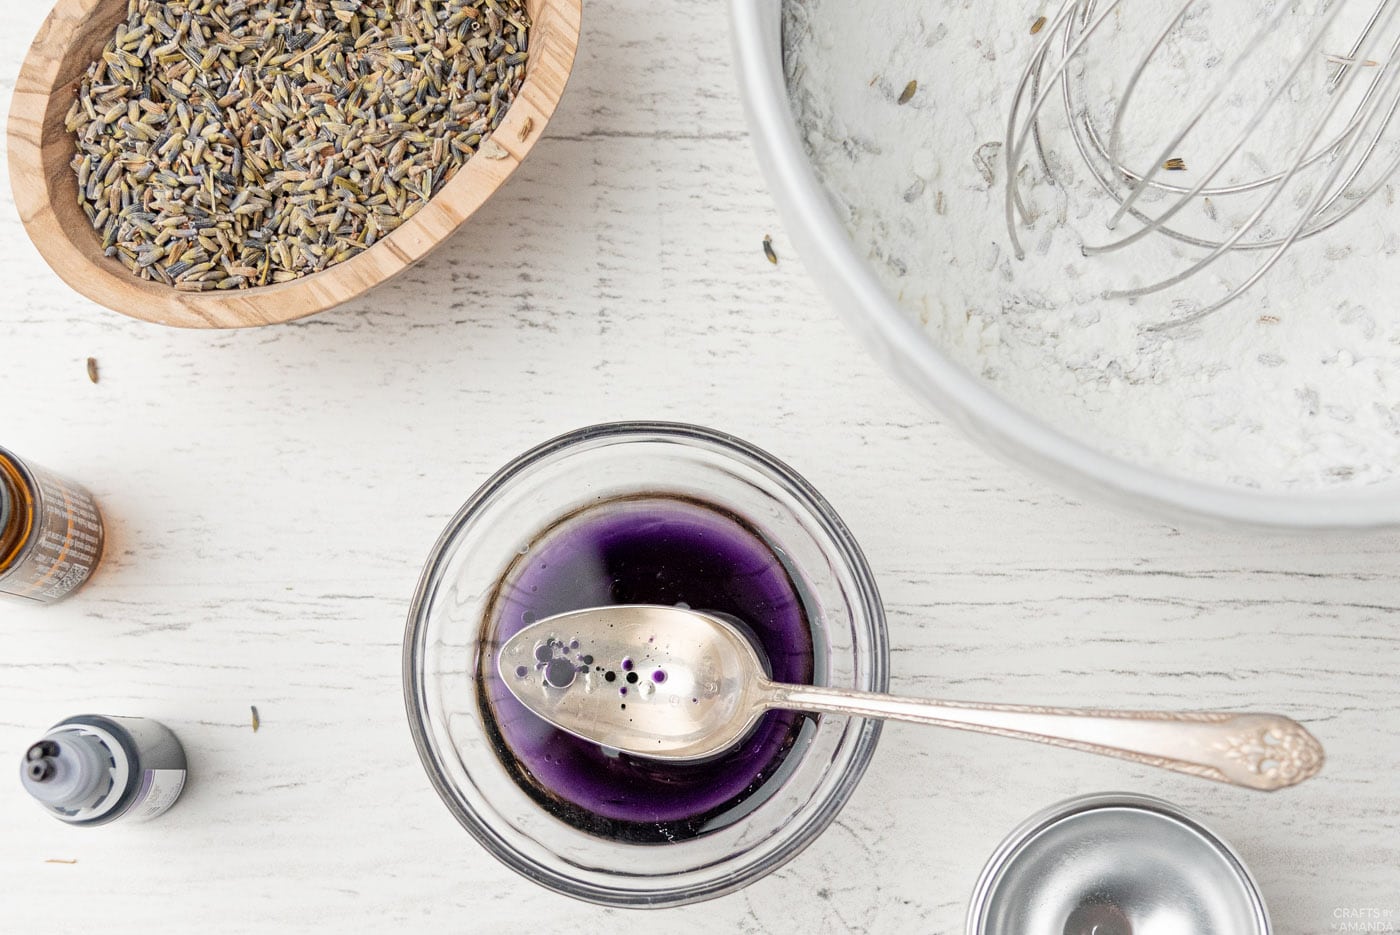
- In a small glass jar or bowl, stir together melted coconut oil and water.
- If coloring your bath bombs, add 8 drops of purple soap coloring to the wet ingredients and stir.
- If adding essential oils, add 10 drops of lavender-scented oil to the wet ingredients.
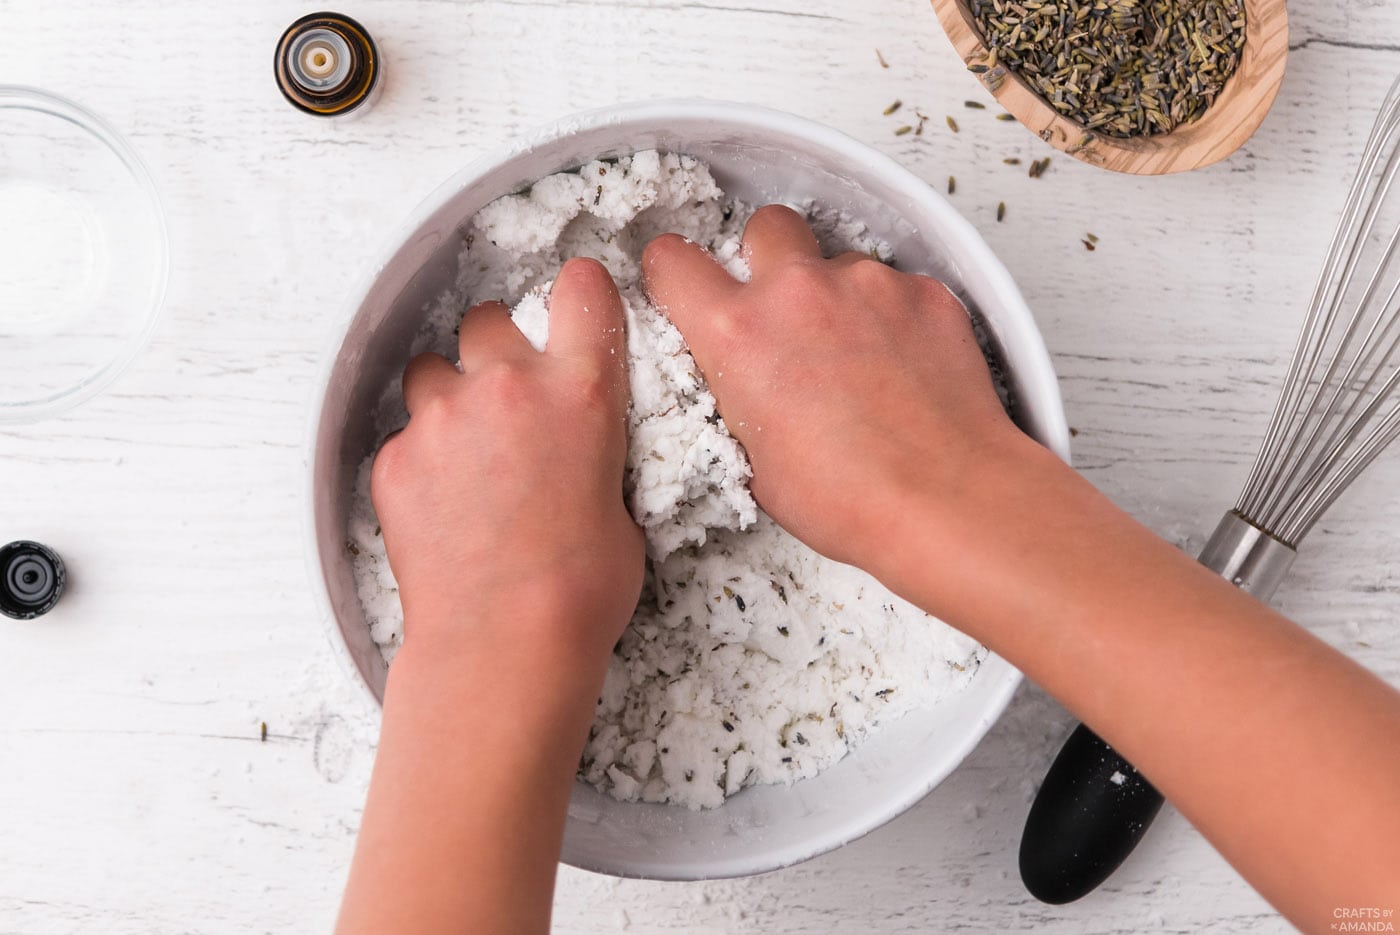
- Very slowly pour the wet mixture in with the dry mixture, whisking as you go. If you see the mixture fizz or foam, you may be adding the liquid too quickly. Slow down adding the wet mixture if so.
- Once the wet and dry ingredients are combined, take a small amount in your hand and squeeze it together. It should stick together in maybe 1-2 pieces. If it’s still too powdery to hold together, slowly add a tiny bit more water and try squeezing it again.
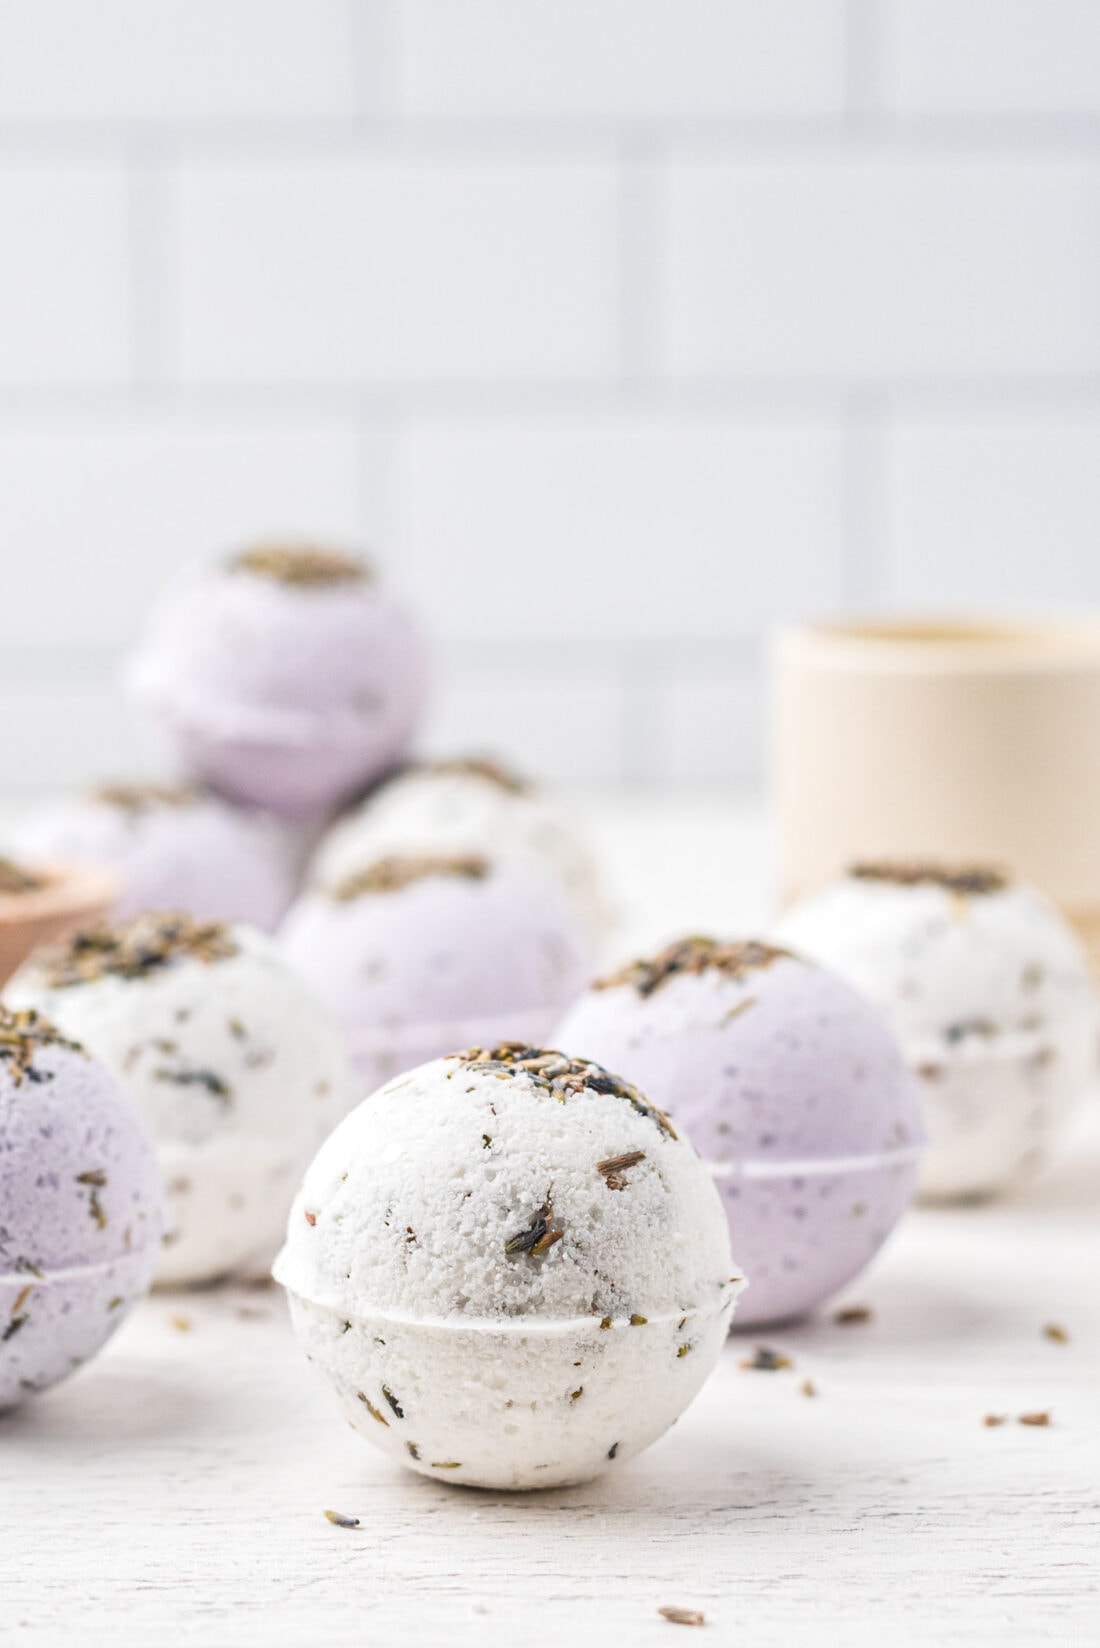
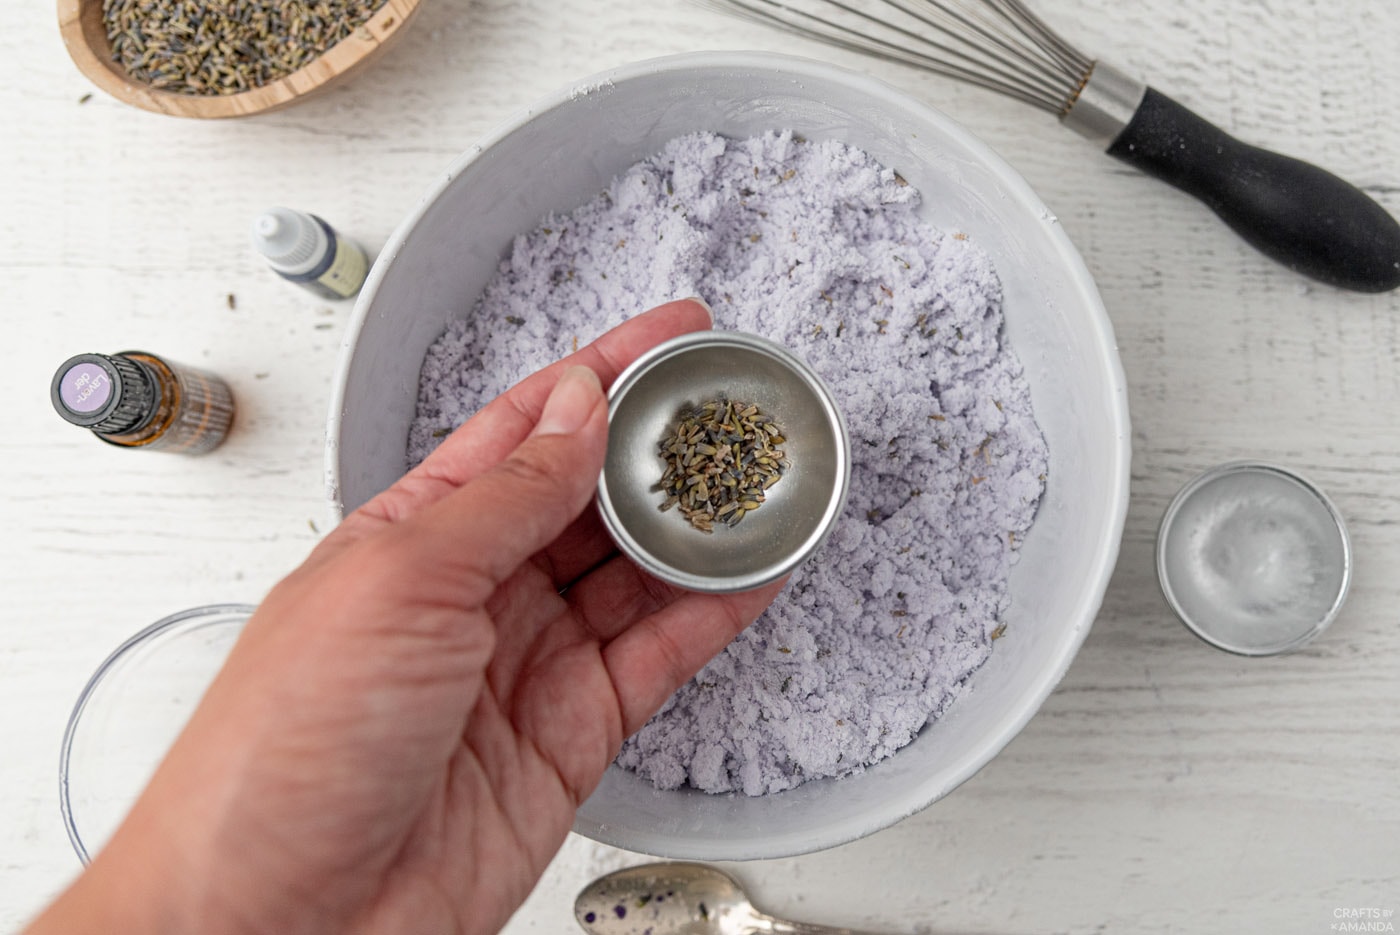
- This is optional, but we added dried lavender buds to the bottom of the molds before jumping into the next step. This is what gives your bath bombs a beautiful lavender topping!
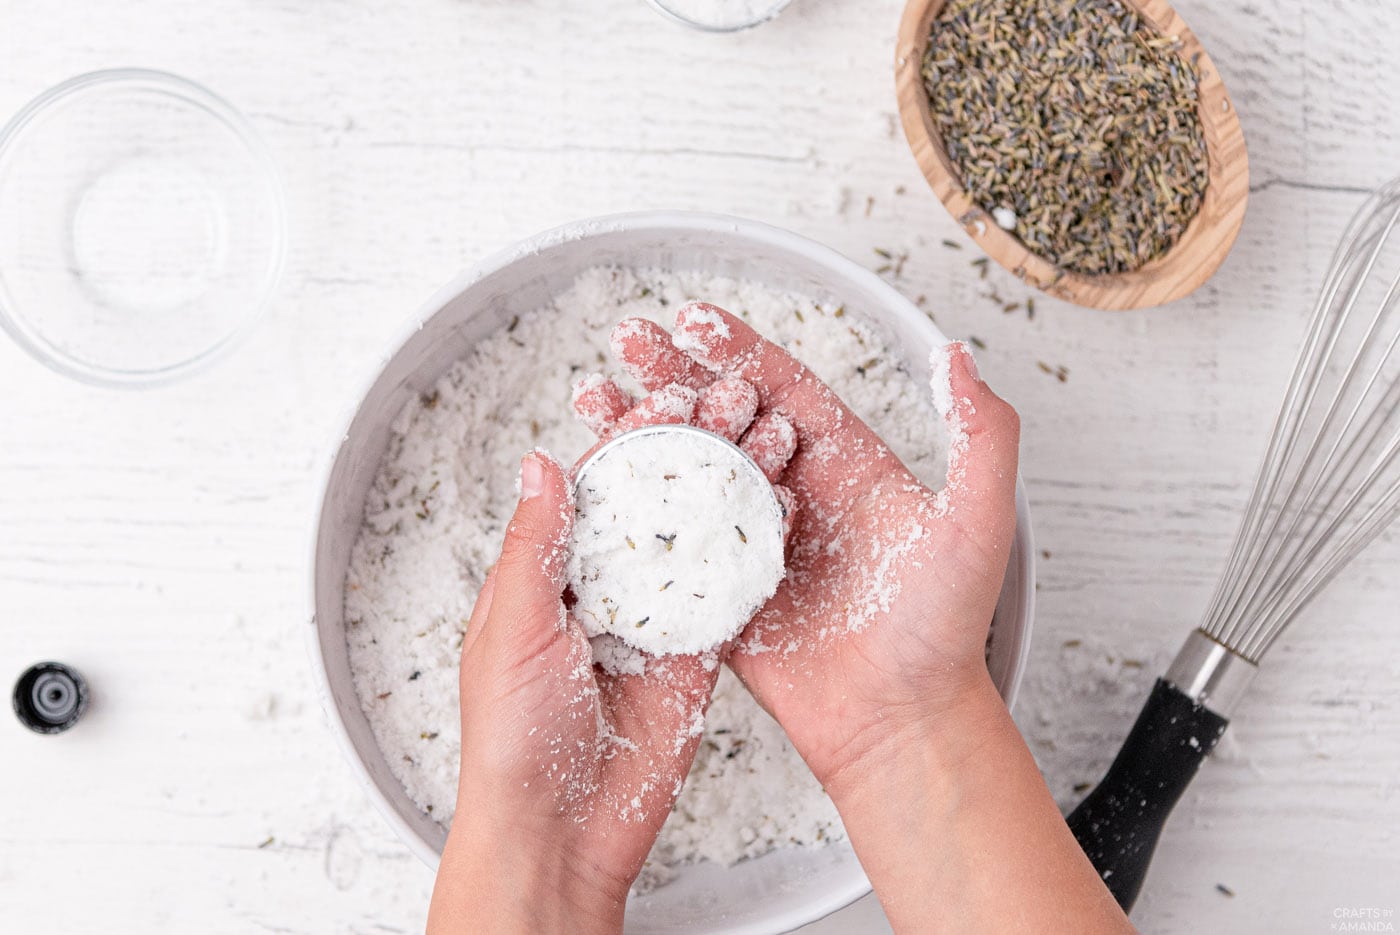
- Using a 2 inch 2-sided mold, tightly pack each half with the mixture until it’s overflowing just a little. Press the mold pieces together to further pack the mixture, then gently remove one side of the mold.
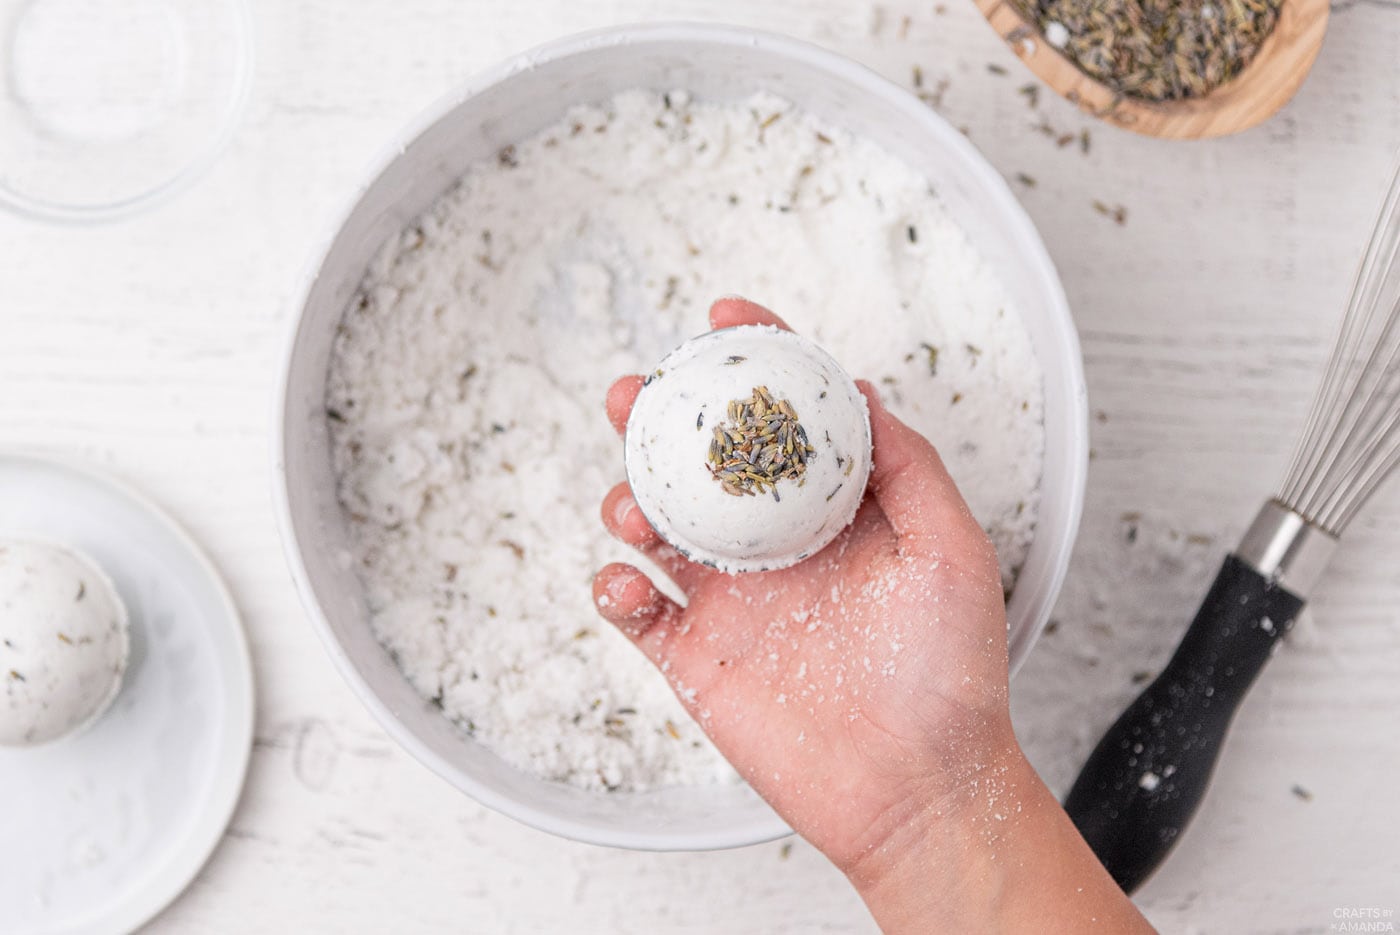
- Place the bomb on a tray, mold side down, and allow to dry out before removing the other side (about an hour). The key here is being gentle in the un-molding process!
- Once your bath bombs are un-molded and on a baking sheet, they should be left to dry for at minimum 8 hours or overnight. You want your bath bombs to be completely dry before wrapping them or placing in a container as moisture can activate the bath bombs. If you live in a humid area, allow 24 hours for drying time.

Expert Crafting Tips
- You can add Bergamot, Sandalwood, or Patchouli essential oils to the mix if you’d like, these oils pair beautifully with lavender. Simply use half of whatever scent you want, and half lavender essential oil while making the bombs. Be careful not to add too much oil though!
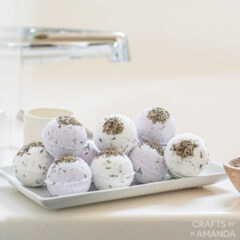
- As you see above, we did a batch of purple-colored bath bombs and a batch of white bombs. It’s best to do these as separate batches if you’re looking to do both as measuring can get tricky when dividing.
- In case a bath bomb cracks while removing it from a mold, go back to step 7 and start the molding process again. If needed, add a tiny bit of water to remix ingredients.
- If your Epsom salts already have a fragrance, you can skip adding the essential oils.
- If giving as gifts, wrap your bath bombs in plastic wrap after completely dried and then wrap with tissue paper and a bow!
These lavender bath bombs are made with skin-loving ingredients that’ll leave you feeling relaxed with its calming properties! Place these beauties in a glass jar with a lid in a cool and dry environment.
Lavender bath bombs make awesome Mother’s Day, birthday, or Christmas gifts for friends and family.
More Bath and Body Tutorials
I love to create and share my projects with you! I know it’s hard to remember to come back and search, so I’ve made it easy for you with my weekly newsletter! You can subscribe for free and I’ll send you fun crafts and delicious recipes every week right to your email.
Lavender Bath Bombs
Supplies
- 1 cup baking soda
- 1/2 cup citric acid
- 1/2 cup Epsom salt
- 1/2 cup cornstarch
- 2 1/2 Tbsp coconut oil melted
- 3/4 Tbsp water
- 2 Tbsp lavender buds
- 10 drops lavender essential oil
- 8 drops purple liquid coloring *optional
Craft tools
- 2-inch bath bomb mold
- Medium and Small Mixing Bowls
Instructions
- Combine the baking soda, citric acid, epsom salt, dried lavender, and cornstarch in a medium sized bowl.
- Use a whisk or fork to stir together and remove any lumps.
- In a small glass jar or bowl, stir together melted coconut oil and water.
- If coloring your bath bombs, add 8 drops of purple coloring to the wet ingredients and stir.
- If adding essential oils, add 10 drops of lavender scented oil to the wet ingredients. If you’d like two different scents in one, add 5 drops of lavender and 5 drops of the other scent.
- Very slowly pour the wet mixture in with the dry mixture, whisking as you go. If you see the mixture fizz or foam, you may be adding the liquid too quickly. Slow down adding the wet mixture if so.
- Once the wet and dry ingredients are combined, take a small amount in your hand and squeeze it together. It should stick together in maybe 1-2 pieces. If it’s still too powdery to hold together, slowly add a tiny bit more water and try squeezing it again.
- This is optional, but we added dried lavender buds to the bottom of the molds before jumping into the next step. This is what gives your bath bombs a beautiful lavender topping!
- Using a 2-sided mold, tightly pack each half with the mixture until it’s overflowing just a little. Press the mold pieces together, then gently remove one side of the mold. Place the bomb on a tray and allow to dry before removing the other side (about an hour). The key here is being gentle in the un-molding process!
- Once your bath bombs are un-molded and on a baking sheet, they should be left to dry for at least 8 hours or overnight. If you live in a humid area, allow even more time for the bombs to dry, around 24 hours. It's important they are completely dry before storing them as any moisture can activate the bath bombs!
Expert Tips & FAQs
- You can add Bergamot, Sandalwood, or Patchouli essential oils to the mix if you’d like, these oils pair beautifully with lavender. Simply use half of whatever scent you want, and half lavender essential oil while making the bombs. Be careful not to add too much oil though!
- As you see above, we did a batch of purple-colored bath bombs and a batch of white bombs. It’s best to do these as separate batches if you’re looking to do both as measuring can get tricky when dividing.
- In case a bath bomb cracks while removing it from a mold, go back to step 7 and start the molding process again. If needed, add a tiny bit of water to remix ingredients.
- If your Epsom salts already have a fragrance, you can skip adding the essential oils.
- If giving as gifts, wrap your bath bombs in plastic wrap after completely dried and then wrap with tissue paper and a bow!
This post originally appeared here on Feb 5, 2021.
- Tie Dye Beach Towels - July 24, 2026
- Swirling Twirling Ladybugs - July 21, 2026
- Drip Tie Dye Backpack - July 17, 2026


Millie Nelles says
can you use Citric Acid “Food Grade”? where do I buy the Citric Acid from? I live in Canada
Amanda Formaro says
Yes food grade is fine. :) I’m not in Canada, so I don’t know where you can find it. You may need to search google. I know it’s available at craft stores here and amazon https://amzn.to/2ZcNPow