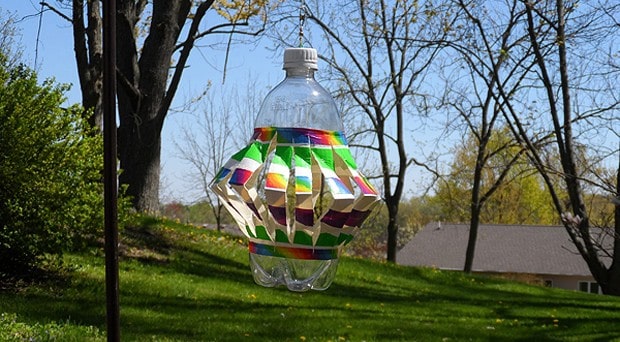
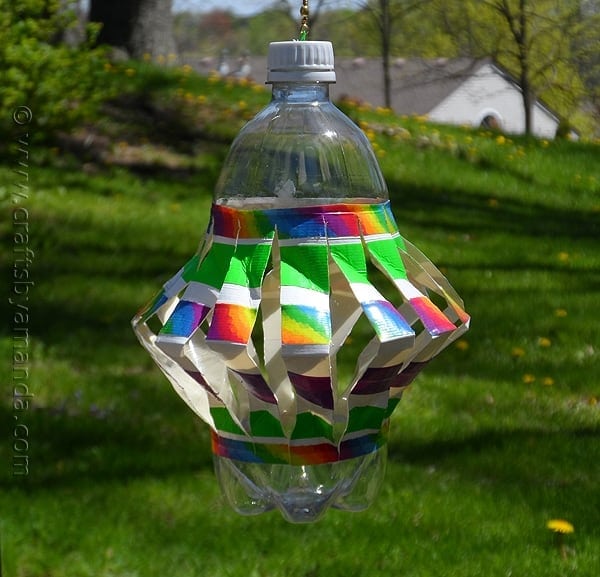
This wind spinner is made from a recycled plastic bottle and is a great way to keep critters out of your garden. This fun recycled duct tape project is an easy craft for kids to do this summer.
Plastic Bottle Wind Spinner
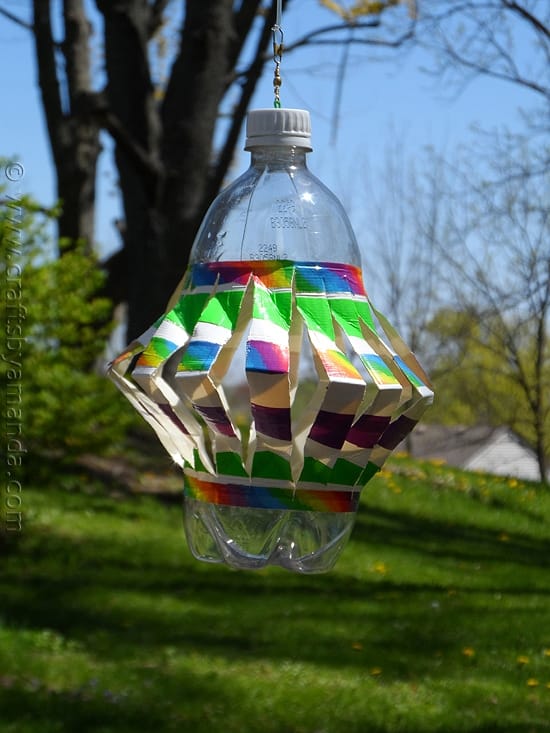
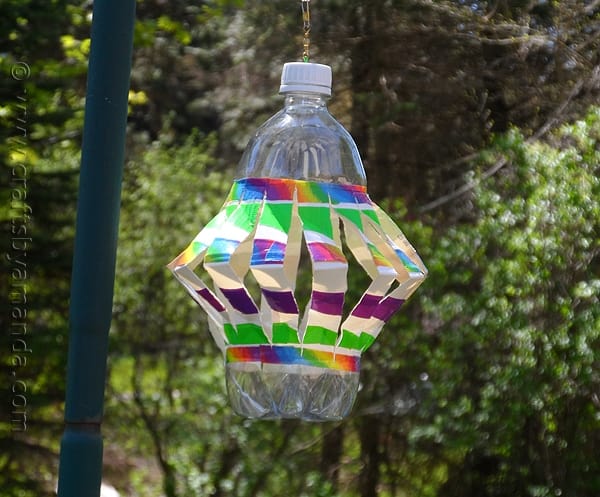
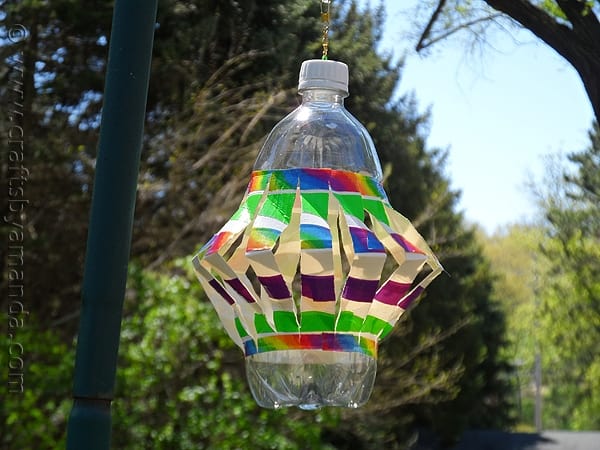
There are some truly classic craft projects out there, the kind that never get old or go out of style. This wind spinner, made from a recycled plastic bottle is a perfect example.
Kids have been making wind spinners for years, only now; we have pretty colored duct tape to decorate them! So don’t toss those plastic bottles just yet, make a colorful recycled craft out it!
This is one of those crafts that the kids can enjoy day after day. You hang it outside from a tree branch or on a shepherd’s hook, and watch it spin every time a breeze comes through.
This is actually a rather useful project as well. If you have a vegetable garden, especially one with tomatoes or berries that birds like to get into, hang one or several wind spinners to keep the birds out. The movement of the wind spinner deters the birds from landing and feasting on your long awaited harvest!
You can see it in action with a light breeze by watching the short demonstration video below:
This is a great way to recycle plastic bottles into something fun to watch and the kids will love making them. Heck, you might too!
What you’ll need to make a Plastic bottle Wind Spinner
- 1-liter plastic bottle
- Colored duct tape or electrical tape
- Box cutter or craft knife
- Scissors
- Snap swivel
- Coated paper clip
- Fishing line
How to make the Wind Spinner
- Start by washing out your bottle and removing any labels. Cover the middle section of the bottle with white tape. You can cut different colored tape into strips to create a stripe effect like I have.
- Starting from the top of the tape and ending at the bottom of the tape, cut vertical slits in the bottle, about ¾” apart.
- Push the top of the bottle toward the bottom of the bottle. This will cause the slits to collapse. Hold it in place and fold each slit in the center, creating a crease.
- Next angle the slits by making folds at the top and bottom of each slit. This allows the wind to catch them and make it spin. At the top of each slit make a 45-degree fold to the right. At the bottom of each slit make a 45-degree fold to the left.
- Cut a small hole in the top of the bottle cap. Unfold and stretch the paper clip out and thread it through the looped end of the swivel.
NOTE: A snap swivel is a piece of fishing tackle available anywhere that sells tackle, such as Walmart. Look for them in packages in the fishing aisle of the sporting goods section. They are inexpensive, a couple dollars for a package. The swivel is used so that the fishing line that your wind spinner is hanging from does not tangle around itself.
- Twist the paper clip together then insert it into the hole in the top of the bottle cap. Bend the ends of the paper clip so that it can’t come back out the hole.
- Twist the cap onto the bottom and hang from the open end of the swivel using fishing line.
Find even more recycled crafts below!
- These DIY mason jar nightlights are perfect for the kiddos. Place them in their room to create a magical essence with unicorn or fairy designs!
- We can show you how to make bracelets from recycled shirts. This is a great craft for tweens to make with their friends, or even for adults! Put your old t-shirts to good use instead of throwing them in the trash.
- This bottle cap flower is another garden craft we love. Add this to your garden decor for a fun look, and over time the rust that accumulates adds a lot of character!
- Collect the tops or your canned goods to make this pretty rainbow button wind chime!
Recycled Plastic Bottle Wind Spinner
Supplies
- 1- liter plastic bottle
- Colored Duck Tape or electrical tape
- Box cutter or craft knife
- Scissors
- Snap swivel
- Coated paper clip
- Fishing line
Instructions
- Start by washing out your bottle and removing any labels. Cover the middle section of the bottle with tape. You can cut different colored tape into strips to create a stripe effect like we have.
- Starting from the top of the tape and ending at the bottom of the tape, cut vertical slits in the bottle, about ¾” apart.
- Push the top of the bottle toward the bottom of the bottle. This will cause the slits to collapse. Hold it in place and fold each slit in the center, creating a crease.
- Next angle the slits by making folds at the top and bottom of each slit. This allows the wind to catch them and make it spin. At the top of each slit make a 45-degree fold to the right. At the bottom of each slit make a 45-degree fold to the left.
- Cut a small hole in the top of the bottle cap.
- Unfold and stretch the paper clip out and thread it through the looped end of the swivel. Twist the paper clip together then insert it into the hole in the top of the bottle cap. Bend the ends of the paper clip so that it can’t come back out the hole.
Expert Tips & FAQs
- Paper Plate Tropical Fish Craft - July 19, 2024
- Tropical Paper Flowers - July 16, 2024
- DIY Mosquito Repellent Candles - July 9, 2024




ras grace says
I am amazed by your crafts. Is there any other way to replace the fishing swivel?
Amanda Formaro says
I’m not sure because you really do need something that will swivel. They are only a couple of dollars at discount department stores. Or maybe you have a neighbor or family member that fishes and would give you one?
Alon Brontman says
To replace the fishing swivel, you can use anything that will separate the movement of the bottle from the movement of the fishing line.
One example would be to thread a couple of round beads with the paper clip on the underside of the bottle’s cap.
Make sure that the beads rotate freely on the paper clip.
The beads’ contact point with each other has very little surface area, and beads made of smooth glass or plastic, or even wood, have very low friction, so even if one bead moves with the cap, (and hence with the bottle), and the other moves with the paper clip, (and hence with the fishing line), they will be quite effective, certainly good enough for this purpose.
Maija says
Hi.
Is the duct tape (or painting) necessary for making this wind chime?
I am having a hard time finding things to do the big plastic bottle that are used on top of the water dispenser/coolers.
They are 10 gallon or something like that. I have a whole stash of the disposable ones and would love to find some creative ways of using them.
Amanda Formaro says
No you don’t have to use the duct tape, it’s strictly for decoration :)
marinalva says
Ola Amanda,moro no Brasil e você tem os traços de uma prima minha que mora em Chicago e há anos que não a vejo,aproximadamente uns 15 anos.Há alguma possibilidade de ser você?A proposito amo suas idéias.Quero fazer algumas com os adolescentes com os quais trabalho.Saudações.
Amanda Formaro says
Hi marinalva. I don’t have any cousins in Brazil. I live near Chicago, but never actually lived there :)
Julie says
At first I was intrigued with the Duck tape and then realized it’s known as duct tape here in Australia. Either way, I think this would be very colorful when spinning in the wind.
Amanda Formaro says
Ah yes, Julie, Duck Tape is a brand name. Sorry for the confusion! :)
Janet says
What a great idea! I made one a while back with paint and you cut pieces out of the bottle – kind of a pain! Will definitely try this one! Also made candlestick holders for my wedding out of 2 liter bottles they turned out awesome! Love working with recycled stuff!
Amanda Formaro says
I love making things from recycled items too Janet, so glad you like this!
mary says
love this idea and so easy.
Amanda Formaro says
Thanks Mary!
Asha says
soo cute idea..
Amanda Formaro says
Thank you Asha!
Yvette H says
I made this project with my 3-year-old grandson and 4-year-old granddaughter a couple of days ago and they turned out great! The kids have been enjoying watching them spin in the yard ever since. Thanks so much for this post!
Amanda Formaro says
That’s so fun, thanks for sharing Yvette!
Deceptively Educational says
This is awesome, Amanda! What a fabulous summer project to do with the kids.
Amanda Formaro says
Thank you! I appreciate that! :)
jet says
awesome idea, briliant, I never had t hought of tape, i always paint my plastic bottles, and give it a clear varnish layer after all.
i like this idea, i have some trees that likes to hang in a spinner. Thank you for the tute and the sharing.;-D
Amanda Formaro says
Thanks Jet! Using the tape was definitely an easier way to go :)
Henri says
I had forgotten about this spinner. Thanks. Would you have the bird feeder that is made with a plastic bottle and wooden spoons. Also an “oldie but goodie” Hanger was the same as this spinner. Thanks for any help.
Amanda Formaro says
Hi Henri! Make and Takes has one on her blog here http://www.makeandtakes.com/bottle-bird-feeder though she doesn’t use the swivel. Spoonful also has one here http://spoonful.com/crafts/backyard-bird-feeder and they use an eyelet, though I think the swivel would be better! And here’s one more, again they don’t use the swivel. http://www.herecomesthesunblog.net/2012/04/soda-bottle-bird-feeder.html I would imagine you could just use the instructions from my wind spinner on the bird feeder though :)
Henri says
How cool! 3 patterns! Thank you. I make crafts with my grandchildren and summering neighbor hood children. I have been saving water bottles. I made the spinner with colored tape and pop bottles. But not being a pop drinker , the kids crafts will be made with water bottles. Thanks again for the info. I enjoy your site. Blessings, Henri
Casse-bonbec says
fantastic, I just love that creation!
Amanda Formaro says
Thank you Casse!