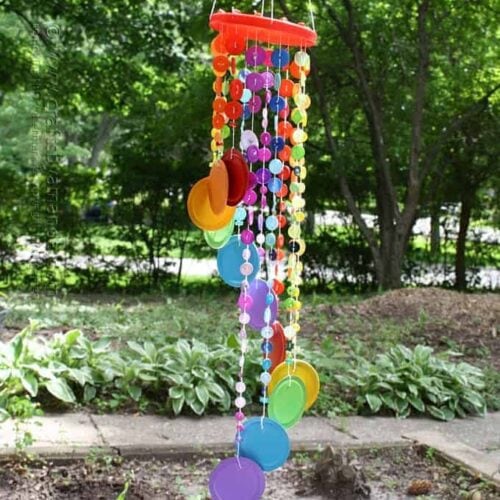
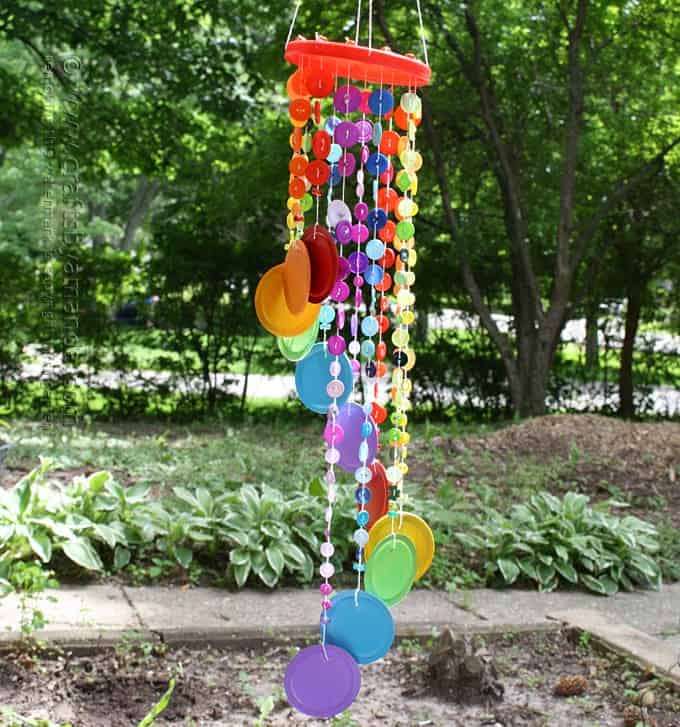
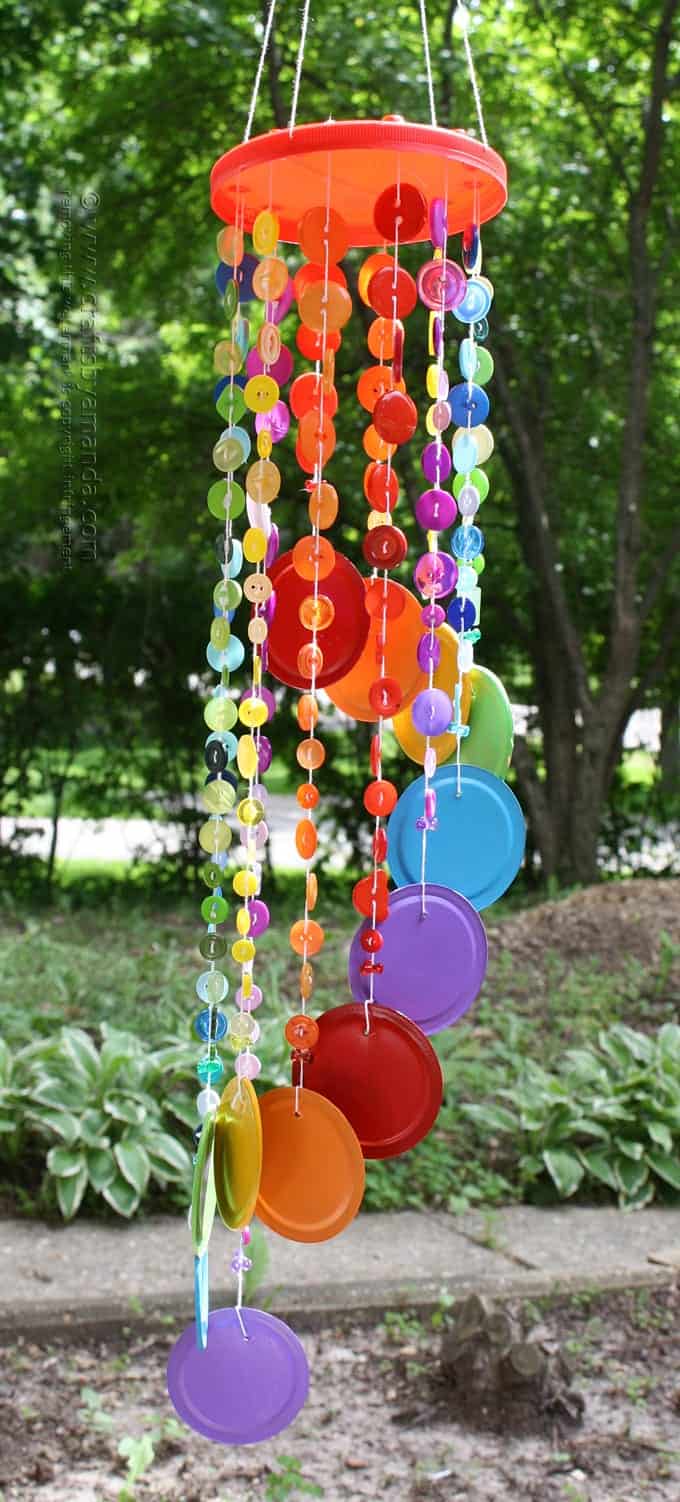
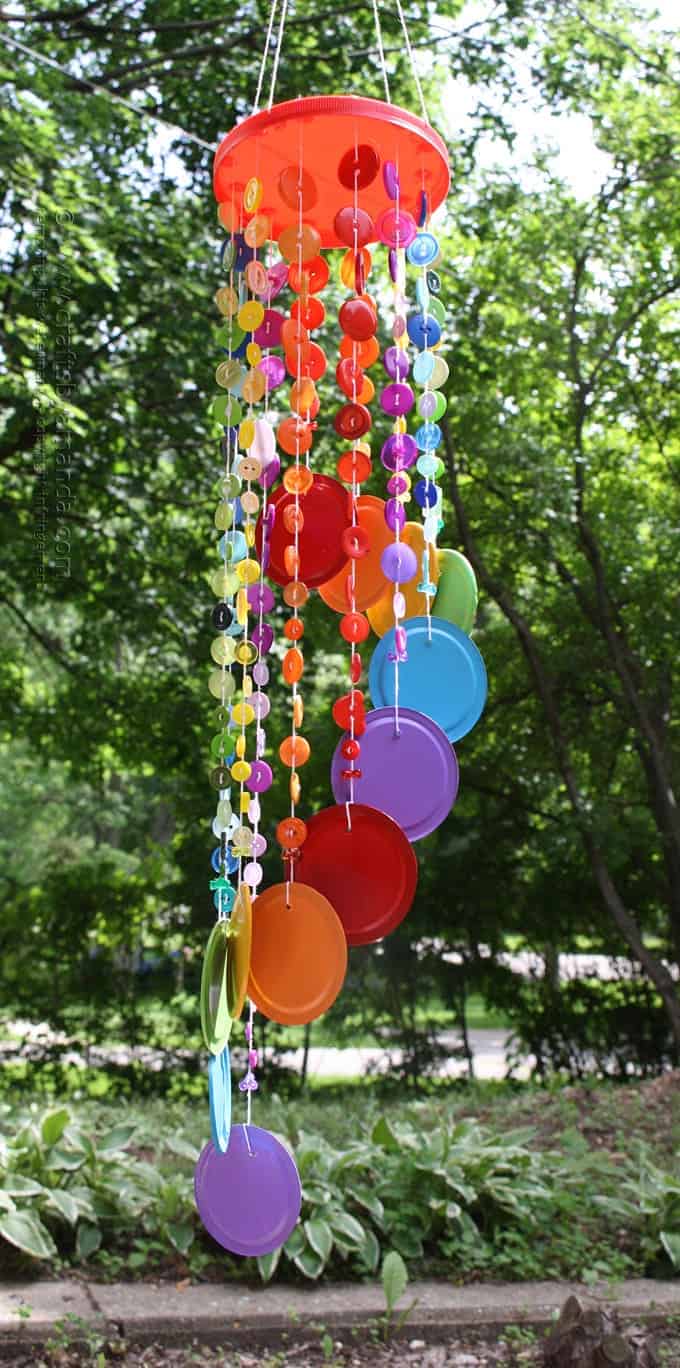
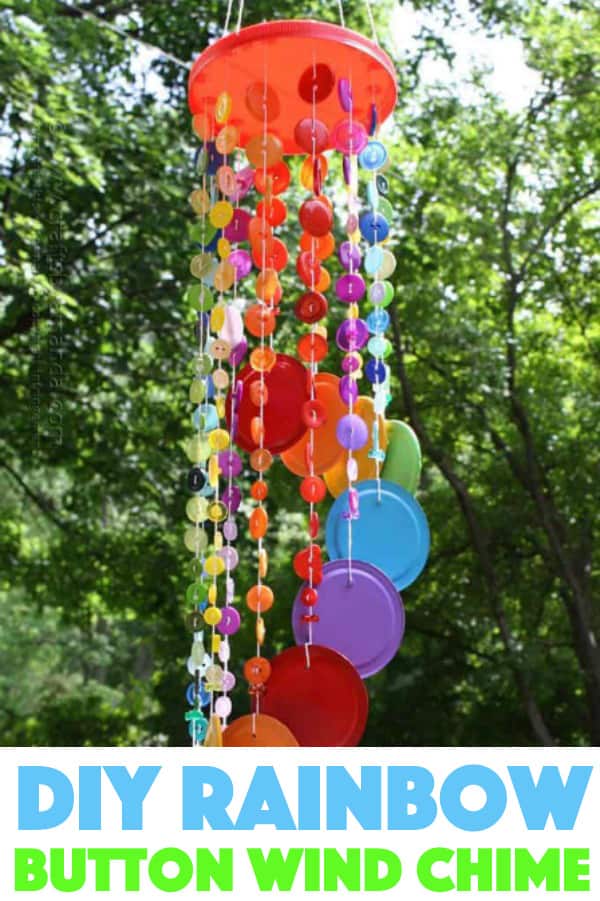
This button wind chime in rainbow colors is one of my favorite projects in my book Button Mania. Since it’s still summer and we have plenty of months left of warm weather, I thought this would be a fun tutorial to share.
Button Wind Chime
Here’s a short video that will show the button wind chime in action in a light breeze:
In case you are wondering where I got all the buttons, you can buys bags or containers of them at craft stores and discount department stores. I bought mine mostly from WalMart, but I did pick some up at Michaels and JoAnn’s. You can also shop for them at Amazon.
What to buy a rainbow wind chime? It’s not made with buttons, but it IS gorgeous!
I like to keep the container in my studio full, so I’m always stocking up! Don’t you just love all the colors of the button wind chime?? And because it’s a rainbow, it’s also part of my collection of St. Patrick’s Day crafts.
You’ll need some canning lids too. I thought about using recycled laundry soap lids in different colors, but I wanted some uniformity in the look, so I went with the canning lids. It’s still recycling, you can’t can with those a second time!
Bottle cap flower in my herb garden that I made for my book “Button Mania: Buttons, Bottlecaps and Beyond!” -releases next month! Link in profile #buttonmania #craftsbyamanda A photo posted by Amanda Formaro (@amandaformaro) on
Button Mania: Buttons, Bottlecaps and Beyond! is appropriately named. There are button crafts, projects using bottle caps and even plastic lids that can’t be recycled. Don’t you just love this bottlecap flower I posted on Instagram? You can get the tutorial in the book!
There are also instructions for my Button Lamp Shade. This lamp is right next to me every day on my desk. I love it because it’s so cheerful and bursting with color!
My bottlecap rag doll horse sits on a shelf and greets me every morning. From my new book Button Mania: Buttons, Bottlecaps and Beyond! #buttonmania A photo posted by Amanda Formaro (@amandaformaro) on
Another of my favorites is this rag doll bottlecap horse. here he’s sitting on a shelf right inside the door of my studio. He’s so cute! So as you can see, there are plenty of fun projects in the book, so hopefully, you’ll order a copy! My other two books are coming out at the same time: Paper Fun Mania and Star Wars Mania. So now let’s get back to making this wind chime, shall we?
What you need to make a Button Wind Chime
- 1 large, sturdy plastic lid
- Lots of buttons
- String
- 16 pony beads
- 12 tri-beads
- 12 metal canning lids
- Hot glue gun
- White craft glue
- Scissors
- Hammer and a nail
- Thumbtack
- Outdoor craft paint (optional)
- Use hammer and nail to poke a hole in the top of each canning lid.
- If you’d like, paint each of the lids, front and back and let them dry.
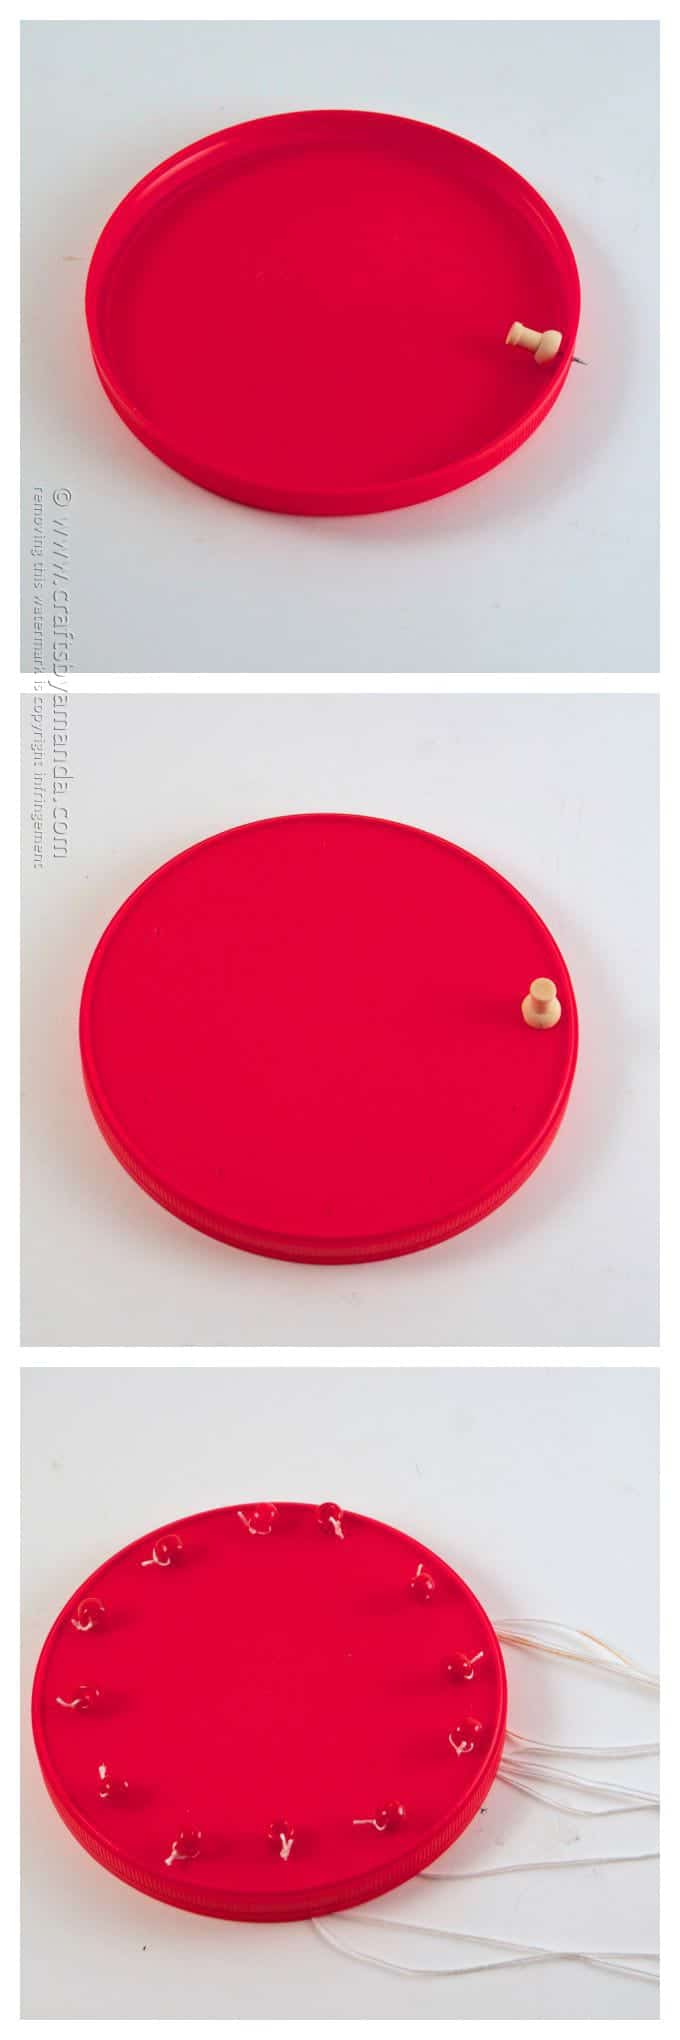
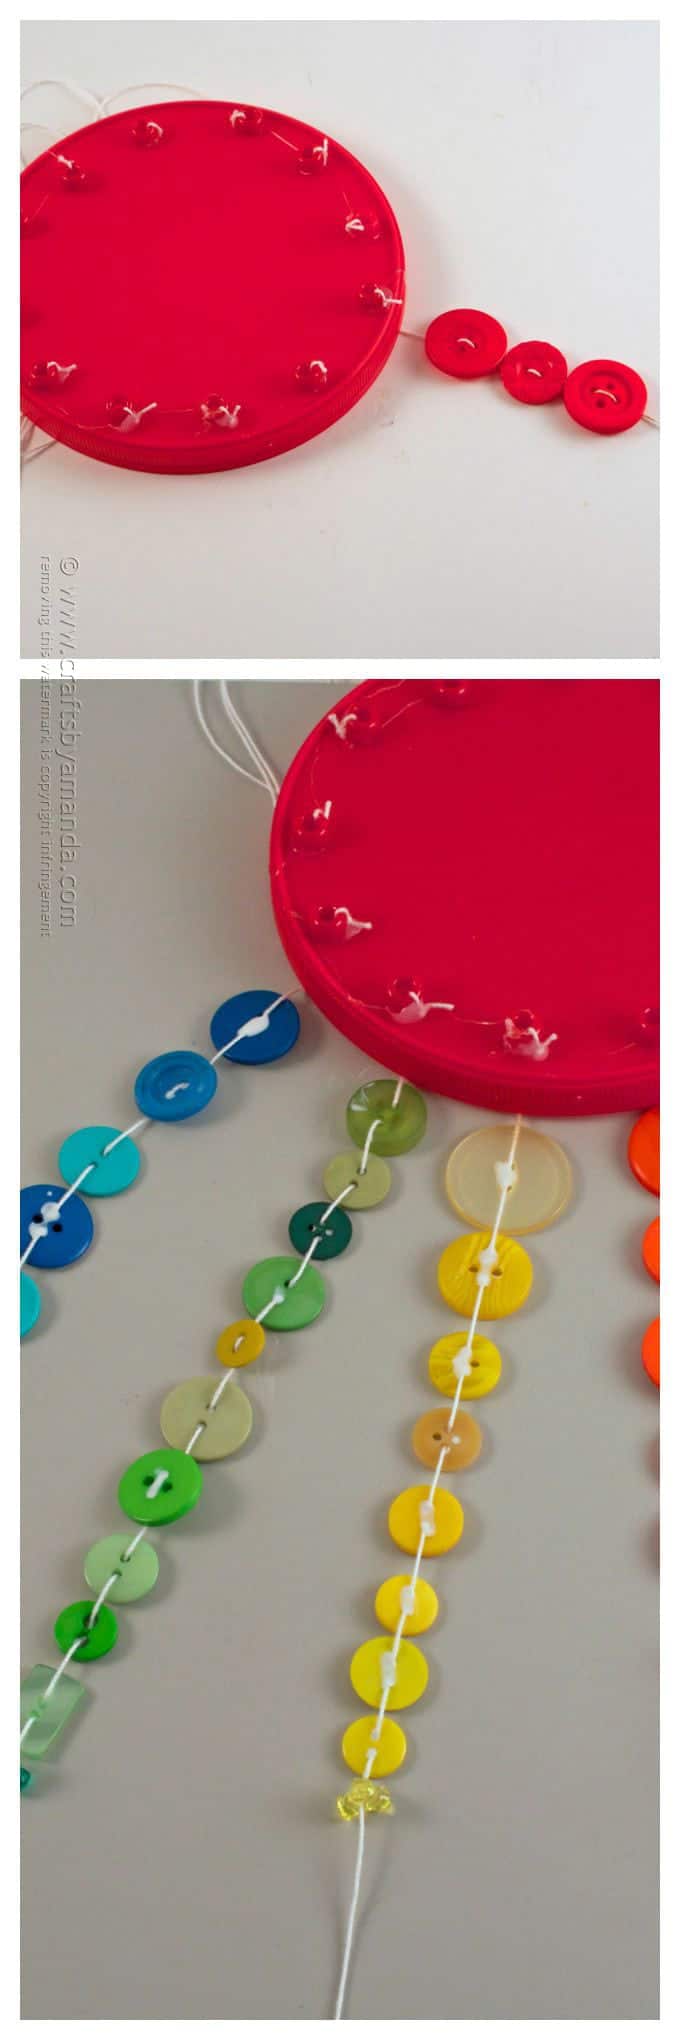
- Use a thumbtack to poke four evenly spaced holes into the inside rim of the plastic lid. This will be for your hanger.
- Use a thumbtack to poke twelve evenly spaced holes in the top of the plastic lid.
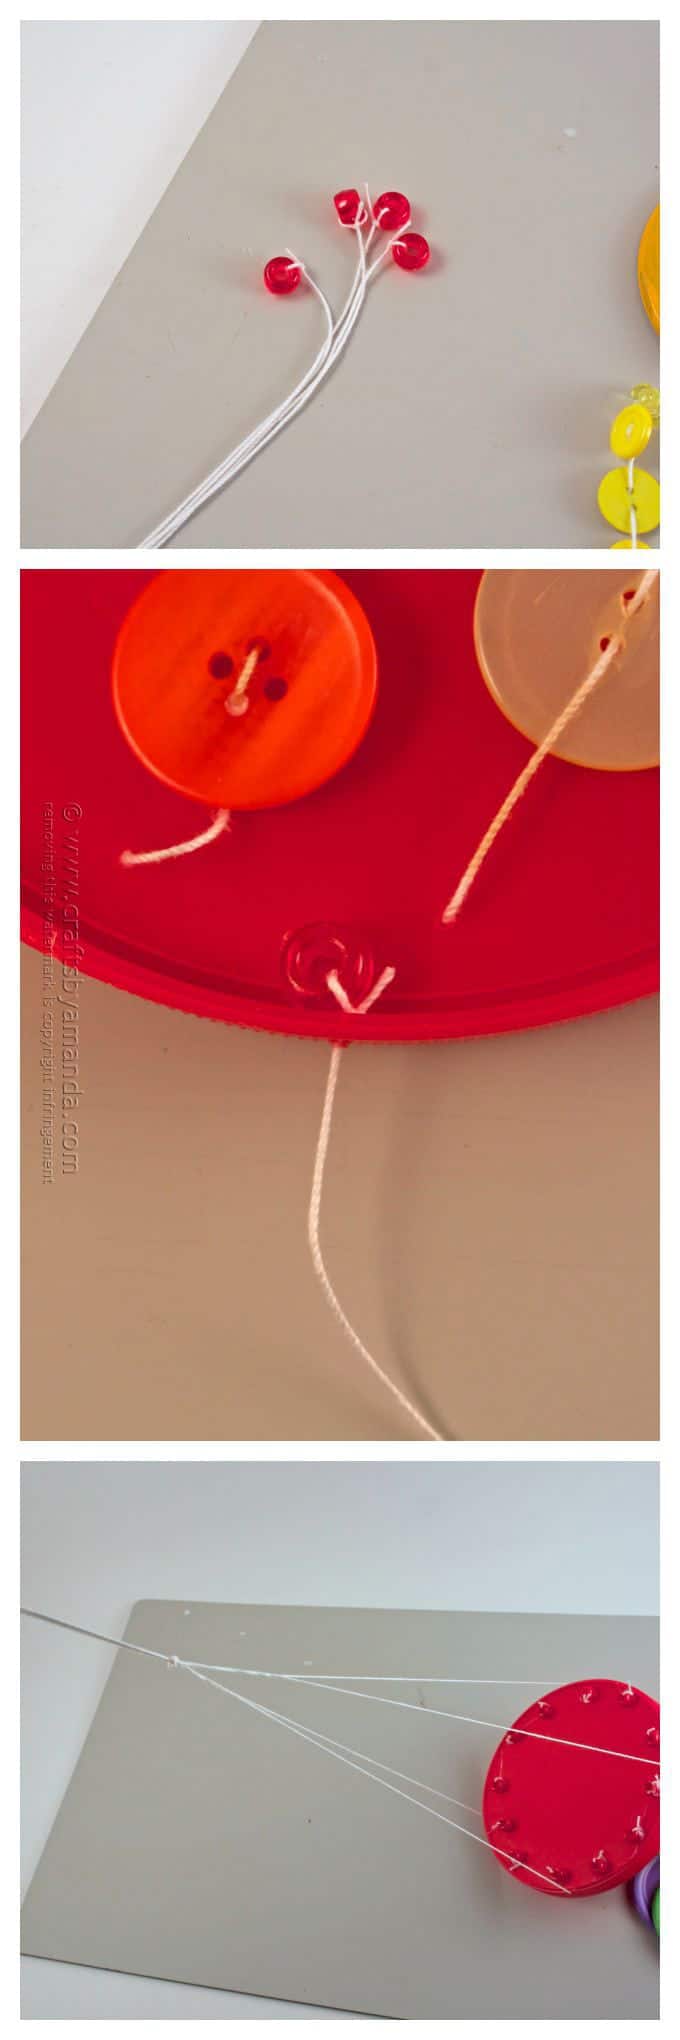
- Measure and cut sixteen pieces of string, about 24-inches long. Tie a pony bead to the end of each string.
- Set four strings aside and thread remaining twelve strings through the top of the lid so that the pony bead holds them in place.
- Tack a bead in place with a little hot glue.
- Thread the first string through four large buttons and add a tri-bead. Add some white glue to each button and the bead.
- Repeat step 6, eleven more times, adding a few more buttons each time to create a tiered effect.
- Tie the end of each string to a canning lid.
- Use the four remaining strings to create the hanger.
- Thread each one through the holes in the sides of the lid.
- Gather all four strings together and tie in a knot.
Now hang it up outside and enjoy! I hope you have fun with this project!
Reprinted with permission from Button Mania: Buttons, Bottlecaps and Beyond! by Amanda Formaro, published by Studio Fun International
More you might like:
- Dangling Button Earrings
- 4-Seasons Button Tree
- Batman vs. Superman Button Checkers
- Plastic Lid Wind Chime
Rainbow Button Wind Chime
Supplies
- 1 large sturdy plastic lid
- Lots of buttons
- String
- 16 pony beads
- 12 tri-beads
- 12 metal canning lids
- Hot glue gun
- White craft glue
- Scissors
- Hammer and a nail
- Thumbtack
- Outdoor craft paint optional
Instructions
- Use hammer and nail to poke a hole in the top of each canning lid.
- If you like paint each of the lids, front and back and let them dry.
- Use a thumbtack to poke four evenly spaced holes into the inside rim of the plastic lid. This will be for your hanger.
- Use thumbtack to poke twelve evenly spaced holes in the top of the plastic lid.
- Measure and cut sixteen pieces of string, about 24-inches long. Tie a pony bead to the end of each string. Set four strings aside and thread remaining twelve strings through the top of the lid so that the pony bead holds them in place. Tack bead in place with a little hot glue.
- Thread the first string through four large buttons and add a tri-bead. Add some white glue to each button and the bead.
- Repeat step 6, eleven more times, adding a few more buttons each time to create a tiered effect.
- Tie the end of each string to a canning lid.
- Use the four remaining strings to create the hanger. Thread each one through the holes in the sides of the lid. Gather all four strings together and tie in a knot.
This post was originally published on Jul 15, 2015.
- Winter Luminaries: Snowy Pinecone Candle Jars - November 19, 2024
- Pinecone Owls - November 12, 2024
- Thanksgiving Handprint Tree - November 1, 2024


Susan Kraut says
Love the button embellished lampshade. Can’t wait to share your button crafting ideas with my grand kids.
Amanda Formaro says
Thanks Susan, hope you have fun!
Amanda Lawson says
How did you paint your canning lids? When I spray painted them the rubber seal disintigrated and they wouldn’t dry. I also tried hand painting them and had to paint them so many times to get the right coverage that it was very time consuming, plus the gloss paint stuck together and peeled off. Any tips?
Amanda Formaro says
Hi Amanda. I used a brush-on multi-surface acrylic paint with a matte finish. I believe I did have to do a couple of coats. However, I left my windchime outside and the weather took its tole on the canning lids. So the paint did end up flaking off by the end of autumn.
Cucicucicoo: Eco Sewing and Crafting says
That’s a great idea! I love how you’ve created a rainbow look with the different colors! I have a gazillion totally random buttons, so I doubt I’d be able to get enough of each color, but I just might try anyway! :) Lisa
Amanda Formaro says
You can get colored buttons in multicolor packs or single colors at JoAnns and Michaels :)
Barbara says
This is really pretty and so colorful! I think you could also use different colors of string or clear fishing line would be nice
also. I will be making one of these soon, thanks for sharing!
Amanda Formaro says
Thanks Barbara! :)
Anne-Marie Roode says
Thanks Amanda,I realy enjoy the thing’s you made please send some more!! Thanks for sharing!! Xx
Amanda Formaro says
Thank you Anne-Marie! :)
cookie17 says
This cute Amanda Hope u having fun this summer ,making the pretty thing’s you make Thank’s for sharing ..
Amanda Formaro says
Thanks Cookie!
sarina says
If canning lids are not available what would be another suggestion?
Amanda Formaro says
Hi Sarina. You could use washers as they have some nice weight to them. Anything that has a little weight will work!
Sharon says
Cake icing container lids or any other plastic lid, You could glue a metal lid on so it would make a sound when it taps against the buttons. You could also add jingle bells for added sound when it is windy.