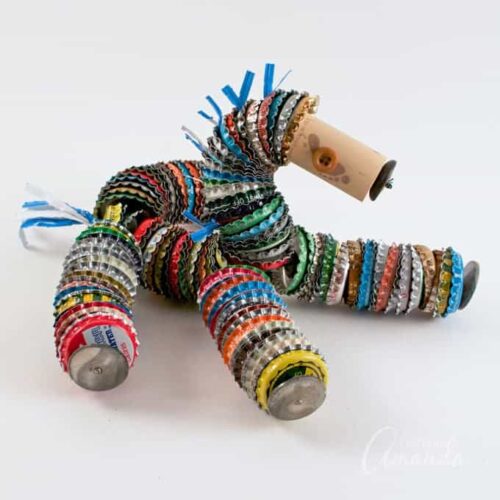
This bottle cap horse uses light floral wire, which allows your horse to flop around like an old rag doll. And darn it, he’s just so cute!
Bottle Cap Horse
This ragdoll-type bottle cap horse sits on the shelf right inside my studio door, and he’s quite the conversation piece! I had actually purchased a big bag of caps when I made this Bottle Cap Flower for my garden, so I needed another project. I figured one of the cutest ways to use up the rest of my stash was to create this bottle cap horse!
As it turns out, this project is one of my top five favorites from my book Button Mania. It’s a great recycled craft using saved bottle caps, or you can buy vintage-looking caps brand new. If you don’t have a stash of bottle caps, you can buy them on Amazon here!
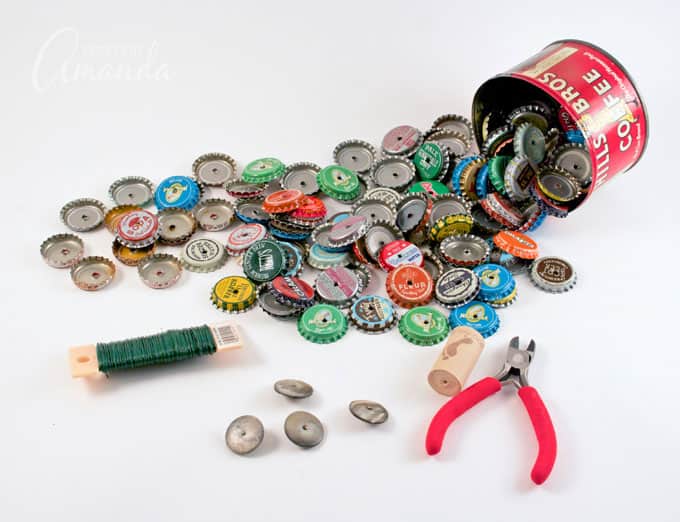
What you need to make a Bottle Cap Horse:
- Hammer and nail
- 122 bottle caps, holes poked into the center of each
- 24-gauge floral wire
- Wire cutters
- 4 large buttons (shank or holed buttons)
- 5 medium buttons
- 2 small buttons (eyes)
- Cork
- Toothpick
- 8-10 twist ties
- Hot glue gun
- Scissors
- Flat nose pliers
NOTE: Pipe cleaners can be substituted for the twist ties.
How to make a Bottle Cap Horse
- To prepare for this project you will need to make holes in all your bottle caps. I used an old wooden cutting board that I didn’t need anymore. Place the bottle cap top-side facing up and use a hammer and nail to create a hole in the center.
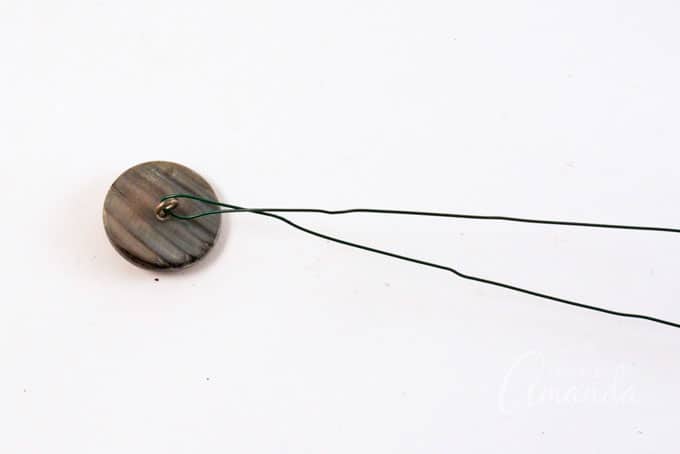
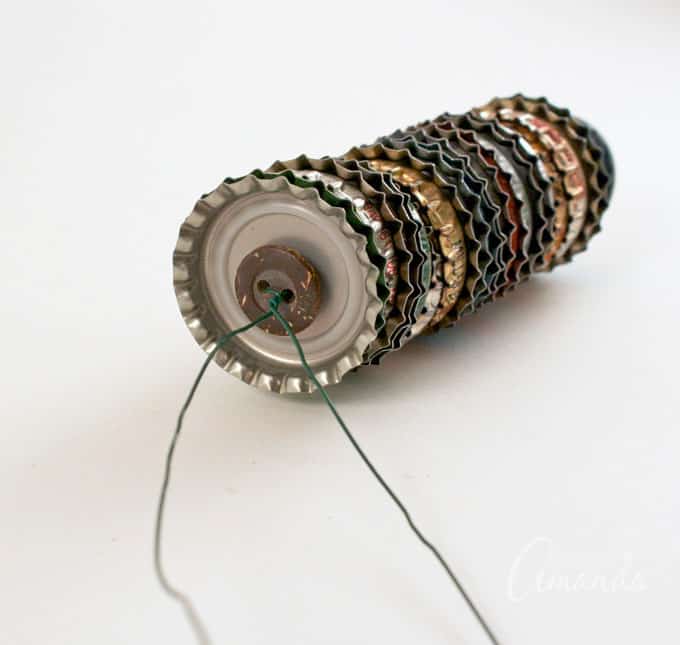
- Cut four lengths of wire, 16-inches each. Thread a large button onto one of the wires, center it in the middle of the wire and twist the wire once or twice to secure.

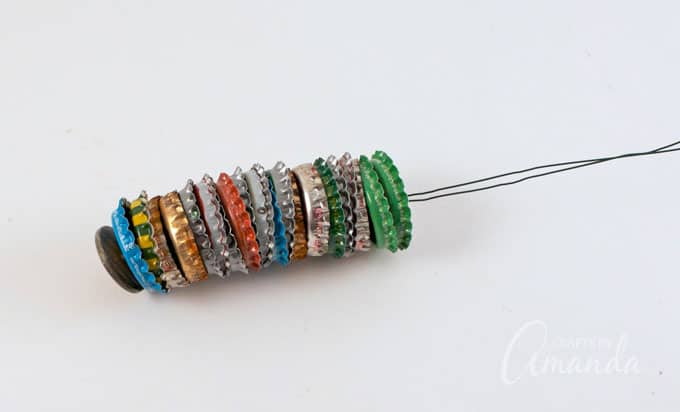
- Insert the ends of the wire into the hole in the top of a bottle cap. Keep adding bottle caps until you reach 20 caps.

- Thread the ends of the wire through a medium button and twist the wire a couple times to secure. Repeat these steps for the three remaining legs.

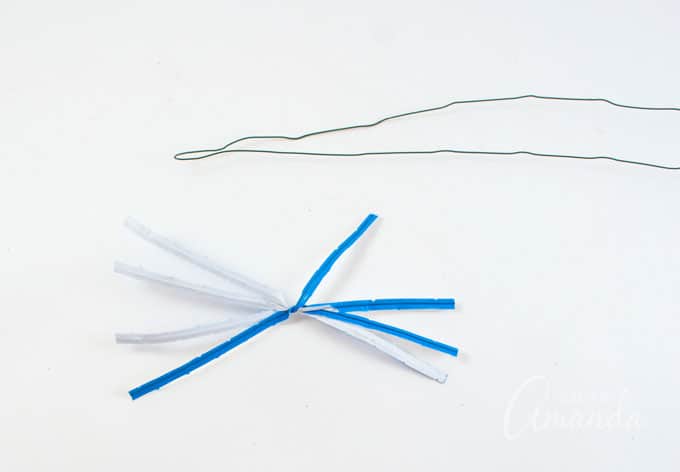
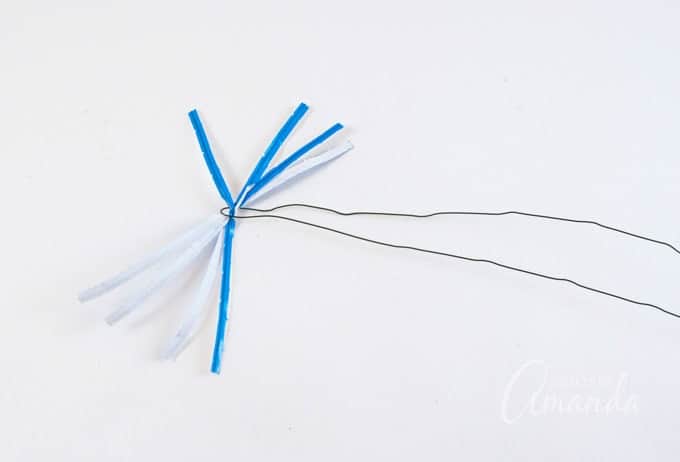
- Cut a length of wire 24-inches long and fold it in half.

- Gather four twist ties and twist together in the center two times.

- Place the center of the twist ties in the center of the wire. Twist the ties together, then twist the wire together to secure.


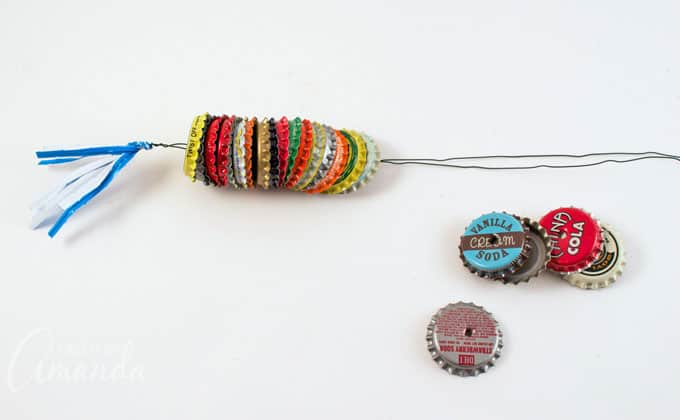
- Thread the wire through the hole in the top of a bottle cap. Keep adding bottle caps until you reach 42 caps.

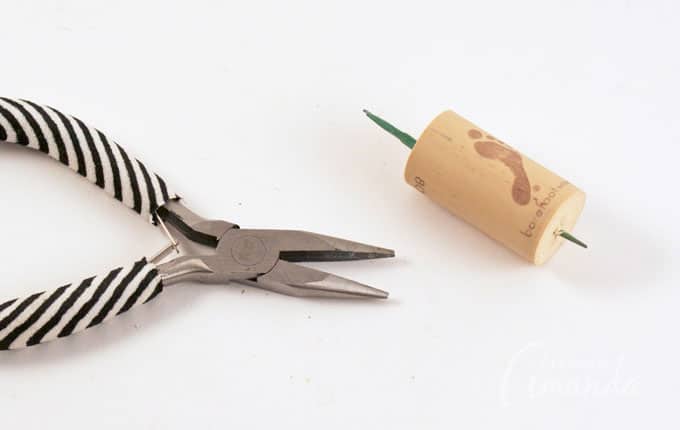
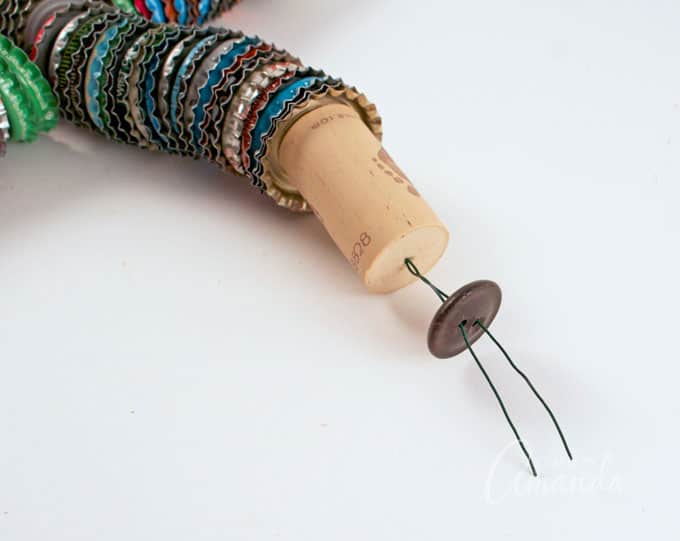
- Use a toothpick to create a hole through the cork. Using pliers to grasp, push and pull the toothpick is helpful. Remove the toothpick.

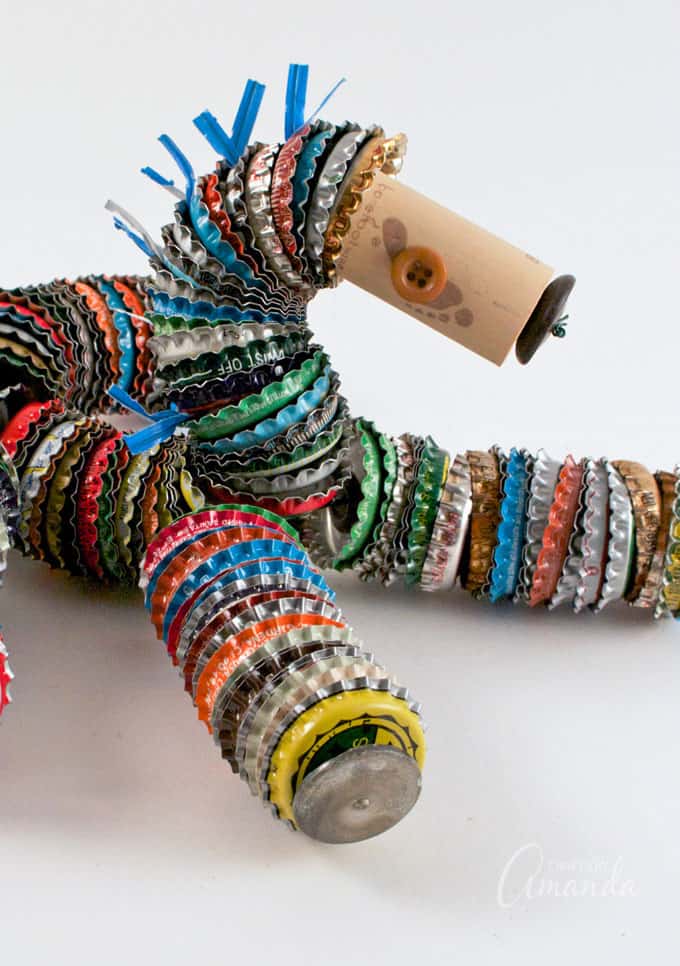
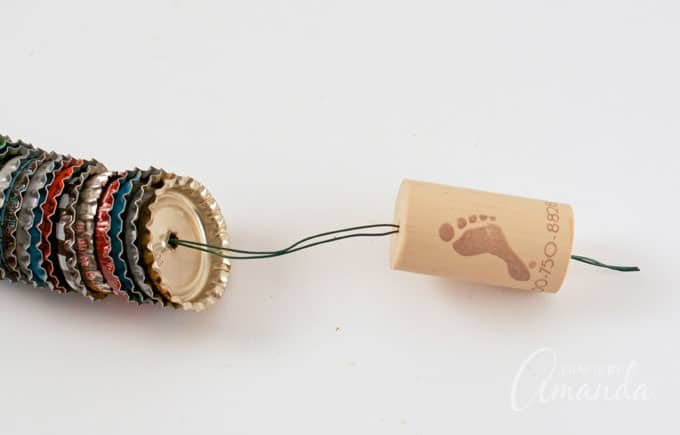
- Thread the ends of the wire through the cork and thread the last medium button on after. Twist the wire a few times and snip off the excess.
- Add the legs by inserting the wire between two bottle caps on the body. Wrap the wire around a few times and snip off the excess. Repeat for the other three legs.


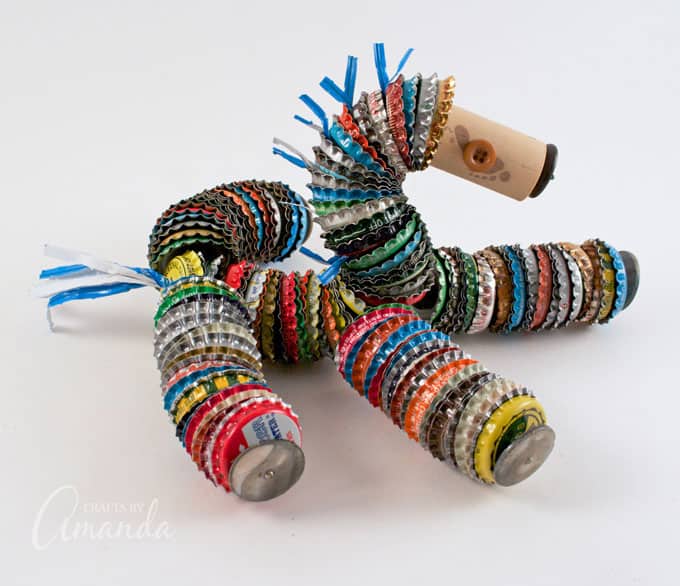
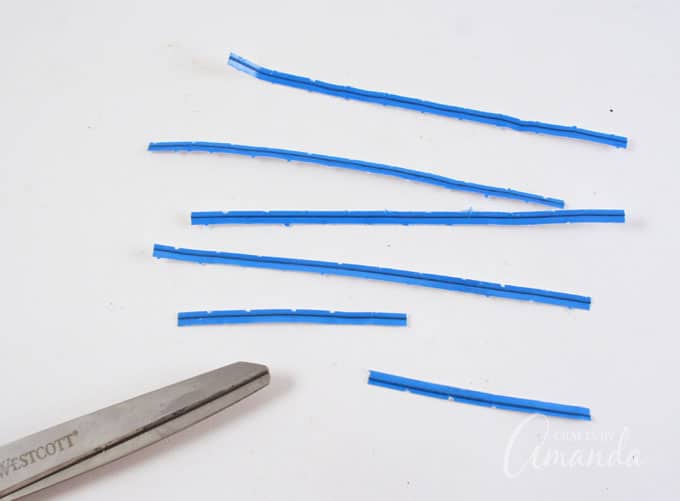
- To create the mane, cut the remaining twist ties in half and wrap around the wire between bottle caps on the neck.


- Hot glue the two small buttons to the cork for the eyes.


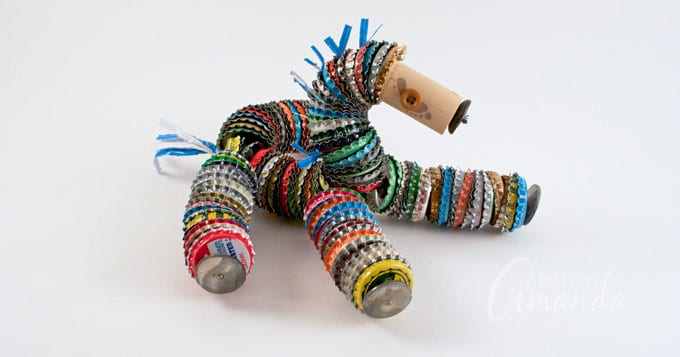
There you have it! A cute bottle cap horse. He’d look great sitting on a shelf indoors, or even hiding in your garden outside. Keep in mind though, if you keep him outside, he will rust. But that can contribute some rustic charm that you may love!
This project originally appeared in my book, Button Mania: Buttons, Bottle Caps and Beyond!
Be sure to check out my Recycled Plastic Lid Windchime for another great recycled lid project, or these Fairy House Night Lights for a fun recycled plastic bottle craft.

Bottle Cap Horse
Supplies
- Hammer and nail
- 122 bottle caps holes poked into the center of each
- 24- gauge floral wire
- Wire cutters
- 4 large buttons shank or holed buttons
- 5 medium buttons
- 2 small buttons eyes
- Cork
- Toothpick
- 8-10 twist ties
- Hot glue gun
- Scissors
- Flat nose pliers
Instructions
- To prepare for this project you will need to make holes in all your bottle caps. I used an old wooden cutting board that I didn’t need anymore. Place the bottle cap top-side facing up and use a hammer and nail to create a hole in the center.
- Cut four lengths of wire, 16-inches each.
- Thread a large button onto one of the wires, center it in the middle of the wire and twist the wire once or twice to secure.
- Insert the ends of the wire into the hole in the top of a bottle cap. Keep adding bottle caps until you reach 20 caps.
- Thread the ends of the wire through a medium button and twist the wire a couple times to secure.
- Repeat steps 2-4 for the three remaining legs.
- Cut a length of wire 24-inches long and fold it in half.
- Gather four twist ties and twist together in the center two times.
- Place the center of the twist ties in the center of the wire. Twist the ties together, then twist the wire together to secure.
- Thread the wire through the hole in the top of a bottle cap. Keep adding bottle caps until you reach 42 caps.
- Use a toothpick to create a hole through the cork. Using pliers to grasp, push and pull the toothpick is helpful. Remove the toothpick.
- Thread the ends of the wire through the cork and thread the last medium button on after. Twist the wire a few times and snip off the excess.
- Add the legs by inserting the wire between two bottle caps on the body. Wrap the wire around a few times and snip off the excess. Repeat for the other three legs.
- Cut remaining twist ties in half and wrap around the wire between bottle caps on the neck.
- Hot glue the two small buttons to the cork for the eyes.
- NOTE: Pipe cleaners could be substituted for twist ties.
This post originally appeared here on Jan 24, 2018.
- Tie Dye Beach Towels - July 24, 2026
- Swirling Twirling Ladybugs - July 21, 2026
- Drip Tie Dye Backpack - July 17, 2026


Leave a Reply