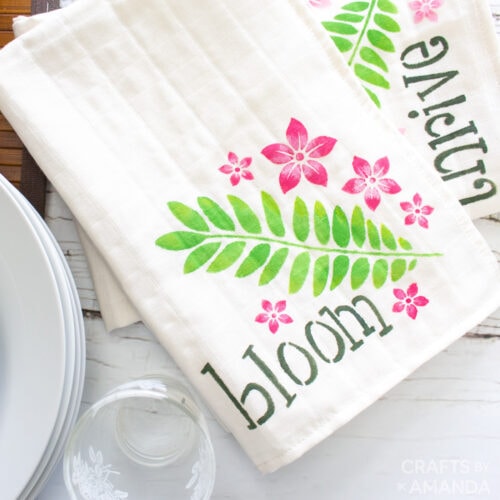
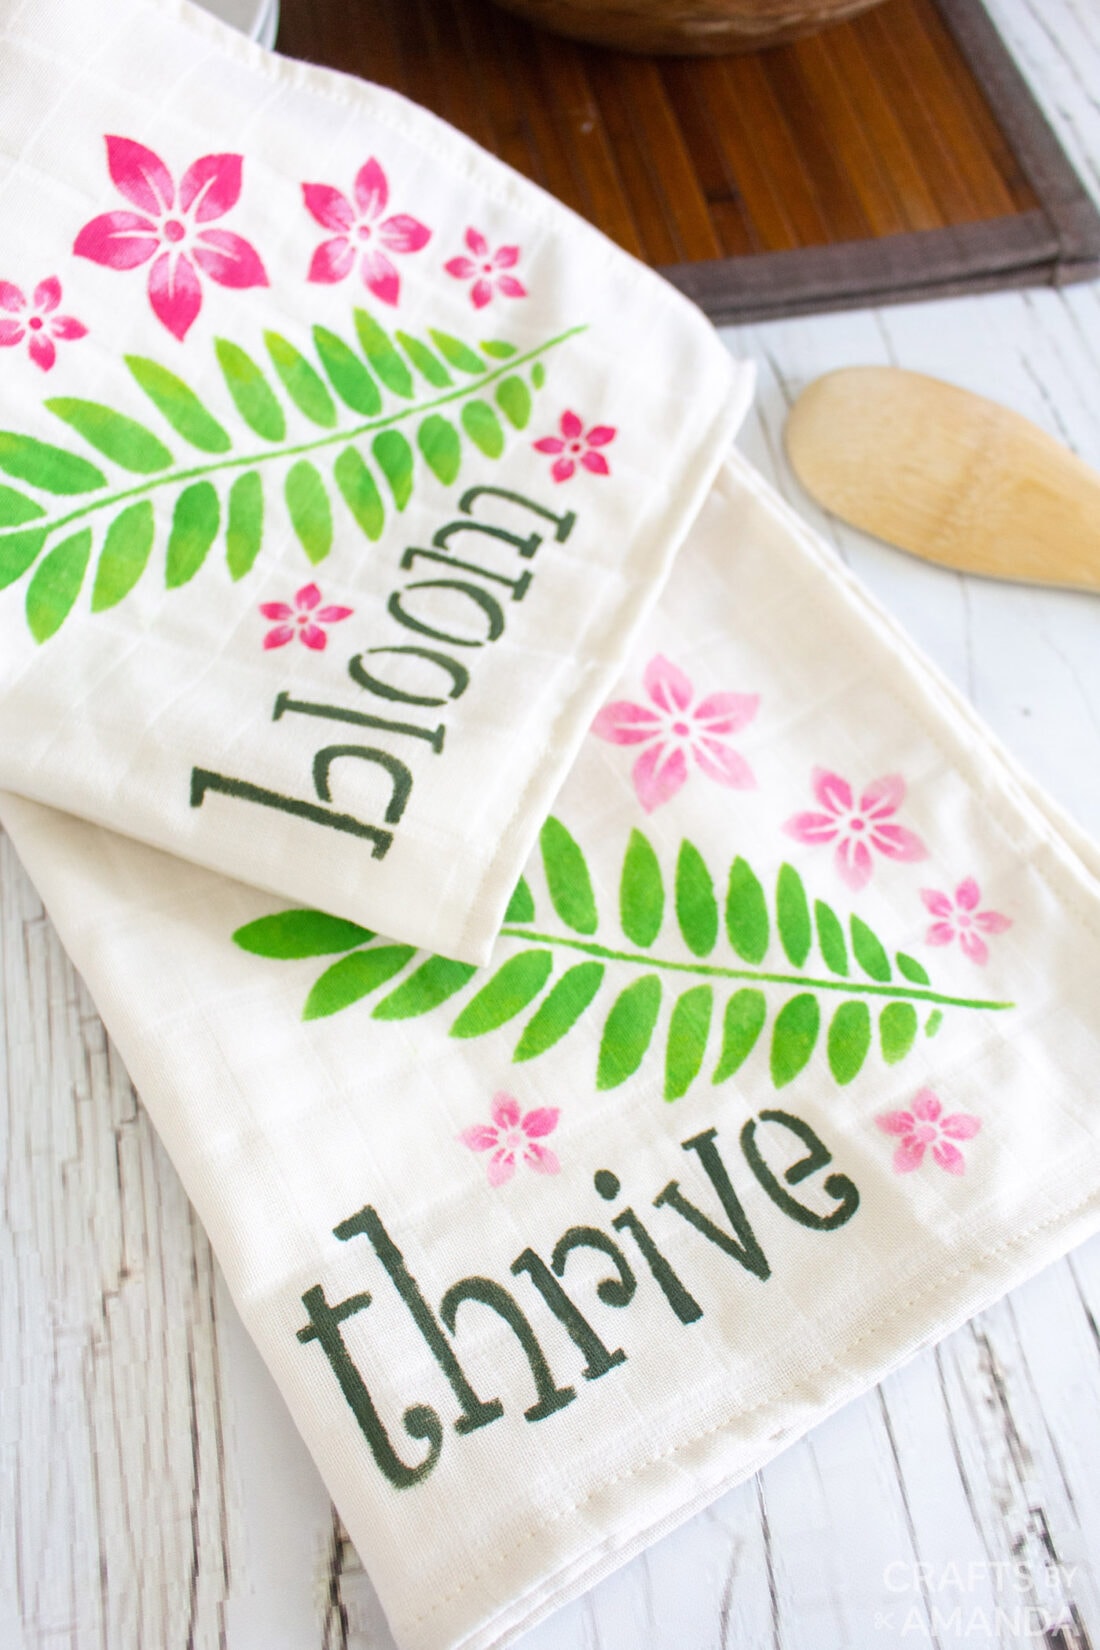
These DIY tea towels are made from pretty botanical stencils and brightly colored fabric paint. Flexible, soft, and so easy to make whether it’s for spring or all year round.
Why we love this project
I always incorporate the seasons in by adding one or two pieces throughout the home. The perfect way to add a touch of spring is by adding accent tea towels you can hang from the cabinet, dishwasher, oven, or over the sink. Making these DIY tea towels is so easy using stencils and good quality paint, and they certainly don’t need to be just for springtime.
You can use these stencils and paints on T-shirts, pillowcases, curtains, bandanas, or shoes as well. The paint is soft to the touch and very durable even after running through the laundry. So sit down with a few different fabric items and some friends or family for a fun craft day!
Crafts by Amanda is a proud member of the DecoArt core blogger family! And just so you know, we were compensated for this project, though all of the opinions are 100% ours and we love this product!
Helpful Project Information:
- Age Level: 10 and up
- Mess Factor: Medium – paint
- Level of Difficulty: Medium
- Time to Complete: Less than 30 minutes
- Cost Estimate: Less than $15.00
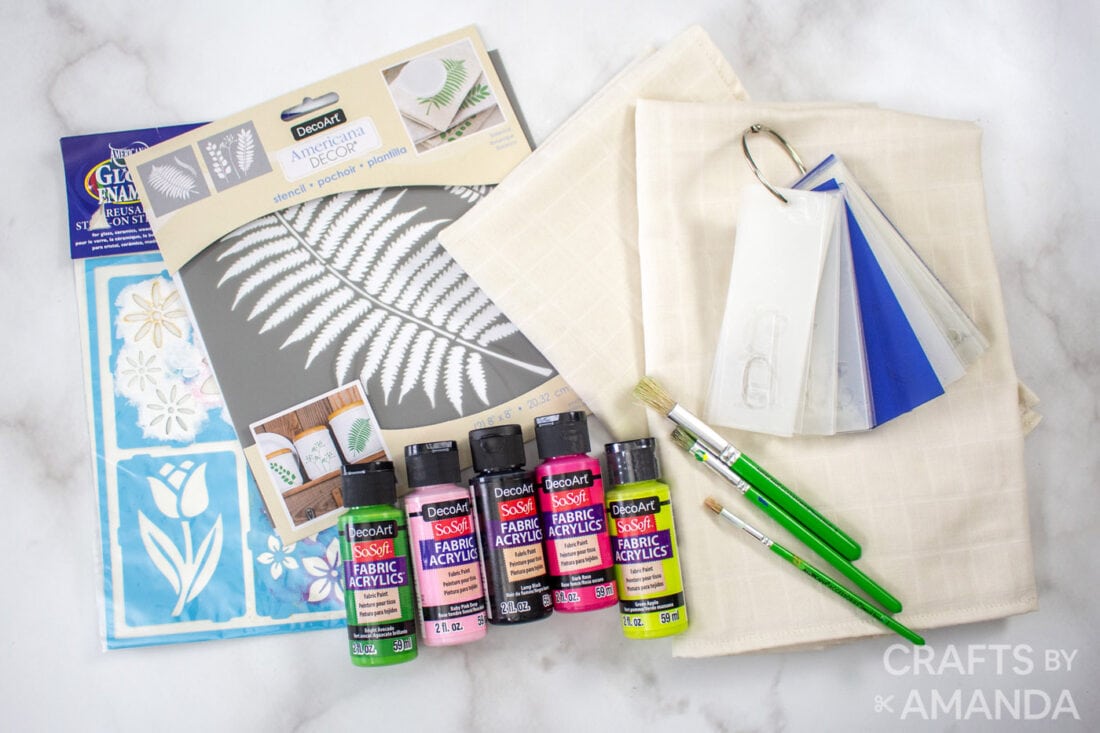
Craft supplies you will need
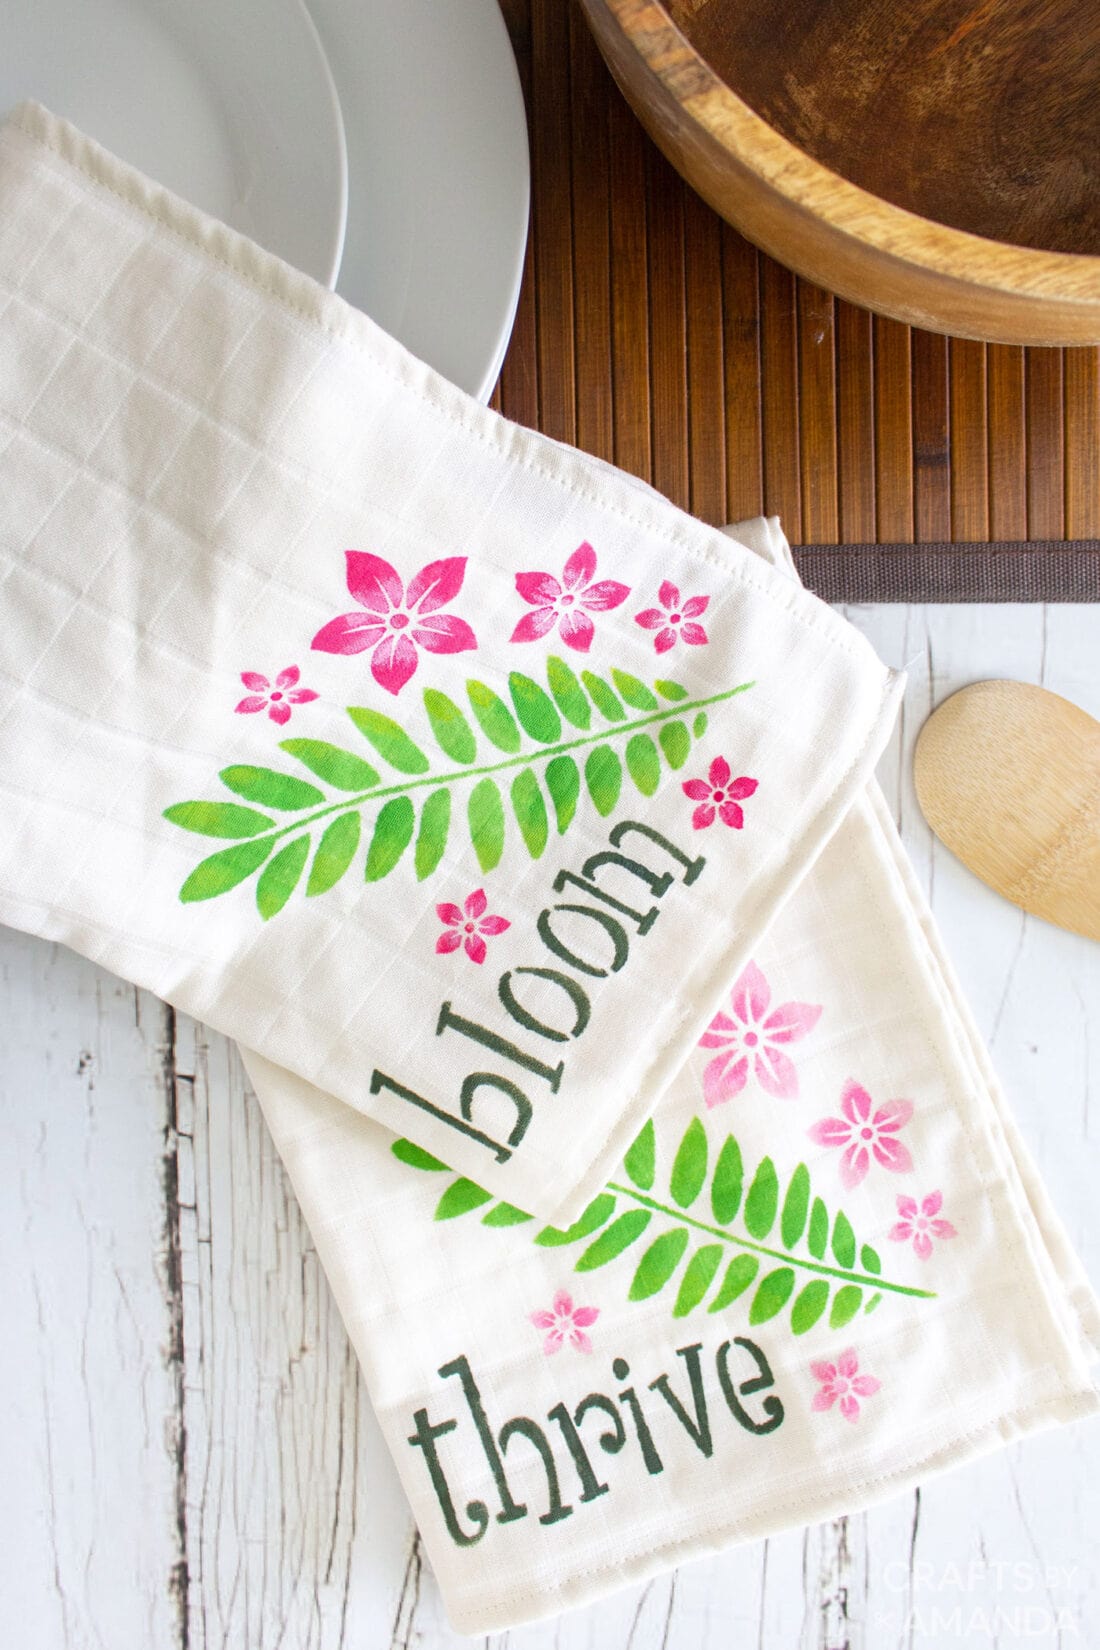
All of the paint colors used here are DecoArt SoSoft™ Fabric Paint. These acrylic paints are our go-to fabric paint thanks to the durability and softness it offers. Our stencils are DecoArt Americana Decor 8×8 Botanical Stencil, Americana Gloss Enamels Floral Stencil, and DecoArt Stencils on a Ring, Whimsical Delight.
P.S. if you buy your paint from the links above (the DecoArt shop) you can take 20% off! Use this code: CraftsbyAmanda20
Get full list of supplies and directions in the printable version at the end of this post.
How to a Make DIY Tea Towels
These step by step photos and instructions are here to help you visualize how to make this project. Please scroll down to simply print out the instructions!
- Place the tea towel on top of your work surface. To prevent paint from bleeding through the fabric, separate the layers with a piece of cardboard that is wrapped with plastic, freezer paper, or foil.
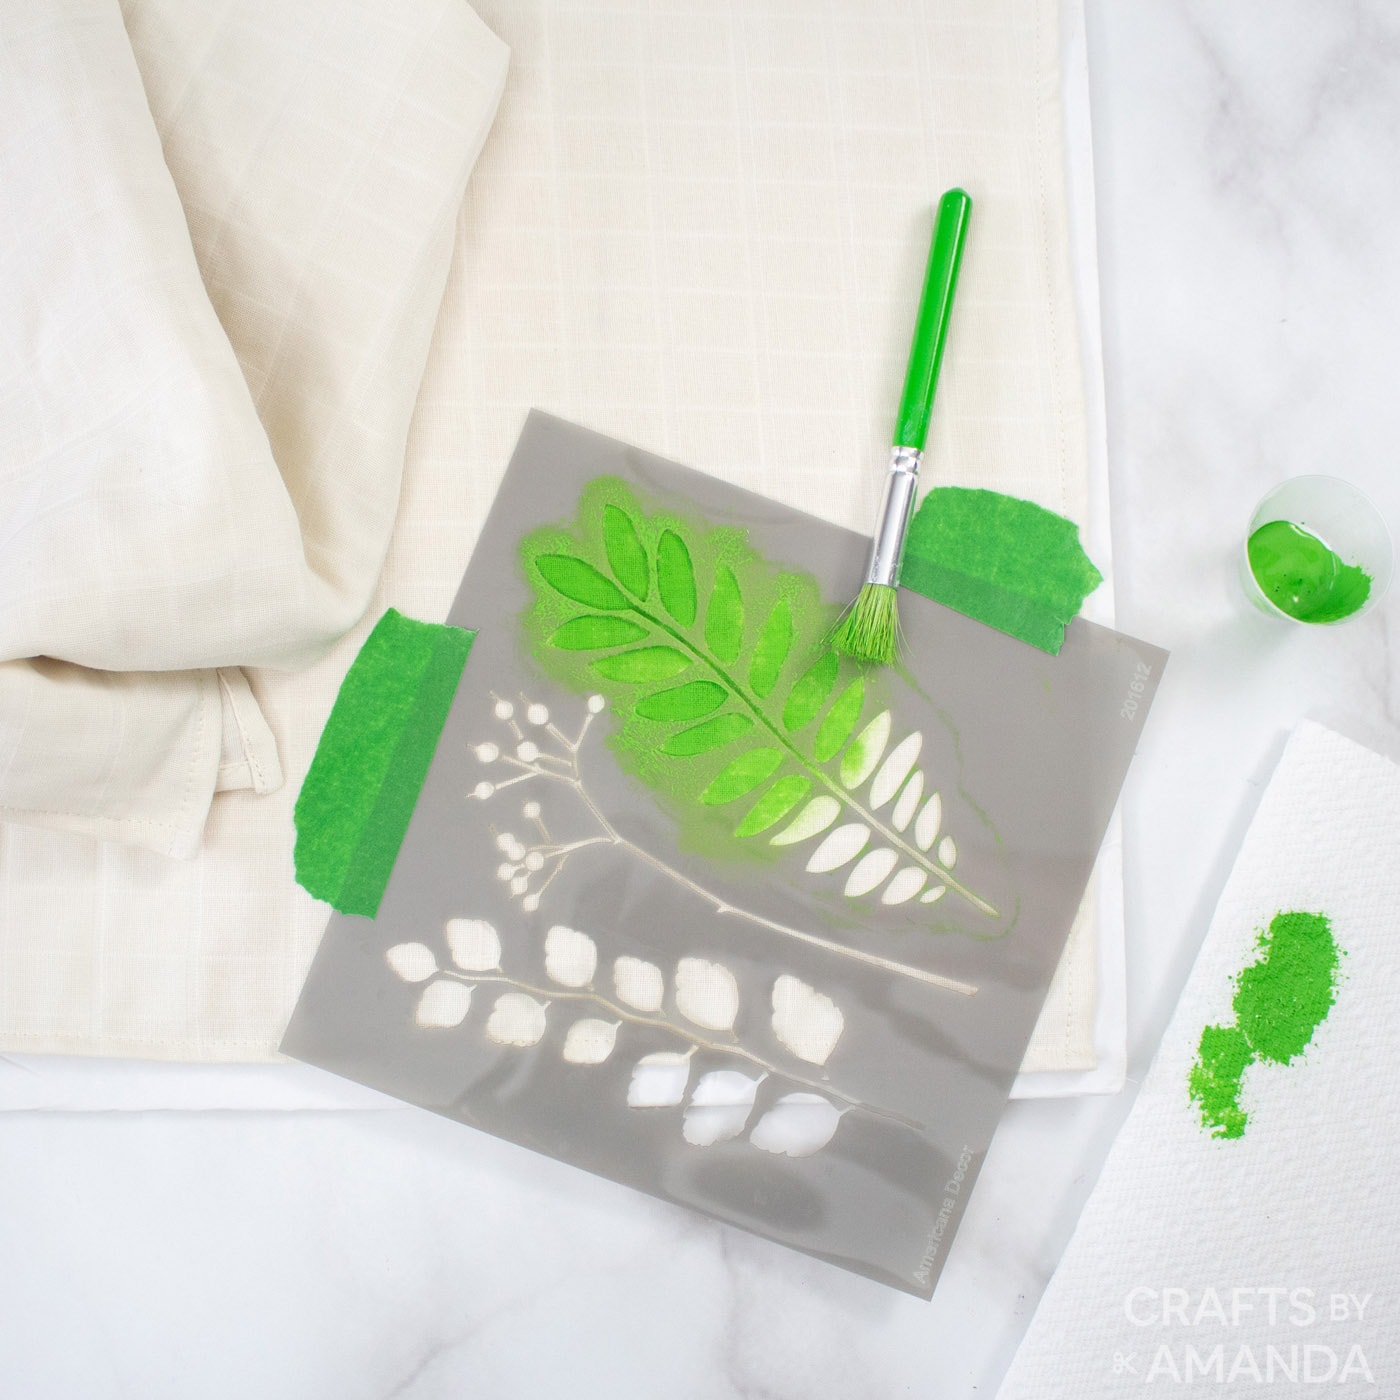
- Position the fern stencil on top of the tea towel in the bottom right corner. Tape the edges of the stencil in place to keep it from moving or hold steady with your other hand.

- Using a stencil brush, dip it in Bright Avocado and blot off the excess paint on a paper towel. Dab the brush over top of the stencil transferring the paint onto the tea towel. Continue until the entire image is transferred.
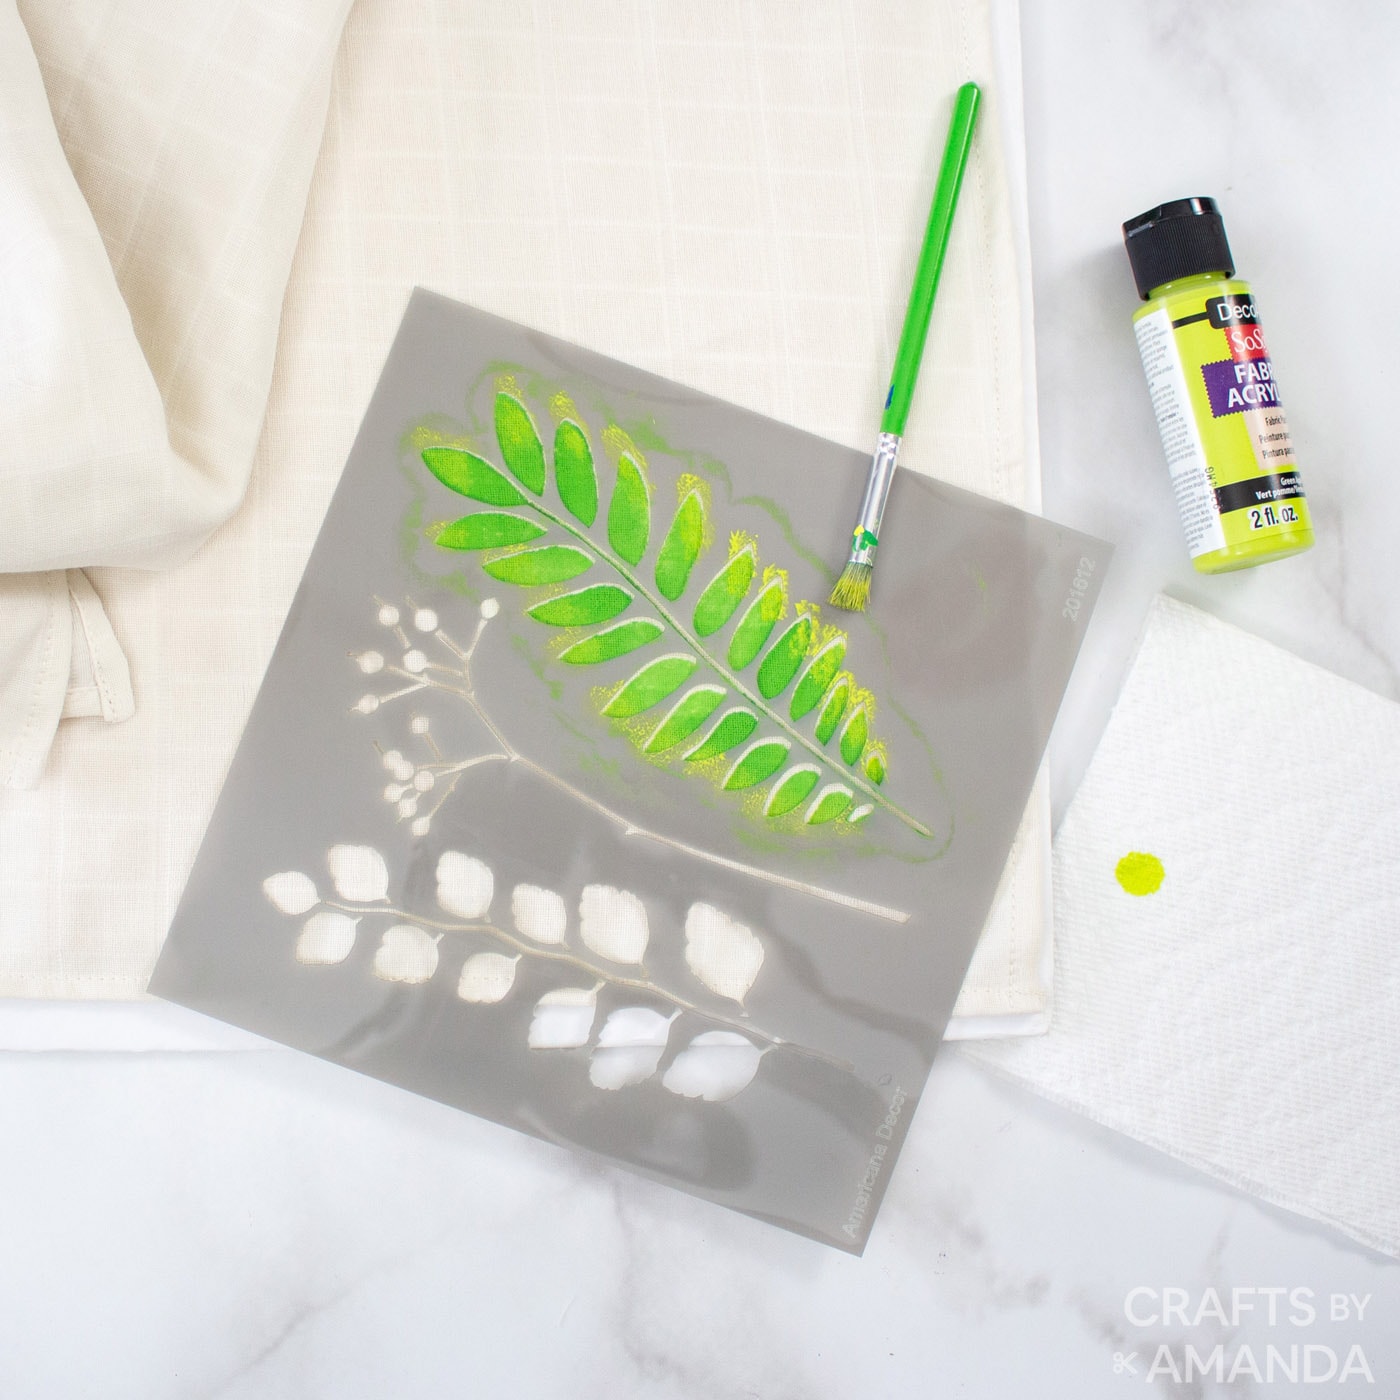
- Using a smaller stencil brush, apply Apple Green fabric paint to the outer edges of all the leaves.
- Remove the stencil brush and wash the stencil with warm water.
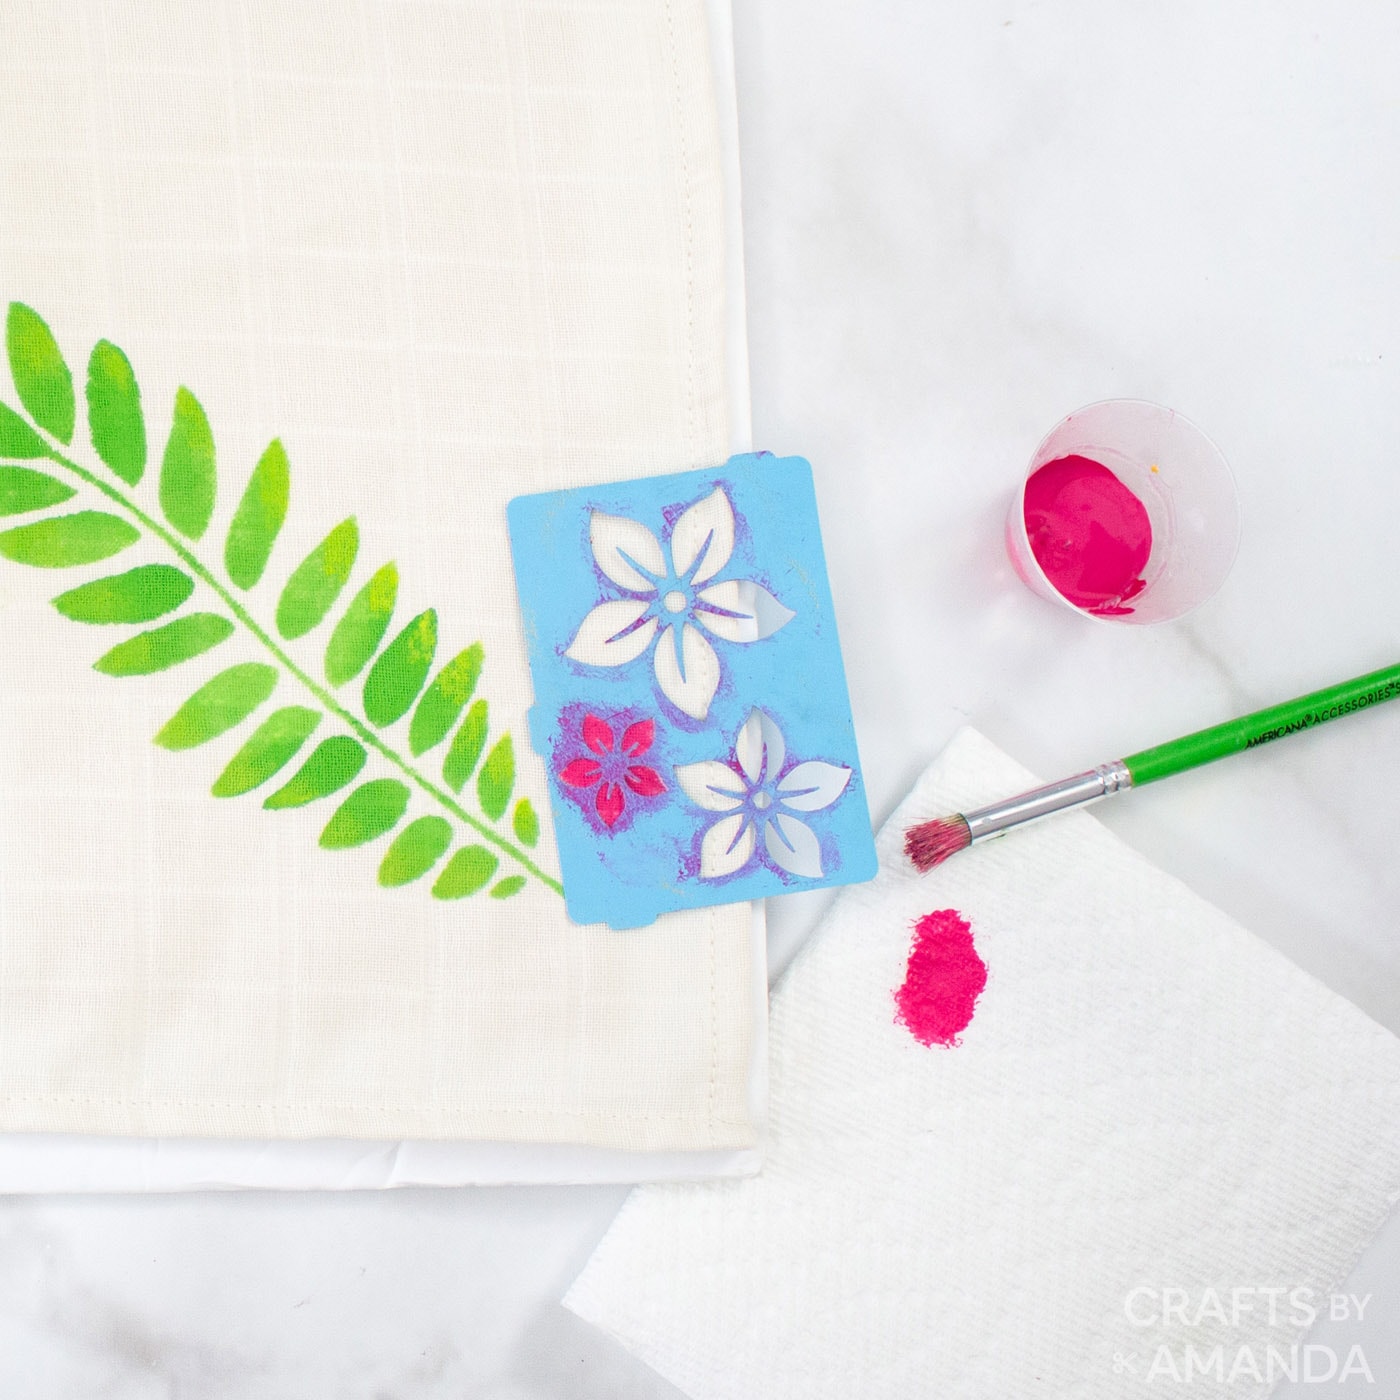
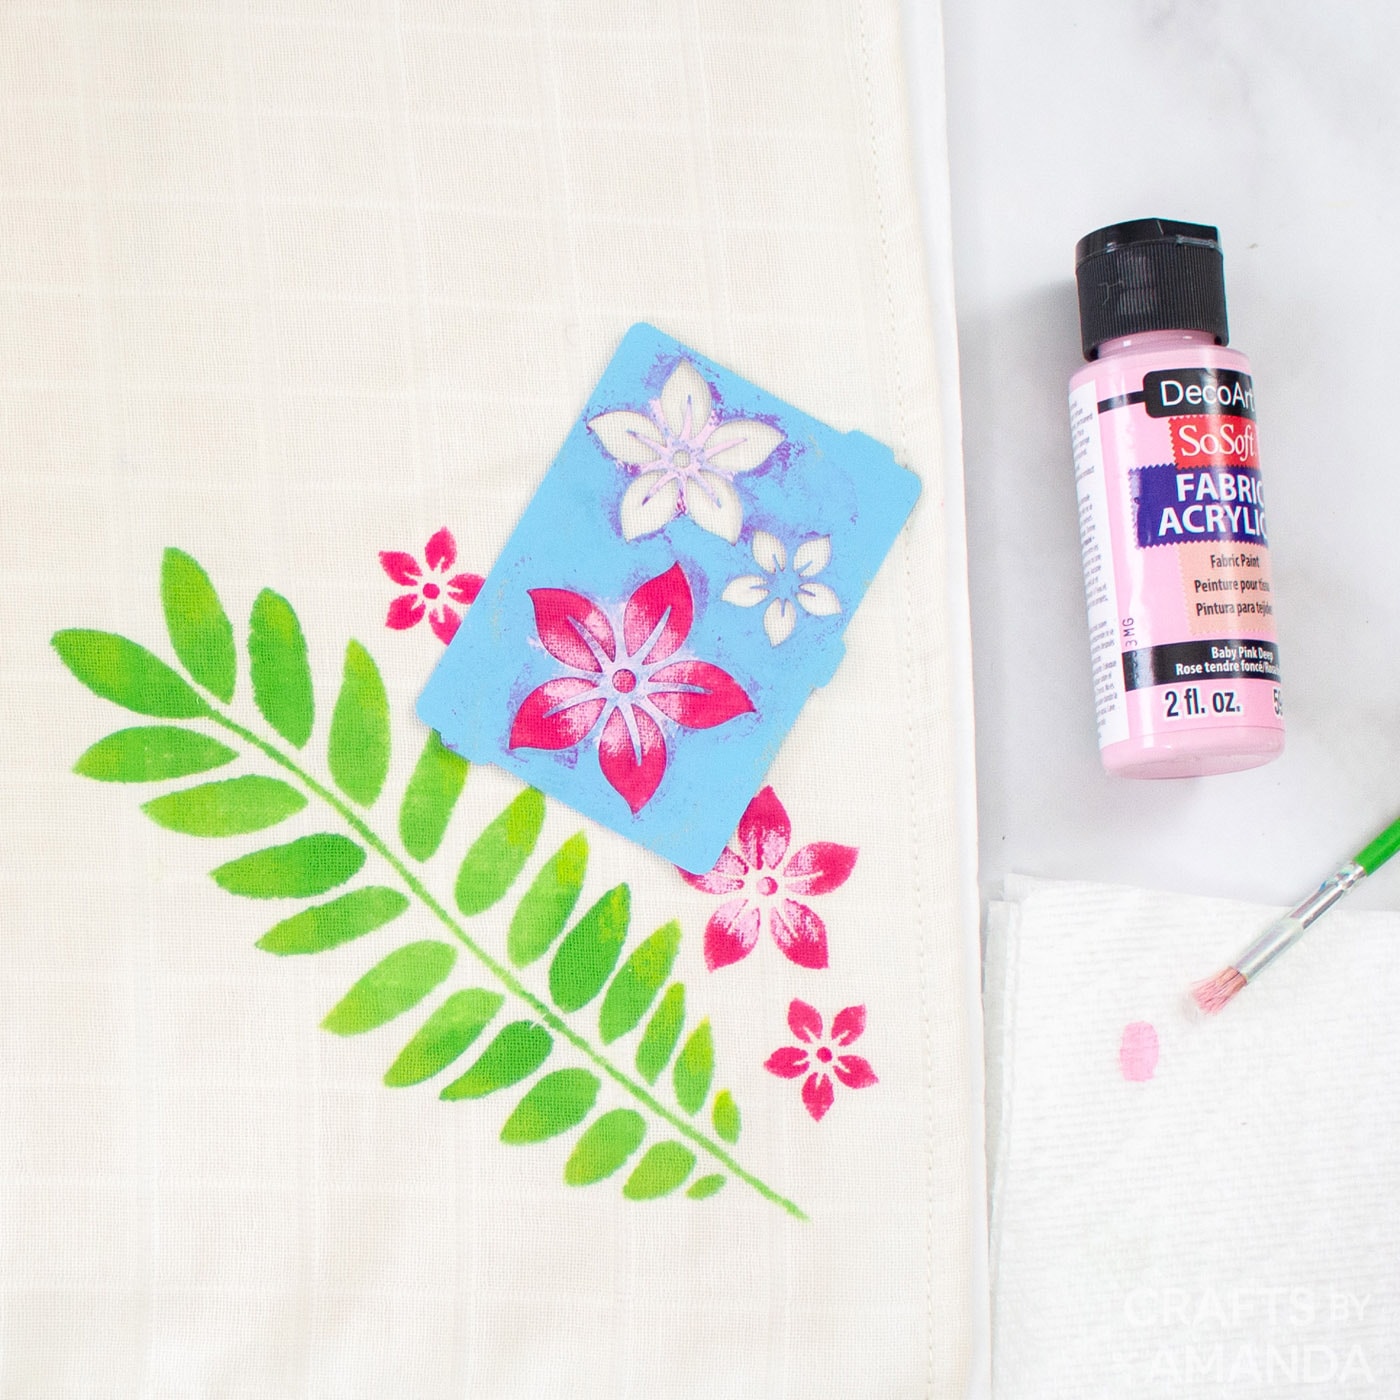
- Place the flower stencil on top of the tea towel and use the brush to dab Dark Rose fabric paint over top of the stencil. Remove stencil and continue adding more flowers with the other different sized flower stencils around the fern.
- Reposition the stencil over top of each flower and add some Baby Pink Deep to the centers of each flower.
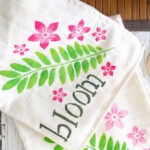
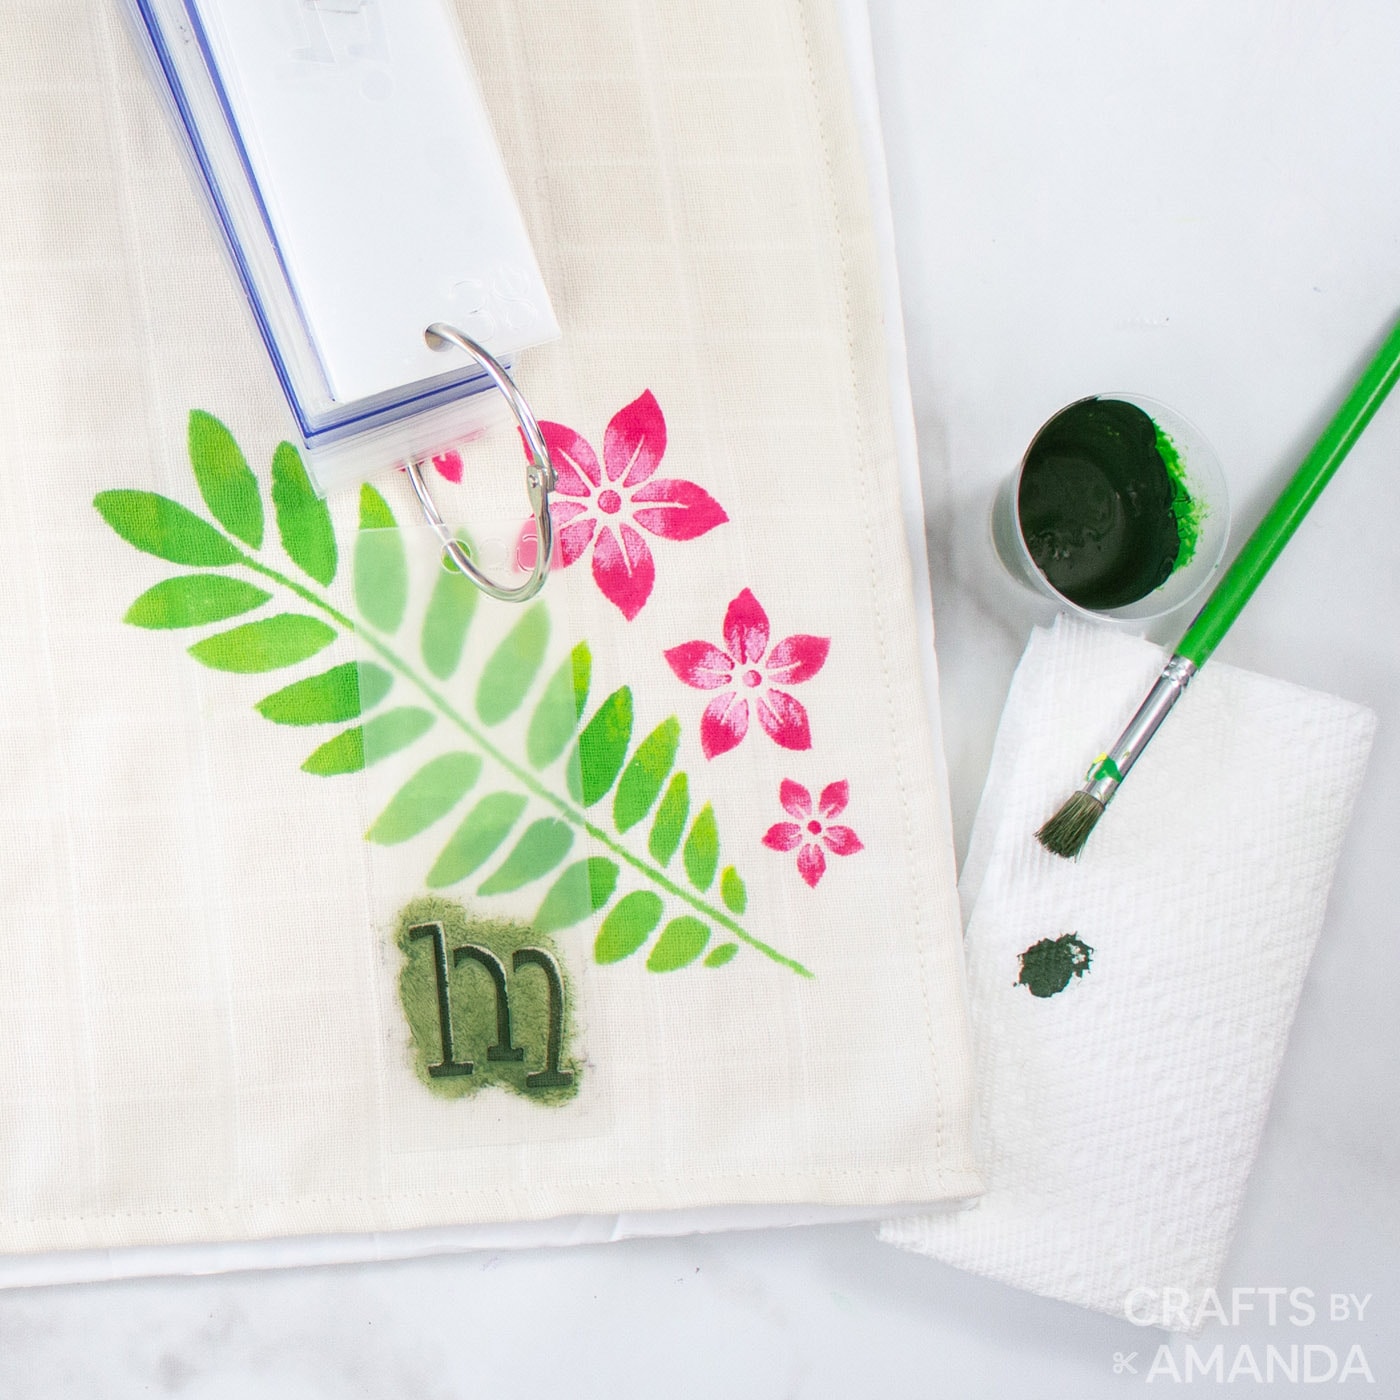
- Add the word “bloom” to the tea towel using the alphabet stencil and a mix of 1 part Lamp Black and 3 parts Bright Avocado fabric paint. Starting with the letter closest to the fern, place the stencil onto the tea towel and brush on the paint. Continue with the remaining letters.
- Repeat these steps for stenciling the other tea towel, changing the base flowers to Baby Pink Deep instead. Add some Dark Rose fabric paint to the center of each flower.
Expert Crafting Tips
- Pre-wash tea towels without adding any fabric softeners. Leave them to dry fully and iron out any wrinkles if necessary before beginning.
- Remember to remove the tea towel from the covered cardboard before completely dry to prevent it from sticking together. Allow paint to dry for 48-72 hours and then wash on the gentle cycle. Hang to dry or dry on low heat.
These beautiful DIY tea towels make awesome gifts as well. Think hostess gift, Mother’s Day, Easter, or for a neighbor. The flexibility of the paint on fabric makes it great for all sorts of projects you have in mind.
I’m sure you’ve noticed over the years my preference for DecoArt’s products. They are my preferred paints! You can see DecoArt’s library of free projects here.
More Paint Projects
- Drip Paint Pots
- Cactus Painted Rocks
- Mason Jar Canisters
- Ladybug Painted Rocks
- Burlap Stenciled Pillow Covers
I love to create and share my projects with you! I know it’s hard to remember to come back and search, so I’ve made it easy for you with my weekly newsletter! You can subscribe for free and I’ll send you fun crafts and delicious recipes every week right to your email.
DIY Tea Towels
Supplies
- Tea towels in a neutral color we used double gauze 100% organic cotton
- DecoArt SoSoft Fabric Acrylics in Dark Rose, Baby Pink Deep, Bright Avocado, Green Apple, Lamp Black
- Americana Decor 8×8 Botanical Stencil
- Americana Gloss Enamels Floral Stencil
- DecoArt Stencils on a Ring, Whimsical Delight
- Cardboard and paper towels
Craft tools
- Stencil brushes
Instructions
- Pre-wash tea towels without adding any fabric softeners. Leave them to dry fully and iron out any wrinkles if necessary.
- Place the tea towel on top of your work surface. To prevent paint from bleeding through the fabric, separate the layers with a piece of cardboard that is wrapped with plastic, freezer paper or foil.
- Position the fern stencil on top of the tea towel in the bottom right corner. Tape the edges of the stencil in place to keep it from moving or hold steady with your other hand.
- Using a stencil brush, dip it in Bright Avocado and blot off the excess paint on a paper towel. Dab the brush over top of the stencil transferring the paint on to the tea towel. Continue until the entire image is transferred.
- Using a smaller stencil brush, apply Apple Green fabric paint to the outer edges of all the leaves.
- Remove the stencil brush and wash the stencil with warm water.
- Place the flower stencil on top of the tea towel and use the brush to dab Dark Rose fabric paint over top of the stencil. Remove stencil and continue adding more flowers with the other different sized flower stencils around the fern. Reposition the stencil over top each flower and add some Baby Pink Deep to the centers of each flower.
- Add the word “bloom” to the tea towel using the alphabet stencil and a mix of 1 part Lamp Black and 3 parts Bright Avocado fabric paint. Starting with the letter closest to the fern, place the stencil onto the tea towel and brush on the paint. Continue with the remaining letters.
- Repeat these steps for stenciling the other tea towel, changing the base flowers to Baby Pink Deep instead. Add some Dark Rose fabric paint to the center of each flower.
- Allow paint to dry for 48-72 hours and then wash on the gentle cycle. Hang to dry or dry on low heat.
Expert Tips & FAQs
- DIY Mosquito Repellent Candles - July 10, 2026
- Mason Jar Solar Lights - July 3, 2026
- Patriotic Pinwheels - June 23, 2026


Leave a Reply