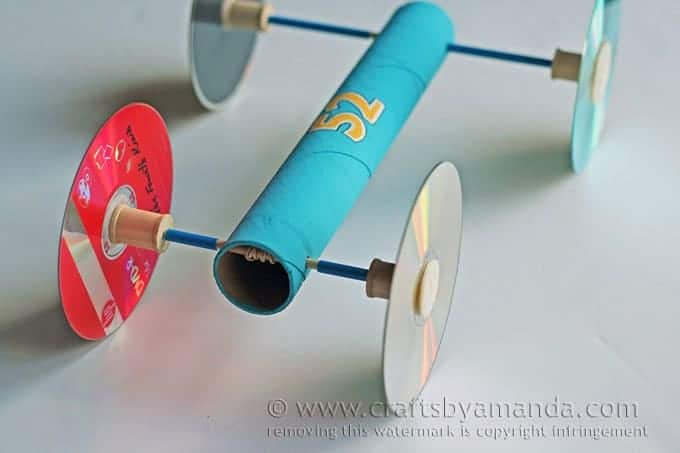
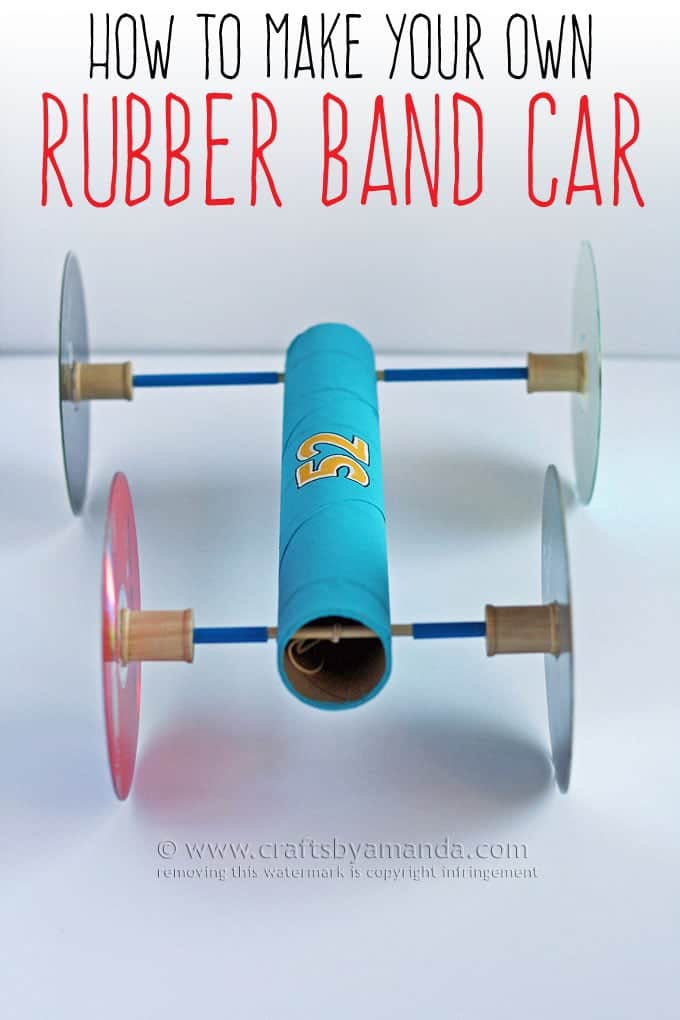
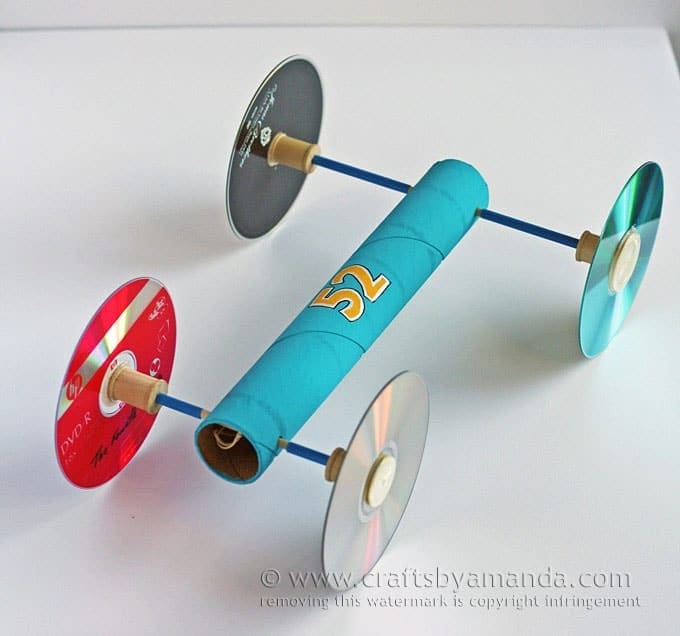
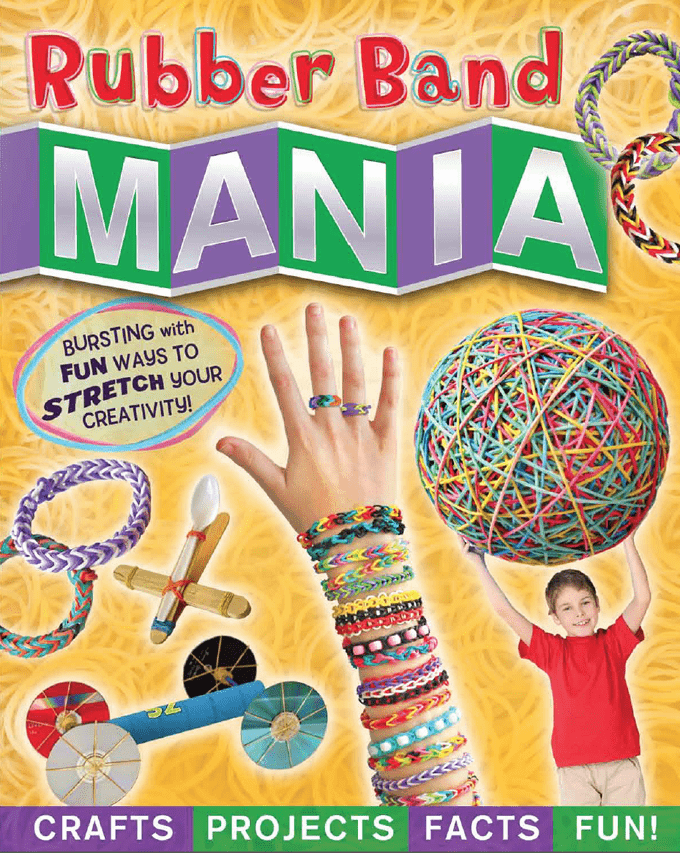
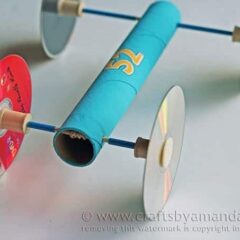
This rubber band car tutorial comes right out of the pages of one of my new books, Rubber Band Mania. While you can certainly use a paper towel tube for your car, I chose a sturdier tube that came from a box of aluminum foil. It’s a thicker cardboard and will definitely hold up better.
Kids will love this margarine tub boat craft too, another great recycling idea.

How to make a rubber band car
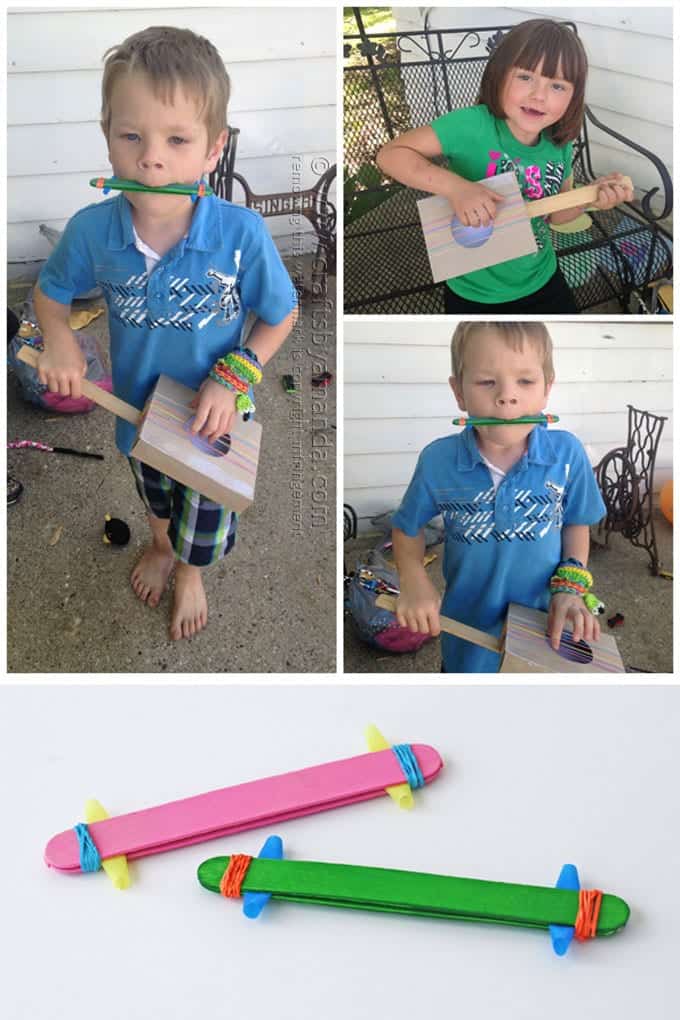
If you’re looking for a fun project for science class or maybe something for the scout troop to do together, this is perfect. You can talk about elasticity, motion, if the kids are old enough, Newton’s Laws of Motion.
You probably thought Rubber Band Mania![]() was all about rubber band bracelets, didn’t you?
was all about rubber band bracelets, didn’t you?
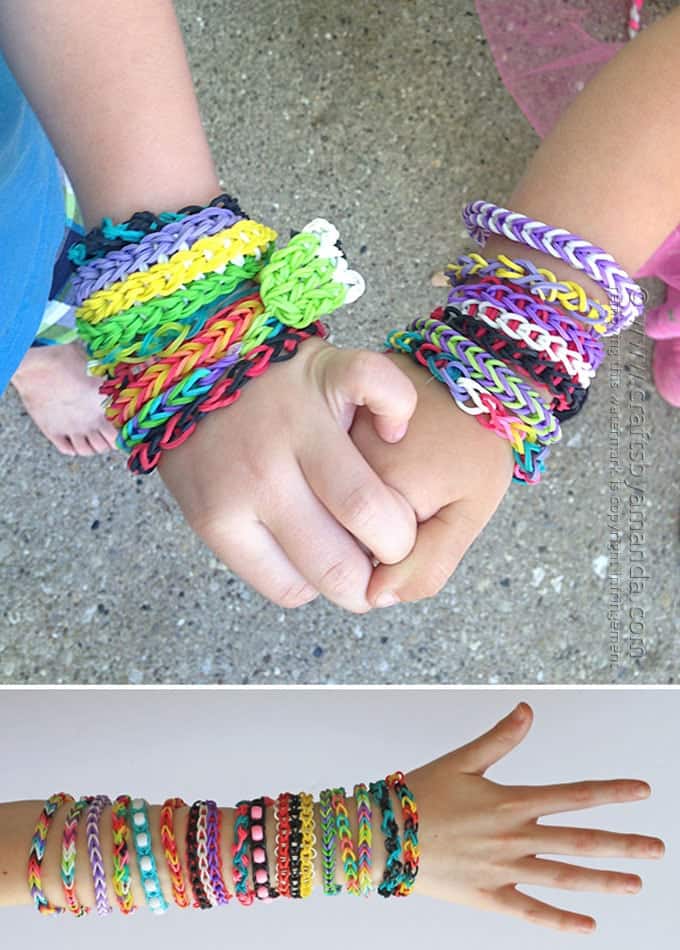
Oh yes, the bracelets are in there… my book gives you a few different ways to make them. And if you’re looking for more, there are 9 different ways to make rubber band bracelets at Kids Activities Blog.
…but so are tons of other fun rubber band crafts, activities and experiments. So after you make this car, you’ll probably want to get your own copy![]() .
.
Note: some links below are affiliate links. That means if you happen to buy something, a small percentage of that sale goes back into this site, which enables me to continue to bring you free tutorials such as this one. So, thanks!
As always, a full printable supply list and instructions are at the end of this post.
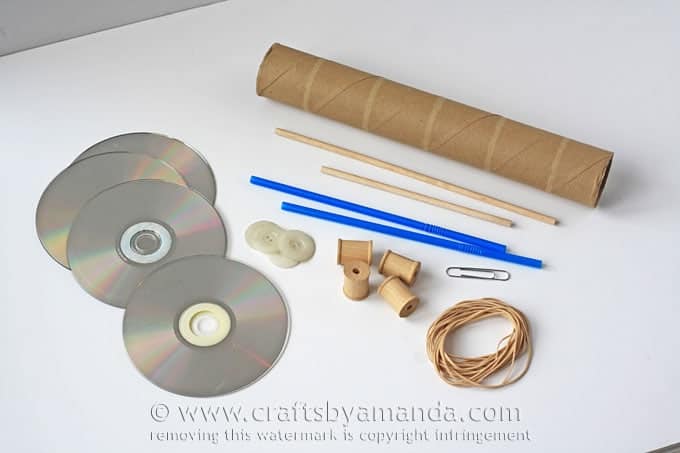
For this project you will need the following supplies:
- Heavy 12-inch cardboard tube (from aluminum foil works great)
- 1- 6” x 3/16” wooden dowel
- 1- 9” x 3/16” wooden dowel
- 4 recycled CDs
- 4- 1” x 3/4” wooden craft spools
- 2 drinking straws
- 4 large buttons
- 20 standard rubber bands
- 1 large paper clip
- Hot glue gun
- Scissors
- Hole punch
- White craft glue
- Paint (optional)
Note: Dowels should fit snugly inside the holes of the spools, however dowels should move freely in the axle holes.
If you would like to decorate your car, paint the cardboard tube and set aside to dry.

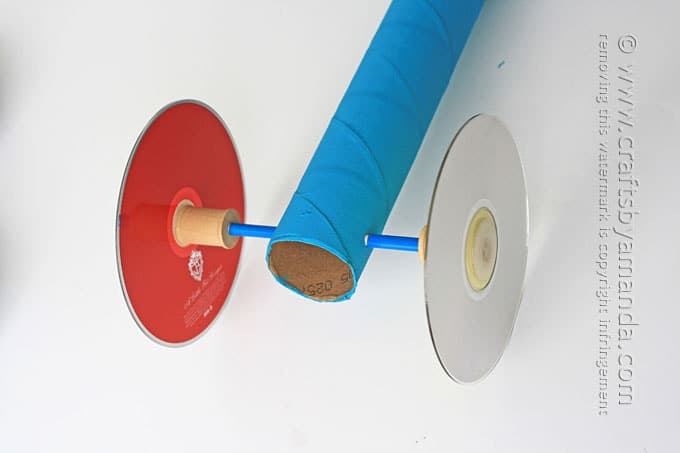
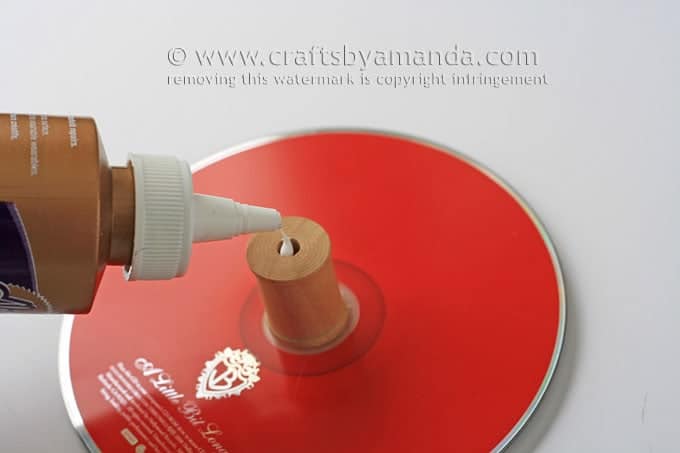
Hot glue a spool to the center of each CD (be sure they are centered!). It’s easiest if you stand your spool up on the table and place the CD over the top so you can see if it’s centered.
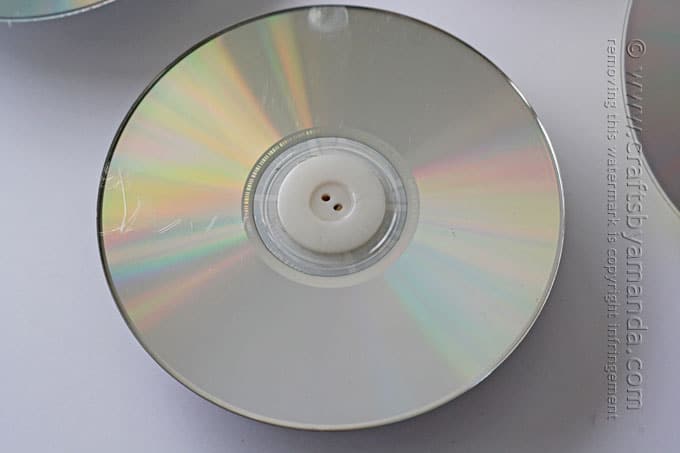
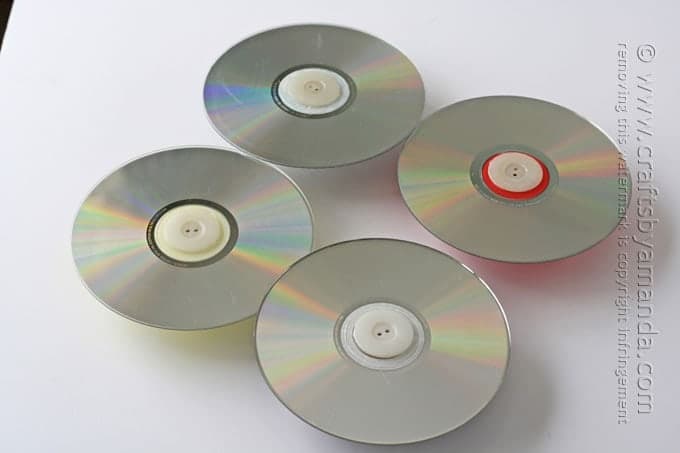
Hot glue buttons to the other side of the CDs as hubcaps. This also keeps the axle from coming through.
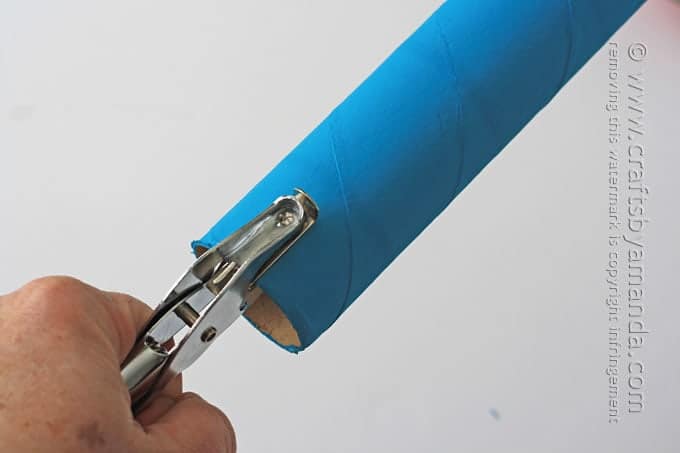
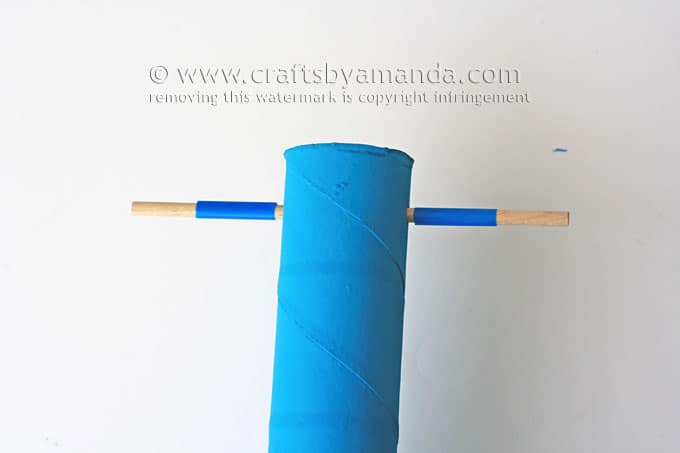
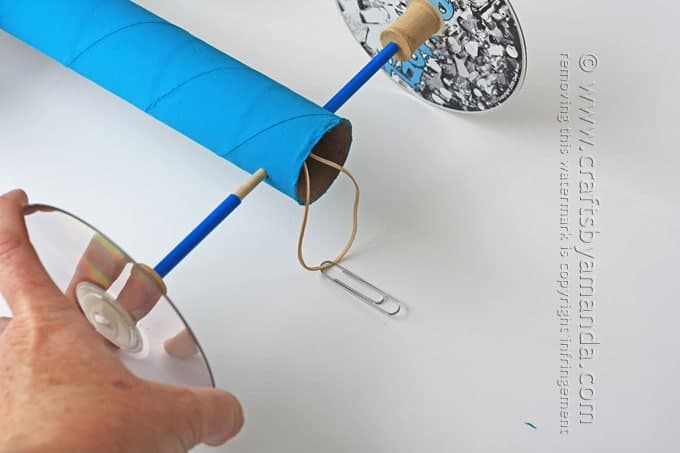
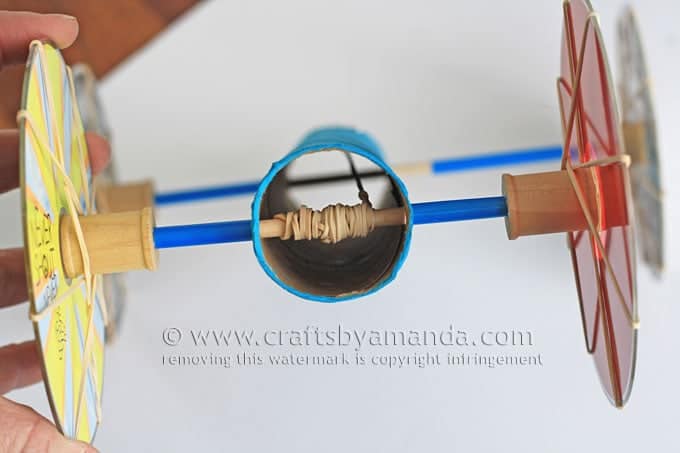
Use hole punch to create a hole for the axle on one side of the cardboard tube. Create another hole on the other side of the cardboard tube, using a ruler to make sure they are the same distance from the end of the tube. Repeat these steps at the other end of the tube, again using a ruler to make sure they align with the first axle.
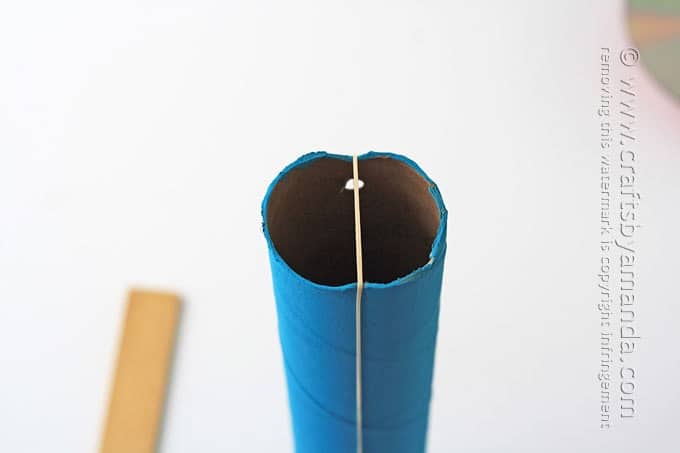
HINT: An easy way to line up the holes in the axles to make sure they are even is to loop a rubber band around the full length of the cardboard tube. Place the rubber band over the center of one hole and use the rubber band as a guide for placing the rest of the holes!
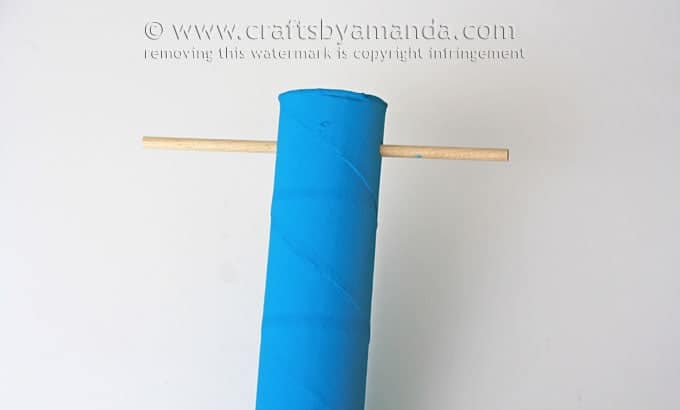
Insert the 6-inch dowel into the holes of the front axle.
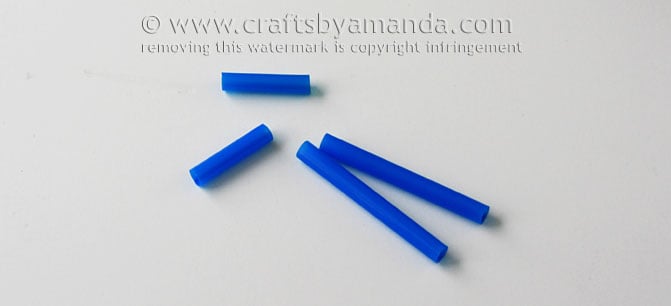
Center the dowel and cut a drinking straw to create a “stopper” between the axle hole and the spool on the wheel. This will keep the axle from being able to freely move all the way to one side, keeping the wheels from hitting the cardboard tube body. Ours measure approximately 1-inch each for the front axle.
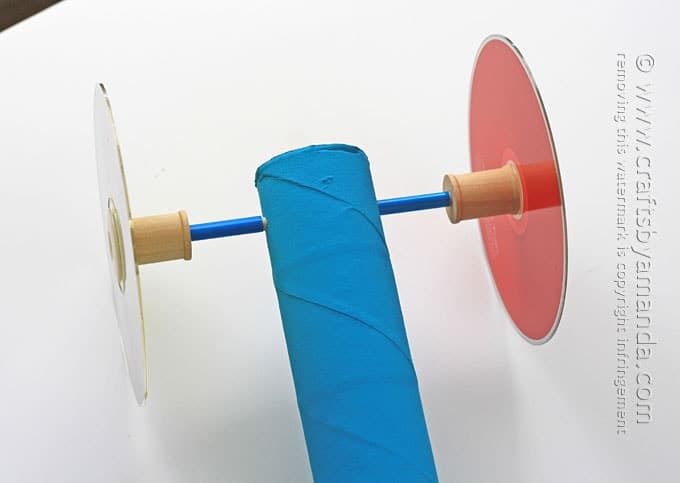
Thread the straws onto both ends of the wooden dowel. Insert the ends of the dowel into the spools on the wheels. If you are satisfied with everything and your axles turn freely, remove dowel from spool, add some white craft glue to the inside of the spool and replace the dowel.
Repeat these steps with the back axle and the 9-inch wooden dowel. Your drinking straw stoppers will be a little longer on the back due to the longer axle, approximately 2 1/4”.
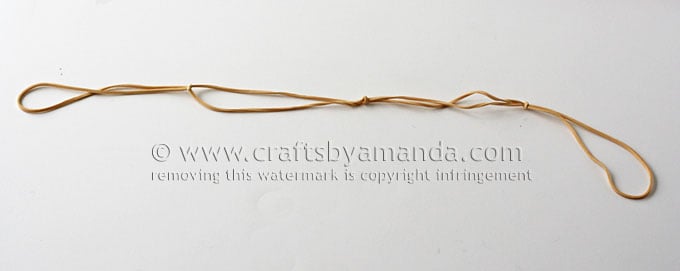
Use 3-4 rubber bands (depending on the length of your bands) to make a rubber band chain.
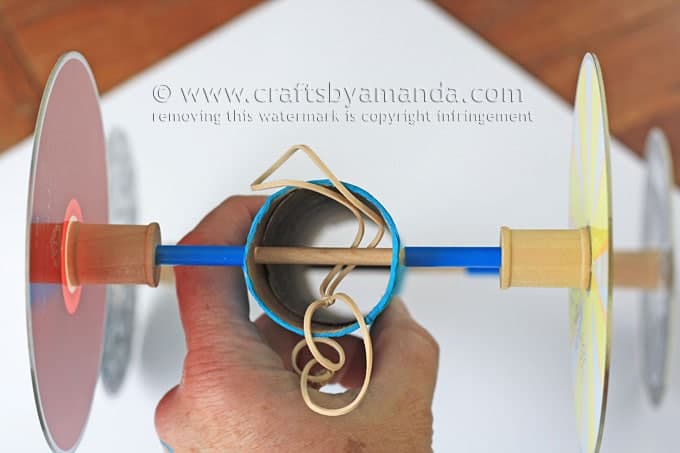

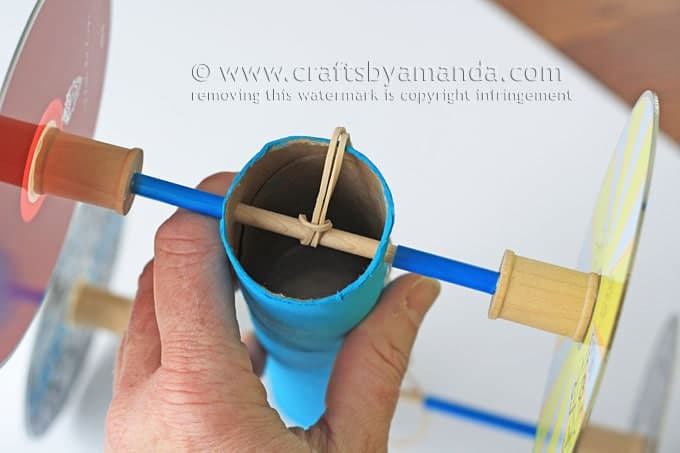
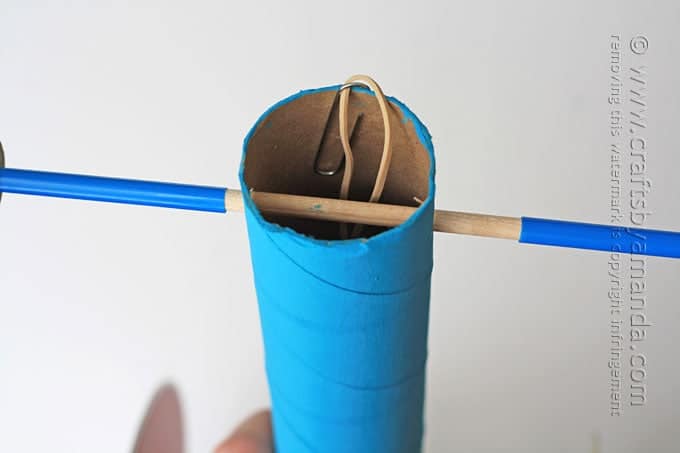
Loop the first rubber band in the chain around the front axle inside the cardboard tube and run the entire chain through the loop; pull it tight.
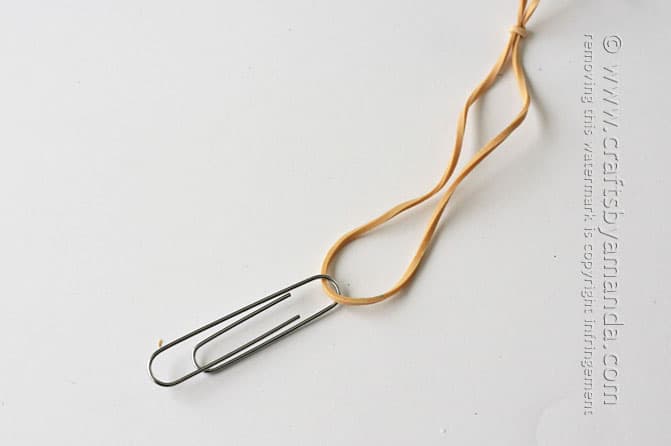
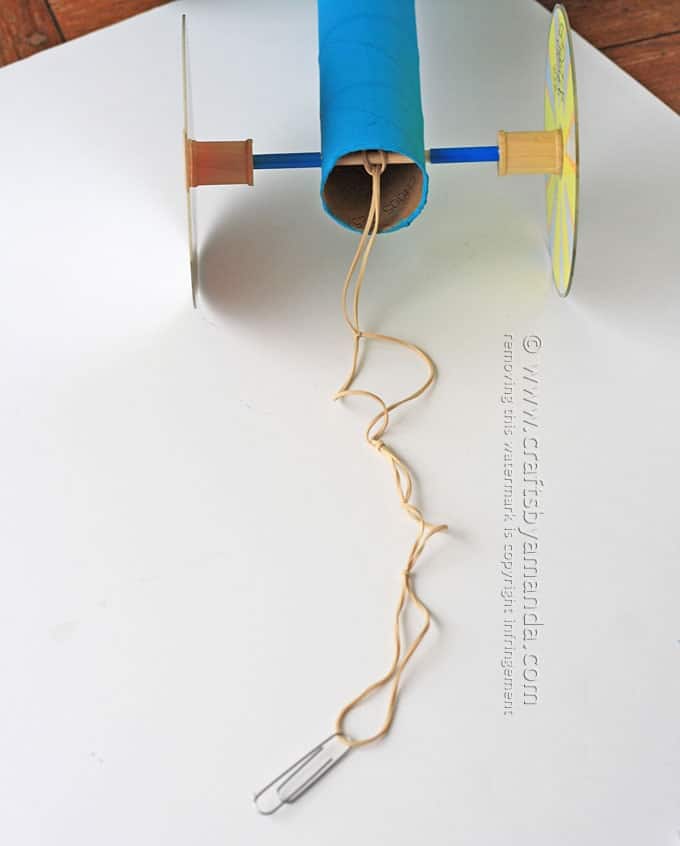
Attach a large paper clip to the end of the rubber band chain and drop it down into the tube.
Reach into the back end of the cardboard tube to retrieve the paper clip.
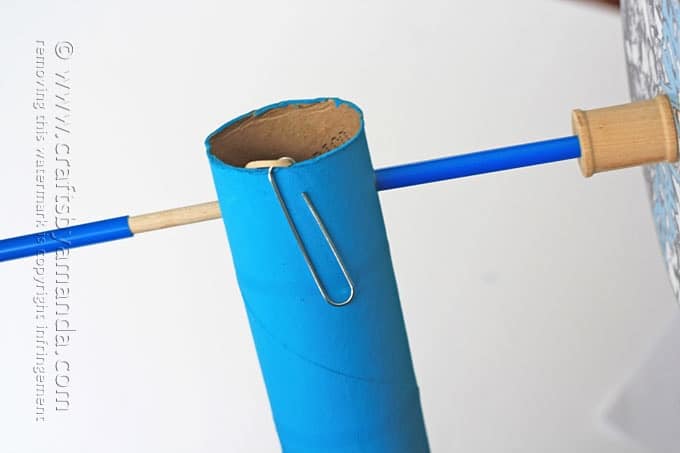
Clip it to the end of the cardboard tube. The length of the rubber band chain should be about the same length as the cardboard tube, so if it’s too long shorten the chain by one band.
Finally, to give your wheels added traction, attach rubber bands around the CD wheels, four on each wheel.
To wind up the car, hold the car with the back axle toward you and turn the front wheels counterclockwise. The rubber band chain will wrap around the front axle and get tighter. When it’s tight, place the car on the ground and watch it go!

Hope you had fun! Whiles boys and girls will enjoy this project, it’s probably favored more by boys. Here are several more craft ideas for boys! Remember, to order a copy of Rubber Band Mania go here![]() . Don’t forget to win a copy too! See below.
. Don’t forget to win a copy too! See below.
If you have any rubber bands leftover, you’ll want to try making one of these cool catapults!
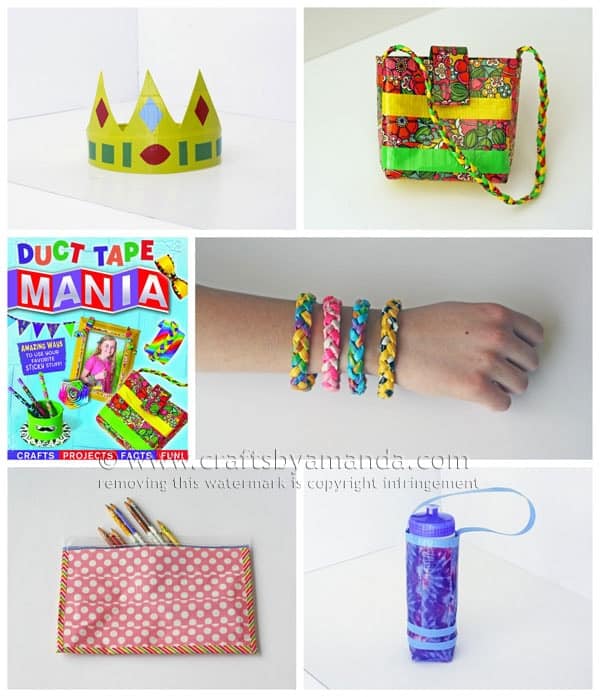
My other book, Duct Tape Mania is also available. Get a peek inside that book here!
(Printable instructions after the giveaway box)
Here’s a short (and grainy haha) video of my car in action. I was using my iPhone, so my apologies for the quality as well as the inability to show you how to wind it up because I only have two hands.
How to Make a Rubber Band Car
Supplies
- Heavy 12-inch cardboard tube from aluminum foil works great
- 1- 6 ” x 3/16” wooden dowel
- 1- 9 ” x 3/16” wooden dowel
- 4 recycled CDs
- 4- 1 ” x ¾” wooden craft spools
- 2 drinking straws
- 4 large buttons
- 20 standard rubber bands
- 1 large paper clip
- Hot glue gun
- Scissors
- Hole punch
- White craft glue
- Paint optional
Instructions
- If you would like to decorate your car, paint the cardboard tube and set aside to dry.
- Hot glue a spool to the center of each CD (be sure they are centered!). It’s easiest if you stand your spool up on the table and place the CD over the top so you can see if it’s centered.
- Hot glue buttons to the other side of the CDs as hubcaps. This also keeps the axle from coming through.
- Use hole punch to create a hole for the axle on one side of the cardboard tube. Create another hole on the other side of the cardboard tube, using a ruler to make sure they are the same distance from the end of the tube. Repeat these steps at the other end of the tube, again using a ruler to make sure they align with the first axle.
- HINT: An easy way to line up the holes in the axles to make sure they are even is to loop a rubber band around the full length of the cardboard tube. Place the rubber band over the center of one hole and use the rubber band as a guide for placing the rest of the holes!
- Insert the 6-inch dowel into the holes of the front axle.
- Center the dowel and cut a drinking straw to create a “stopper” between the axle hole and the spool on the wheel. This will keep the axle from being able to freely move all the way to one side, keeping the wheels from hitting the cardboard tube body. Ours measure approximately 1-inch each for the front axle.
- Thread the straws onto both ends of the wooden dowel. Insert the ends of the dowel into the spools on the wheels. If you are satisfied with everything and your axles turn freely, remove dowel from spool, add some white craft glue to the inside of the spool and replace the dowel.
- Repeat these steps with the back axle and the 9-inch wooden dowel. Your drinking straw stoppers will be a little longer on the back due to the longer axle, approximately 2 1/4”.
- Use 3-4 rubber bands (depending on the length of your bands) to make a rubber band chain.
- Loop the first rubber band in the chain around the front axle inside the cardboard tube and run the entire chain through the loop; pull it tight.
- Attach a large paper clip to the end of the rubber band chain and drop it down into the tube.
- Reach into the back end of the cardboard tube to retrieve the paper clip.
- Clip it to the end of the cardboard tube. The length of the rubber band chain should be about the same length as the cardboard tube, so if it’s too long shorten the chain by one band.
- Finally, to give your wheels added traction, attach rubber bands around the CD wheels, four on each wheel.
- To wind up the car, hold the car with the back axle toward you and turn the front wheels counterclockwise. The rubber band chain will wrap around the front axle and get tighter. When it’s tight, place the car on the ground and watch it go!
Video
Expert Tips & FAQs
- Tie Dye Beach Towels - July 24, 2026
- Swirling Twirling Ladybugs - July 21, 2026
- Drip Tie Dye Backpack - July 17, 2026


Danielle says
A Video tutorial would’ve been much better to understand and follow
Amanda Formaro says
Ah sorry about that. I made this for a printed book, so they didn’t need a video of course. Good suggestion though, I will add it to the list!
Angel says
How can this car be utilized In a bigger way?
Cassidy Fields says
My car did not move. When I wound it and picked it up, the axle spun fine. However, when placed on the ground, nothing happened. Any tips?
Amanda Formaro says
Hmm not sure, would you be able to do a video on your phone and send it to me?
Tally says
My son loved making these!
muzmil says
i like dis v much
Christina @There's Just One Mommy says
What a fun craft idea for car lovers!
I can’t wait to try this out with my son. (Plus, it’s a perfect use for some of those rubber bands!)
Amanda Formaro says
Hope you guys have fun racing it around Christina!
Charlie says
This is fantastic!
My grandchildren will love it. The ones old enough to participate are six, five and four, and three.
Thank you so much for the instructions.
I just found your site and will be signing up for emails
Have a Joyful Day :~D
Charlie
Ann says
Great fun for our Grandsons!
Carolyn Clarke says
I love the car and I can’t wait to make some with my preschool children. We are always looking for new ideas to try.
Kristin says
Looking forward to trying this out with my kids!
Laura Conklin says
I would love to win this for a friend who is a single mom with 6 children who range in age from 3 to 16. I am getting a box of craft books and materials together for them to have on hand when the children need something to do.
Bonnie Griffith says
I love this idea, I’m going to try it with my School-agers. I think they will love it, and a book of ideas like yours is just what I need! Would love to win!
Kat says
What a fun craft, and great way to use old CDs, also!
Janie Frie says
I would love this for activities in our local nursing home…thanks for the chance to win a book!! Love your ideas!!
Terri VanHoudt says
I do daycare and the rubber bands fills my girls days. Especially on non school days!!
lisa howel says
Great craft idea! Please enter this is the give away for the book.. thanks Lisa