
These adorably festive paper plate Santa, snowman, and Rudolph characters are a fun Christmas craft for kids. No messy paint, just some crayons or markers plus cotton balls and pom poms!

Paper Plate Santa, Snowman, and Rudolph
Most paper plate crafts involve paint. But for this paper plate Santa and characters project, I decided to use crayons. Sure, there’s some glue involved, but using crayons is far less messy than paint and kids love to color. That means less cleanup for you and plenty of fun for them. A Christmas win/win!
Paint is fun for sure, but there’s drying time involved, and it can be messy. So for a less-mess alternative, and a simpler version for younger kids, crayons are a better bet. You could certainly make yours with paint instead if you prefer!
Supplies You Will Need
- Also, there are a few optional elements to this paper plate santa and friends project. Instead of using pipe cleaners for the antlers on Rudolph, you could trace your child’s hands onto brown construction paper.
- For older kids, include the step where they will add the sparkly pom-poms to the antlers, but maybe leave that step off for little ones whose fine motor skills aren’t quite ready.
- I used scrapbook paper instead of construction paper, simply because I thought it would be fun. That’s what’s important about crafting with your kids, fun!
- Of course, it needs to be affordable too, so don’t feel you have to run out and buy scrapbook paper for this project. Construction paper works wonderfully and it’s a supply I highly recommend having on hand at all times.
- And finally, the jingle bell was for fun, so if you don’t have one, no worries! If you have a lid from a plastic milk jug, use your marker to write Rudolph across the front of it and glue it to the collar. Use your imagination and when needed, substitute items as you go along.

How to Make a Paper Plate Santa, Rudolph, and Snowman
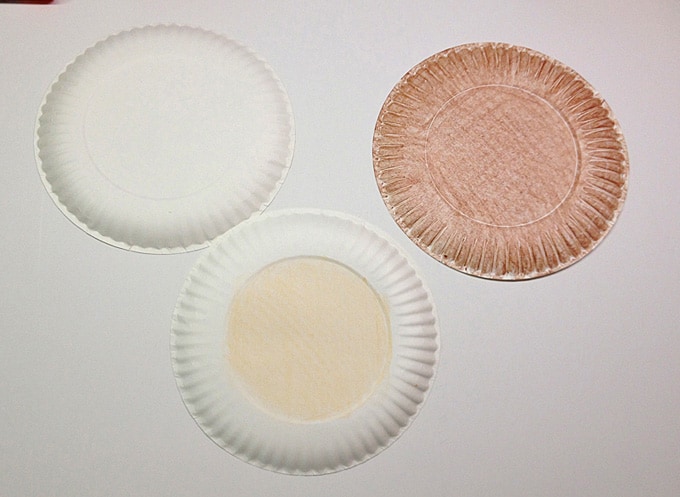
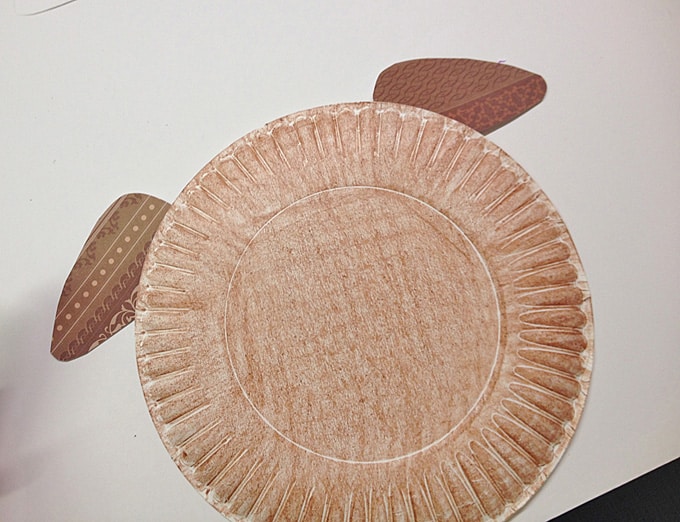
Turn paper plates upside down. Color one of them brown and color the center of another one with the peach crayon.
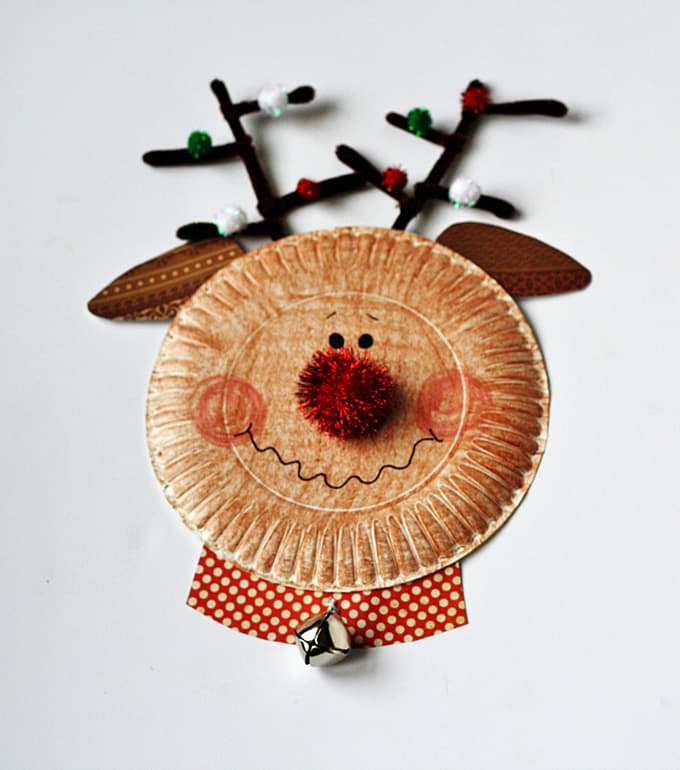
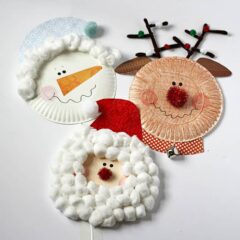
Paper Plate Rudolph
- Using the pattern, cut Rudolph’s ears from brown paper and glue or tape them to the back of the brown paper plate. Glue a large red glittery pom-pom to the center of the plate. Use a dark pink crayon to color circles for rosy cheeks.

- Use a black marker to add eyes, eyebrows, and a smile. Cut the collar from red paper and glue or tape at the bottom, attaching it to the back of the plate. String ribbon through the jingle bell and tie in a knot. Trim excess and glue or tape to the collar.
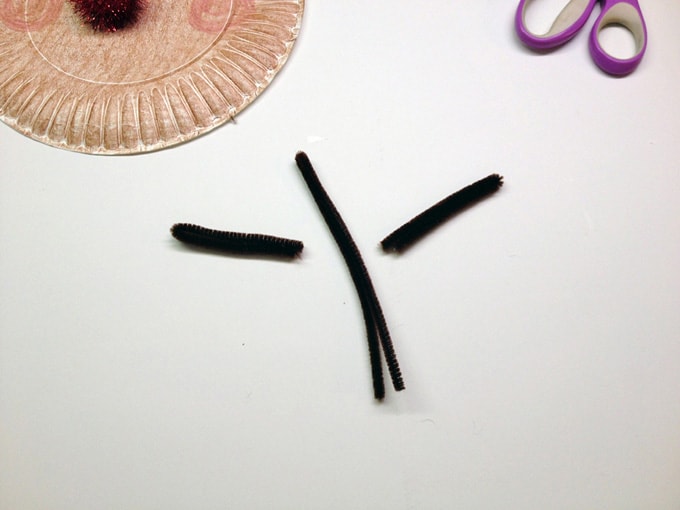
- To make the antlers you will need 3 brown pipe cleaners for each antler. Bend one pipe cleaner in half. Cut two pipe cleaners in half and then bed those in half.

- Twist the smaller pipe cleaners around the larger pipe cleaner, two on the left and two on the right. Repeat these steps for the second antler. Glue glittery pom-poms to the antlers and glue the antlers to the back of the paper plate.
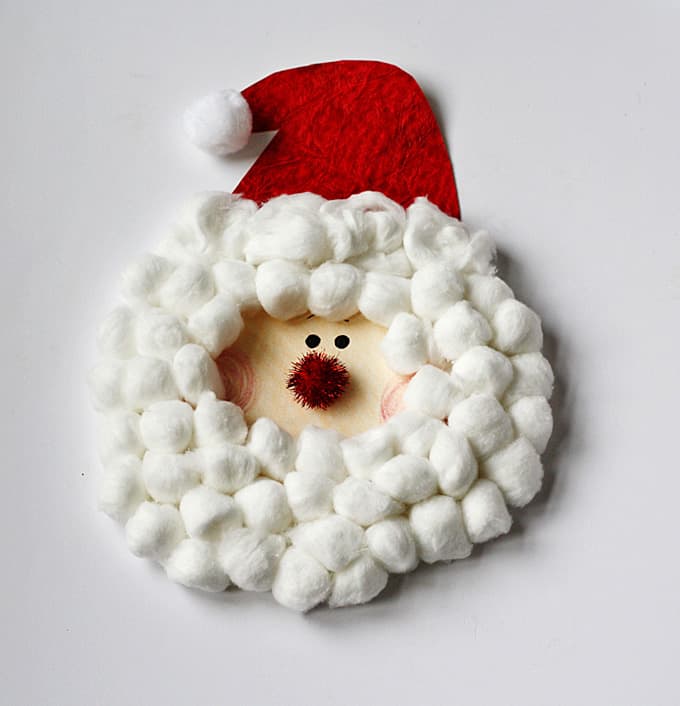
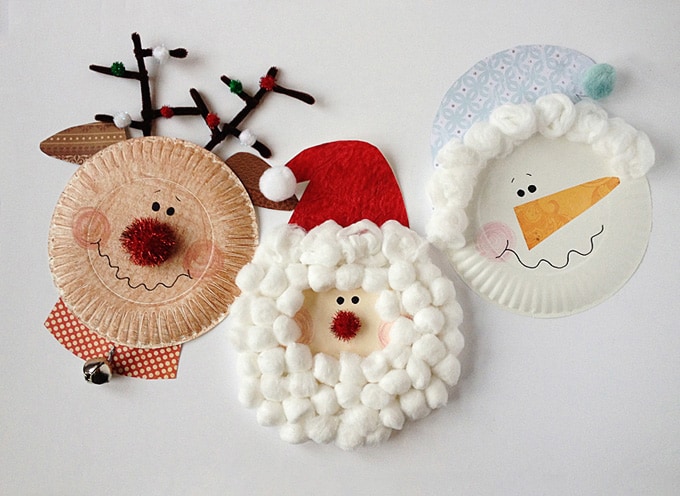
Paper Plate Santa
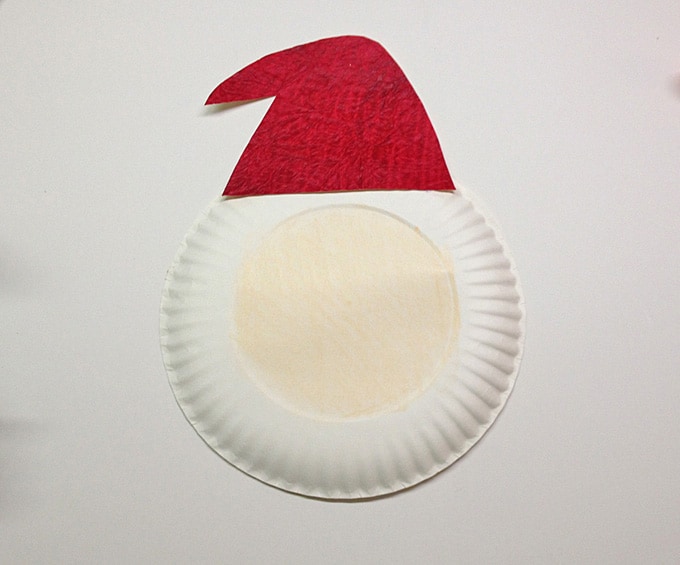
- Using the pattern, cut Santa’s hat from red paper and glue it to the top of the plate with the peach center. Glue a white pom-pom to the end of the hat. Glue a glittery red pom-pom to the center of the plate. Use black marker to draw eyes and eyebrows.

- Color circles for using a pink crayon to make rosy cheeks. Use white craft glue to cover the outer areas of the plate with cotton balls to create the brim for the hat and Santa’s beard.
Paper Plate Snowman
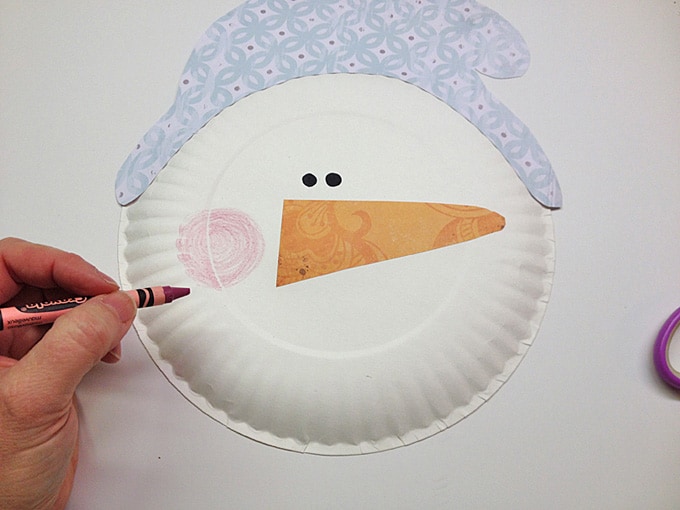
- Using the pattern, cut the snowman’s hat from a light blue paper and glue it to the top of the plain paper plate. Cut the snowman’s nose from orange paper and glue it to the center of the paper plate. Color a circle with dark pink crayon to create a rosy cheek.
- Use a black marker to draw eyes, eyebrows and a smile. Use white craft glue to attach cotton balls for the hat brim. Glue a pom-pom to the end of the hat.
All done. I hope you have fun and Merry Christmas!
More Christmas Crafts for Kids
- Christmas Handprint Crafts
- Paper Plate Elf Craft
- Paper Bag Reindeer Puppet
- Cardboard Tube Gnomes for Christmas
Paper Plate Santa, Snowman and Rudolph
Supplies
- 3 paper plates
- Cotton balls
- Scrapbook paper or construction paper
- Black Sharpie marker
- Crayons brown, peach, dark pink
- 4 brown pipe cleaners
- 2 large pom-poms can use cotton balls
- 1 large glittery red pom-pom
- 1 medium glittery red pom-pom
- 4- inch piece of ribbon
- 1 large jingle bell optional
- 8 small glittery pom-poms
- White craft glue
- Tape
- Pattern 1
- Pattern 2
Instructions
- Turn paper plates upside down. Color one of them brown and color the center of another one with the peach crayon.
Rudolph
- Using the pattern, cut Rudolph’s ears from brown paper and glue or tape them to the back of the brown paper plate. Glue a large red glittery pom-pom to the center of the plate. Use a dark pink crayon to color circles for rosy cheeks. Use a black marker to add eyes, eyebrows and a smile. Cut the collar from red paper and glue or tape at the bottom, attaching it to the back of the plate. String ribbon through the jingle bell and tie in a knot. Trim excess and glue or tape to the collar.
- To make the antlers you will need 3 brown pipe cleaners for each antler. Bend one pipe cleaner in half. Cut two pipe cleaners in half and then bed those in half. Twist the smaller pipe cleaners around the larger pipe cleaner, two on the left and two on the right. Repeat these steps for the second antler. Glue glittery pom-poms to the antlers and glue the antlers to the back of the paper plate.
Santa
- Using the pattern, cut Santa’s hat from red paper and glue it to the top of the plate with the peach center. Glue a white pom-pom to the end of the hat. Glue a glittery red pom-pom to the center of the plate. Use black marker to draw eyes and eyebrows. Use pink crayon to color circles for rosy cheeks. Use white craft glue to cover the outer areas of the plate with cotton balls to create the brim for the hat and Santa’s beard.
Snowman
- Using the pattern, cut the snowman’s hat from a light blue paper and glue it to the top of the plain paper plate. Cut the snowman’s nose from orange paper and glue it to the center of the paper plate. Colors a circle with dark pink crayon to create a rosy cheek. Use a black marker to draw eyes, eyebrows and a smile. Use white craft glue to attach cotton balls for the hat brim. Glue a pom-pom to the end of the hat.
I originally made this project for KixCereal.com. It originally appeared on this blog on Dec 8, 2013.
- Fingerprint Daddy & Me Coffee Mug - June 12, 2026
- Patriotic Bandana Wreath - June 9, 2026
- Ladybug Painted Rocks - June 5, 2026


Elva Roberts says
This Santa Claus and Rudolph plates are so cute and children could make them with a little supervision. Then the child can put up some of his artwork for all to admire-always a nice thought.
Monica Rugg says
I would love to make these with my foster sons
Amanda Formaro says
Hope you have fun!