• Home
  • About
    • About Crafts by Amanda
    • Visit Our Recipe Site
  • Work With Us
  • Join
    • Free Newsletters
    • Join our Facebook craft group
↑
  • Tutorials
    • Tutorial Index
    • Adult Crafts
    • Crafts for Kids
    • Crafts for Seniors
    • Recycled Crafts
    • Seasonal Crafts
    • Holiday Crafts
    • Free Printables
    • Craft Collections
  • Adult Crafts
    • Bath & Body
    • Beach Crafts
    • Clay Pot Crafts
    • Crafts for Seniors
    • Decoupage Crafts for Adults
    • DIY Gift ideas
    • Garden Crafts
    • Home Decor Projects
    • Kitchen Crafts
    • Light Bulb Crafts
    • Luminary Crafts
    • Mason Jar Crafts
    • Needlework
    • Photo Display Ideas
    • Recycled Crafts for Adults
    • Wearable Crafts for Adults
  • Crafts for Kids
    • Animal Crafts for Kids
    • Back to School Crafts
    • Beach Crafts for Kids
    • Camp Crafts
    • Cardboard Tube Crafts for Kids
    • Decoupage Crafts for Kids
    • Easy Crafts for Kids
    • Nature Crafts for Kids
    • Other Kid’s Crafts
    • Paper Plate Crafts for Kids
    • Recycled Crafts for Kids
    • Slimes, Doughs, & Clay
    • Wearable Crafts for Kids
  • Holiday Crafts
    • 4th of July Crafts
    • Christmas Crafts
    • DIY Gift ideas
    • Earth Day Crafts
    • Easter Crafts
    • Father’s Day Crafts
    • Halloween Crafts
    • Memorial Day Crafts
    • Mother’s Day Crafts
    • New Year’s
    • Other Holidays
    • Patriot Day Crafts
    • St. Patrick’s Day Crafts
    • Thanksgiving Crafts
    • Valentine’s Day Crafts
  • Seasonal Crafts
    • Winter Crafts
    • Spring Crafts
    • Summer Crafts
    • Fall Crafts
  • Skip to primary navigation
  • Skip to main content
  • Skip to primary sidebar
  • Skip to footer

Crafts by Amanda

crafts for adults and kid's crafts

  • Tutorials
    • Tutorial Index
    • Adult Crafts
    • Crafts for Kids
    • Crafts for Seniors
    • Recycled Crafts
    • Seasonal Crafts
    • Holiday Crafts
    • Free Printables
    • Craft Collections
  • Adult Crafts
    • Bath & Body
    • Beach Crafts
    • Clay Pot Crafts
    • Crafts for Seniors
    • Decoupage Crafts for Adults
    • DIY Gift ideas
    • Garden Crafts
    • Home Decor Projects
    • Kitchen Crafts
    • Light Bulb Crafts
    • Luminary Crafts
    • Mason Jar Crafts
    • Needlework
    • Photo Display Ideas
    • Recycled Crafts for Adults
    • Wearable Crafts for Adults
  • Crafts for Kids
    • Animal Crafts for Kids
    • Back to School Crafts
    • Beach Crafts for Kids
    • Camp Crafts
    • Cardboard Tube Crafts for Kids
    • Decoupage Crafts for Kids
    • Easy Crafts for Kids
    • Nature Crafts for Kids
    • Other Kid’s Crafts
    • Paper Plate Crafts for Kids
    • Recycled Crafts for Kids
    • Slimes, Doughs, & Clay
    • Wearable Crafts for Kids
  • Holiday Crafts
    • 4th of July Crafts
    • Christmas Crafts
    • DIY Gift ideas
    • Earth Day Crafts
    • Easter Crafts
    • Father’s Day Crafts
    • Halloween Crafts
    • Memorial Day Crafts
    • Mother’s Day Crafts
    • New Year’s
    • Other Holidays
    • Patriot Day Crafts
    • St. Patrick’s Day Crafts
    • Thanksgiving Crafts
    • Valentine’s Day Crafts
  • Seasonal Crafts
    • Winter Crafts
    • Spring Crafts
    • Summer Crafts
    • Fall Crafts
Craft Tutorials | Seasonal Crafts | Spring Crafts | Spring Hoop Wreath
Spring Crafts

Spring Hoop Wreath

Author by Jane and Sonja on March 27, 2019 Updated on December 6, 2020

5 from 1 vote
Create a simple Spring hoop wreath with a playful polka-dot ribbon, a large gold ring and faux eucalyptus sprigs.
Jump to Project
DIY Spring hoop wreath
980 shares
  • Share
  • Tweet
  • Flipboard
  • Email

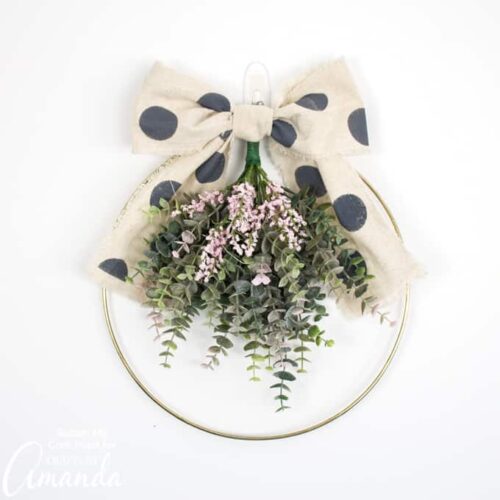
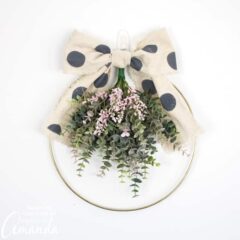
Embrace the change to warmer temperatures with a playful new and easy to make Spring hoop wreath. Faux eucalyptus sprigs and other craft materials create a beautiful piece of DIY door decor.

DIY Spring hoop wreath


A Playful and Pretty Spring Hoop Wreath

Inspired by the leftover faux florals and eucalyptus sprigs from the XO valentine door decor, we created this simple DIY project for a new and fresh Spring wreath.  The act of displaying a new wreath is one clear sign that the seasons are changing and we welcome that change: out with the old and in with the new. 

When you can’t find the perfect ribbon for your project, consider making your own. Using a piece of plain canvas trim with frayed edges allows you to customize the ribbon to match your style and mood.  I particularly love this polka-dot stencil pattern because it’s playful and fun and evokes a sense of newness and youth fullness.  How great would this idea also look on simple canvas placemats or a table runner?  With so many different options to choose from, there’s always a pattern to meet your project needs.  

If you’re looking for more creative wreath ideas, we have them here in this roundup of 30+ DIY Spring wreaths. Which wreath is your favorite? And if that’s not enough inspiration, consider making a forsythia wreath or a hula hoop wreath with faux florals!

DIY Spring hoop wreath

Materials Needed to Make A Spring Hoop Wreath:

  • Gold Metal Ring, 14” diameter
  • 4” wide canvas ribbon with frayed edges, 35” long and 5” long
  • Americana Decor Stencil Polka-Dot Pop, 12”x12”
  • Decoart Americana Acrylics in Zinc
  • Americana Decor Stencil brush, large size 12
  • Ashland faux Spring bush in pink
  • Ashland faux eucalyptus sprigs
  • Floral wire
  • Floral tape
  • Wire Cutter (not shown)
  • Needle and matching thread color
  • Scissors (not shown)


DIY Spring hoop wreath


Instructions for Making a Spring Hoop Wreath:

Stenciling the ribbon:

Place the long piece of cut ribbon on a protected flat surface and position the polka-dot stencil over top of the ribbon. Dip the stencil brush in the paint and blot off the excess paint. Holding the stencil in place, begin to dab the paint onto the ribbon until your happy with the coverage.

Peel away the stencil and reposition it along another section of the ribbon. Continue until the entire ribbon length is stenciled. Leave the ribbon to dry fully before using.

DIY Spring hoop wreath

Preparing the ribbon:

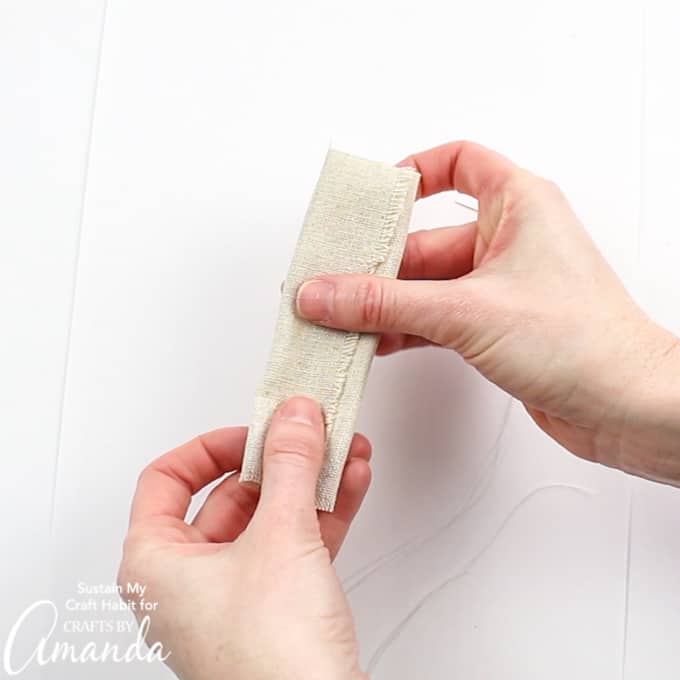
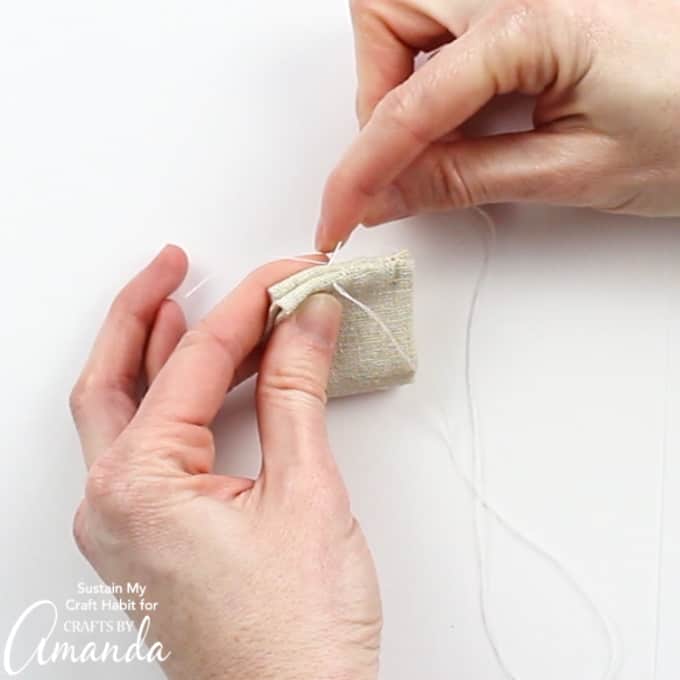
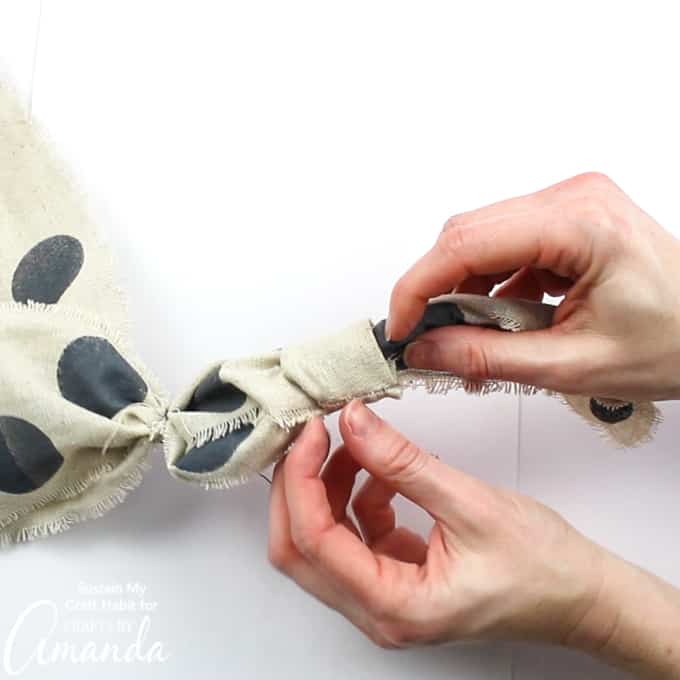
To form the center loop of the ribbon, fold in the sides of the smaller cut ribbon widthwise reducing the total width to 1 ¼” wide. Next fold the ribbon lengthwise in half tucking in the cut edges approximately ½” on either end. Using a sewing needle and thread, begin to sew the loop closed to form the center loop. Put aside.

DIY Spring hoop wreath

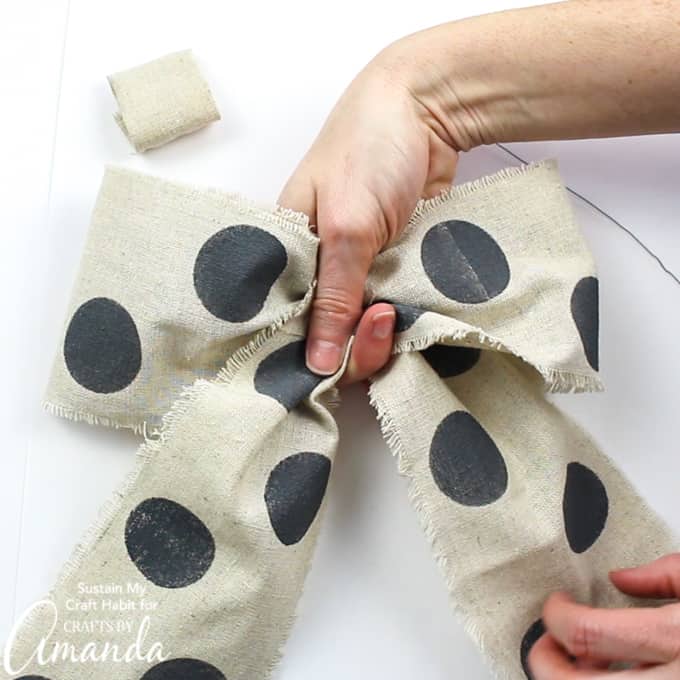
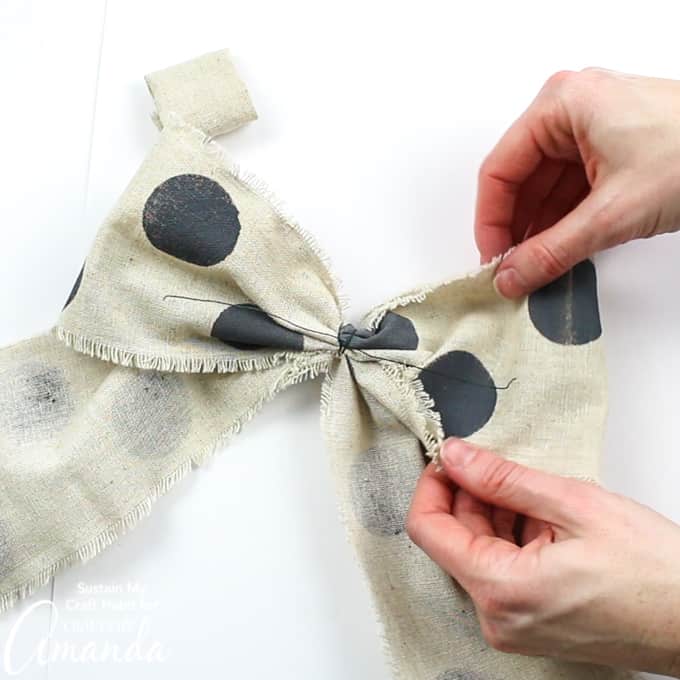
Next, take the long stencilled ribbon and fold in half lengthwise to mark the center point. Lay the ribbon on a flat surface, stenciled side facing down. Fold the ends inward at the midway point criss crossing them at the center.

DIY Spring hoop wreath

Precut a piece of floral wire approximately 5” long. Pinch the center of the bow with your fingers and wrap a cut piece of floral wire around the center to hold the bow in place.

DIY Spring hoop wreath

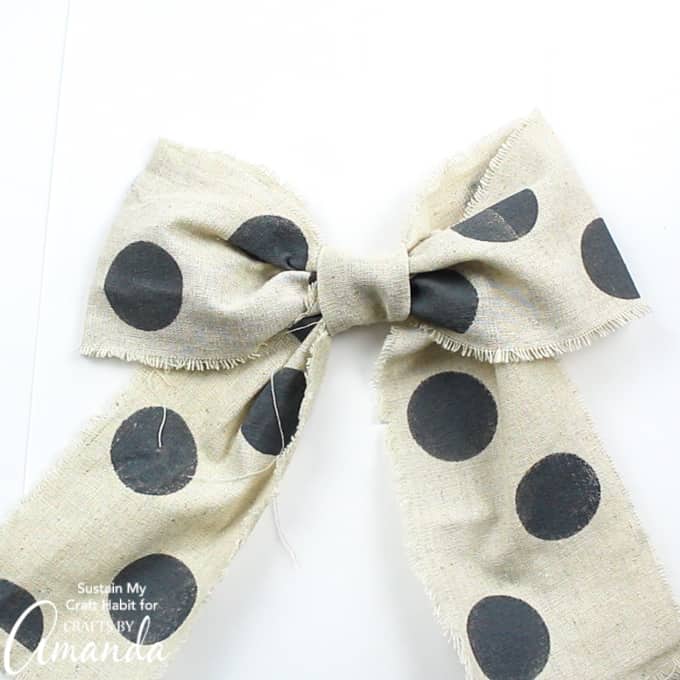
To finish the bow, thread the one side of the bow through the prepared ribbon loop positioning the stitched side of the loop towards the back of the bow. Pull one end of the wire through the loop as well. This wire will be used to attach the bow to the wreath.

DIY Spring hoop wreath

Assembling the Wreath:

Place the eucalyptus sprig facing downward over top of the metal ring (in other words, with the eucaplytus stem upwards). Pre-cut a piece of floral wire. 

DIY Spring hoop wreath

Fold the wired stem of the foliage in half looping it over the gold ring and tie a piece of floral wire around the folded stem to hold it in place. Add more floral wire if needed to secure the eucalyptus sprig in place. To protect your fingers from the cut wire, you can wear a pair of gardening gloves.

DIY Spring hoop wreath

Add some additional faux floral bunches on top and secure them in place with more floral wire.

DIY Spring hoop wreath

Rip off a piece of floral tape and wrap it around the stem of the eucalyptus until it looks tidy and neat and all the exposed wire is concealed.

DIY Spring hoop wreath

Place the prepared ribbon at the top of the gold ring and attach it to the hanging eucalyptus at the point of the folded stem.

DIY Spring hoop wreath

Create another small loop with the ends of the floral wire to use for hanging the wreath. By using this loop for hanging, it will also force the faux florals and bow to remain in place at the top of the wreath.

DIY Spring hoop wreath

Hang your new simple Spring hoop wreath and enjoy! And after Spring has passed, you could easily disassemble the wreath and create a new felt succulent wreath using the same gold metal ring. 

DIY Spring hoop wreath

Spring is in the air, that means all things herb garden, bird feeders, and garden decor, happy crafting!


DIY Spring hoop wreath
Print Project
5 from 1 vote

A Simple DIY Spring Hoop Wreath

Create a simple Spring hoop wreath with a playful polka-dot ribbon, a large gold ring and faux eucalyptus sprigs.

Supplies

  • Gold Metal Ring, 14” diameter
  • Ashland faux eucalyptus sprigs
  • Ashland faux Spring bush in pink
  • 4” wide canvas ribbon with frayed edges, 35” long and 5” long
  • Americana Decor Stencil Polka-Dot Pop, 12”x12”
  • Decoart Americana Acrylics in Zinc
  • Decoart stencil brush, large size 12
  • Floral wire
  • Floral tape
  • Wire cutter
  • Needle and matching thread color
  • Scissors

Instructions

  • Using a stencil brush and acrylic paint, apply the polka-dot stencil pattern on to the blank canvas ribbon.
  • Fold the prepared ribbon to form a bow and fasten in place using a piece of cut floral wire.
  • Prepare the center loop of the bow by hand stitching the smaller piece of folded canvas ribbon. 
  • Thread the one side of the prepared bow through the loop to complete the bow. 
  • Assemble the wreath by placing eucalyptus sprig hanging downward at the top of the gold metal ring.
  • Fold stem over and use floral wire to secure in place. 
  • Add any extra faux floral and secure in place with floral wire. 
  • Cover the wire wrapped stem with floral tape.
  • Attach the bow to the folded eucalyptus stem at the top of the gold metal ring. 

DIY spring hoop wreath

  • Author
  • Recent Posts
Follow Along
Jane and Sonja
Bloggers at Sustain My Craft Habit
Jane and Sonja are sisters, moms and lifelong craft addicts both living near Toronto, Canada with their families. They share their love of creativity, nature and coastal craft and DIY ideas on their blog Sustain My Craft Habit.
Follow Along
Latest posts by Jane and Sonja (see all)
  • Kid-Friendly DIY Stained Glass - February 25, 2025
  • Pressed Flower Resin Magnets - February 21, 2025
  • Fabric Scrap Heart Garland - January 24, 2025
980 shares
  • Share
  • Tweet
  • Flipboard
  • Email

Filed Under: DIY Gift ideas, Home Decor Projects, Spring Crafts Tagged With: diy, diy wreath, door decoration, home decor, spring, spring wreath

Reader Interactions

Free CraftsBy email every week

Latest crafts straight to your inbox!

5 from 1 vote (1 rating without comment)

Leave a Reply Cancel reply

Your email address will not be published. Required fields are marked *

Rate This Project


The maximum upload file size: 640 MB. You can upload: image, video. Links to YouTube, Facebook, Twitter and other services inserted in the comment text will be automatically embedded. Drop files here

Primary Sidebar

Hi! I’m Amanda and I’m the founder and head designer of Crafts by Amanda. I have spent over 25 years creating projects to share, but it’s not just me anymore! It’s turned into a complete family affair. Come and meet the Creative Team!

Free CraftsBy email every week

Latest crafts straight to your inbox!

All Time Favorites

snowy pinecone candle jar luminaries

Winter Luminaries: Snowy Pinecone…

Make pretty winter luminaries that appear to be covered ... Go To project

Make this wonderful deco mesh pumpkin wreath to hang on your door this fall!

Deco Mesh Pumpkin Wreath…

Adorn your door this fall with a pretty deco mesh ... Go To project

Learn to make these adorable ladybug painted rocks. use special outdoor paint for this adorable garden craft so you can keep garden ladybugs all summer!

Ladybug Painted Rocks…

I'm going to show you how to make these adorable ... Go To project

Reuse those empty prescription pill bottles in all sorts of ways. From organizing to making cookies. Yes, cookies! See how to use your empty pill bottles!

20 Uses for Prescription Pill…

You've been collecting prescription pill bottles for ... Go To project

Meet the Family

Amanda

Founder and Designer

Kristen

Editorial Manager

Lindsay

Social Media Manager

As seen on:

Footer

Favorites

  • Jar Photo Frames
  • No-Sew Roman Shade
  • Paper Flowers
  • How to Make a Scrunchie
  • Mermaid Slime

About

  • Home
  • Meet the Creative Team
  • Work with Us
  • Privacy Policy
  • Accessibility
  • Contact Us

Images/text copyright Amanda Formaro 2020. To feature a post from Crafts by Amanda, you may use one photo credited and linked back directly to the project post.

Free CraftsBy email every week

Latest crafts straight to your inbox!

Copyright ©2025, Crafts by Amanda. All Rights Reserved.
Design by Pixel Me Designs

Rate This Tutorial

Your vote:


To share a photo with your comment click here!

A rating is required
A name is required
An email is required

Recipe Ratings without Comment

Something went wrong. Please try again.