


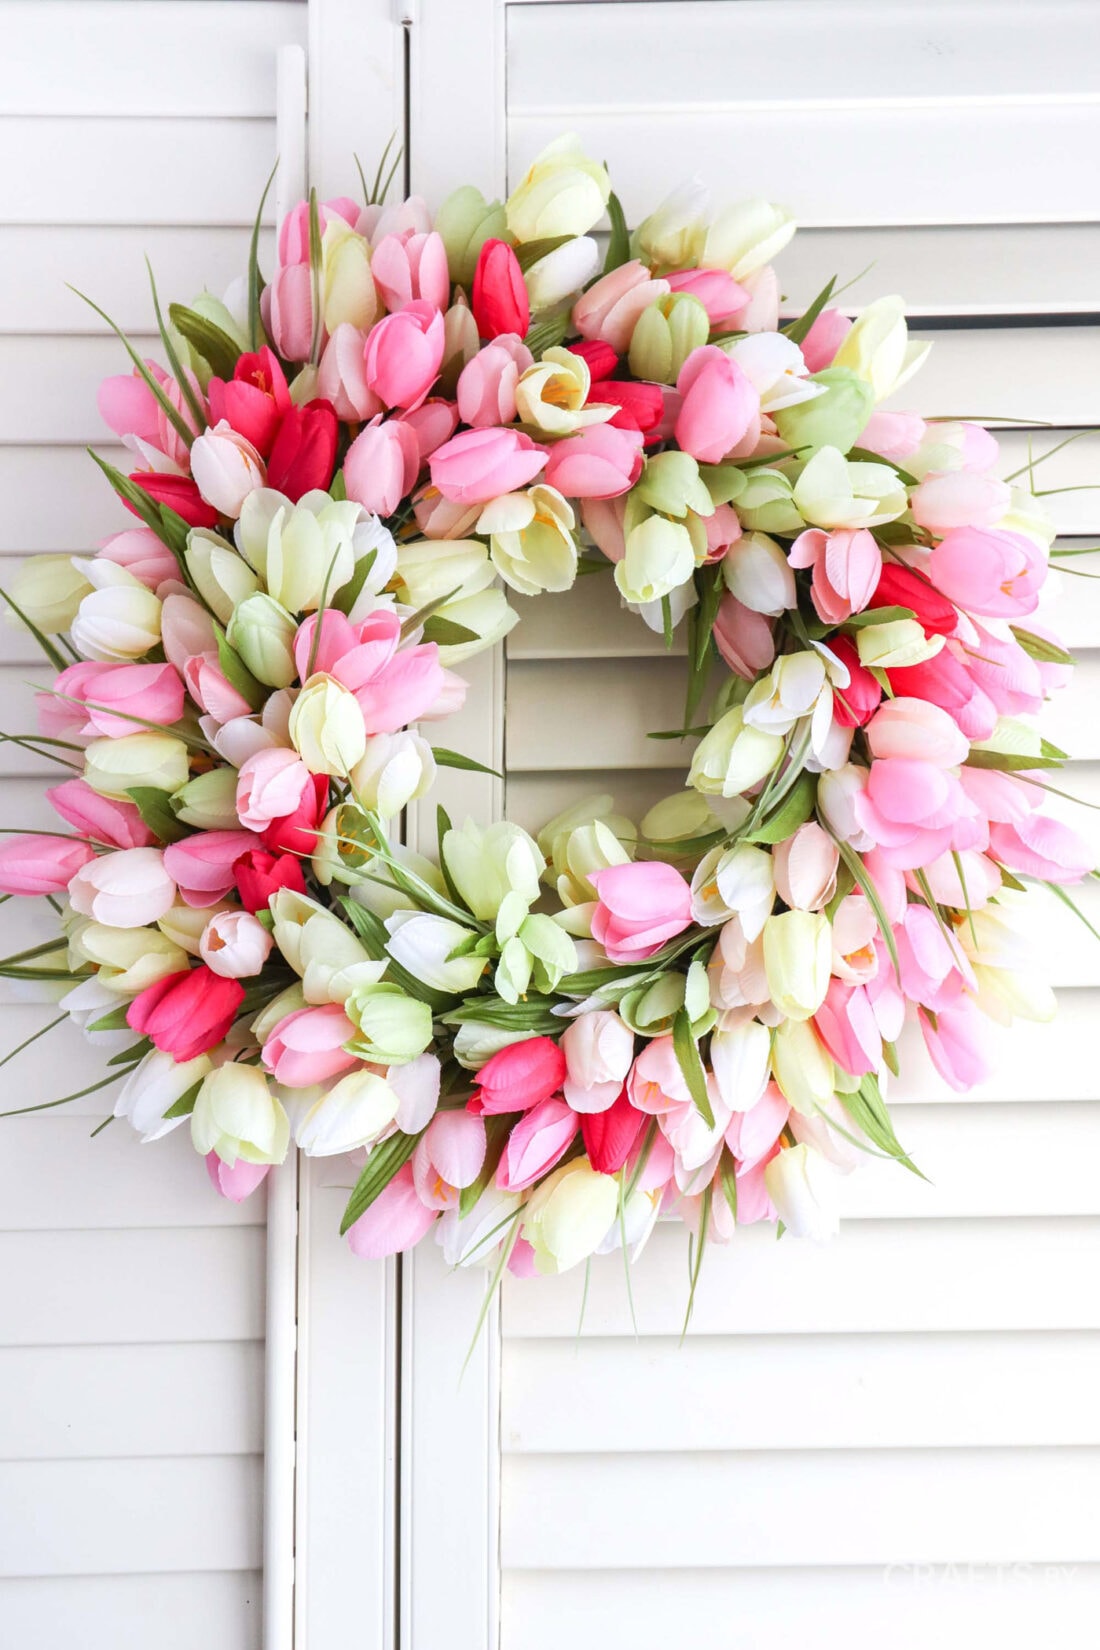
A bright, cheery Tulip Wreath will add life to your front door. All you’ll need are 4 different supplies to create a beautiful statement piece for spring.
Why we love this project
A tulip wreath makes a lovely front door adornment for spring and Easter. Its colorful tulips make the early days of the rain-filled season less dreary and more bright-eyed, that’s something we can all appreciate.
We love spring wreaths so much that we have a whole collection of 30+ DIY Spring Wreaths for you to check out.
Helpful Project Information:
- Age Level: 13 and up
- Mess Factor: Medium
- Level of Difficulty: Easy
- Time to Complete: Less than 30 minutes
- Cost Estimate: Less than $15.00
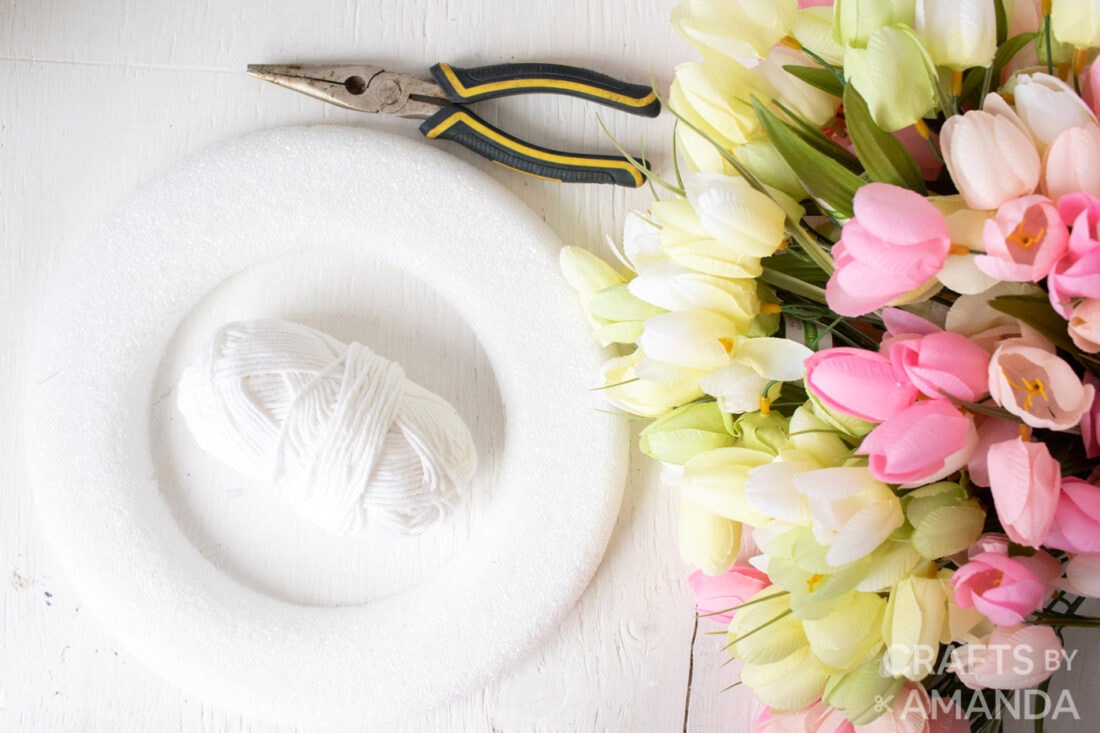
Craft supplies you will need
How to a Make a Tulip Wreath
These step by step photos and instructions are here to help you visualize how to make this project. Please scroll down to simply print out the instructions!
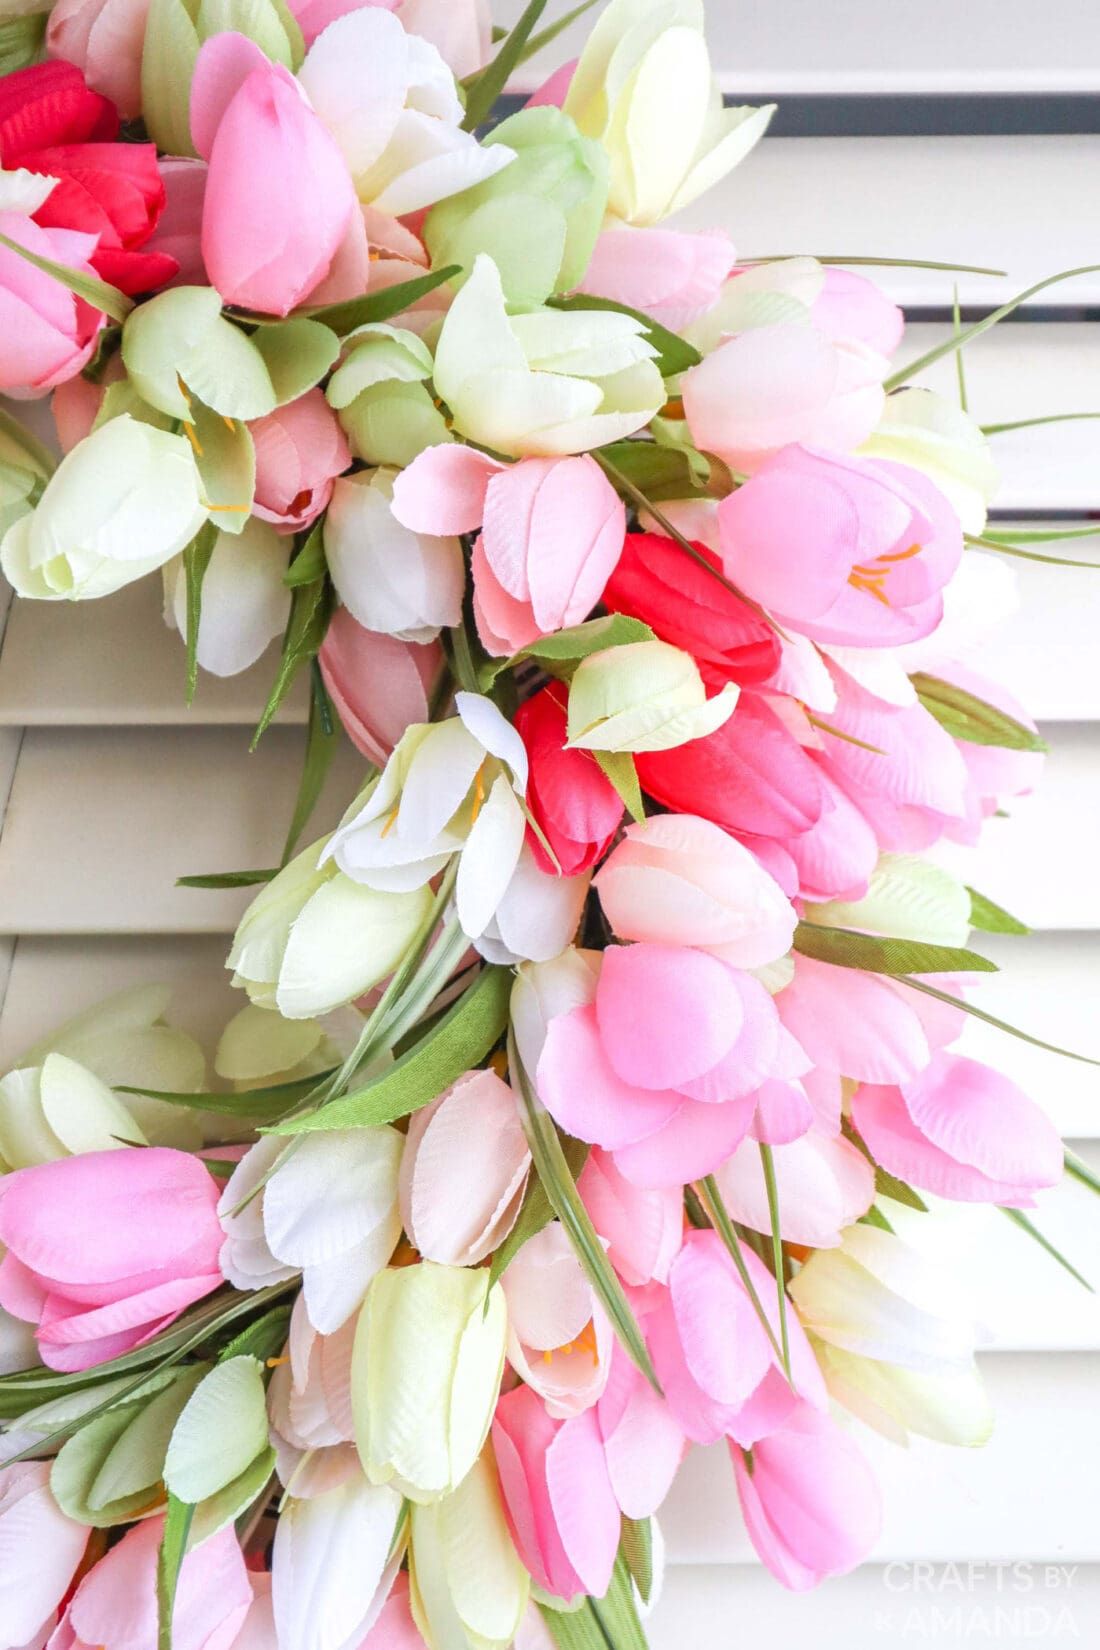
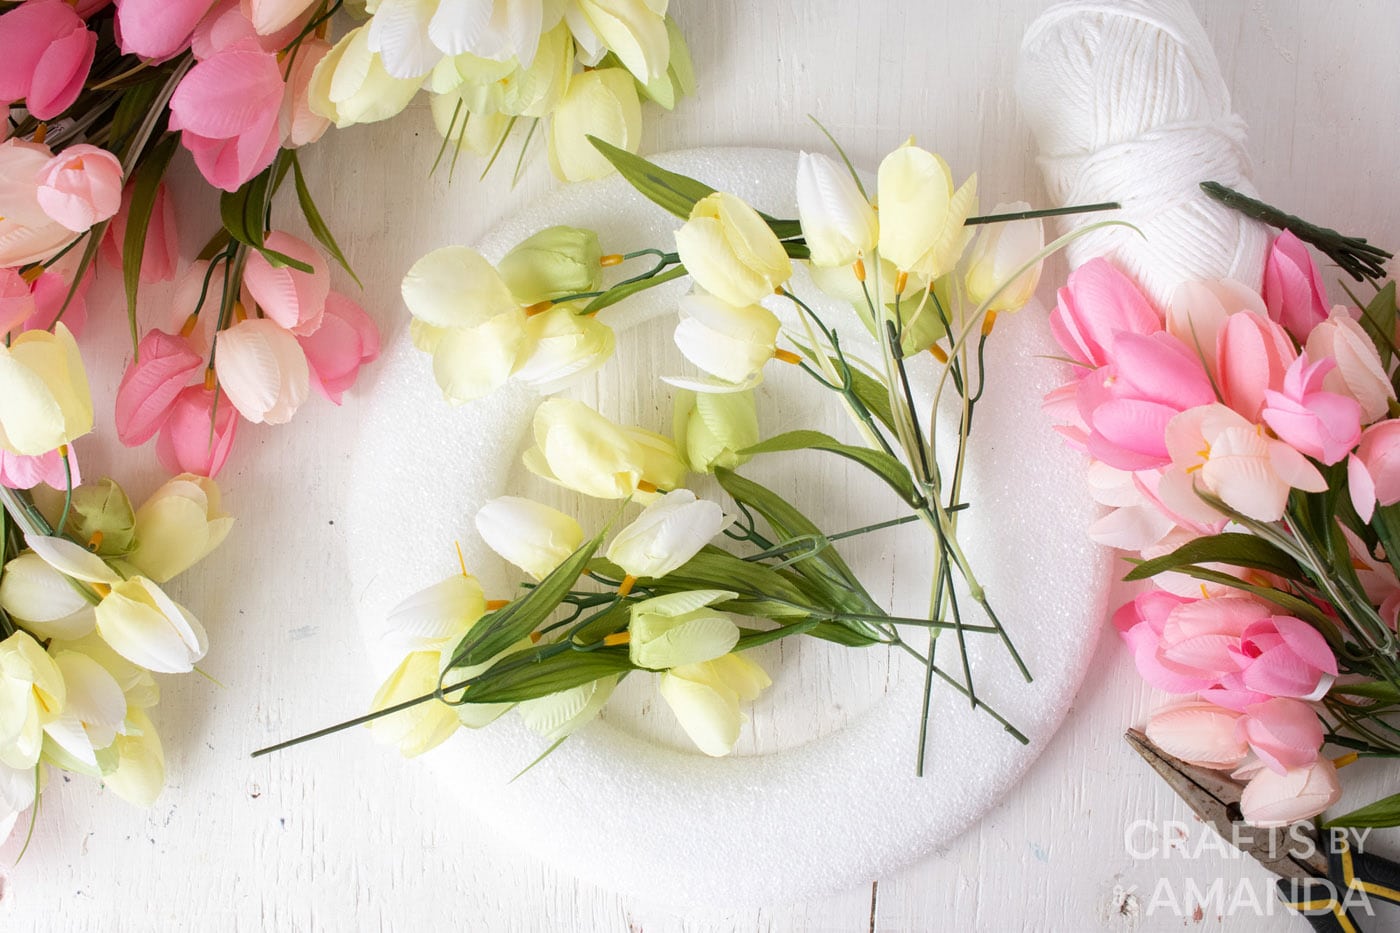
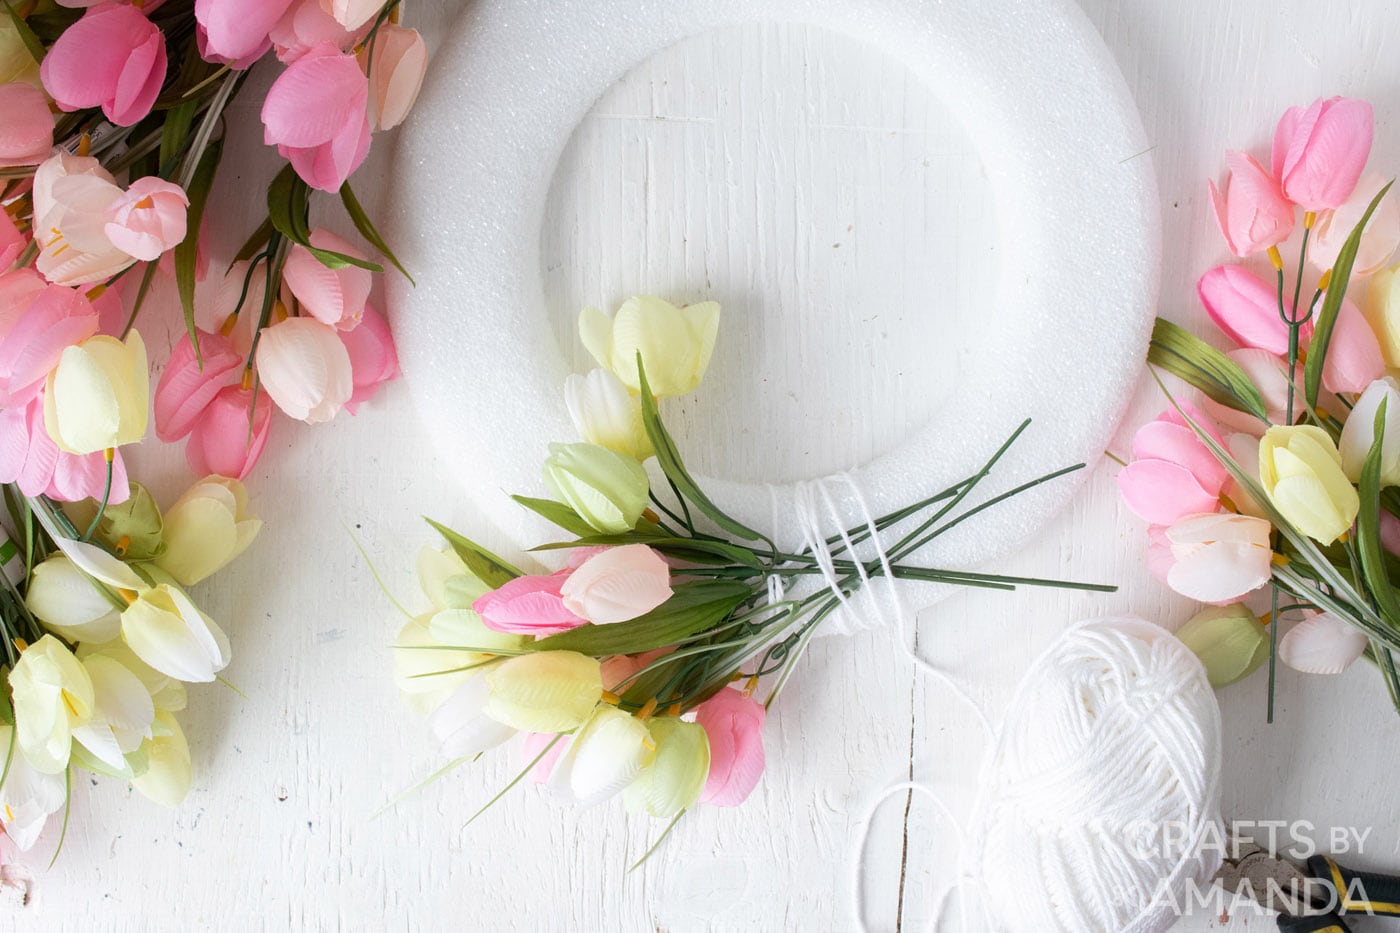
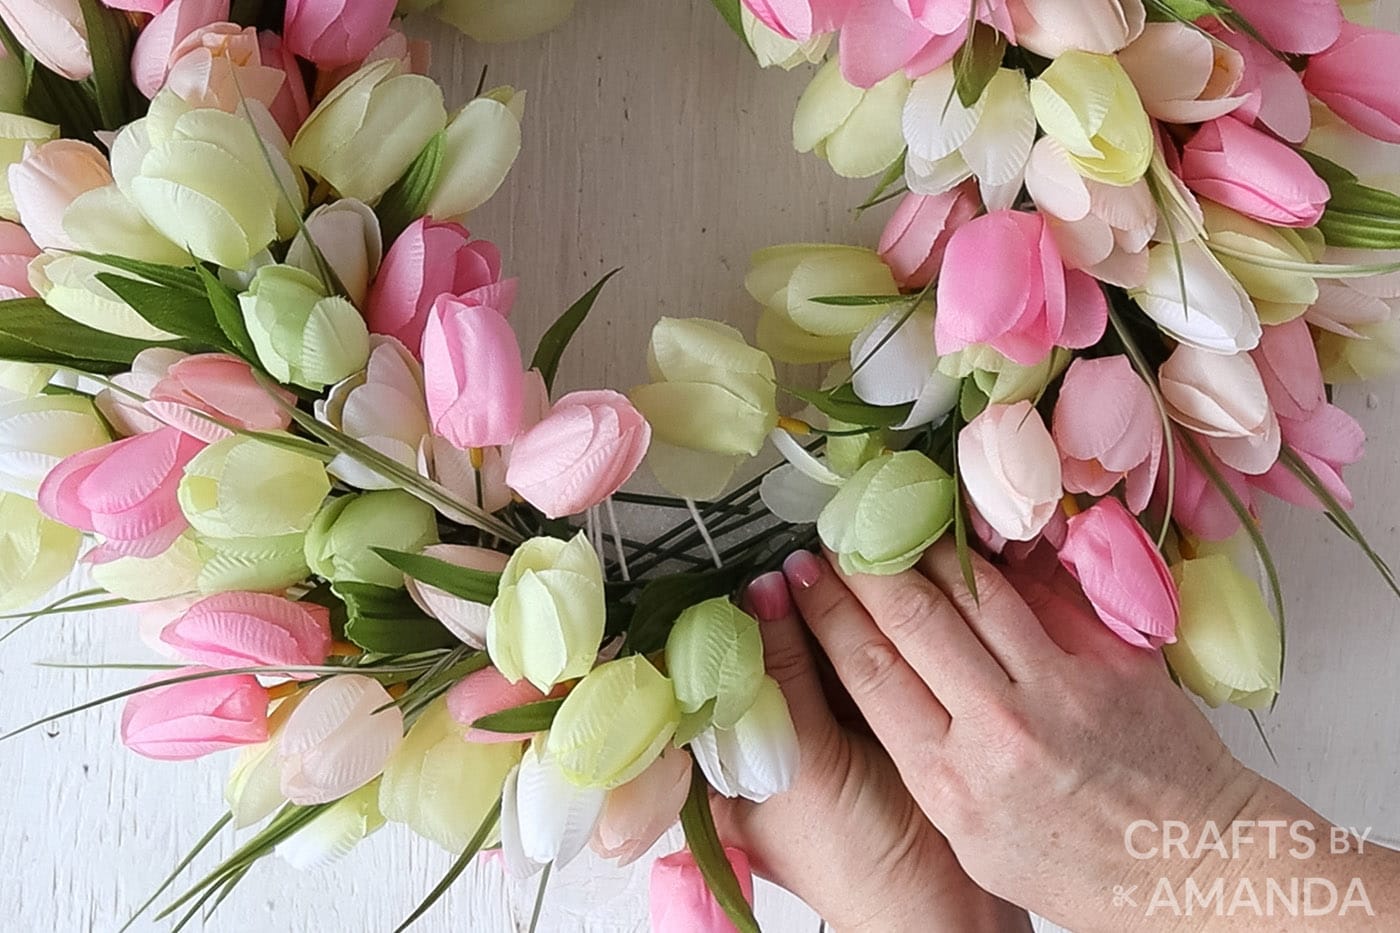
- If your tulips come in a bunch, snip into individual stems using wire snippers. Be sure to leave the stems nice and long. Push any of the greenery up towards the bloom of the tulip. We used these light pink tulips, and these cream and green tulips.

- Starting with one pink stem and one white stem, place them in a criss-cross manner onto your wreath form.
- Use ribbon or yarn to wrap around and secure the stems in place.
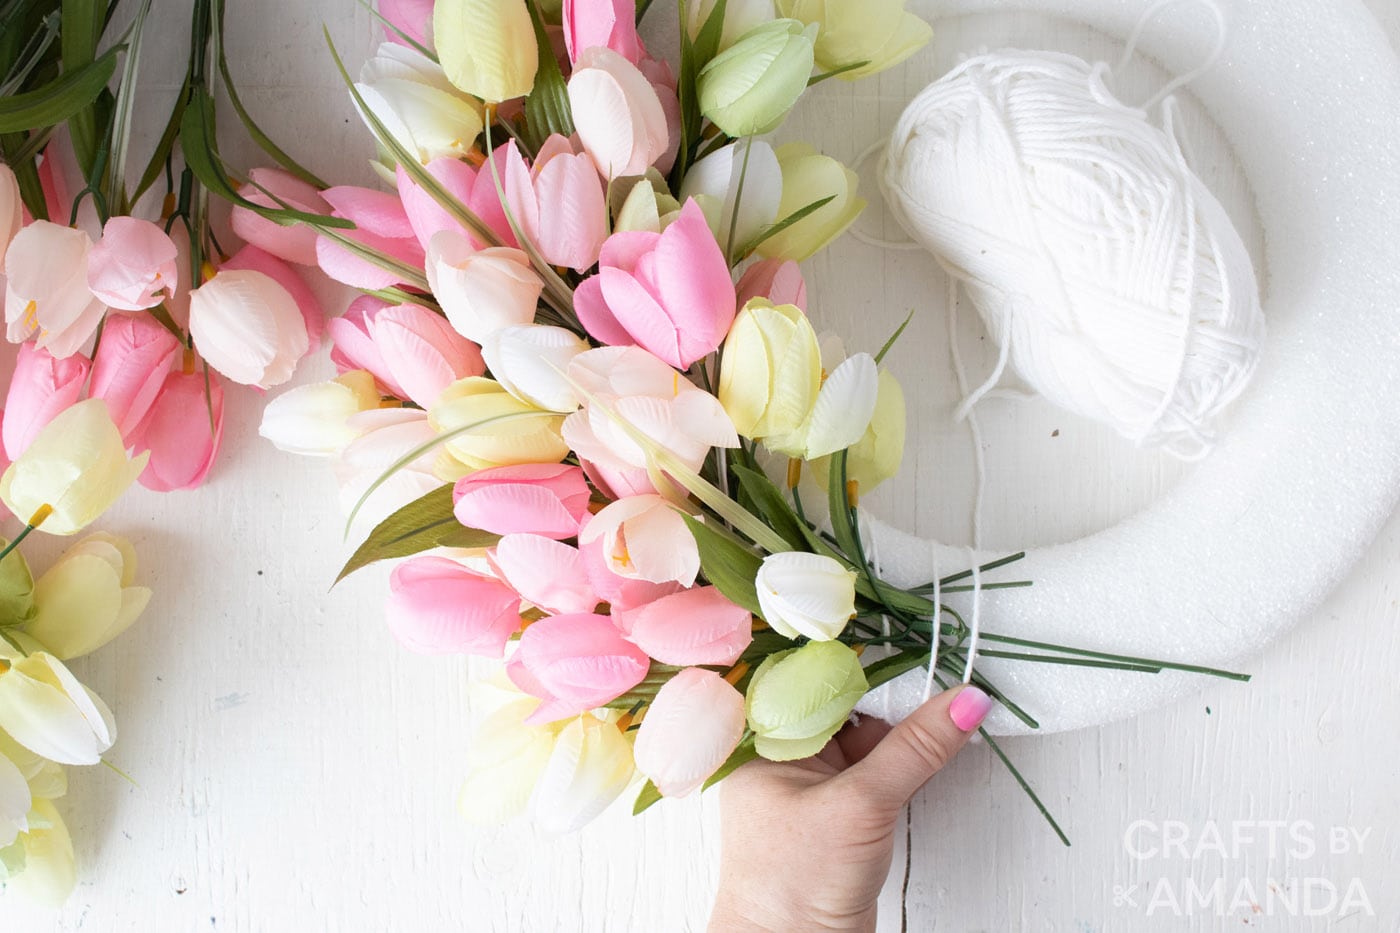
- Take the next pair of tulip stems and position them to cover over the first two stems you put in place. Make sure that they are generally pointing in the same direction and that there is an overhang on the outer edge of the wreath.
EXPERT TIP The more the tulips hang past the outer edge, the larger the wreath will be in the end. - Continue again with the next pair of stems, making sure to alternate colors and filling in any small gaps from the previous stems.
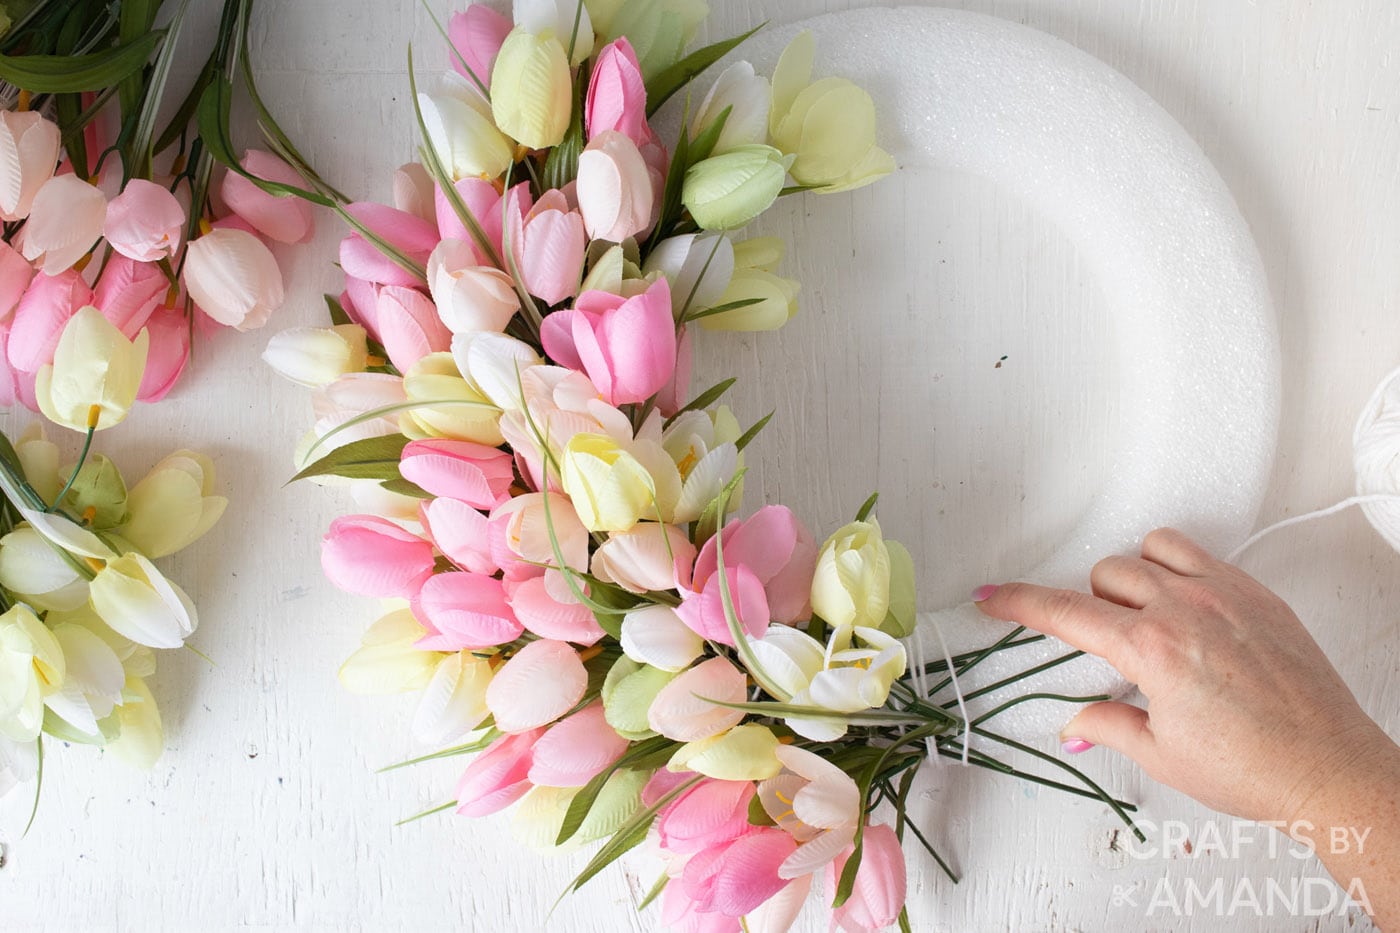
- Continue all the way around the wreath making sure to tightly wrap the stems as you go.
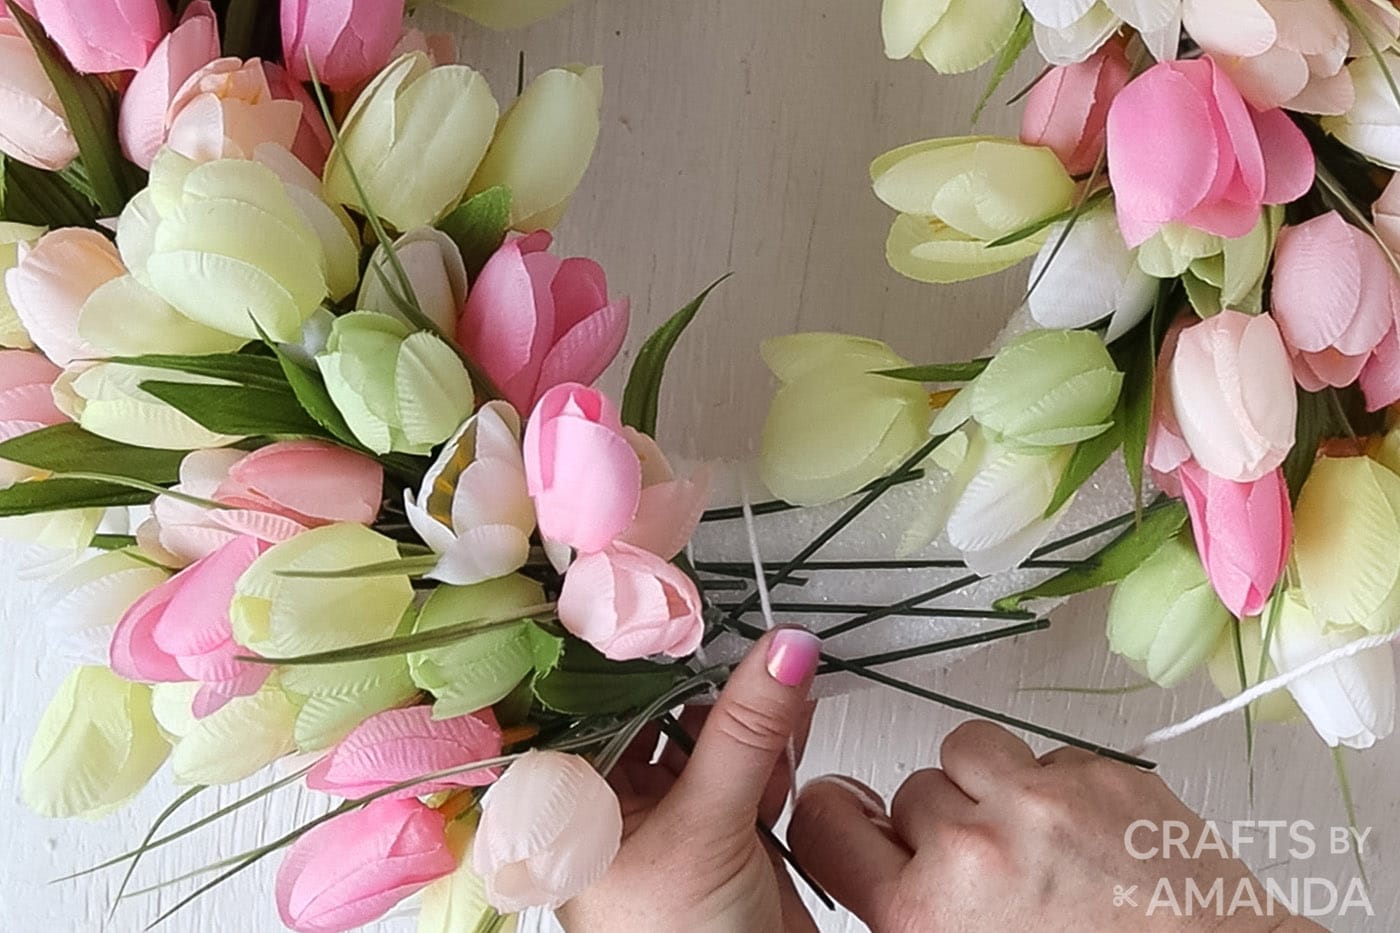
- When you get back to the beginning be sure to tuck the stems underneath the starting tulips and fill in any gaps.
- Look at the finished wreath to make sure that it is symmetrical and balanced. Make any adjustments as needed.

Expert Crafting Tips
- If you’d like, tuck in a few blooms of tulips in a highly contrasting color such as this dark pink for extra depth and dimension to your wreath.
- You can use whatever colored tulips you want for this craft, mix and match with your favorite colors to better suit your taste.
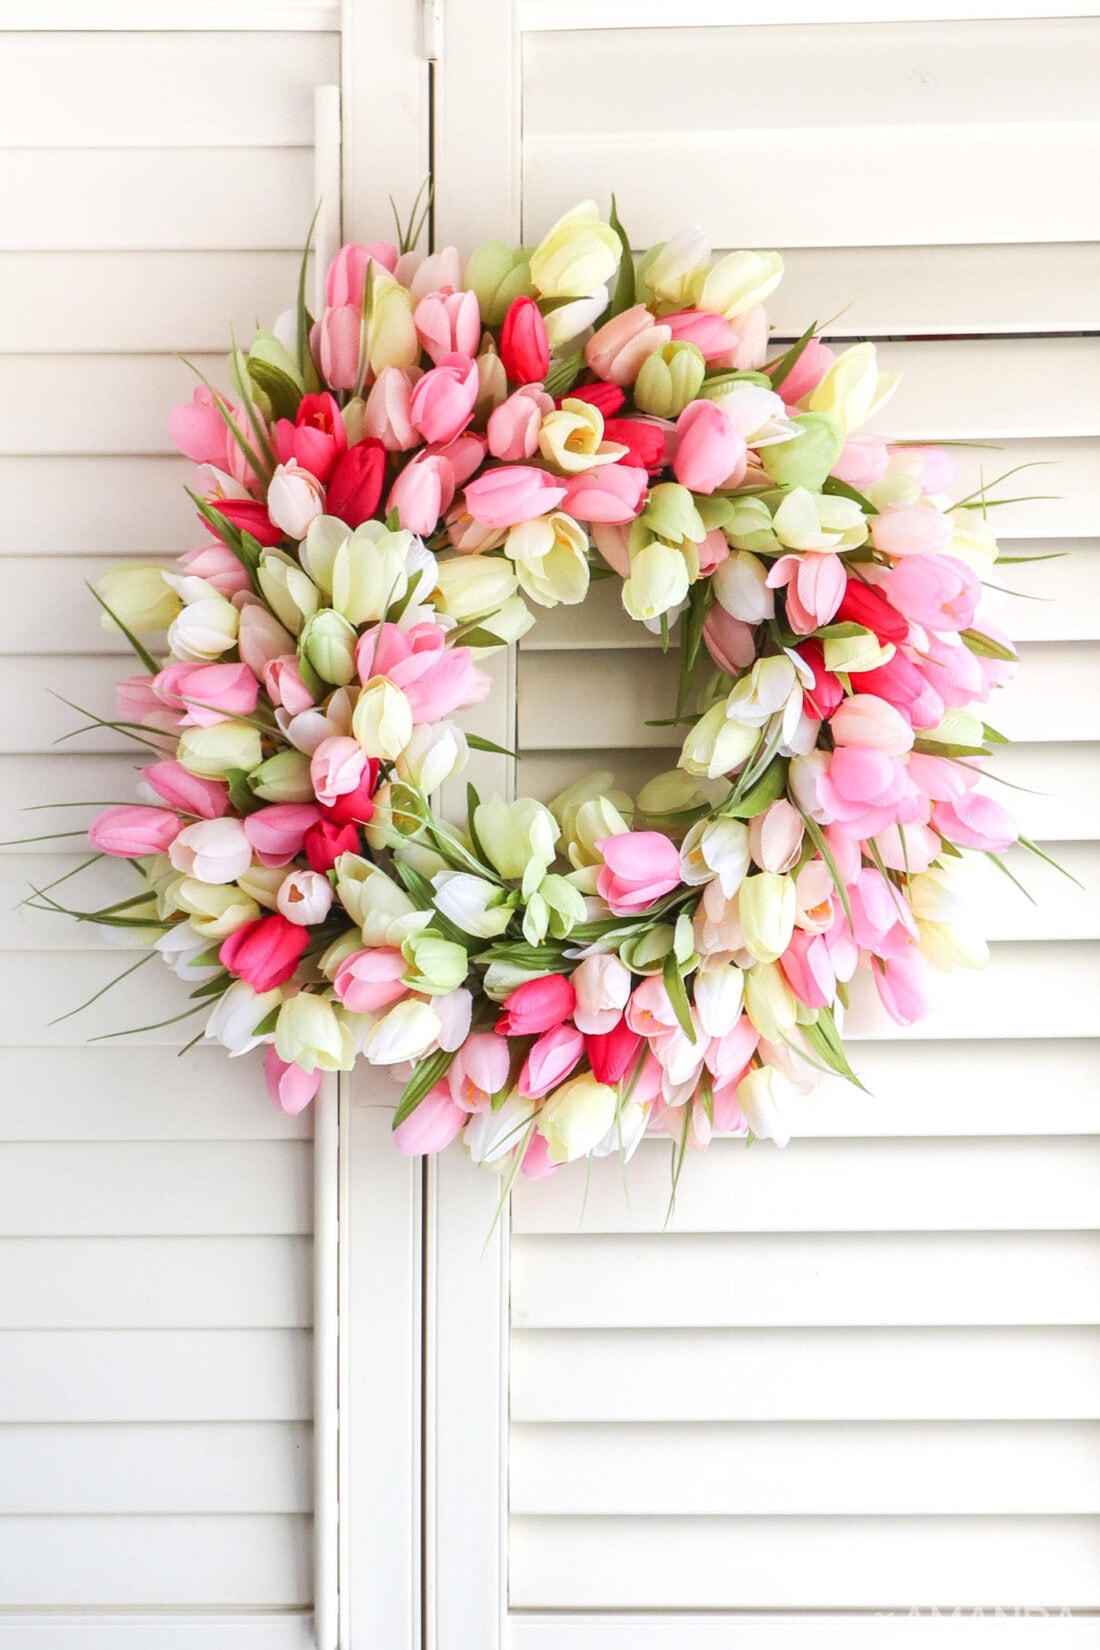
This DIY tulip wreath is so inviting and gives off that warm feeling that spring is nearby!
More Spring Crafts
- Pressed Flower Art
- DIY Easter Egg Wreath
- Drip Paint Planter Pots
- DIY Garden Stepping Stones
- A Watering Can that Pours Crystals
- Sunflower Wreath
I love to create and share my projects with you! I know it’s hard to remember to come back and search, so I’ve made it easy for you with my weekly newsletter! You can subscribe for free and I’ll send you fun crafts and delicious recipes every week right to your email.
Tulip Wreath
Supplies
- 1 styrofoam wreath form we used a 1” x 11.8”
- 10 bunches miniature tulips in coordinating colors such as light pinks and soft white/greens, and 1 bunch of dark pink tulips (optional)
- ribbon or yarn
Craft tools
- Wire cutters
Instructions
- If your tulips come in a bunch, snip into individual stems using wire snippers. Be sure to leave the stems nice and long. Push any of the greenery up towards the bloom of the tulip.
- Starting with one pink stem and one white stem, place them in a criss-cross manner onto your wreath form. Use ribbon or yarn to wrap around and secure the stems in place.
- Take the next pair of tulip stems and position them to cover over the first two stems you put in place. Make sure that they are generally pointing in the same direction and that there is an overhang on the outer edge of the wreath. The more that the tulips hang past the outer edge, the larger the wreath will be in the end.
- Continue again with the next pair of stems, making sure to alternate colors and filling in any small gaps from the previous stems.
- Continue all the way around the wreath making sure to tightly wrap the stems as you go.
- When you get back to the beginning be sure to tuck the stems underneath the starting tulips and fill in any gaps.
- Look at the finished wreath to make sure that it is symmetrical and balanced. Make any adjustments as needed.
- If you'd like, tuck in a few blooms of tulips in a highly contrasting color such as this dark pink for extra depth and dimension to your wreath.
Video
Expert Tips & FAQs
- You can use whatever colored tulips you want for this craft, mix and match with your favorite colors to better suit your taste.
This post originally appeared here on Mar 1, 2021.
- Paper Plate Santa, Snowman and Rudolph - December 13, 2024
- Cinnamon Ornaments - December 6, 2024
- Snowman Door - December 3, 2024


Amanda says
Hi, the wreath is beautiful and looks easy to make but how does it hang please?
Amanda Formaro says
We use a simple wreath hanger https://amzn.to/44jUkWf – the wreath form will rest in the hook part of the wreath hanger.
Sandra says
This looks simple and easy enough to make a beautiful wreath. Tulips are my favorite flower!! I must try.
Karen light says
I was looking for an ideal for a beautiful but easy wreath to put on my front door. I was being lazy so I even started looking for one to buy online but couldn’t see spending that much money on something that I could make myself. So when I seen this project in my email I was so delighted. And even better I already had all the supplies on hand. So I hand made one using you directions and I’m really proud of it. Lovely wreath, easy to do yourself and its a keeper. Thank You.
Robin says
Beautiful tulip wreath. I’ll try to make it & will let you know how it came out. Thanks
Lauren says
What are the final dimensions of the wreath?
Angie says
So pretty! Adding this project to my things to do list!
Carla Lombardo Ehrlich says
Hi, beautiful wreath! Where can I find the tulips cheap??
Amanda Formaro says
We have added links to the post for the tulips, we found ours at Michaels.
Ginny says
great idea