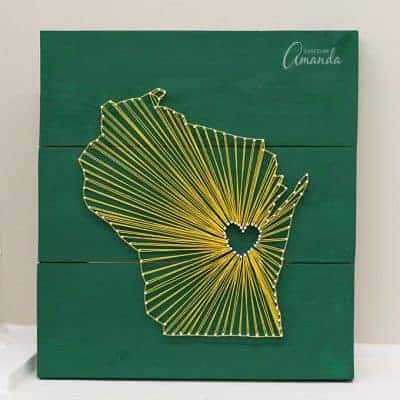
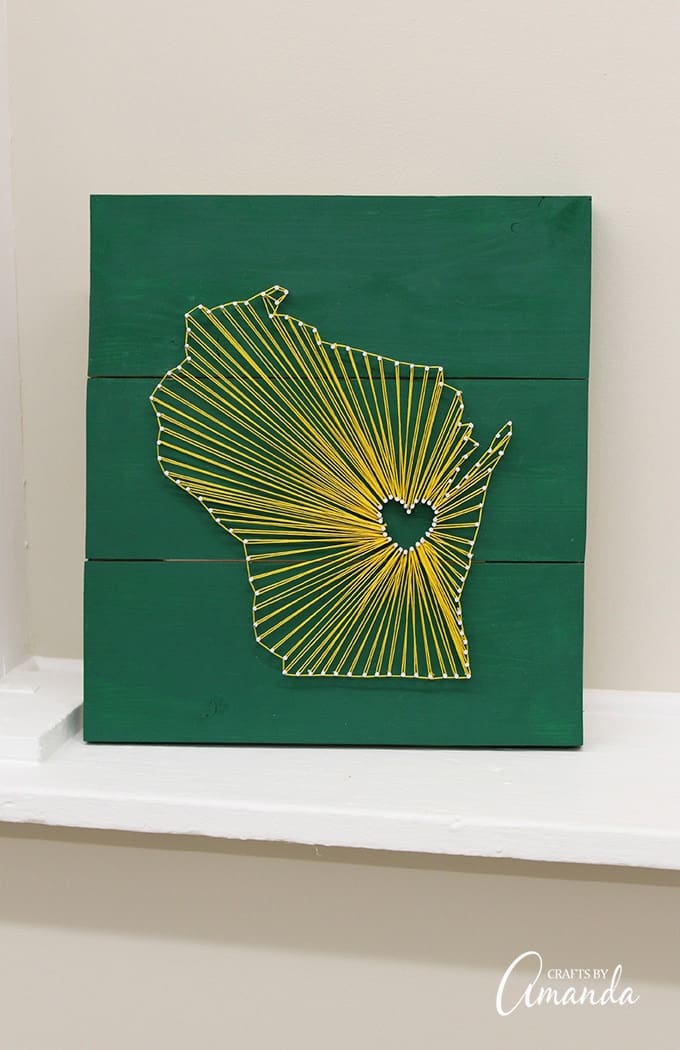
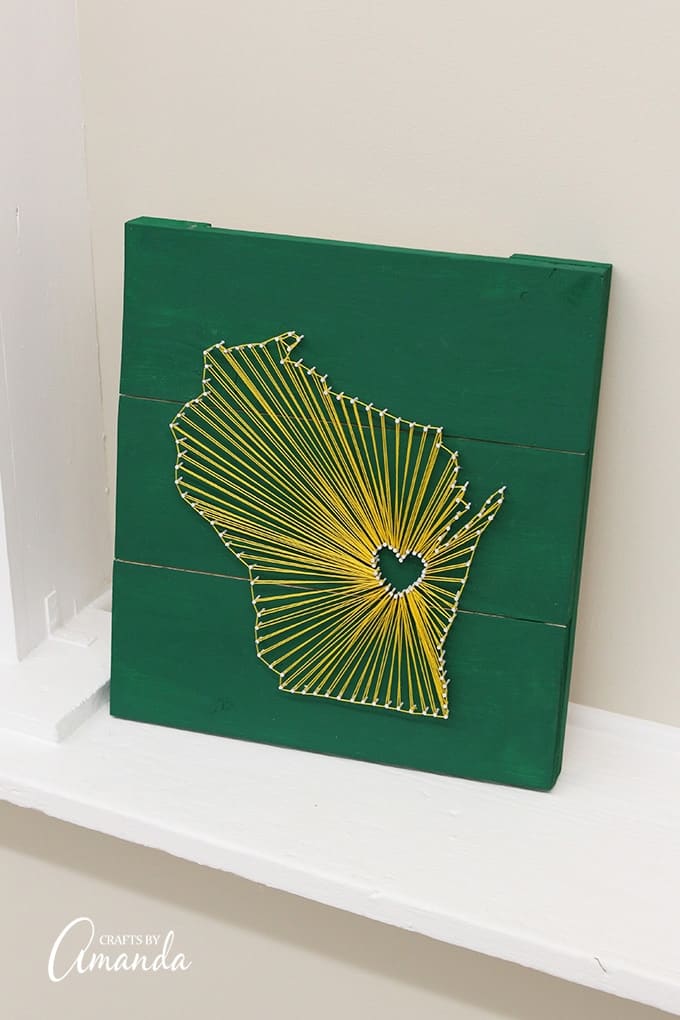
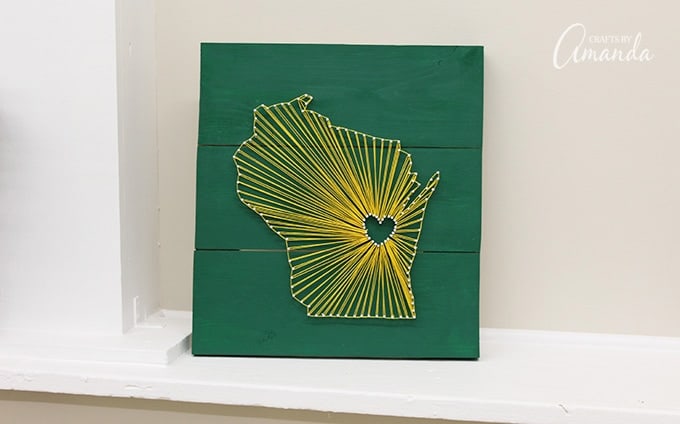
I live in southeast Wisconsin, very close to the Illinois border, right in the heart of Bear/Packer country. In fact, when I hit the grocery store on Sundays I see plenty of people wearing both green & gold and blue & orange. Anyone who watches football knows that the Chicago Bears and the Green Bear Packers have a rivalry that goes way back. My niece wanted to make a gift for a friend of hers who was a Packer fan, so this green and gold Wisconsin state string art was born.
Wisconsin State String Art
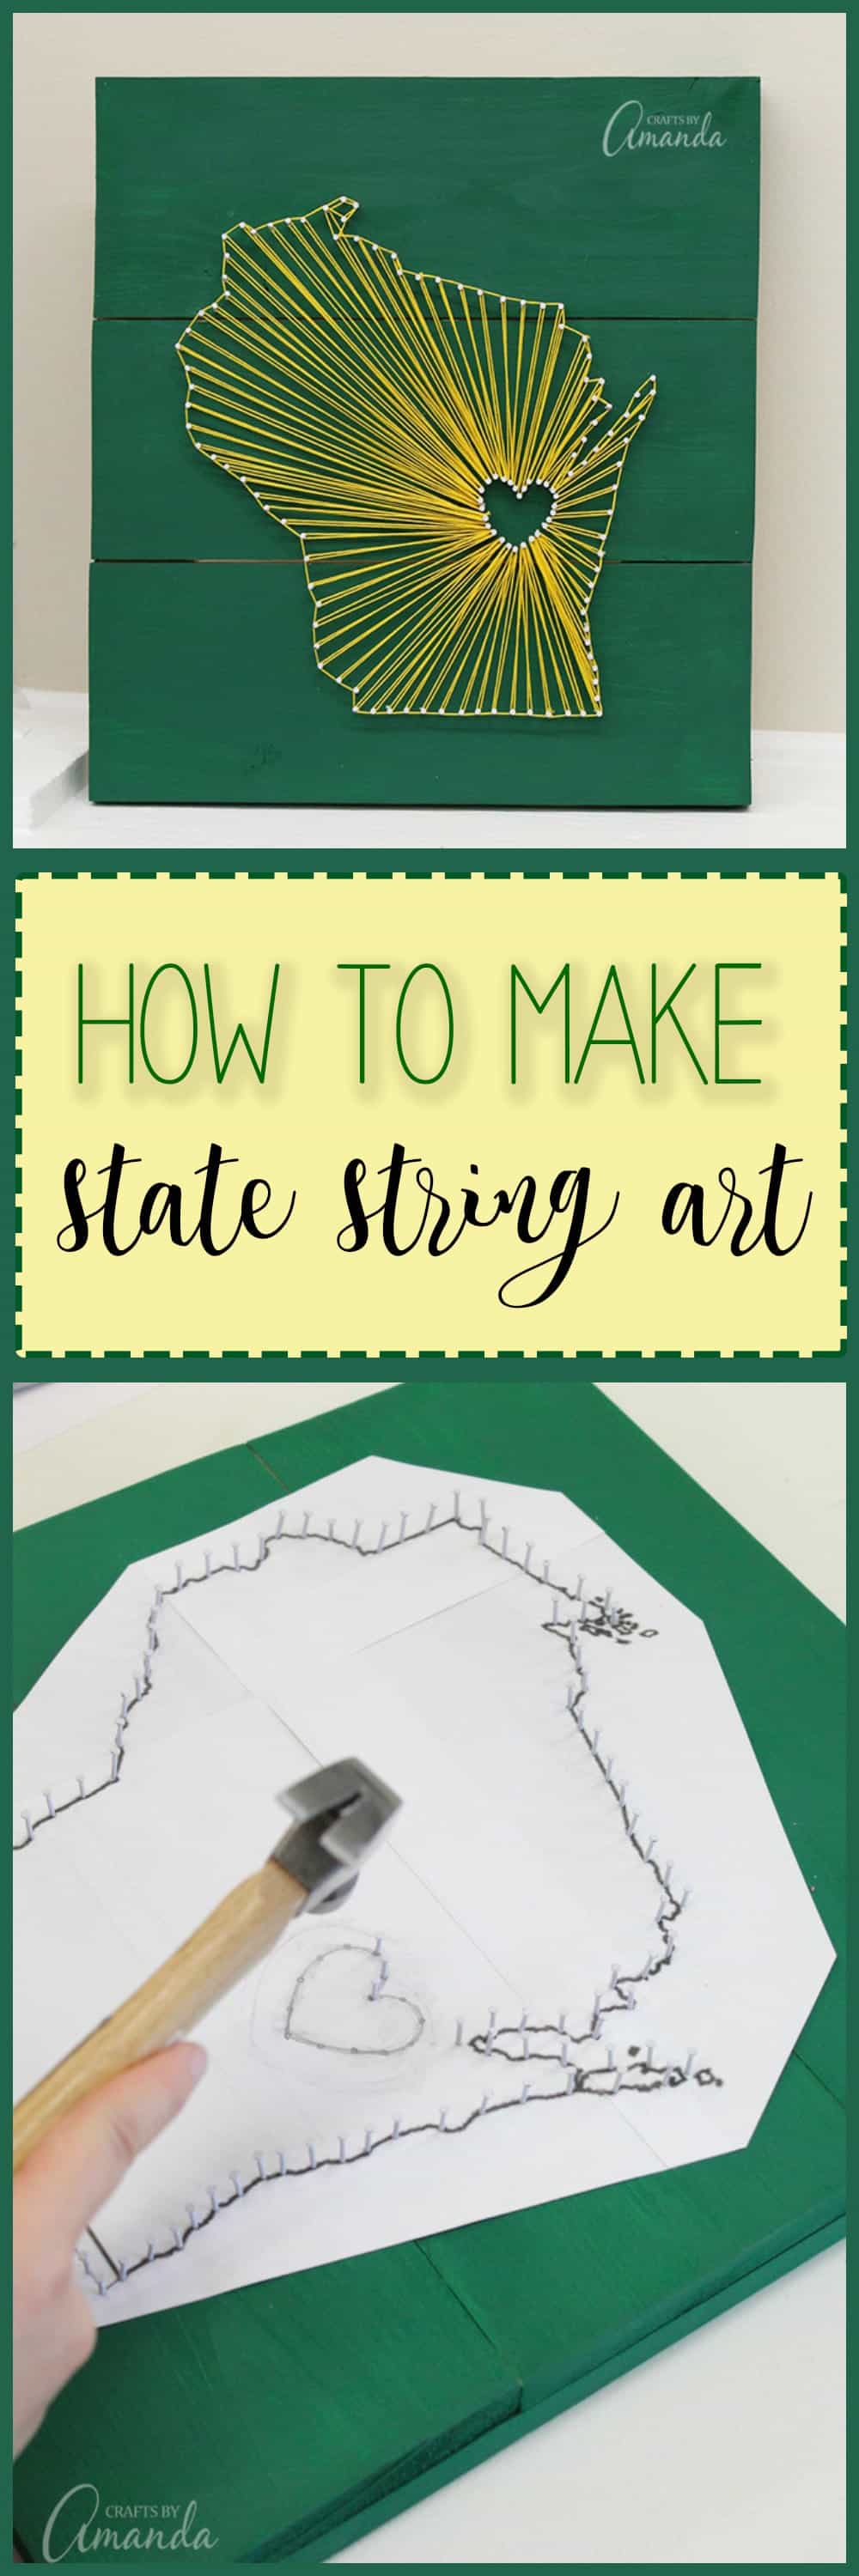
State string art makes a great gift and it’s a fun craft project for adults. This one has a green and gold color scheme because the gift recipient is a Green Bay Packer fan, however stained wood and white string is a popular choice with these types of projects.
When Dakota came to me with this project idea she knew I had made my string art wall letters and knew what she wanted to do, she just needed some guidance. So we met at my studio to get started.
There are affiliate links in this post. That means if you buy something from that link, I will earn a small commission, but it won’t cost you anything additional.
Craft supplies needed to make state string art:
- Wooden board
- Embroidery floss
- Small nails
- Hammer
- White craft glue
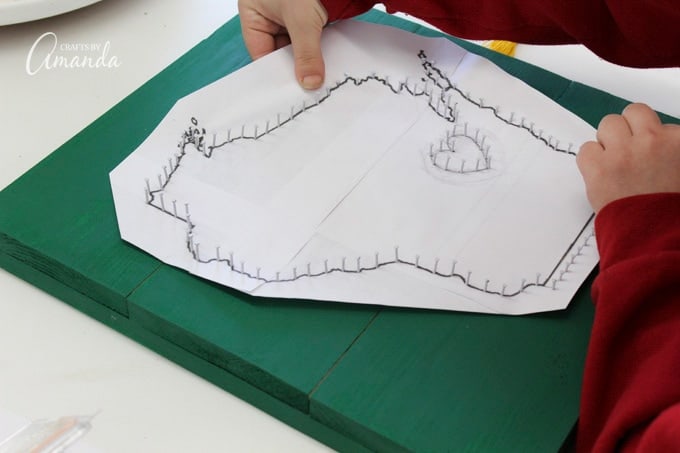
We started by printing out a pattern of the state of Wisconsin. Obviously an 8.5 x 11 piece of paper was not going to be big enough to cover the wood boards she had put together, so we needed to enlarge the state print out in four sections. Ince we had it the size we wanted, we taped all of the pieces together.
We also drew a small heart in the general area of the state where the gift recipient lives. This heart also serves as the anchor point for the strings.
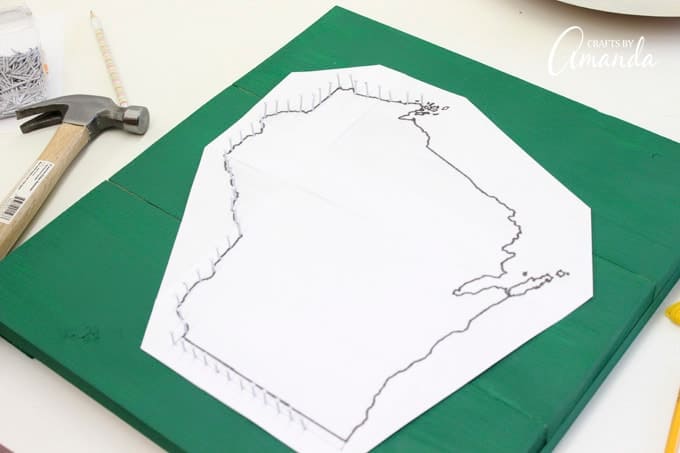
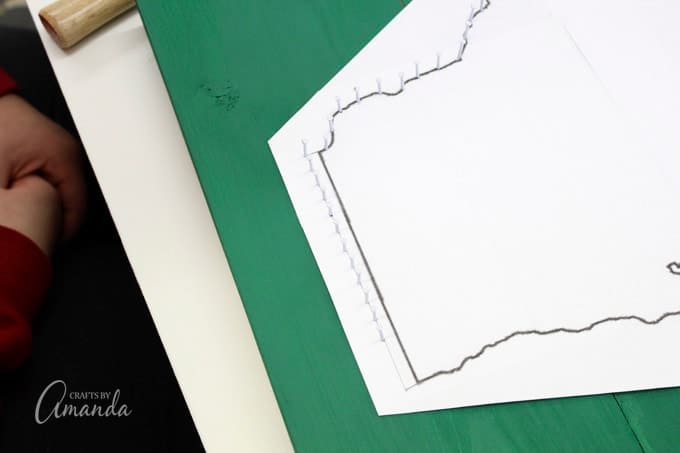
Next you will position your enlarged state print out onto your wooden board. You may want to tape the edges in a few places just to hold it still while you begin adding nails. Hammer nails into the pattern along the state outline. Nails should be approximately 1/2-inch apart.
As you can see in the photo above we ended up extending the bottom of our state slightly. This was because when we got to the bottom of the state we were off just a little with the nails. No biggie!
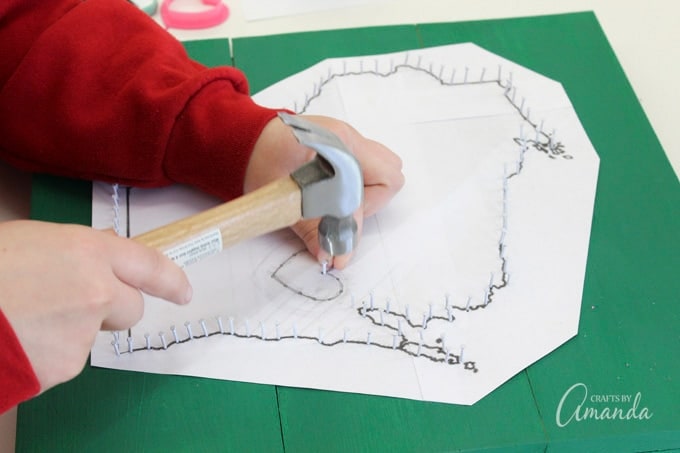
Next you’ll need to hammer around the outline of the little heart.
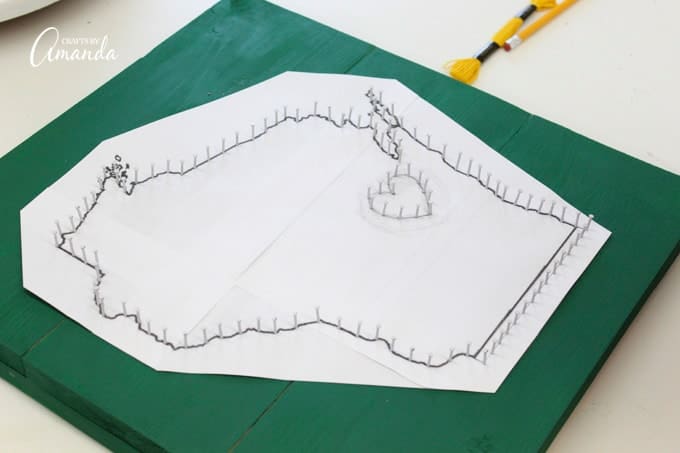
When you’re done adding nails it should look uniform and complete.
Now you will want to remove the paper state pattern from the nails. You no longer need the pattern, so don’t worry if it rips.
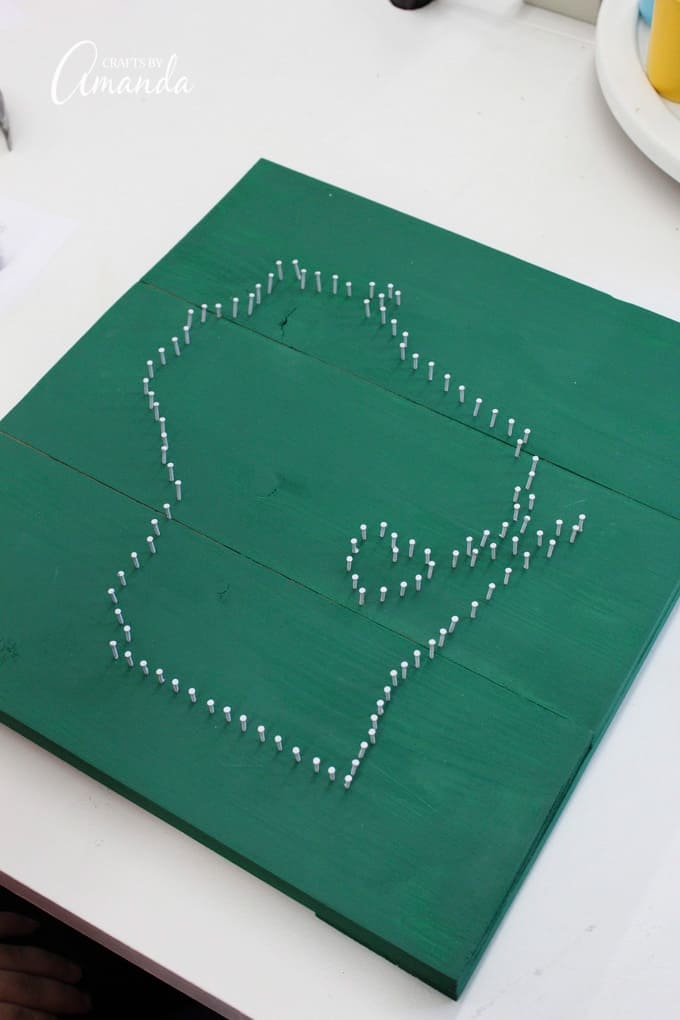
Here’s what it will look like once you remove the pattern.
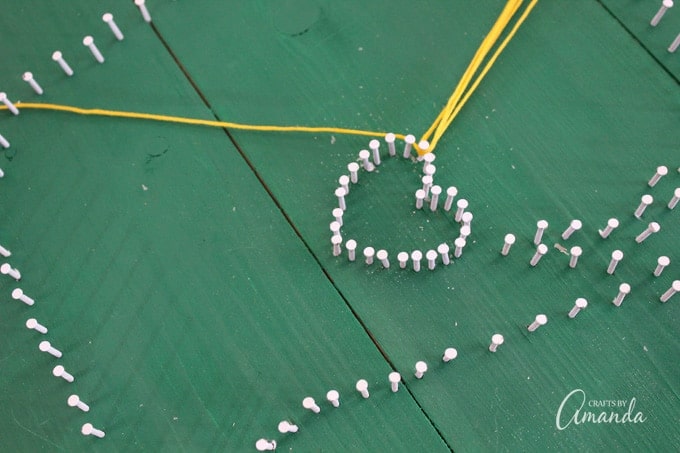
Starting from the state outline nails (doesn’t matter where, just choose a starting point) tie a strand of embroidery floss to a nail and add a little glue to the knot. From here you will stretch the string to a nail on the heart. Loop it around the heart nail then stretch it back to the nail next to your starting point.
TIP: Be careful not to stretch the string too tight that your nails may bend, but make sure you keep it taught enough that it doesn’t sag.
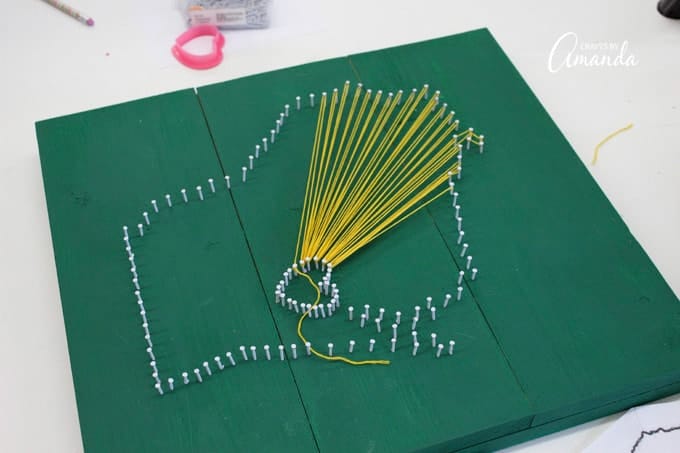
Continue this process around the the outline of the state to the heart, back and forth. You will probably find that you need to go over nails on the heart more than once in order to keep your strings looking uniform. This is simply because there are a lot more state outline nails than there are heart nails.
Continue until you have completed the entire state. Be sure to always add glue whenever you start and end a string with a knot.
To go around the outline of the state, start wherever you ended, then work your way around the outside, wrapping once around each nail.
Allow the glue to dry completely.

Making this Wisconsin state string art was a bit time consuming but Dakota was really proud of her project when it was all done. I think it looks amazing and her friend loved the gift! Hope you enjoyed this project too.

Wisconsin State String Art
Supplies
- Wooden board
- Embroidery floss
- Small nails
- Hammer
- White craft glue
Instructions
- Download a free state pattern from the Internet.
- Enlarge as needed.
- Draw a small heart in the general area of the state to represent the city. This heart also serves as the anchor point for the strings.
- Position your enlarged state print out onto your wooden board. Tape the edges in a few places just to hold it still while you begin adding nails.
- Hammer nails into the pattern along the state outline. Nails should be approximately 1/2-inch apart.
- Hammer around the outline of the little heart.
- Remove the paper state pattern from the nails. You no longer need the pattern, so don't worry if it rips.
- Starting from the state outline nails (doesn't matter where, just choose a starting point) tie a strand of embroidery floss to a nail and add a little glue to the knot. From here you will stretch the string to a nail on the heart. Loop it around the heart nail then stretch it back to the nail next to your starting point. Be careful not to stretch the string too tight that your nails may bend, but make sure you keep it taught enough that it doesn't sag.
- Continue this process around the the outline of the state to the heart, back and forth. You will probably find that you need to go over nails on the heart more than once in order to keep your strings looking uniform. This is simply because there are a lot more state outline nails than there are heart nails.
- Continue until you have completed the entire state. Be sure to always add glue whenever you start and end a string with a knot. Allow the glue to dry completely.
- Patriotic Pinwheels - June 23, 2026
- Fingerprint Daddy & Me Coffee Mug - June 12, 2026
- Patriotic Bandana Wreath - June 9, 2026


Jen says
Can you tell me more about how you outlined the state boarder? Did you use yellow for that too and was this something you did at the end?
Amanda Formaro says
Oh my gosh, thank you for bringing that to my attention – I will fix it right away! But to answer you question, yes you do the outline last. start wherever you ended, then work your way around the outline of the state, wrapping once around each nail.
Ari says
Great project! I’m still in school, and this would be great as a birthday or mothers day gift! Thanks a lot!
Brittany Rado says
Can I get a rough estimate of how many packages of embroidery string you used? Thanks!
Amanda Formaro says
I can’t remember for sure, but I think we used one full skein and part of another.
Erin says
How big is the board you used for this?
Amanda Formaro says
I don’t have the board any more to measure it (it was a gift) but if I had to guess I would say 3’x2′
Brooklyn Jones says
Hello! I was just wondering if you could use sewing pins instead of nails if you use a canvas instead of wood. Thanks!
Amanda Formaro says
I haven’t tried that, can’t guarantee they will stay put. If you do try it, when you insert the pin, add a dab of glue to each point.
Arlene says
Any suggestions for removing the bits of paper that sometimes get trapped under some of the nails?
Amanda Formaro says
Tweezers work great for this!
Samriddhi says
This is amazing ❤ I am gonna make it for my country ? which paint is used for painting the wooden board ?
Amanda Formaro says
Hi, Samriddhi! You can just use regular acrylic paint, and if you’d like you can also do a coat of white paint before applying the main color to help it pop more. Hope that helps!
Samriddhi says
Thankyou so much ? this is really great.. can I get to you on facebook or Instagram???
Gracie says
About how many loops per nail did you do for this project?
Amanda Formaro says
Hi, Gracie! There is only one loop per nail. You take one loop around each nail unless instructed in the tutorial where you may need to go around 1 nail more than once. Hope that helps!
Erin says
Do you know about how many loops you made around each nail in the heart?
Amanda Formaro says
Some were 2, some 3 and some 4 depending on how much space needed to be filled. No more than 4 or it’s too much for the nail.