These Easter bunny mason jars are such a cute and easy holiday craft to make. Fill them with candy or votive candles and use them for Easter decor or as Easter gifts. And good news. No special equipment is needed! You can make your own silhouette bunny stickers without any fancy machines.
If you’re using these adorable bunny mason jars as gifts, pair them with a printable Easter basket tag that you can tie around the rim!
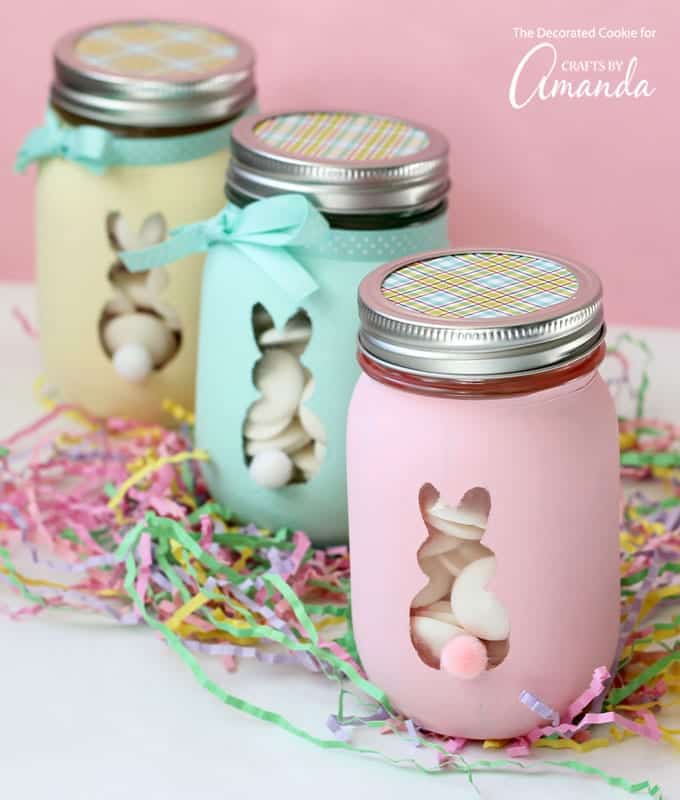
Easter Bunny Mason Jars
You can find all the supplies you need for these bunny mason jars at the craft store. I used chalk paint here because it works so well on non-porous surfaces, often with just one coat.
To make the bunny silhouette sticker, you can use your own bunny stickers or any shape you draw or find online. I’ve included a template I made for you if you prefer the bunny shown here.
To Make Easter Bunny Mason Jars You’ll Need
- mason jars
- 2-inch blue painter’s tape
- bunny printable (printed on white cardstock)
- wax paper
- scissors or craft knife
- chalk paint in pastel colors
- paintbrushes
- mini or medium pom-poms (optional)
- hot glue gun (optional)
- colorful cardstock and ribbon (optional)
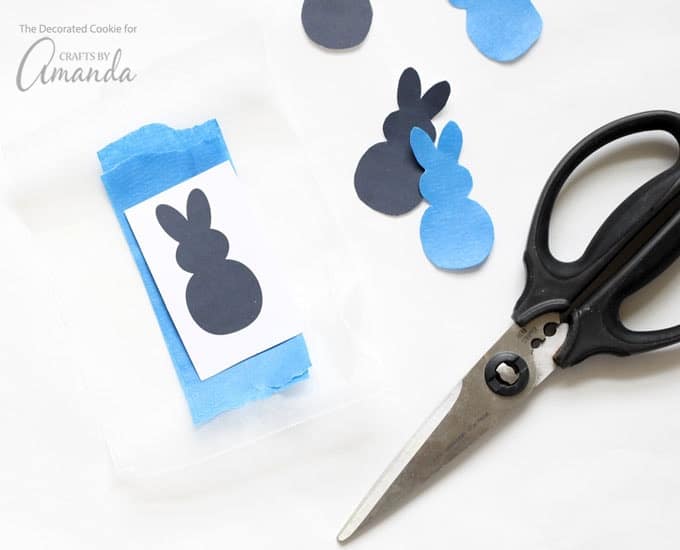
- To make the bunny sticker, place a piece of blue painters tape (4 to 5 inches long) on wax paper, sticky side down.
- Place a second piece of blue painters tape on top of the first, sticky side down, so the sticker is thicker.
- Cut one of the bunnies from the template (no need to be precise, just cut a rectangle around the bunny).
- Place the bunny on the blue tape.
- With scissors or a craft knife, cut out the bunny, cutting the template, blue tape, and wax paper.
- Remove the wax paper from the blue tape.
- This may take some fiddling, but work the edge with a toothpick or your fingernail.
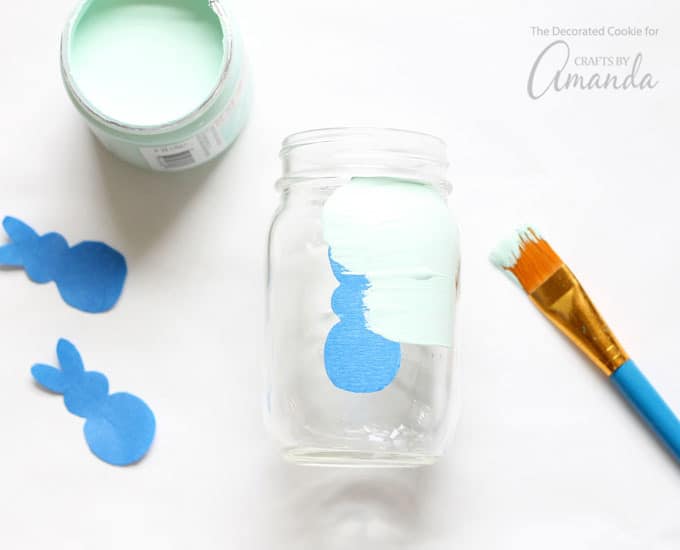
- Adhere the bunny sticker to the mason jar.
Paint the mason jar with chalk paint. Let dry and, if necessary, paint a second coat. When dry, remove the bunny sticker.
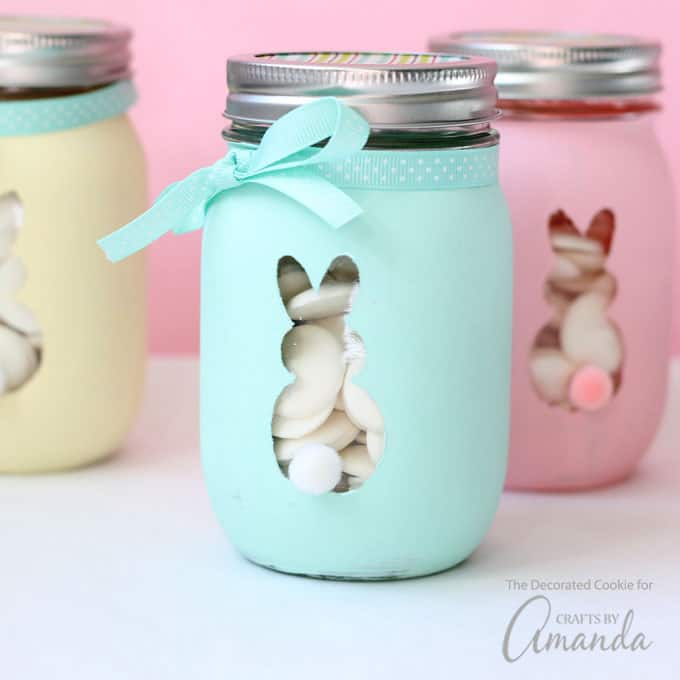
If you like, add a mini or medium pom-pom tail with a dab of hot glue. Cut circles of cardstock to cover the lid and add ribbon, if desired.
Is there anything the mason jar can’t do? I’m loving these pretty Easter bunny mason jars. Right now, mine are filled with white candies and resting on my mantle until I can find a worthy recipient. That recipient may just be me!
Looking for more fun inspiration for Easter crafts? Check out this roundup of 40+ Creative Easter Crafts for Kids, these Yarn Pom Pom Chicks, these super adorable Bunny and Chick Washcloths (great as baby shower gifts as well), or these Easter Chick Placeholders!
The inspiration for these cute Easter bunny mason jars came from the blog Happiness is Homemade.
Easter Bunny Mason Jars
Supplies
- mason jars
- 2- inch blue painter's tape
- bunny printable printed on white cardstock
- wax paper
- scissors or craft knife
- chalk paint in pastel colors
- paint brushes
- mini pom-poms optional
- hot glue gun optional
- colorful cardstock and ribbon optional
Instructions
- To make the bunny sticker, place a piece of blue painters tape (4 to 5 inches long) on wax paper, sticky side down.
- Place a second piece of blue painters tape on top of the first, sticky side down, so the sticker is thicker.
- Cut one of the bunnies from the template (cut a rectangle around the bunny).
- Place the bunny on the blue tape.
- With scissors or a craft knife, cut out the bunny, cutting the template, blue and wax paper.
- Remove the wax paper from the blue tape.
- Adhere the bunny sticker to the mason jar.
- Paint the mason jar with chalk paint.
- Let dry and, if necessary, paint a second coat.
- When dry, remove the bunny sticker.
- If you like, add a mini or medium pom-pom tail with a dab of hot glue.
- Cut circles of cardstock to cover the lid and add ribbon, if desired.
This post was originally published on this blog on March 24, 2017.
- Macrame Sea Glass Necklace - August 20, 2024
- Sea Shell Creatures - July 18, 2023
- Bird Seed Ornaments - May 13, 2022



Allison says
I’m making these for family and I went to put on a second coat of paint and the paint is peeling off!! Help!!
Amanda Formaro says
That is usually due to 1 of 2 things. Either your jar wasn’t clean (oils from your hands can cause paint to peel) – resolve this by always washing your jars and finishing with a rubbing alcohol rinse. Or if you didn’t let the first coat dry enough first.
Bonnie says
This is awesome to do for granddaughter. Ty
joy says
Does Chalk paint work better than acrylic paint? I accidentally bought acrylic and it is coming out streaky.
Amanda Formaro says
You may just need to add another coat and smooth out the strokes as you paint. Use a soft paintbrush. 2-3 coats depending on the color and how transparent it is. Allow the coats to dry in between.
Joy says
Thanks, I got a sample finished and we will be doing this as a library program craft!
Thanks for posting your cute crafts!
TX Deborah says
What an awesome gift for older children. You might want to use plastic jars for younger ones. I can see the jars filled with jelly bird eggs (jelly beans). Now to gather me up some jars and paint.