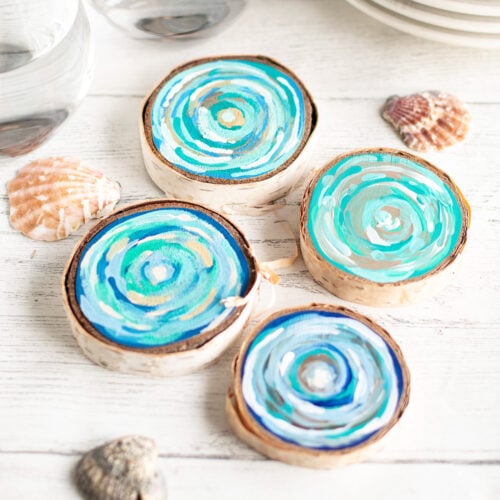
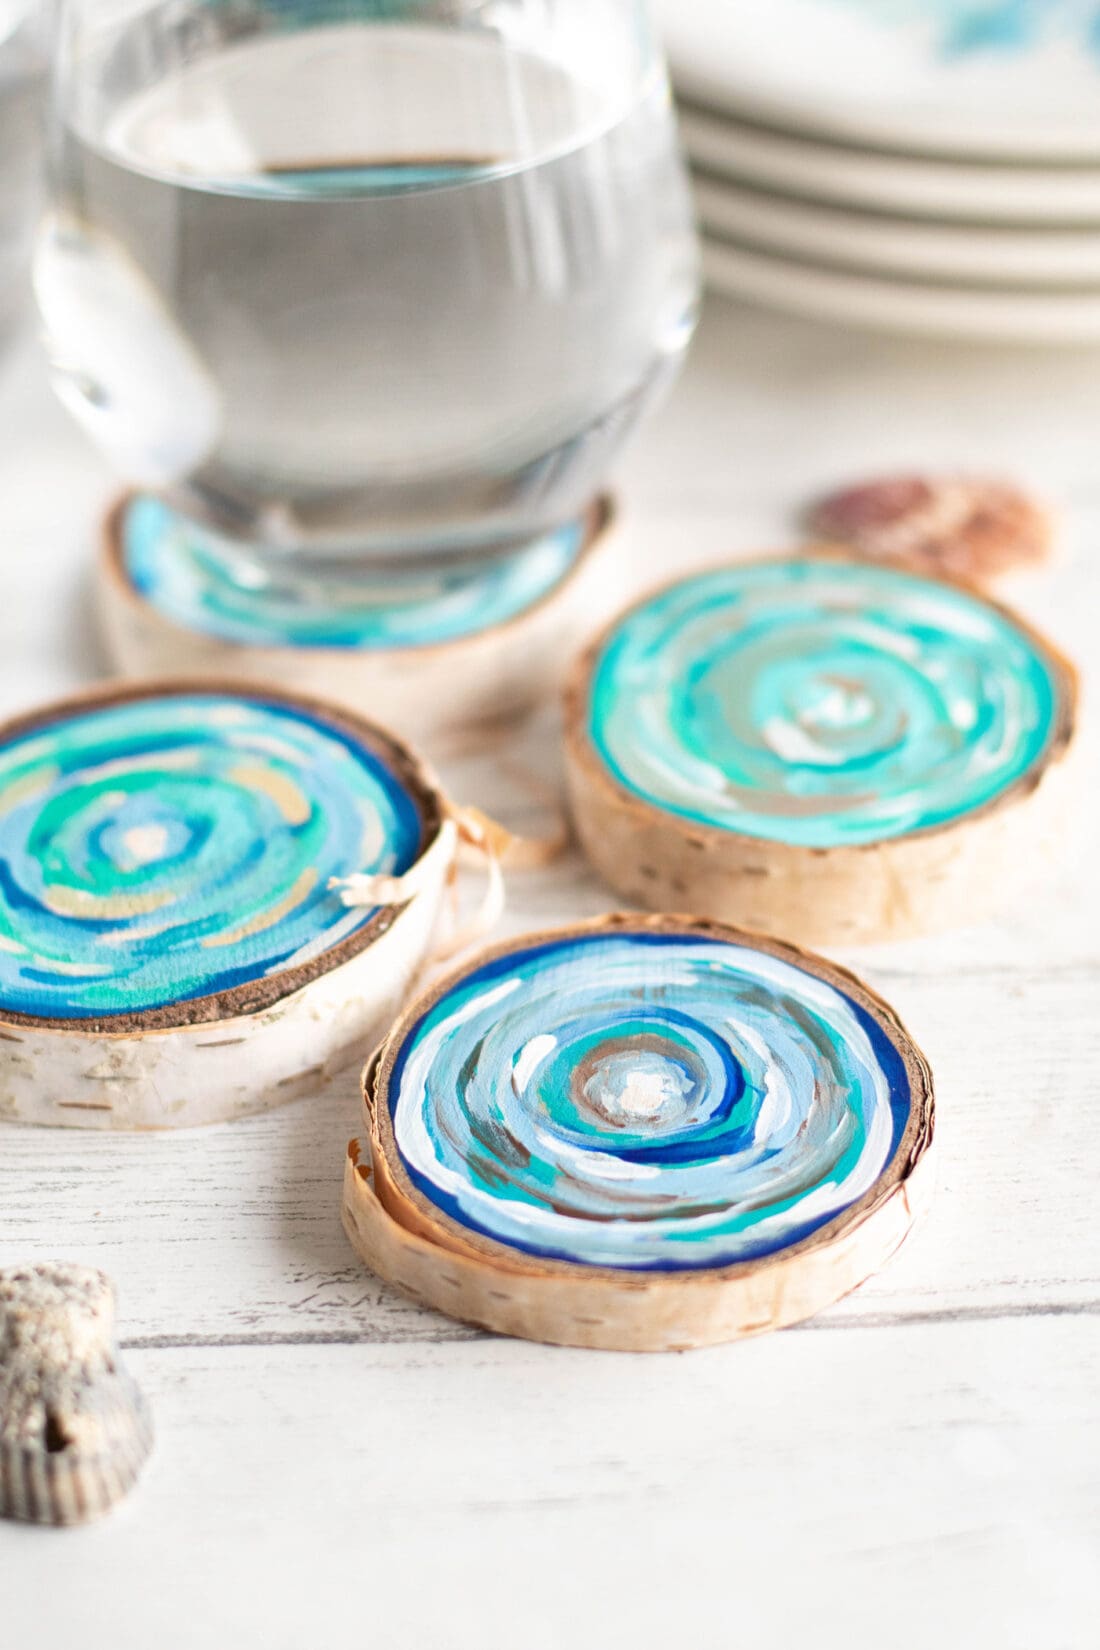
These easy coastal wood slice coasters are painted in a whispy spiral pattern that’s reminiscent of all the gorgeous colors of the ocean.
Why we love this project
While it’s currently winter, sometimes a beachy craft is exactly what you need to take you back to the smell of the ocean breeze with sandy toes and salty hair. Or suppose you have a nautical or coastal-themed home you’re looking to add more flair to. These coastal wood slice coasters are so pretty beaming with their vibrant beachy colors painted in a whispy swirl design, and they’re super easy to make!
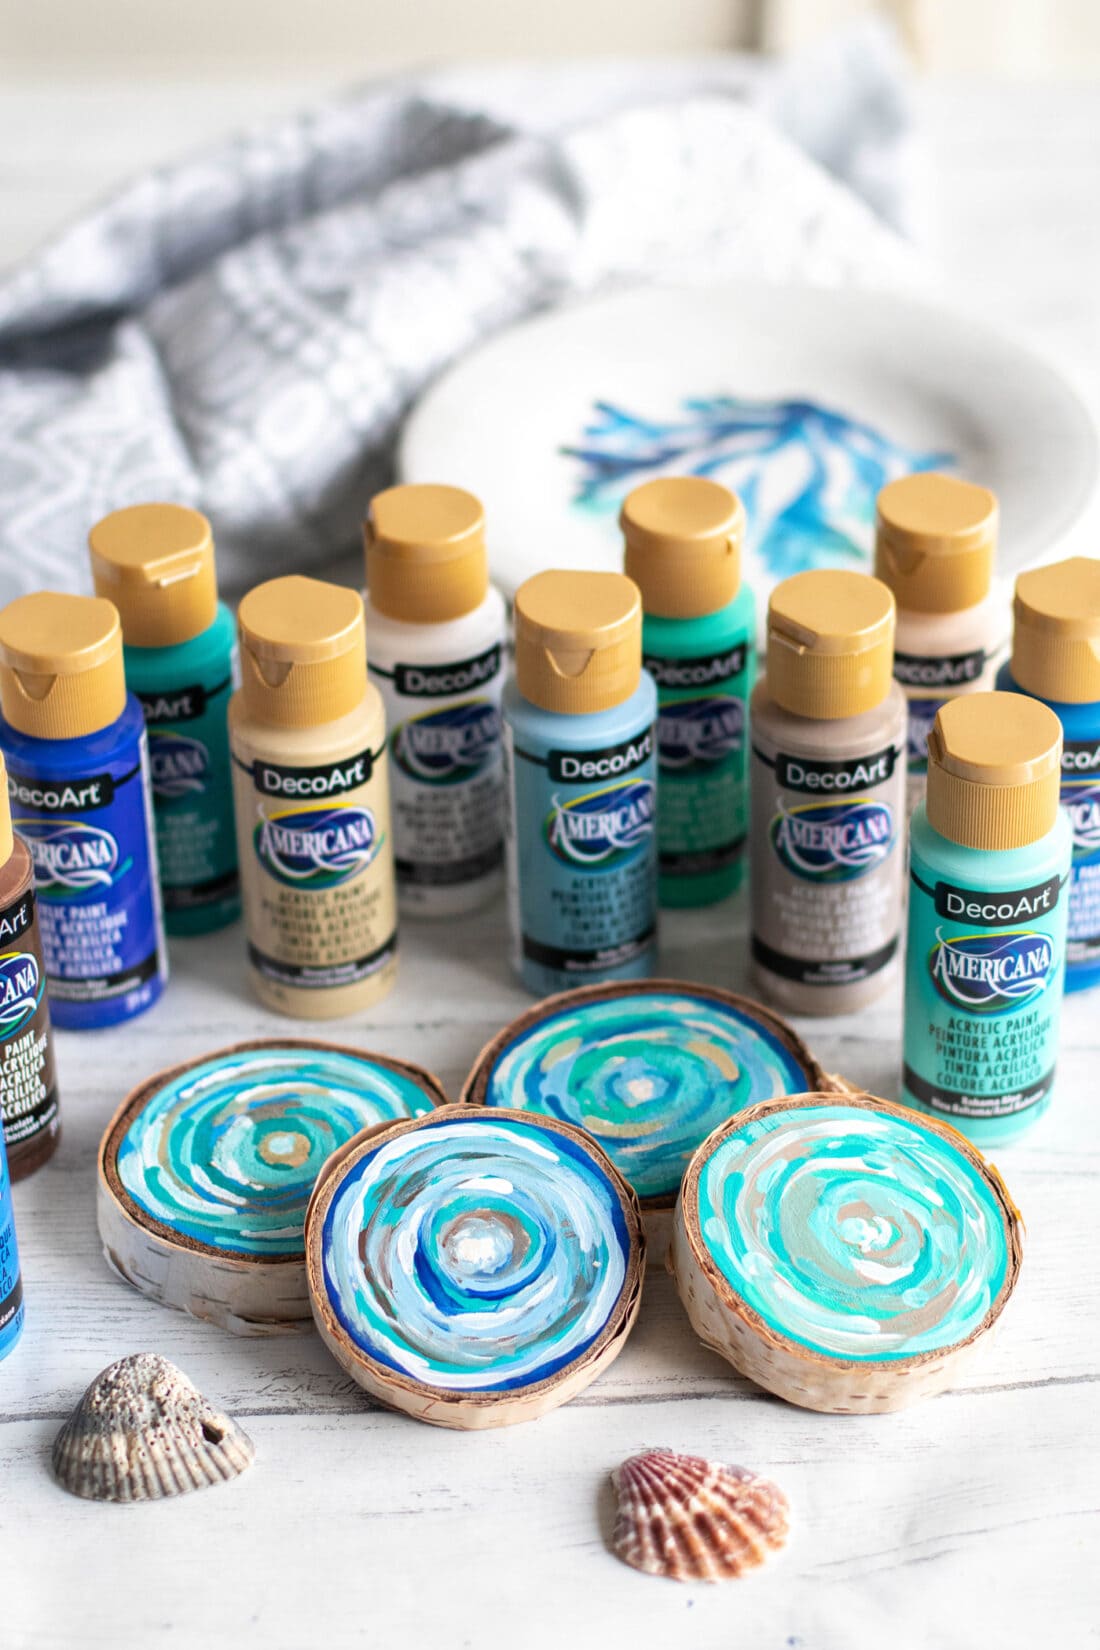
The colors of Decoart Coastal Color Acrylic Paint are perfect for this project. These colors are bright, bold, and beautiful and create a lovely contrast on the wood slices. You can also use these paints to make these mini coastal clay houses!
Crafts by Amanda is a proud member of the DecoArt core blogger family! And just so you know, we were compensated for this project, though all of the opinions are 100% ours and we love these paints!
Helpful Project Information:
- Age Level: 12 and up
- Mess Factor: Medium (paint)
- Level of Difficulty: Easy
- Time to Complete: Less than 1 hour, plus dry time
- Cost Estimate: Less than $15.00 depending on what you already have
Craft supplies you will need
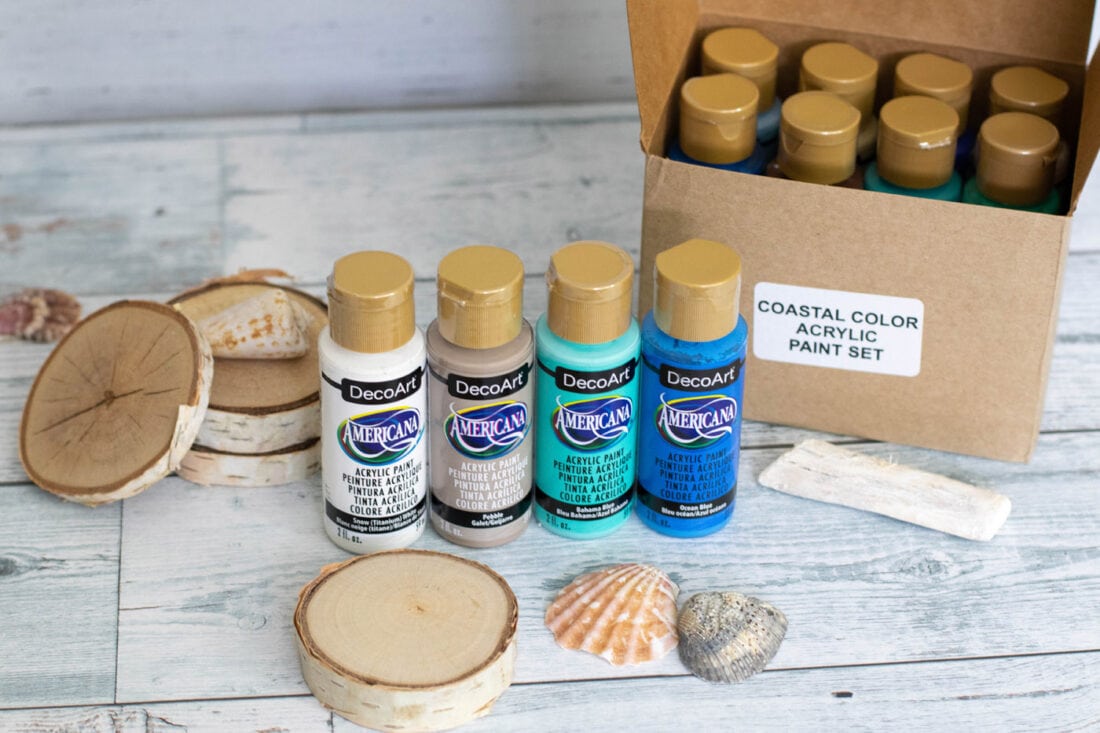
Get full list of supplies and directions in the printable version at the end of this post.
All of the paint colors used in this craft are from the DecoArt Coastal Colors Acrylic Paint Set. These acrylic paints come in a prepacked set of 12 dreamy coastal colors for all your beach themed crafts, so much easier than buying them all seperate!
P.S. if you buy your paint from the link above (the DecoArt shop) you can take 20% off! Use this code: CraftsbyAmanda20
How to Make Coastal Wood Slice Coasters
These step by step photos and instructions are here to help you visualize how to make this project. Please scroll down to simply print out the instructions!
- Make sure the wood slice surfaces are smoothly sanded before starting.
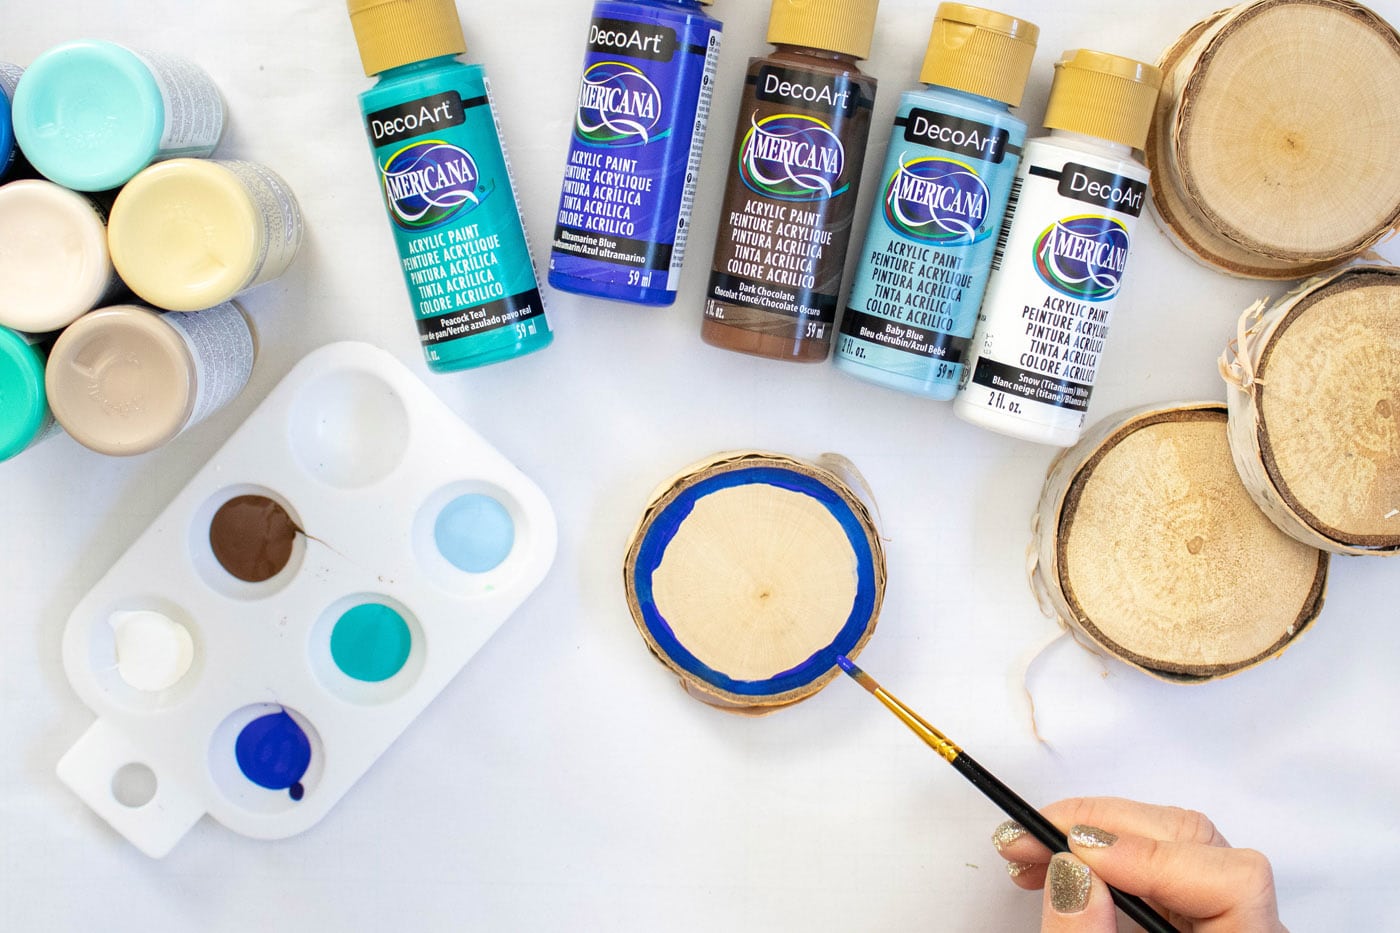
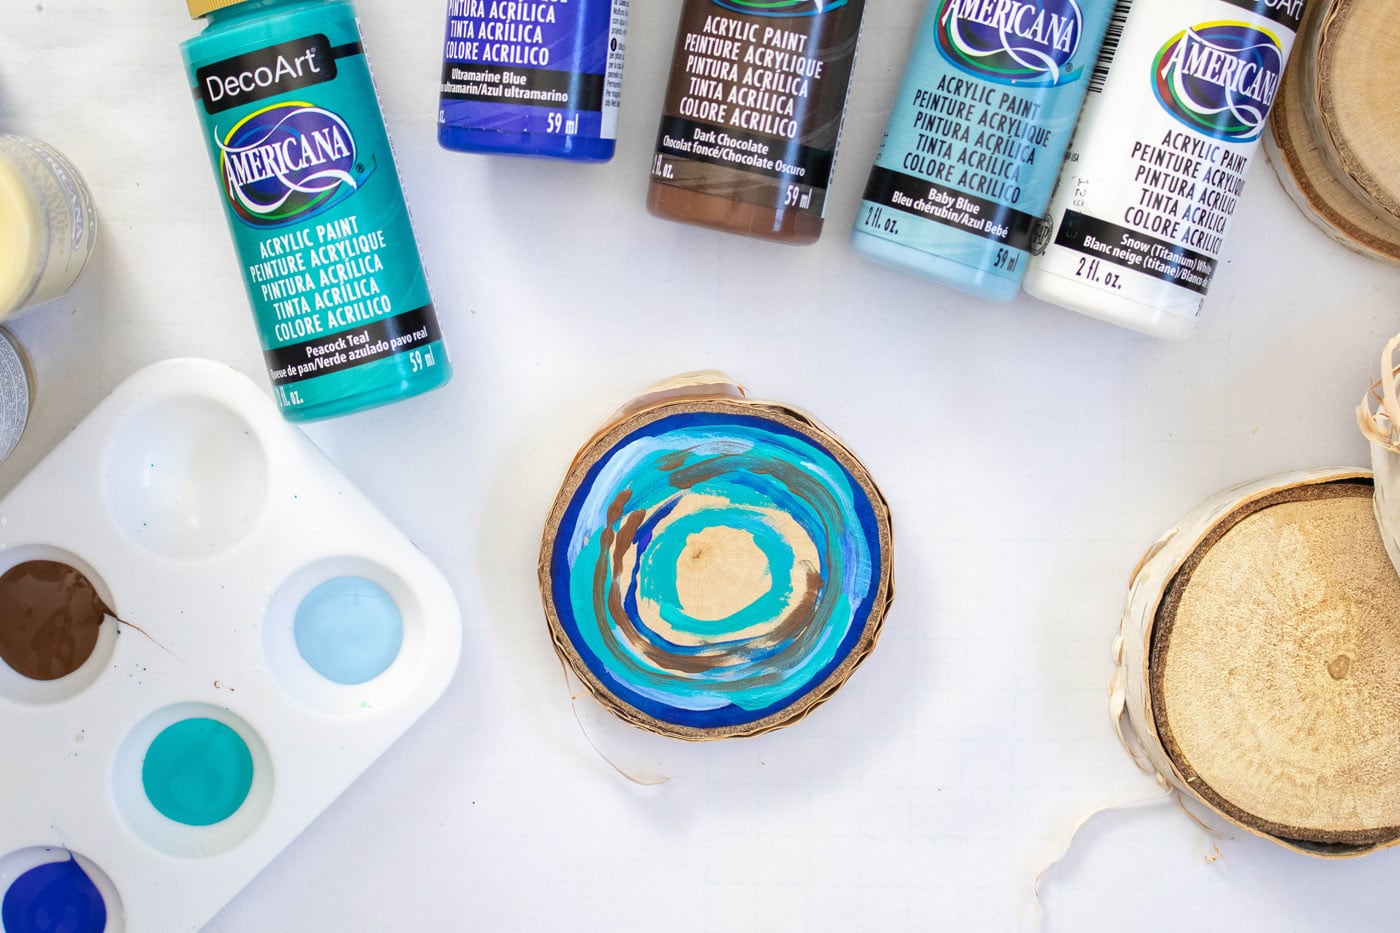
- Select five of the paint colors from the set for each coaster. Consider using three of the blues/greens and two of the taupes/browns. Don’t let the paint dry between colors as you want them to blend together.
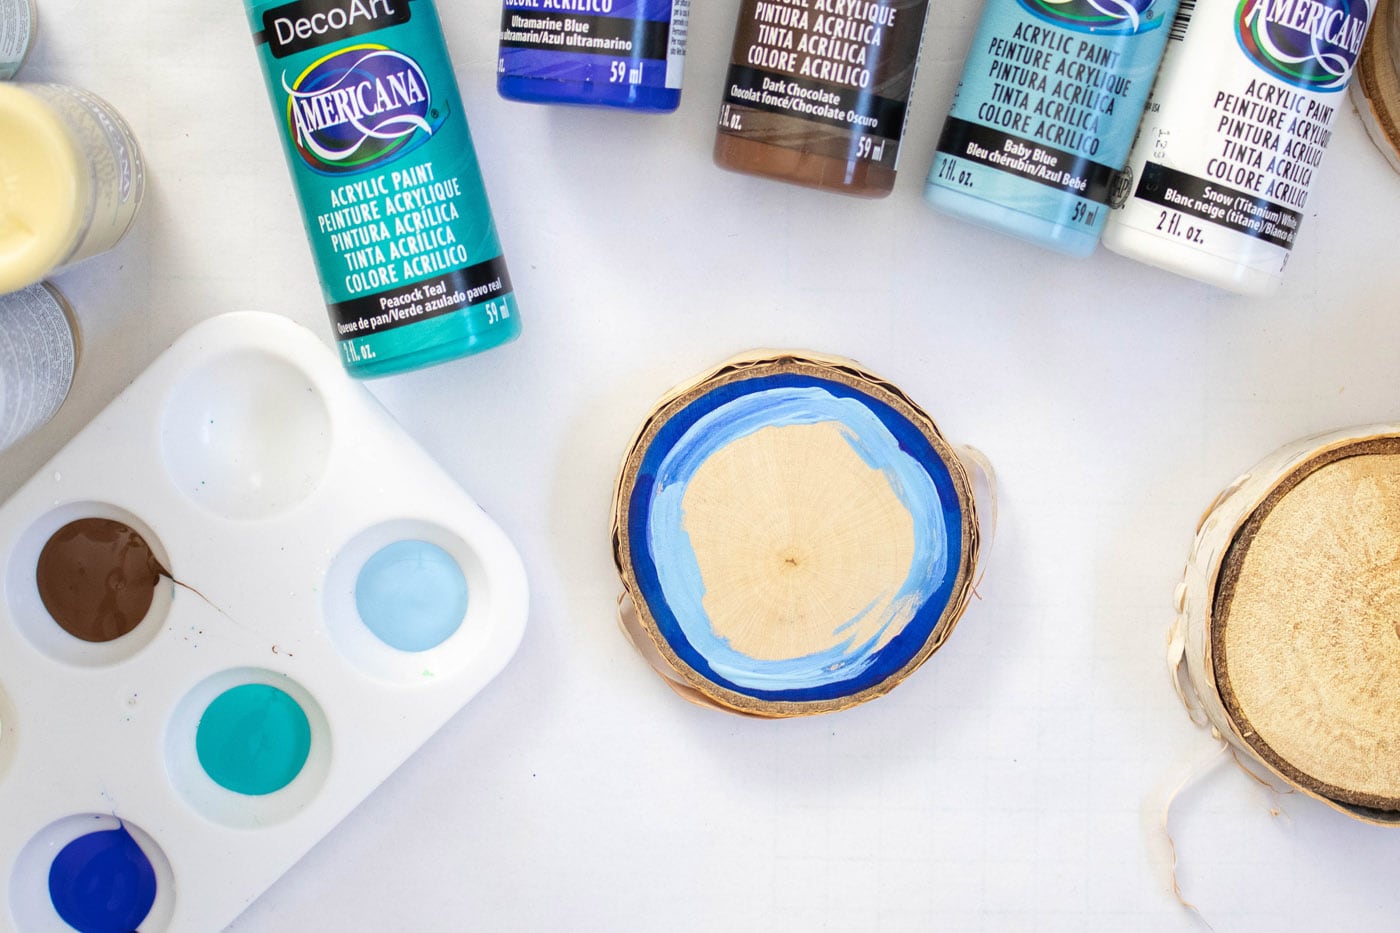
- Start by painting the outer ring with the darkest blue/green color (Ultramarine Blue in this set). Layer in a lighter blue (Baby Blue) slightly overlapping the first ring.

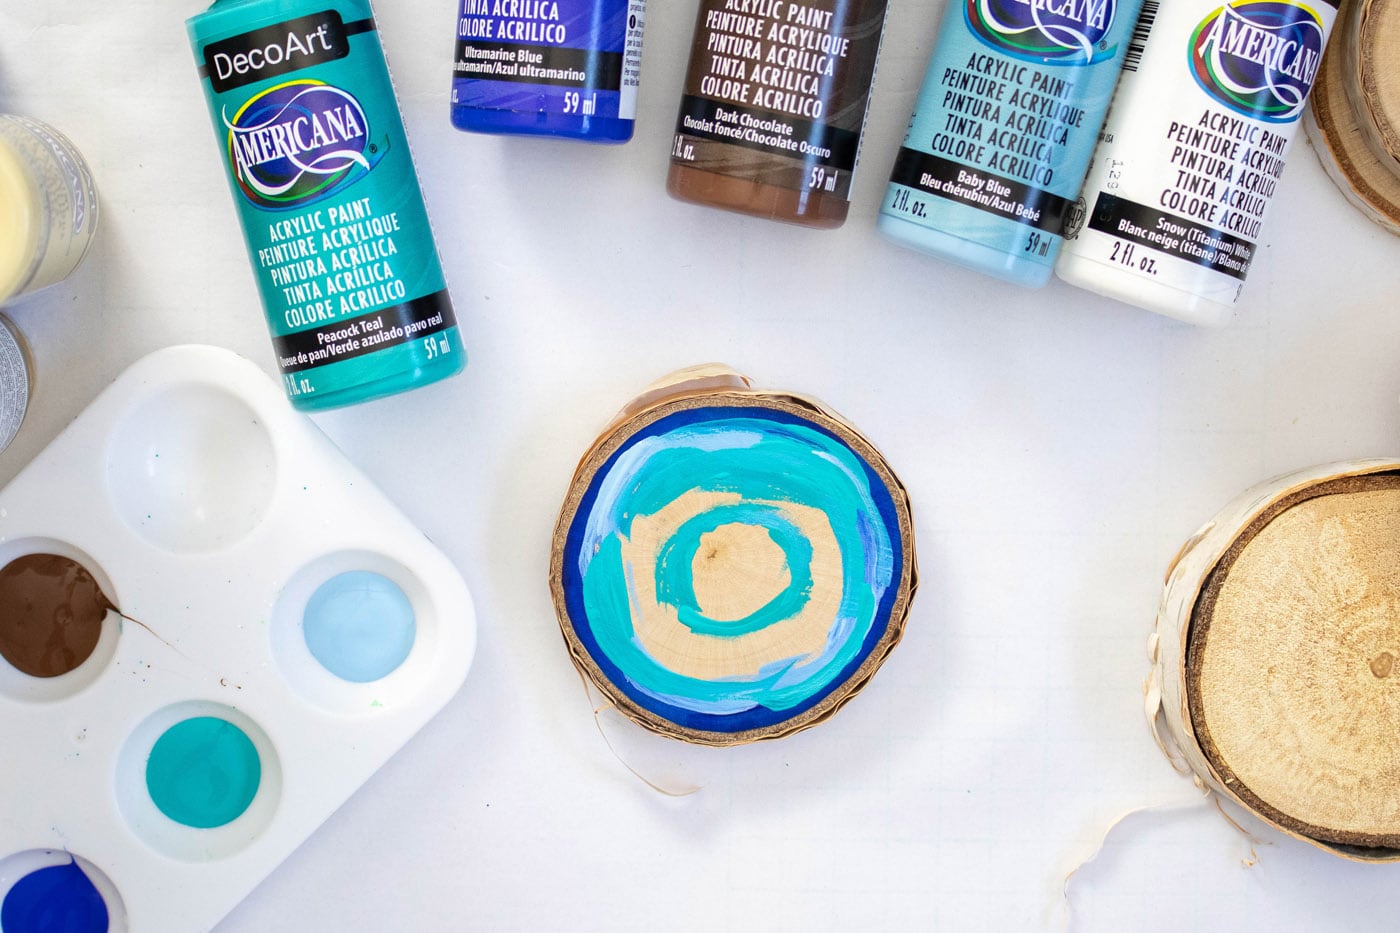
- Next, layer in the third blue (Peacock Teal). Paint uneven rounds and add another ring towards the center.
- Add curved lines of brown paint (Dark Chocolate), blending in with the blues. Swirl in lines of Snow (Titanium) White, overlapping with previous colors.
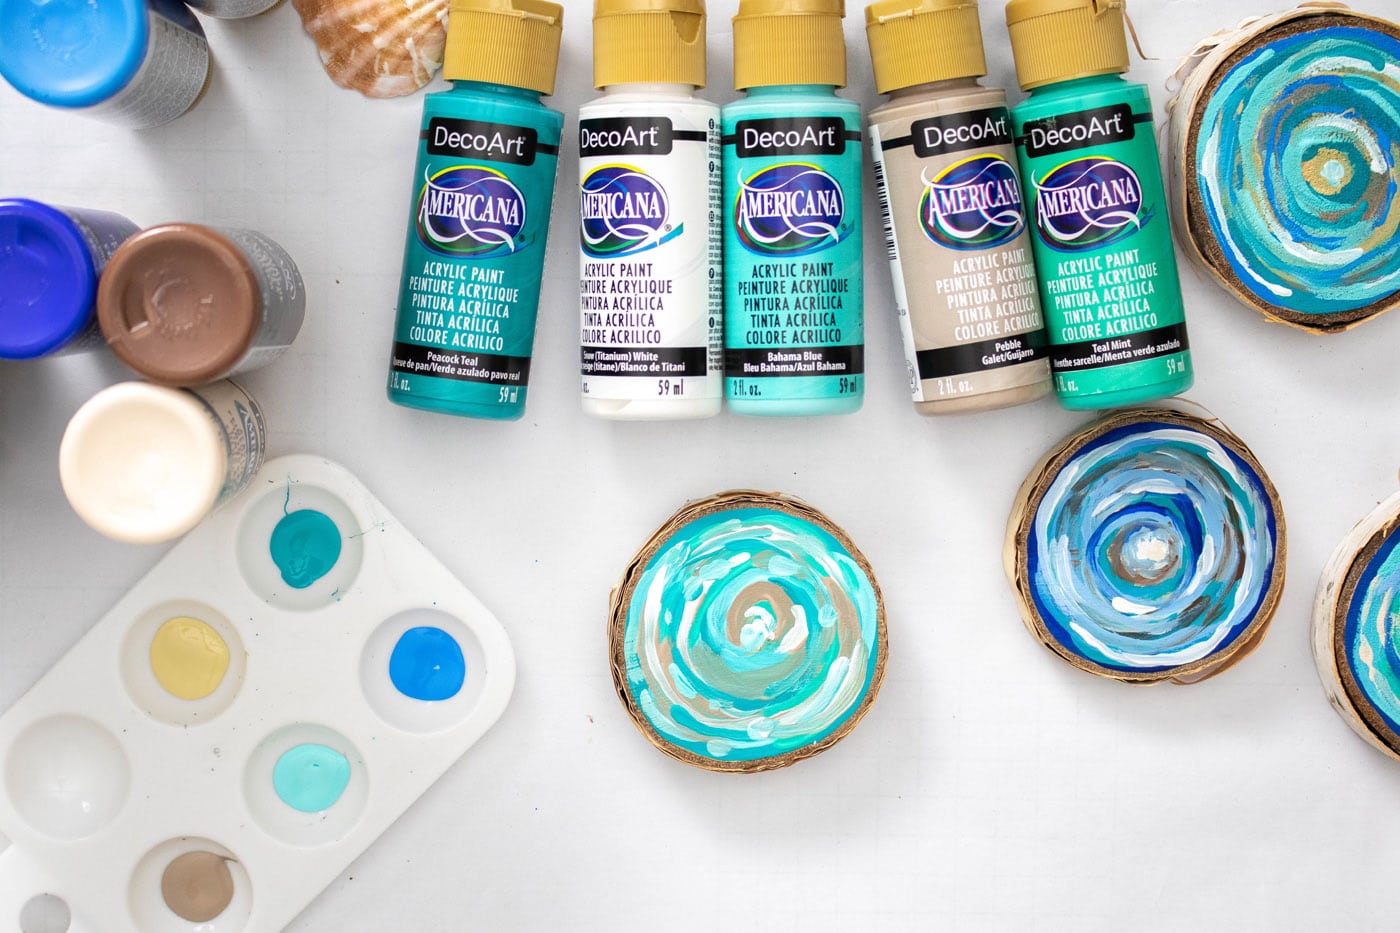
- Repeat the steps above with the following color combinations: -True Blue, Bahama Blue, Baby Blue, Teal Mint, Natural Buff -Ocean Blue, Peacock Teal, Dessert Sand, Bahama Blue, Pebble (+ White for accents) -Peacock Teal, Bahama Blue, Teal Mint, Pebble, Snow (Titanium) White.

Expert Crafting Tips
- Once the paints are completely dry, you can optionally add a coat of DuraClear High Gloss Varnish or clear resin for durability.
- We used birch wood slices, but you can paint on any kind of wood slice you want. Find birch rounds on Etsy, Amazon, Hobby Lobby, Michaels, or your local craft store. These are great natural wood slices as well!
- Drill a small hole at the top of your wood slices to hang them as ornaments for the holidays.
- These coasters are perfect for house warming or hostess gifts.
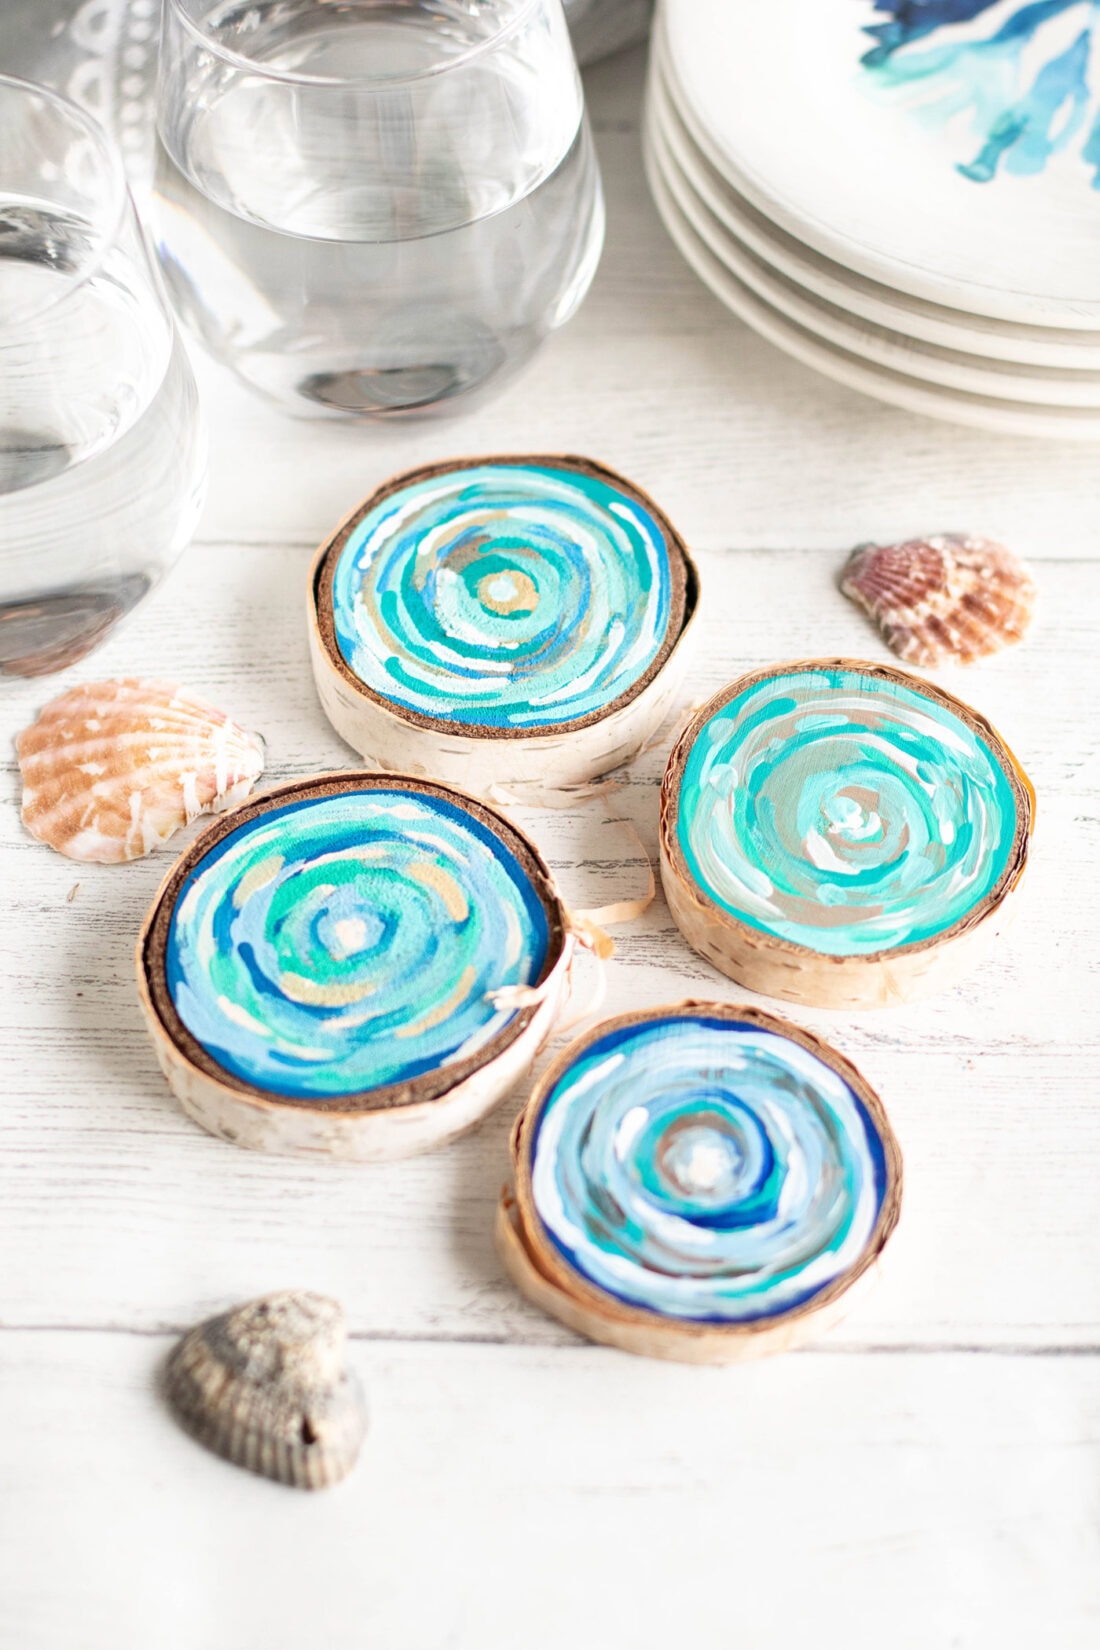
Keep these coastal wood slice coasters (say that ten times fast) for yourself or give them as a gift for the beach lover in your life! We’ve provided three different color combos for these coasters, however, they can be mixed and matched to fit your liking.
I’m sure you’ve noticed over the years my preference for DecoArt’s products. They are my preferred paints! You can see DecoArt’s library of free projects here.
More Coastal Crafts
I love to create and share my projects with you! I know it’s hard to remember to come back and search, so I’ve made it easy for you with my weekly newsletter! You can subscribe for free and I’ll send you fun crafts and delicious recipes every week right to your email.

Coastal Wood Slice Coasters
Supplies
- 4 round wood slices about 3-4” across and 1⁄8” thick
- DecoArt Coastal Color Acrylic Paint Set
- Duraclear coating or resin optional for durability
Craft tools
- Paint brushes, fine tip
- Paint palette
Instructions
- Make sure the wood slice surfaces are smoothly sanded before starting.
- Select five of the paint colors from the set for each coaster. Consider using three of the blues/greens and two of the taupes/browns. Don’t let the paint dry between colors as you want them to blend together.
- Start by painting the outer ring with the darkest blue/green color (Ultramarine Blue in this set). Layer in a lighter blue (Baby Blue) slightly overlapping the first ring.
- Next, layer in the third blue (Peacock Teal). Paint uneven rounds and add another ring towards the center.
- Add curved lines of brown paint (Dark Chocolate), blending in with the blues. Swirl in lines of Snow (Titanium) White, overlapping with previous colors.
Repeat the steps above with the following color combinations:
- -True Blue, Bahama Blue, Baby Blue, Teal Mint, Natural Buff
- -Ocean Blue, Peacock Teal, Dessert Sand, Bahama Blue, Pebble (+ White for accents)
- -Peacock Teal, Bahama Blue, Teal Mint, Pebble, Snow (Titanium) White
- Once the paints are completely dry, add a coat of DuraClear High Gloss Varnish or clear resin.
Expert Tips & FAQs
- Don’t allow the paint to dry inbetween colors, you want them to mix together seamlessly.
- We used birch wood slices, but you can paint on any kind of wood slice you want. Find birch rounds on Etsy, Amazon, Hobby Lobby, Michaels, or your local craft store.
- DIY Mosquito Repellent Candles - July 10, 2026
- Mason Jar Solar Lights - July 3, 2026
- Patriotic Pinwheels - June 23, 2026


Leave a Reply