• Home
  • About
    • About Crafts by Amanda
    • Visit Our Recipe Site
  • Work With Us
  • Join
    • Free Newsletters
    • Join our Facebook craft group
↑
  • Tutorials
    • Tutorial Index
    • Adult Crafts
    • Crafts for Kids
    • Crafts for Seniors
    • Recycled Crafts
    • Seasonal Crafts
    • Holiday Crafts
    • Free Printables
    • Craft Collections
  • Adult Crafts
    • Bath & Body
    • Beach Crafts
    • Clay Pot Crafts
    • Crafts for Seniors
    • Decoupage Crafts for Adults
    • DIY Gift ideas
    • Garden Crafts
    • Home Decor Projects
    • Kitchen Crafts
    • Light Bulb Crafts
    • Luminary Crafts
    • Mason Jar Crafts
    • Needlework
    • Photo Display Ideas
    • Recycled Crafts for Adults
    • Wearable Crafts for Adults
  • Crafts for Kids
    • Animal Crafts for Kids
    • Back to School Crafts
    • Beach Crafts for Kids
    • Camp Crafts
    • Cardboard Tube Crafts for Kids
    • Decoupage Crafts for Kids
    • Easy Crafts for Kids
    • Nature Crafts for Kids
    • Other Kid’s Crafts
    • Paper Plate Crafts for Kids
    • Recycled Crafts for Kids
    • Slimes, Doughs, & Clay
    • Wearable Crafts for Kids
  • Holiday Crafts
    • 4th of July Crafts
    • Christmas Crafts
    • DIY Gift ideas
    • Earth Day Crafts
    • Easter Crafts
    • Father’s Day Crafts
    • Halloween Crafts
    • Memorial Day Crafts
    • Mother’s Day Crafts
    • New Year’s
    • Other Holidays
    • Patriot Day Crafts
    • St. Patrick’s Day Crafts
    • Thanksgiving Crafts
    • Valentine’s Day Crafts
  • Seasonal Crafts
    • Winter Crafts
    • Spring Crafts
    • Summer Crafts
    • Fall Crafts
  • Skip to primary navigation
  • Skip to main content
  • Skip to primary sidebar
  • Skip to footer

Crafts by Amanda

crafts for adults and kid's crafts

  • Tutorials
    • Tutorial Index
    • Adult Crafts
    • Crafts for Kids
    • Crafts for Seniors
    • Recycled Crafts
    • Seasonal Crafts
    • Holiday Crafts
    • Free Printables
    • Craft Collections
  • Adult Crafts
    • Bath & Body
    • Beach Crafts
    • Clay Pot Crafts
    • Crafts for Seniors
    • Decoupage Crafts for Adults
    • DIY Gift ideas
    • Garden Crafts
    • Home Decor Projects
    • Kitchen Crafts
    • Light Bulb Crafts
    • Luminary Crafts
    • Mason Jar Crafts
    • Needlework
    • Photo Display Ideas
    • Recycled Crafts for Adults
    • Wearable Crafts for Adults
  • Crafts for Kids
    • Animal Crafts for Kids
    • Back to School Crafts
    • Beach Crafts for Kids
    • Camp Crafts
    • Cardboard Tube Crafts for Kids
    • Decoupage Crafts for Kids
    • Easy Crafts for Kids
    • Nature Crafts for Kids
    • Other Kid’s Crafts
    • Paper Plate Crafts for Kids
    • Recycled Crafts for Kids
    • Slimes, Doughs, & Clay
    • Wearable Crafts for Kids
  • Holiday Crafts
    • 4th of July Crafts
    • Christmas Crafts
    • DIY Gift ideas
    • Earth Day Crafts
    • Easter Crafts
    • Father’s Day Crafts
    • Halloween Crafts
    • Memorial Day Crafts
    • Mother’s Day Crafts
    • New Year’s
    • Other Holidays
    • Patriot Day Crafts
    • St. Patrick’s Day Crafts
    • Thanksgiving Crafts
    • Valentine’s Day Crafts
  • Seasonal Crafts
    • Winter Crafts
    • Spring Crafts
    • Summer Crafts
    • Fall Crafts
Craft Tutorials | Adult Crafts | Beach Crafts | DIY Driftwood Signs
Beach Crafts

DIY Driftwood Signs

Author by Jane and Sonja on February 17, 2019 Updated on December 6, 2020

5 from 2 votes
Give your cottage bedrooms some extra personality with these DIY driftwood signs for the door.
Jump to Project
Learn how to make a DIY rustic driftwood sign for the lake house or cottage! A fun bedroom decor idea with a step-by-step tutorial.
3643 shares
  • Share
  • Tweet
  • Flipboard
  • Email

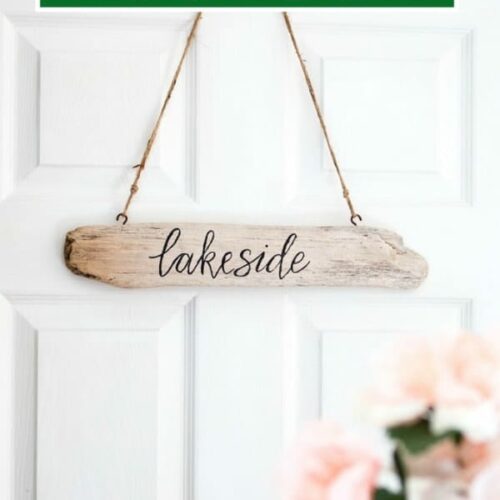
Turning driftwood into a cool rustic sign for your home is a wonderful way to add to your decor. Today we’re showing you how to make a rustic driftwood sign with some beach-found wood pieces and paint!

These DIY driftwood signs will be beautiful additions to your beach decor.

Beach Decor: Driftwood Signs


Driftwood Sign

Over the last several months we have been renovating our family cottage which we call Graystone Beach. So far we’ve completed the beach-themed bathroom remodel and a coastal-style bedroom makeover. We are now in the process of giving the second bedroom a bright and cheery coastal themed update.

Since we got tired of referring to the bedrooms as numbers one and two, we decided to give them names. The room towards the front of the cottage is now the Lakeside Room whereas the one towards the back is the Orchardview Room (yes, there is an orchard!).

And what respectable bedroom doesn’t have a driftwood sign on its door? These driftwood room signs reminded us of these lovely weathered beach signs made by Amanda.

Driftwood Sign 680

Supplies Needed for a DIY Driftwood Sign

  • flat, rectangular piece of sun-washed driftwood
  • black craft paint
  • small paintbrush
  • paper
  • pencil
  • small cup hooks
  • natural twine
  • thumbtack or other mounting hardware


Driftwood sign step 1 supplies needed to make driftwood signs

How to Make a Driftwood Sign

Clean the driftwood by brushing all the sand off. Or if it’s particularly dirty, consider washing it with soapy water and then baking it in the oven at 220F for 1 hour.

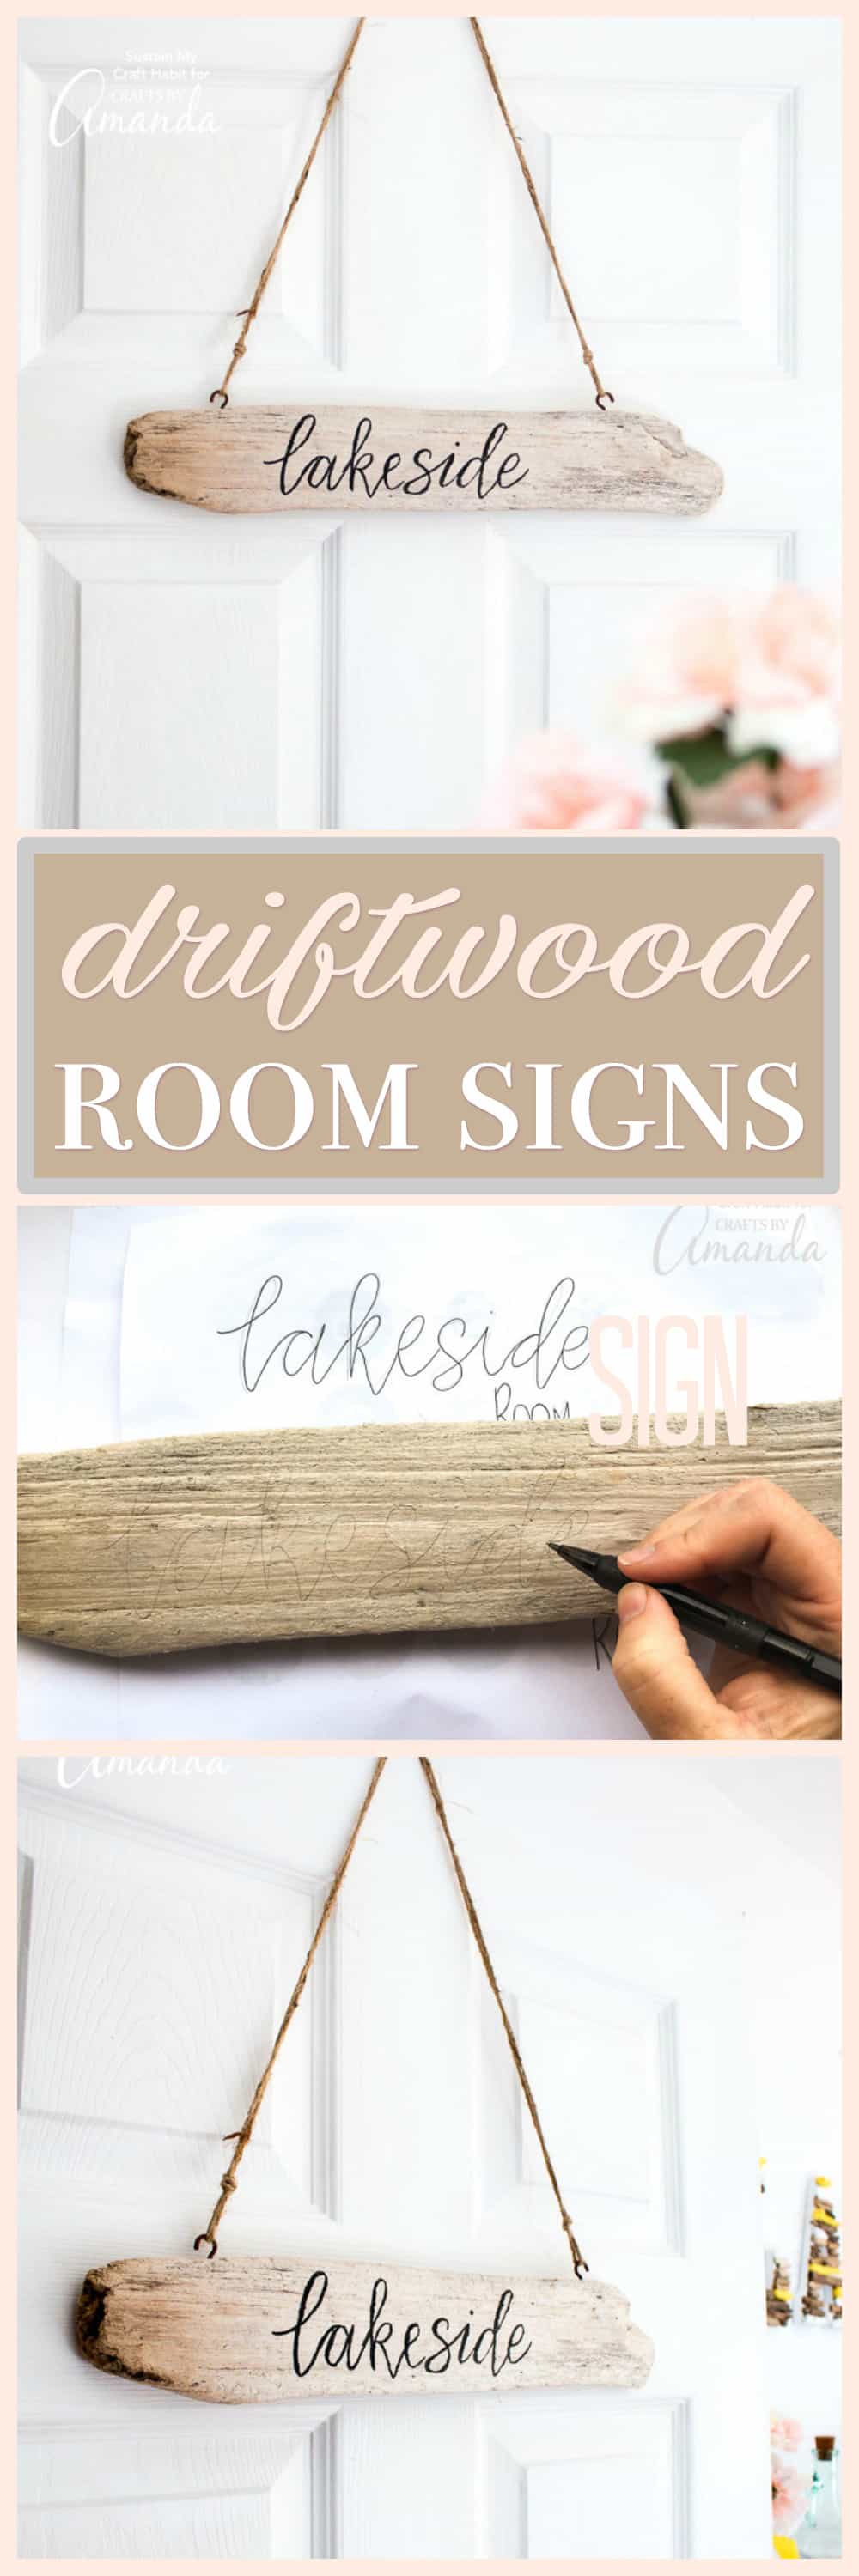
Practice your lettering on a piece of paper. We referred to some of our favorite fonts on Creative Market (specifically Miss Magnolia) for inspiration. Sketch the name of your choice onto paper to help figure out the letter shapes and spacing. You may need to practice this a few times to get the lettering you like.

Using a pencil and the paper sketch as a guide, duplicate the lettering onto the driftwood piece.

Driftwood sign step 2 create template on driftwood using pencil

Once you’re happy with the penciled lettering, paint over it with a small brush. Go slowly and use thin lines for the first pass.

Driftwood sign step 3 paint on words

Fill in any light lines and “thicken” any of the down-stroke lines.

Driftwood sign step 4 let paint dry

Once dry, attach cup hooks to the top of the driftwood sign, about 1″-2″ from each end.

Driftwood sign step 5 adding hook

Tie the twine through the loops creating an upside-down hanging “V” shape. Hang on the door by placing a flat-head thumb tack in the top of the door.

Driftwood sign step 6

Now you have your very own driftwood room sign! If you’re looking for another pretty way to use driftwood, check out this driftwood art! If you’re looking for more sign ideas, check out these 30 DIY ideas fo rustic signs. 

Be sure to check out our newest coastal decor project – make a beach terrarium.

Learn how to make a DIY rustic driftwood sign for the lake house or cottage! A fun bedroom decor idea with a step-by-step tutorial.
Print Project
5 from 2 votes

DIY Driftwood Room Signs

Give your cottage bedrooms some extra personality with these DIY driftwood signs for the door.
Author: Jane Vranic

Supplies

  • flat rectangular piece of sun-washed driftwood
  • black craft paint
  • small paintbrush
  • paper
  • pencil
  • small cup hooks
  • natural twine
  • tthumbtackor other mounting hardware

Instructions

  • Clean the driftwood by brushing all the sand off.
  • Practice your lettering on a piece of paper. Sketch the name of your choice onto paper to help figure out the letter shapes and spacing.
  • Using a pencil and the paper sketch as a guide, duplicate the lettering onto the driftwood piece.
  • Once you’re happy with the penciled lettering, paint over it with a small brush. Go slowly and use thin lines for the first pass.
  • Fill in any light lines and “thicken” any of the down-stroke lines with the paint.
  • Once dry, attach two hooks to the top of the driftwood sign. Tie the twine through the loops creating an upside-down hanging “V” shape. Hang on the door by placing a flat-head thumb tack in the top of the door.

Driftwood Sign beach decor

Learn how to make a DIY rustic driftwood sign for the lake house or cottage! A fun bedroom decor idea with a step-by-step tutorial.

DIY Driftwood Signs

This post was originally published on this blog on Aug 4, 2017.

  • Author
  • Recent Posts
Follow Along
Jane and Sonja
Bloggers at Sustain My Craft Habit
Jane and Sonja are sisters, moms and lifelong craft addicts both living near Toronto, Canada with their families. They share their love of creativity, nature and coastal craft and DIY ideas on their blog Sustain My Craft Habit.
Follow Along
Latest posts by Jane and Sonja (see all)
  • Kid-Friendly DIY Stained Glass - February 25, 2025
  • Pressed Flower Resin Magnets - February 21, 2025
  • Fabric Scrap Heart Garland - January 24, 2025
3643 shares
  • Share
  • Tweet
  • Flipboard
  • Email

Filed Under: Beach Crafts, DIY Gift ideas, Home Decor Projects, Summer Crafts Tagged With: adult crafts, beach crafts, beach decor, coastal decor, driftwood, home decor

Reader Interactions

Free CraftsBy email every week

Latest crafts straight to your inbox!

5 from 2 votes (2 ratings without comment)

Leave a Reply Cancel reply

Your email address will not be published. Required fields are marked *

Rate This Project


The maximum upload file size: 640 MB. You can upload: image, video. Links to YouTube, Facebook, Twitter and other services inserted in the comment text will be automatically embedded. Drop files here

Primary Sidebar

Hi! I’m Amanda and I’m the founder and head designer of Crafts by Amanda. I have spent over 25 years creating projects to share, but it’s not just me anymore! It’s turned into a complete family affair. Come and meet the Creative Team!

Free CraftsBy email every week

Latest crafts straight to your inbox!

All Time Favorites

Learn to make these adorable ladybug painted rocks. use special outdoor paint for this adorable garden craft so you can keep garden ladybugs all summer!

Ladybug Painted Rocks…

These colorful little ladybug painted rocks are the ... Go To project

snowy pinecone candle jar luminaries

Winter Luminaries: Snowy Pinecone…

Make pretty winter luminaries that appear to be covered ... Go To project

Make this wonderful deco mesh pumpkin wreath to hang on your door this fall!

Deco Mesh Pumpkin Wreath…

Adorn your door this fall with a pretty deco mesh ... Go To project

Reuse those empty prescription pill bottles in all sorts of ways. From organizing to making cookies. Yes, cookies! See how to use your empty pill bottles!

20 Uses for Prescription Pill…

You've been collecting prescription pill bottles for ... Go To project

Meet the Family

Amanda

Founder and Designer

Kristen

Editorial Manager

Lindsay

Social Media Manager

As seen on:

Footer

Favorites

  • Jar Photo Frames
  • No-Sew Roman Shade
  • Paper Flowers
  • How to Make a Scrunchie
  • Mermaid Slime

About

  • Home
  • Meet the Creative Team
  • Work with Us
  • Privacy Policy
  • Accessibility
  • Contact Us

Images/text copyright Amanda Formaro 2020. To feature a post from Crafts by Amanda, you may use one photo credited and linked back directly to the project post.

Free CraftsBy email every week

Latest crafts straight to your inbox!

Copyright ©2025, Crafts by Amanda. All Rights Reserved.
Design by Pixel Me Designs

Rate This Tutorial

Your vote:


To share a photo with your comment click here!

A rating is required
A name is required
An email is required

Recipe Ratings without Comment

Something went wrong. Please try again.