• Home
  • About
    • About Crafts by Amanda
    • Visit Our Recipe Site
  • Work With Us
  • Join
    • Free Newsletters
    • Join our Facebook craft group
↑
  • Tutorials
    • Tutorial Index
    • Adult Crafts
    • Crafts for Kids
    • Crafts for Seniors
    • Recycled Crafts
    • Seasonal Crafts
    • Holiday Crafts
    • Free Printables
    • Craft Collections
  • Adult Crafts
    • Bath & Body
    • Beach Crafts
    • Clay Pot Crafts
    • Crafts for Seniors
    • Decoupage Crafts for Adults
    • DIY Gift ideas
    • Garden Crafts
    • Home Decor Projects
    • Kitchen Crafts
    • Light Bulb Crafts
    • Luminary Crafts
    • Mason Jar Crafts
    • Needlework
    • Photo Display Ideas
    • Recycled Crafts for Adults
    • Wearable Crafts for Adults
  • Crafts for Kids
    • Animal Crafts for Kids
    • Back to School Crafts
    • Beach Crafts for Kids
    • Camp Crafts
    • Cardboard Tube Crafts for Kids
    • Decoupage Crafts for Kids
    • Easy Crafts for Kids
    • Nature Crafts for Kids
    • Other Kid’s Crafts
    • Paper Plate Crafts for Kids
    • Recycled Crafts for Kids
    • Slimes, Doughs, & Clay
    • Wearable Crafts for Kids
  • Holiday Crafts
    • 4th of July Crafts
    • Christmas Crafts
    • DIY Gift ideas
    • Earth Day Crafts
    • Easter Crafts
    • Father’s Day Crafts
    • Halloween Crafts
    • Memorial Day Crafts
    • Mother’s Day Crafts
    • New Year’s
    • Other Holidays
    • Patriot Day Crafts
    • St. Patrick’s Day Crafts
    • Thanksgiving Crafts
    • Valentine’s Day Crafts
  • Seasonal Crafts
    • Winter Crafts
    • Spring Crafts
    • Summer Crafts
    • Fall Crafts
  • Skip to primary navigation
  • Skip to main content
  • Skip to primary sidebar
  • Skip to footer

Crafts by Amanda

crafts for adults and kid's crafts

  • Tutorials
    • Tutorial Index
    • Adult Crafts
    • Crafts for Kids
    • Crafts for Seniors
    • Recycled Crafts
    • Seasonal Crafts
    • Holiday Crafts
    • Free Printables
    • Craft Collections
  • Adult Crafts
    • Bath & Body
    • Beach Crafts
    • Clay Pot Crafts
    • Crafts for Seniors
    • Decoupage Crafts for Adults
    • DIY Gift ideas
    • Garden Crafts
    • Home Decor Projects
    • Kitchen Crafts
    • Light Bulb Crafts
    • Luminary Crafts
    • Mason Jar Crafts
    • Needlework
    • Photo Display Ideas
    • Recycled Crafts for Adults
    • Wearable Crafts for Adults
  • Crafts for Kids
    • Animal Crafts for Kids
    • Back to School Crafts
    • Beach Crafts for Kids
    • Camp Crafts
    • Cardboard Tube Crafts for Kids
    • Decoupage Crafts for Kids
    • Easy Crafts for Kids
    • Nature Crafts for Kids
    • Other Kid’s Crafts
    • Paper Plate Crafts for Kids
    • Recycled Crafts for Kids
    • Slimes, Doughs, & Clay
    • Wearable Crafts for Kids
  • Holiday Crafts
    • 4th of July Crafts
    • Christmas Crafts
    • DIY Gift ideas
    • Earth Day Crafts
    • Easter Crafts
    • Father’s Day Crafts
    • Halloween Crafts
    • Memorial Day Crafts
    • Mother’s Day Crafts
    • New Year’s
    • Other Holidays
    • Patriot Day Crafts
    • St. Patrick’s Day Crafts
    • Thanksgiving Crafts
    • Valentine’s Day Crafts
  • Seasonal Crafts
    • Winter Crafts
    • Spring Crafts
    • Summer Crafts
    • Fall Crafts
Craft Tutorials | Seasonal Crafts | Fall Crafts | Easy Fabric Pumpkins
Fall Crafts

Easy Fabric Pumpkins

Author by Amanda Davis on September 28, 2017 Updated on September 4, 2022

1648 shares
  • Share
  • Tweet
  • Flipboard
  • Email

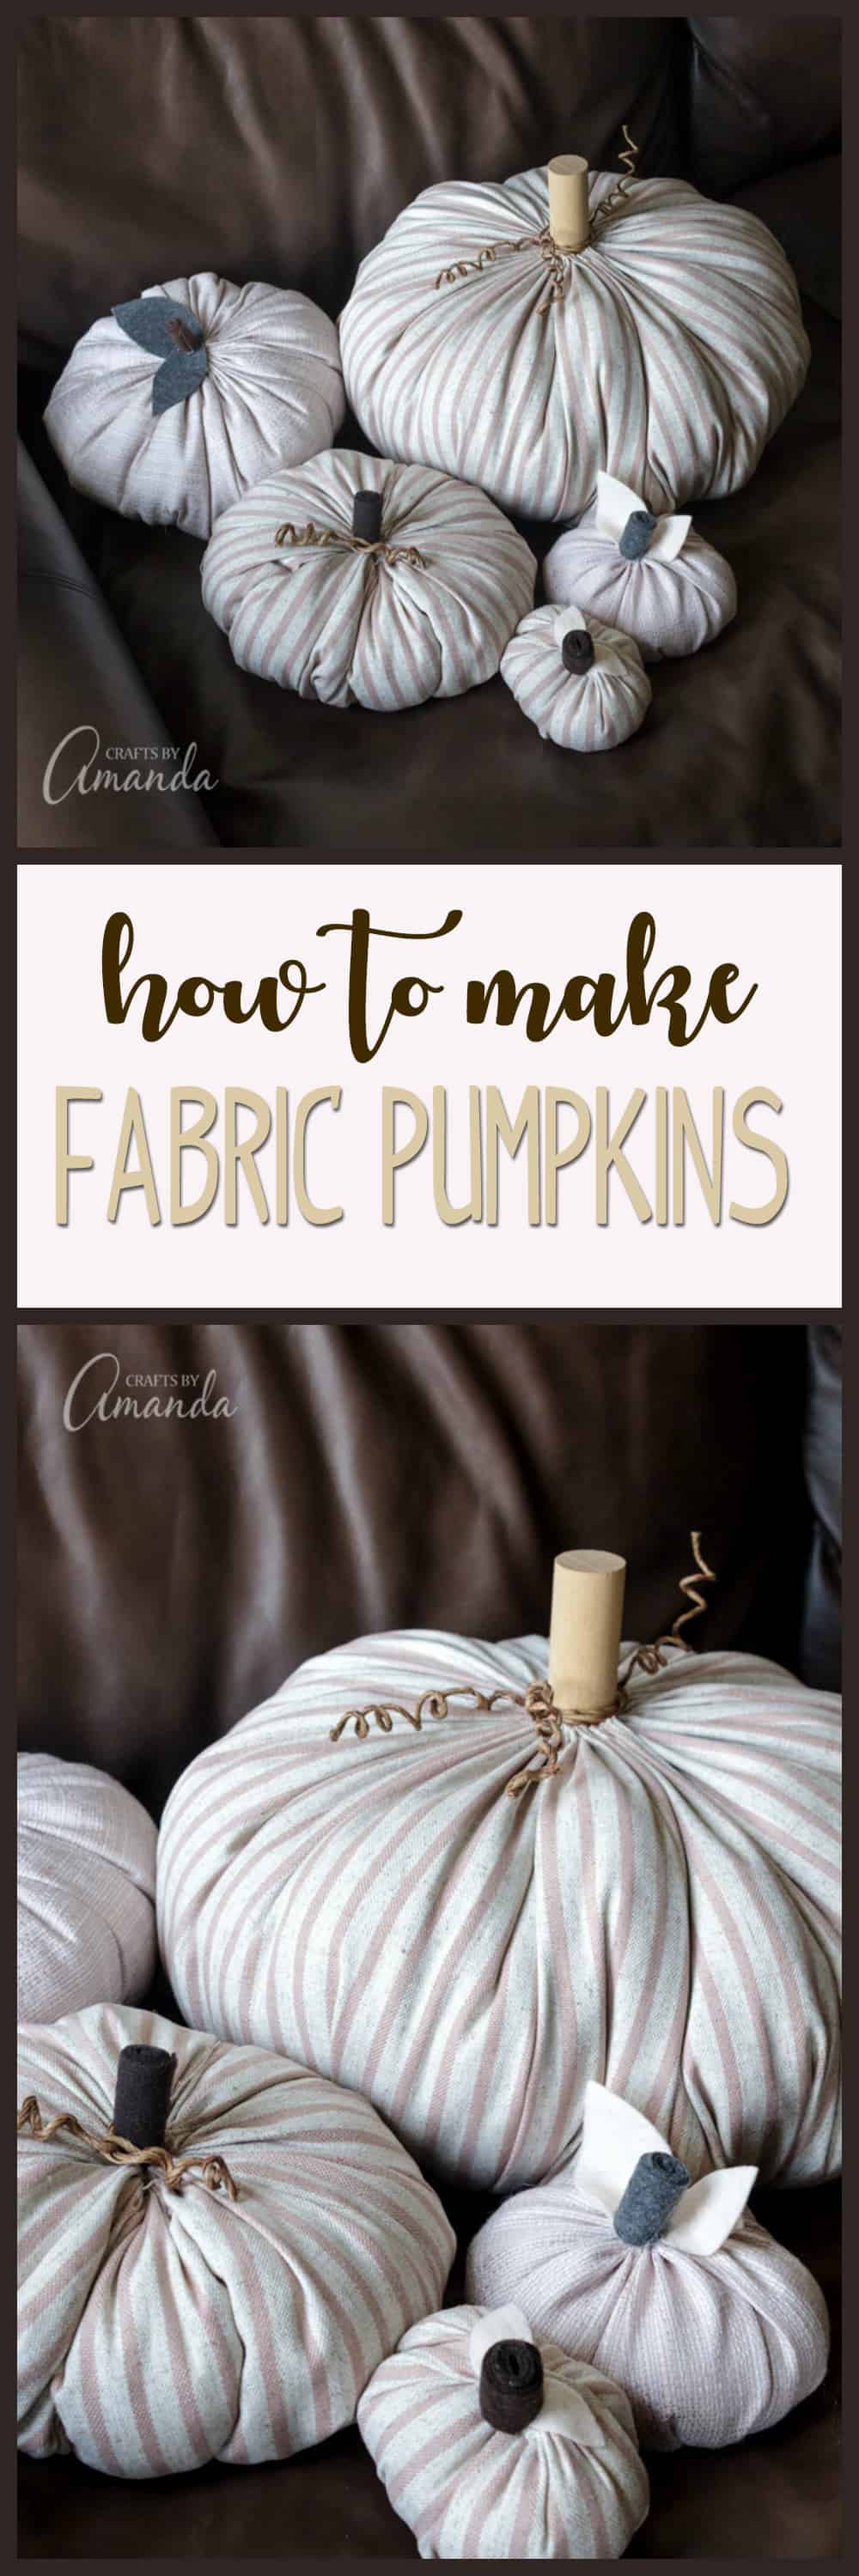
If you’re looking for a fun, fresh way to decorate for fall, make these easy fabric pumpkins to dress up just about any room! Sew up some smaller fabric pumpkins to use on the table, mantle or a shelf, and make bigger ones to put on the porch, bed or coffee table. This post is sponsored by Waverly but the content and opinions expressed here are my own.

Pumpkins made from fabric


Easy Fabric Pumpkins

I know that pumpkins are traditionally orange, but we now live in a Pinterest-crazed world full of design possibilities! You don’t have to be traditional if you don’t want to. Instead, break out of that box and use fabrics and colors that you love. I chose these two designs from the Waverly Design Series at Joann.

Related Craft – DIY Succulent Pumpkin Decor

How to make cute fabric pumpkins

I chose a solid light rose-colored fabric and a trendy striped fabric, giving my fabric pumpkins a much more modern feel. A year ago I would have stuck with a more rustic, country design. But I’ve moved out of the county and into a small metropolis, and my modern apartment seemed to be screaming for some stylish fall decor.

Fabric Pumpkin Supply List

  • Fabric of your choice
  • Polyfil
  • Embroidery floss
  • Felt
  • Vine wrapped craft wire

Tools you will need:

  • Sewing machine
  • Hot glue gun
  • Scissors
  • Tapestry needle


First, cut fabric into rectangles with a ratio of 2:1.

First, cut fabric into rectangles with a ratio of 2:1. For example, my largest pumpkin measured 11″ x 22″. One of my smallest pumpkins started with a rectangle measuring 4″ x 8″. You can use any size you want, just make sure that the width is twice as long as the height.

You will need 2 rectangles for each pumpkin. Once they are cut, place one of top of the other, right sides facing each other. This particular fabric in the photo is double sided.

Next sew the two short sides together.

Next sew the two short sides together. Be sure that you back stitch at each end to avoid any accidental unraveling.

Using your tapestry needle and embroidery floss, sew a simple running stitch along the long edge.

Pro Tip: Instead of tying a knot at the end of the thread, leave a 12-inch long tail. This is especially helpful with a fabric that has a high thread count so that you don’t accidentally pull the knot through when gathering (see below).

Gather all the fabric by pulling the threads.

Using your tapestry needle and embroidery floss, sew a simple running stitch along the long edge. Do not sew the two long edges together. Keep them separate and continue the running stitch all the way around.

Next, gently pull on both ends of the thread (your needle on one end and the tail you left at the other) which will gather the fabric. Continue gathering until you have a snug circle. Tie the tail end and the needle end together to create a knot, then sew back and forth through the gathered center to close off any gaps.

Now gather the fabric by gently pulling on the thread.

Turn the fabric right side out. With your gathered circle at the bottom, do another running stitch (with a tail) all the way around the top of the “pumpkin”. Do not start pulling and gathering just yet.

Fill the fabric about 2/3 with Polyfil.

Fill the fabric about 2/3 with Polyfil. Begin gathering by gently pulling on both the needle end and tail end. Gather about half way then start adding more Polyfil, pushing it carefully down into the pumpkin.

Pro Tip: It is very helpful to have a friend assist you during this step. As you are stuffing the pumpkin, you will need to hold both ends of the embroidery floss. This can be challenging at best! Ask a friend to stuff or hold the threads.

Work together to carefully stuff and gather and tighten up the opening. We found it easiest if one gathered the fabric into the center with their hands and the other tightened the threads. This eliminated the massive amount of tension that there would have been without someone holding the center.

windowsill fabric pumpkins

Now you are ready to add leaves, stems and tendrils! For all except the largest pumpkin is simply rolled up strips of felt and secured them closed with hot glue. I also cut very simple leaves from felt and glued everything in place.

a bunch of fabric pumpkins

For the largest pumpkin I just happened to have a really fat wooden dowel that fit into the center hole perfectly! To make the tendrils, simply wrap the vine craft wire around a paintbrush handle or pencil to create the curls.

And there you have it. Your very own fabric pumpkin patch! A great way to dress up your fall decor.

Try your hand at my decomesh pumpkin wreath too!

FABRIC PUMPKINS! Learn how to make these chic pumpkins with minimal sewing.
  • Author
  • Recent Posts
Amanda Davis
Amanda Davis is the crafty, entrepreneurial mother of four children. She loves to bake, cook, make kid's crafts and create decorative items for her home. She is a crafting expert and guru in the kitchen and has appeared online and in print publications many times over the years.
Latest posts by Amanda Davis (see all)
  • Paper Plate Aquarium Craft - June 17, 2025
  • Patriotic Bandana Wreath - June 13, 2025
  • Ladybug Painted Rocks - June 10, 2025
1648 shares
  • Share
  • Tweet
  • Flipboard
  • Email

Filed Under: Crafts for Seniors, Fall Crafts, Home Decor Projects, Needlework, Sponsored Posts, Thanksgiving Crafts Tagged With: autumn, fabric pumpkin, fall, linqia, pumpkin, pumpkins, sewing

Reader Interactions

Free CraftsBy email every week

Latest crafts straight to your inbox!

Comments

  1. Barbara says

    September 30, 2017 at 9:06 am

    I love fabric pumpkins! I’ve made quite a few – from chenille to flannel to tapestry fabric (or upholstery fabric.) I never get tired of them and I like the handmade effect. Yours are delightful. I like the stem you made from rolled felt. Thanks so much for sharing your technique!

    Reply

Leave a Reply Cancel reply

Your email address will not be published. Required fields are marked *

Rate This Project


The maximum upload file size: 640 MB. You can upload: image, video. Links to YouTube, Facebook, Twitter and other services inserted in the comment text will be automatically embedded. Drop files here

Primary Sidebar

Hi! I’m Amanda and I’m the founder and head designer of Crafts by Amanda. I have spent over 25 years creating projects to share, but it’s not just me anymore! It’s turned into a complete family affair. Come and meet the Creative Team!

Free CraftsBy email every week

Latest crafts straight to your inbox!

All Time Favorites

Learn to make these adorable ladybug painted rocks. use special outdoor paint for this adorable garden craft so you can keep garden ladybugs all summer!

Ladybug Painted Rocks…

These colorful little ladybug painted rocks are the ... Go To project

snowy pinecone candle jar luminaries

Winter Luminaries: Snowy Pinecone…

Make pretty winter luminaries that appear to be covered ... Go To project

Make this wonderful deco mesh pumpkin wreath to hang on your door this fall!

Deco Mesh Pumpkin Wreath…

Adorn your door this fall with a pretty deco mesh ... Go To project

Reuse those empty prescription pill bottles in all sorts of ways. From organizing to making cookies. Yes, cookies! See how to use your empty pill bottles!

20 Uses for Prescription Pill…

You've been collecting prescription pill bottles for ... Go To project

Meet the Family

Amanda

Founder and Designer

Kristen

Editorial Manager

Lindsay

Social Media Manager

As seen on:

Footer

Favorites

  • Jar Photo Frames
  • No-Sew Roman Shade
  • Paper Flowers
  • How to Make a Scrunchie
  • Mermaid Slime

About

  • Home
  • Meet the Creative Team
  • Work with Us
  • Privacy Policy
  • Accessibility
  • Contact Us

Images/text copyright Amanda Formaro 2020. To feature a post from Crafts by Amanda, you may use one photo credited and linked back directly to the project post.

Free CraftsBy email every week

Latest crafts straight to your inbox!

Copyright ©2025, Crafts by Amanda. All Rights Reserved.
Design by Pixel Me Designs