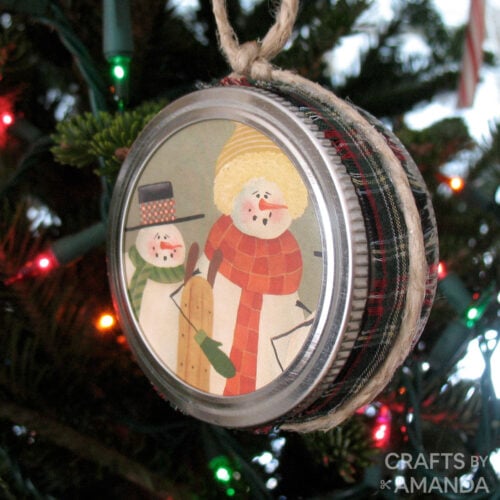
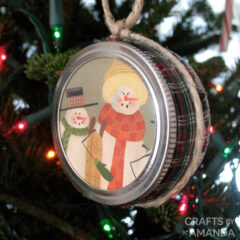
Making homemade ornaments is fun and a great way to recycle items you can no longer use. These mason jar lid snowman ornaments are a great way to use old Christmas cards too!
Why we love this project
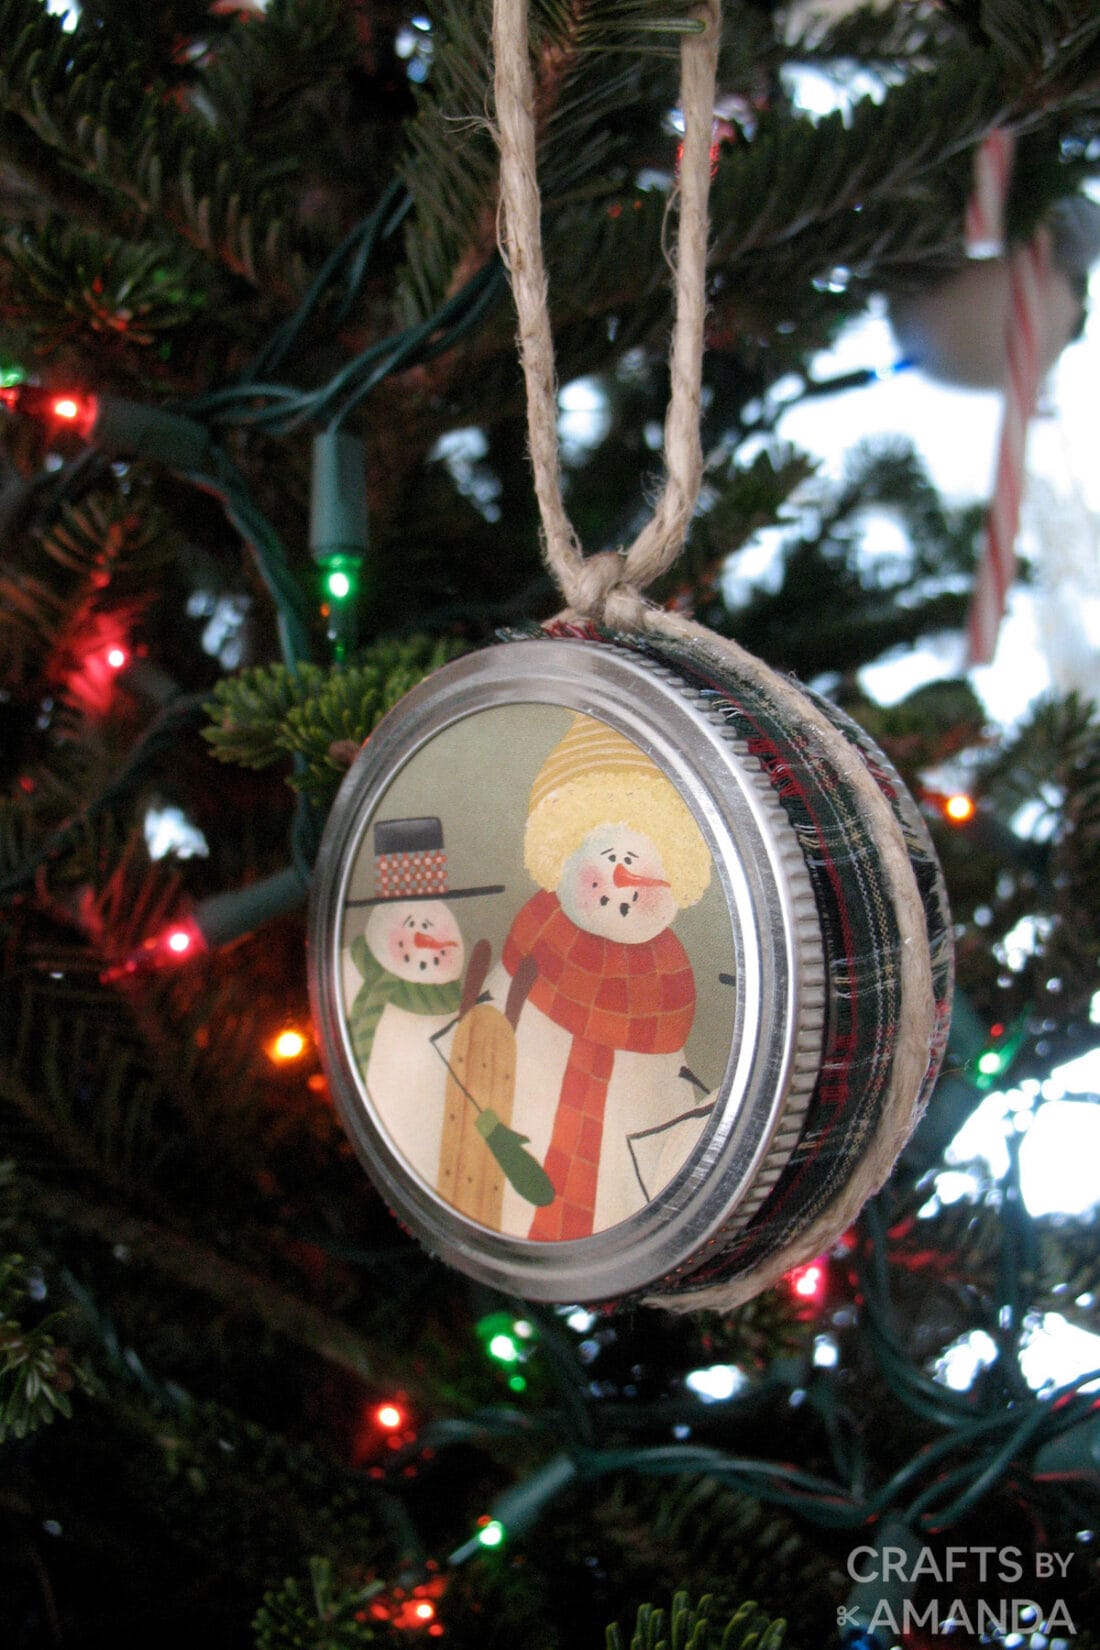
Everyone loves cute snowmen. These ornaments are fun to make and make great gifts. They can be customized to your favorite style, they don’t have to have the rustic look we chose.
I made these mason jar lid snowman ornaments in December 2010, and I still hang them on my tree every year.
Helpful Project Information:
- Age Level: 12 and up
- Mess Factor: Medium
- Level of Difficulty: Easy
- Time to Complete: Less than 30 minutes
- Cost Estimate: Less than $1.00
Craft supplies you will need
I used old canning lids and bands, cotton batting, a plastic bag, gingham material, twine, and some extra Christmas cards I had left over.
Get full list of supplies and directions in the printable version at the end of this post.
How to a Make a Mason Jar Lid Snowman Ornament
These step by step photos and instructions are here to help you visualize how to make this project. Please scroll down to simply print out the instructions!
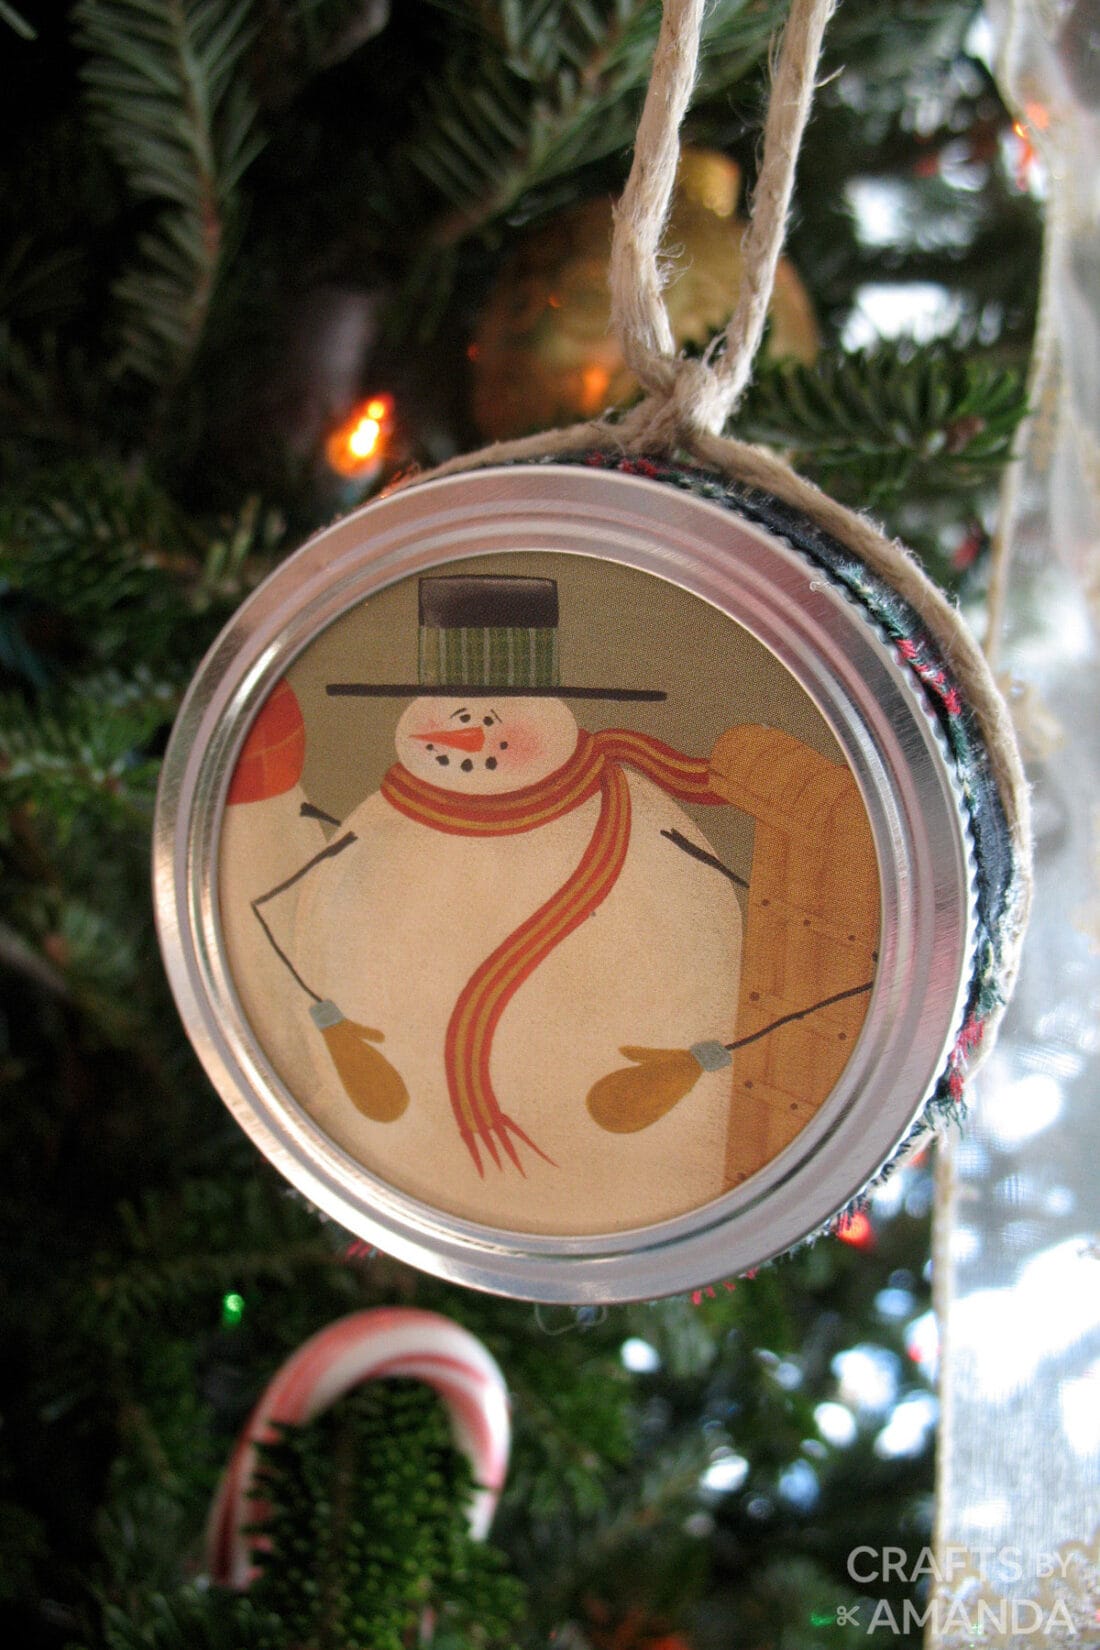
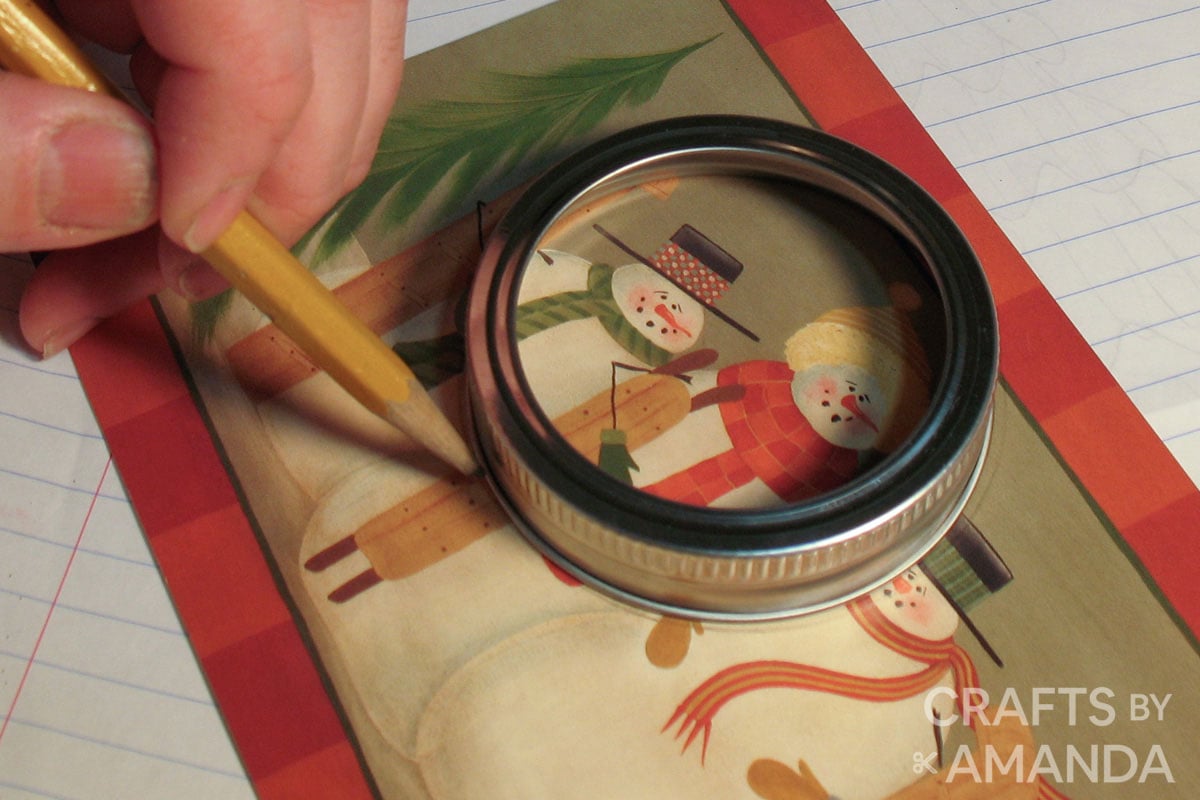
- Center canning band over the section of the card that you want to use and trace around it with a pencil. Cut out the circle, you will need two for each ornament. You may need to trim a small amount around the entire circle for it to fit inside the band. Set aside.

- Turn the canning band upside down and pipe glue around the inside edge. Place the cut out circle upside down into the canning band so that the design will show on the outside. Repeat for the second card and band.

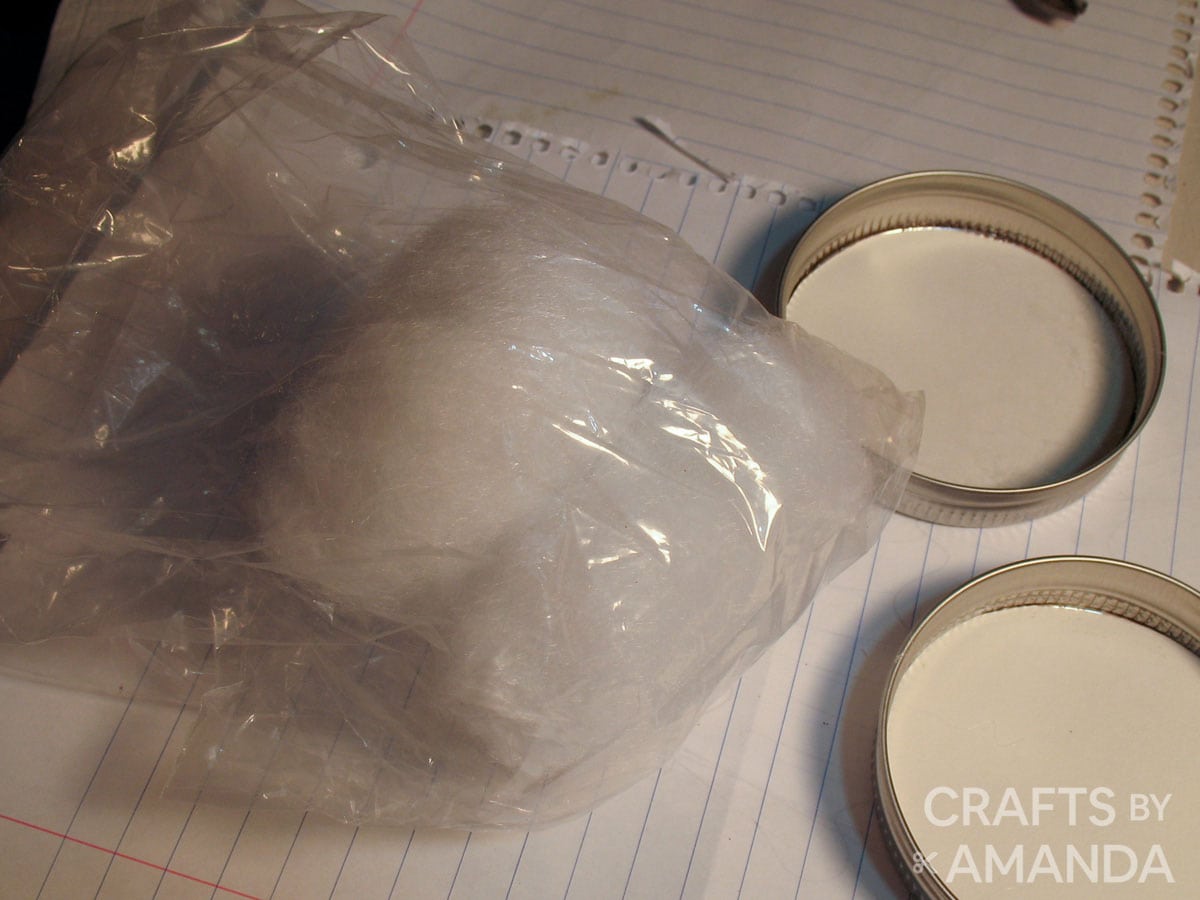
- Place some cotton batting into a small bag. Using the bag will help contain the batting so it’s not poking out while you assemble the ornament.
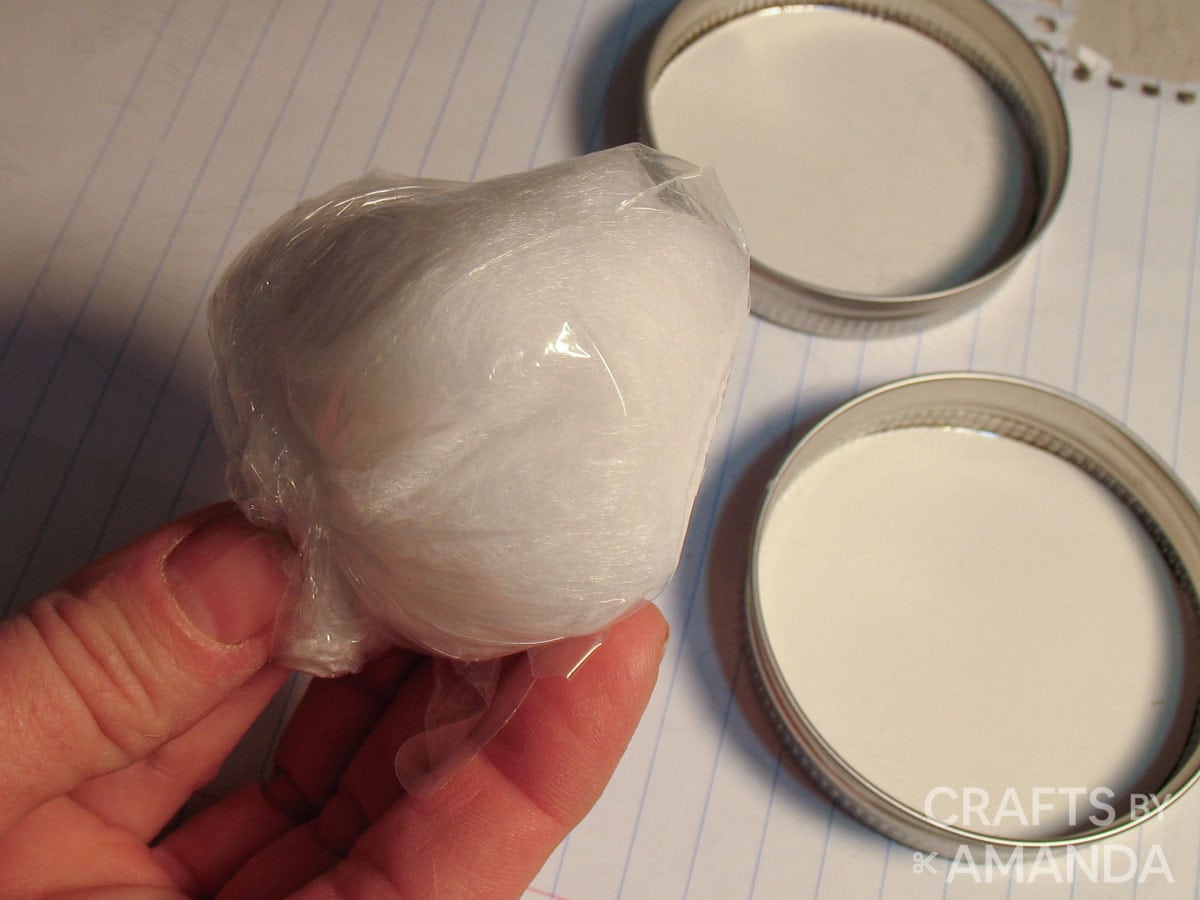
- You want enough batting to fill the empty space that will be in between the two canning bands when you put them together. But not too much that it will put pressure on the cards and force them to pop out. Twist the open end of the bag to close it, secure it with tape.
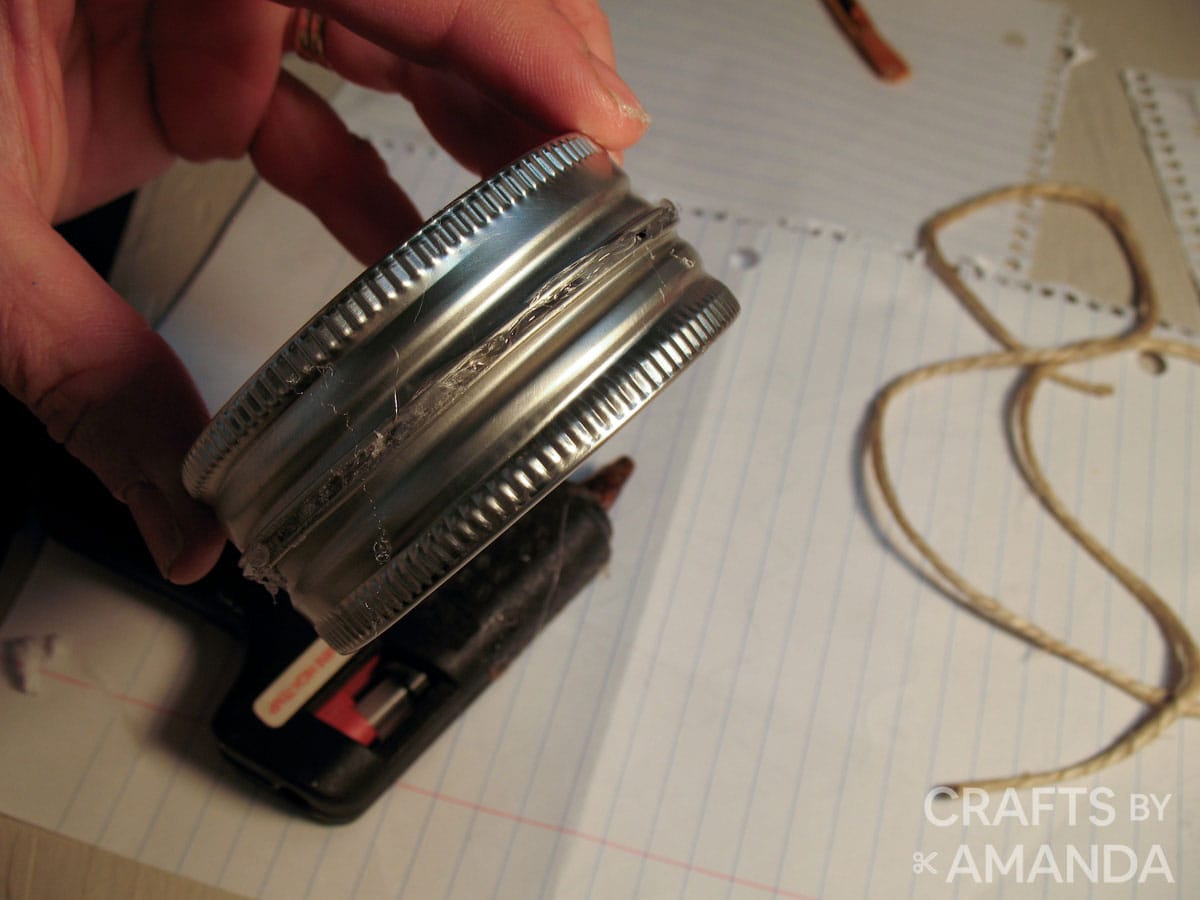
- Place the bagged batting into one of the bands then glue the bands together.
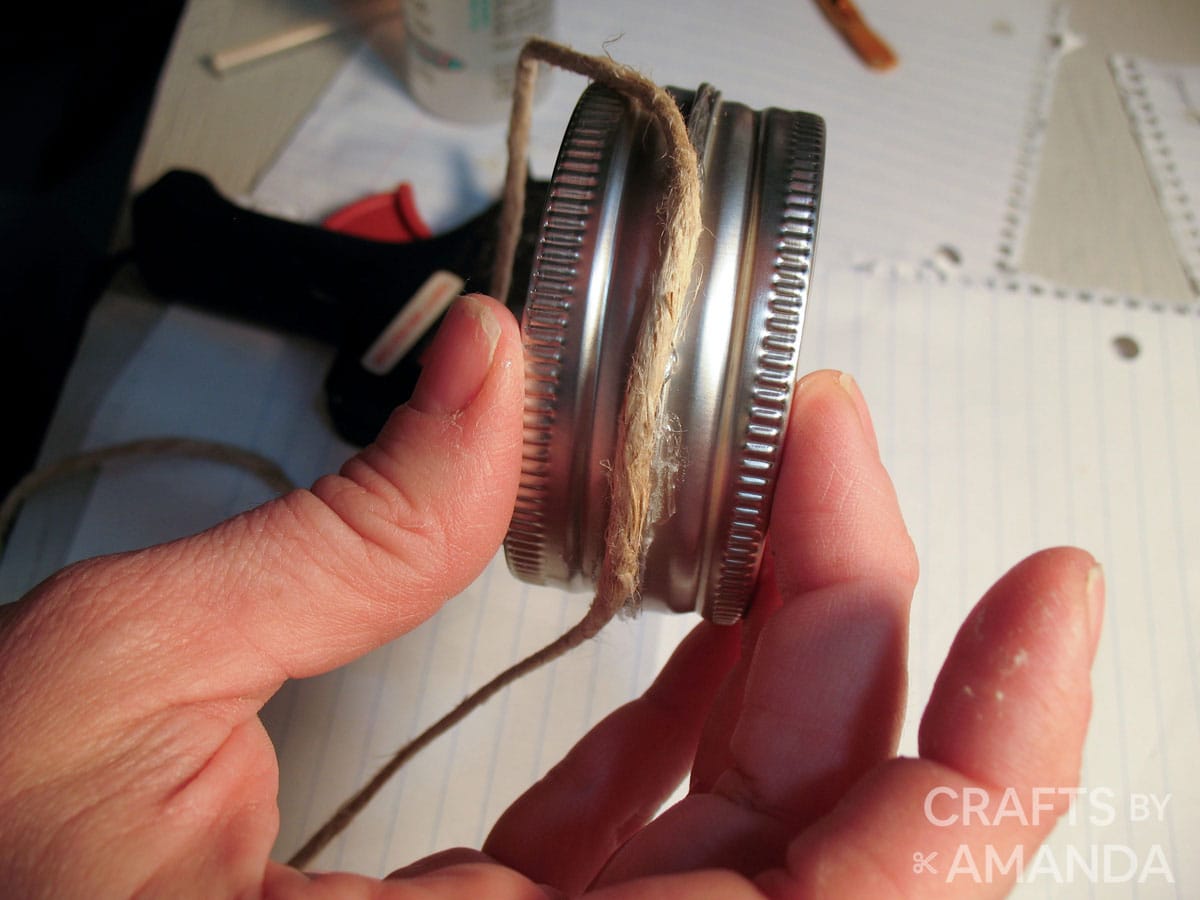
- Wrap twine around the middle of the ornament where the two bands come together, glue in place.
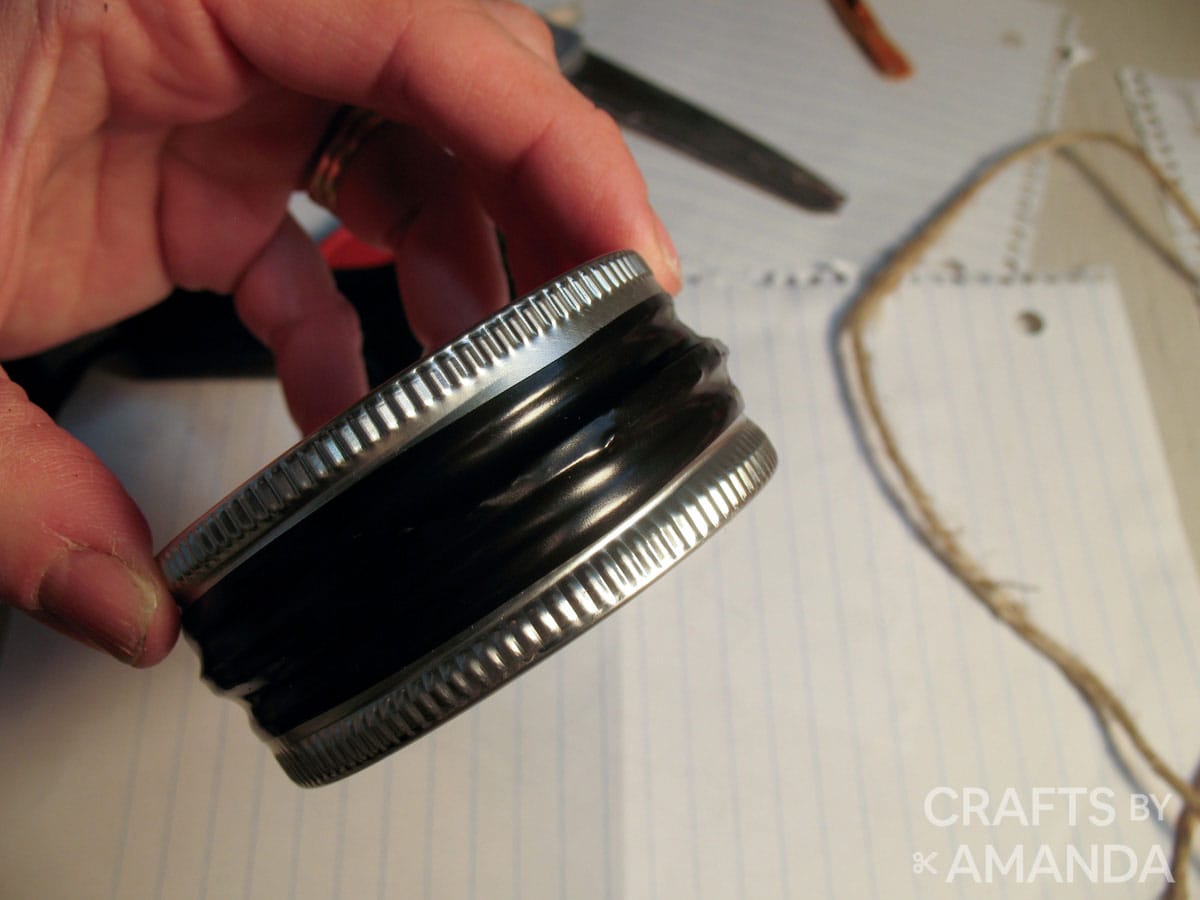
- For added security, wrap the center of the band with black electrical tape.
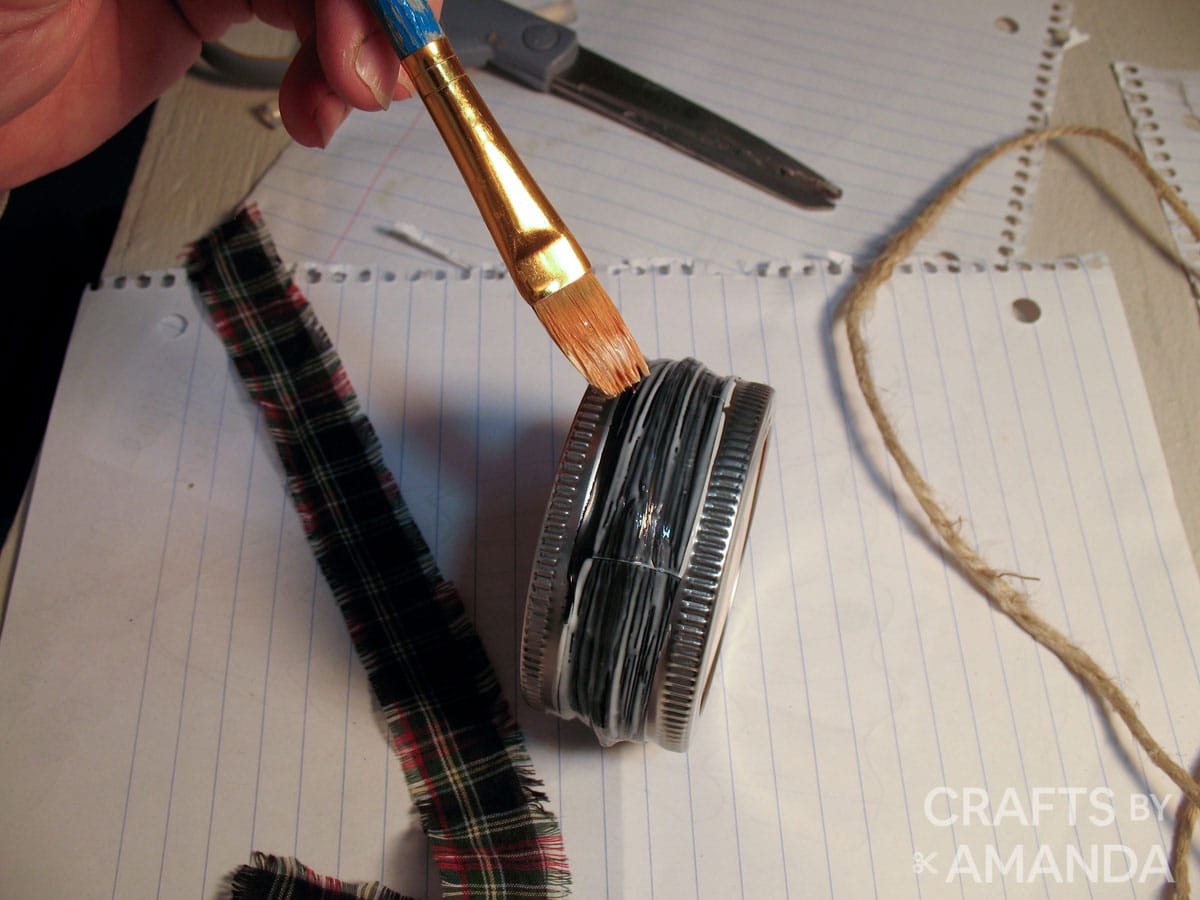
- Cut a strip of fabric wide enough to cover the tape. Brush glue onto the electrical tape and wrap the fabric around it.
- Tie a piece of twine around the band to create a hanger.


Expert Crafting Tips
I don’t recommend hot glue for this project. It may hold, but it may not due to the surface not being porous. A glue like Beacons 3-in-1 or E-6000 is a better choice. See my post on how to choose the best glue for your craft project for more!
I hope you have fun making these mason jar lid snowman ornaments! Or course they don’t have to be snowmen, you can use any design you like. A great way to use left over Christmas cards!
More Ornament Crafts
- Corrugated Cardboard Snowman Ornaments
- Let it Snow – Scrabble Tile Ornament
- Decoupage Wood Slice Ornaments
- Gingerbread Man Canning Lid Ornament
- Pinecone Snowman
- Hot Glue Icicle Ornaments
I love to create and share my projects with you! I know it’s hard to remember to come back and search, so I’ve made it easy for you with my weekly newsletter! You can subscribe for free and I’ll send you fun crafts and delicious recipes every week right to your email.
Mason Jar Lid Snowman Ornaments
Supplies
- Canning bands
- Cotton batting
- Plastic bag
- Fabric of your choice
- Twine or ribbon
- Christmas cards
Craft tools
- Electrical tape
- Beacons 3-in-1 glue or E6000
Instructions
- Center canning band over the section of the card that you want to use and trace around it with a pencil. Cut out the circle, you will need two for each ornament. You may need to trim a small amount around the entire circle for it to fit inside the band. Set aside.
- Turn the canning band upside down and pipe glue around the inside edge. Place the cut out circle upside down into the canning band so that the design will show on the outside. Repeat for the second card and band.
- Place some cotton batting into a small bag. Using the bag will help contain the batting so it’s not poking out while you assemble the ornament. batting in a bag
- You want enough batting to fill the empty space that will be in between the two canning bands when you put them together. But not too much that it will put pressure on the cards and force them to pop out. Twist the open end of the bag to close it, secure it with tape.
- Place the bagged batting into one of the bands then glue the bands together.
- Wrap twine around the middle of the ornament where the two bands come together, glue in place.
- For added security, wrap the center of the band with black electrical tape.
- Cut a strip of fabric wide enough to cover the tape. Brush glue onto the electrical tape and wrap the fabric around it.
- Tie a piece of twine around the band to create a hanger.
Expert Tips & FAQs
- Swirling Twirling Ladybugs - July 21, 2026
- Drip Tie Dye Backpack - July 17, 2026
- Mini Coastal Clay Houses - July 14, 2026


Leave a Reply