
With the painted rock trend still going strong, we decided to make some adorable painted rock chicks for spring and Easter! Who doesn’t love a cute and easy kid’s craft?

Painted Rock Chicks Tutorial
These little painted rock chicks are so adorable and great for Easter. Hide some of these along with the eggs for your Easter Egg Hunt!

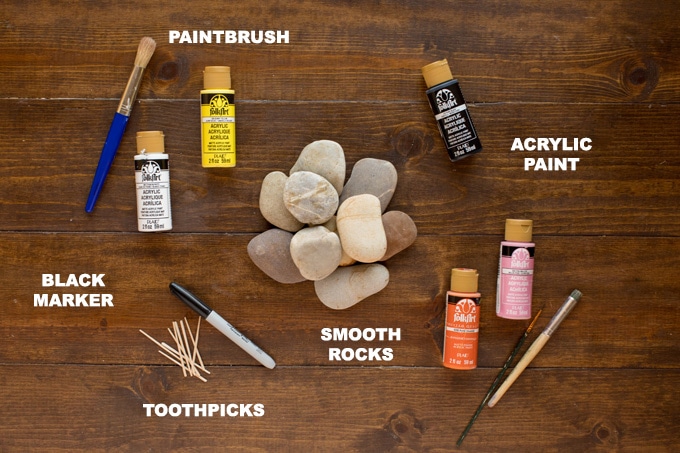
Craft supplies you will need:
- Smooth, round or oval rocks
- Acrylic craft paint – yellow, orange, white, black, pink
- Fine point black marker or pen
NOTE: If you will be placing your rocks outside I recommend a brand of paint called Patio Paint. Or you can use regular acrylic paint and paint them with a coat or two of Patio Paint outdoor sealer.
Craft tools:
- Small paintbrush (or orange paint pen)
- Large paintbrush
- Toothpick
- Scruffy paintbrush, paper towel, or a sponge
Helpful Project Information:
- Age Level: 6 and up – smaller children may need help
- Mess Factor: Medium – paint
- Level of Difficulty: Easy
- Time to Complete: 30 minutes plus drying time
- Cost Estimate: Less than $0.50 per rock

Crafting Tips:
- For a group setting, remember to factor in dry time. Offer alternate playtime or a snack while the paint is drying.
- Use old oversized t-shirts for smocks.
- Kids can use foam applicators instead of paintbrushes.
- Keep costs down by hunting for smooth rocks out in your yard or at the park.
How to Make Painted Rock Chicks
If you found your rocks outside, wash and dry them first.
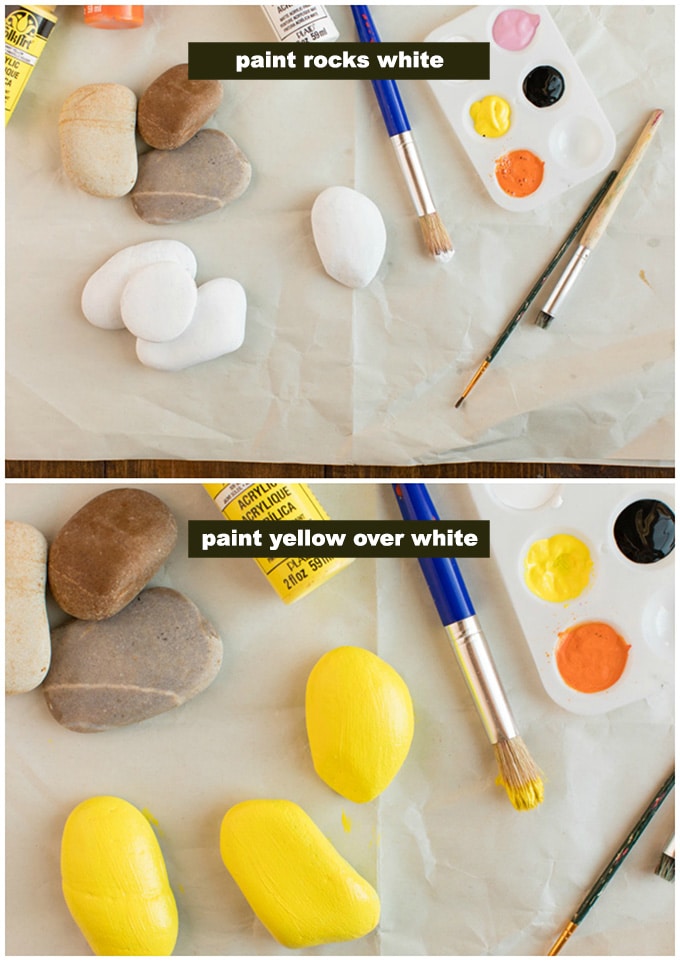
- Use large paintbrush to paint rocks with a coat of white paint and allow to dry.
- Use large paintbrush to paint rocks with yellow paint. Let dry. Add another coat if needed.
- Use a small paintbrush or a paint pen to add orange triangles for the beaks.
- Either using a scruffy old paintbrush with short stiff bristles, OR a small wadded up piece of paper towel or sponge, dip into pink paint. Dab the applicator onto another piece of paper towel over and over until the paint on the applicator is pretty much dry. Then dab the pink onto the rock on either side of the triangle to create rosy cheeks.

- Use the handle end of your paintbrush dipped in white paint to dot on the white circles for the eyes, just above and touching the top of the orange triangle beak. Let them dry.
- Cut the pointed end off of a toothpick. Dip the toothpick into black paint and dot onto the white circle.
- Use black fine point marker to add eyebrows.
Kids and adults will love these sweet little painted rock chicks, they are too cute!
More Spring and Easter Chick Crafts
- Foam Cup Chick
- Yarn Pom Pom Chicks
- Plastic Spoon Chicks
- Washcloth Chick
- Easer Egg Wreath
- 7 Cool Ways to Decorate Easter Eggs

Painted Rock Chicks
These little painted rock chicks are so adorable and great for Easter. Hide some of these along with the eggs for your Easter Egg Hunt!
Makes: 1 rock
Supplies
- 1 Smooth round or oval rock
- Acrylic craft paint yellow, orange, white, black, pink
- Fine point black marker or pen
- orange paint pen optional for the beak
Craft tools
- Small paintbrush (or orange paint pen)
- Large paintbrush
- Toothpick
- Scruffy paintbrush or paper towel or a sponge
Instructions
- If you got your rocks from outside, wash and dry them first.
- Use large paintbrush to paint rocks with a coat of white paint and allow to dry.
- Use large paintbrush to paint rocks with yellow paint. Let dry. Add another coat if needed.
- Use a small paintbrush or a paint pen to add orange triangles for the beaks.
- Either using a scruffy old paintbrush with short stiff bristles, OR a small wadded up piece of paper towel or sponge, dip into pink paint. Dab the applicator onto another piece of paper towel over and over until the paint on the applicator is pretty much dry. Then dab the pink onto the rock on either side of the triangle to create rosy cheeks.
- Use the handle end of your paintbrush dipped in white paint to dot on the white circles for the eyes, just above and touching the top of the orange triangle beak. Let them dry.
- Cut the pointed end off of a toothpick. Dip the toothpick into black paint and dot onto the white circle.
- Use black fine point marker to add eyebrows.
Expert Tips & FAQs
- For a group setting, remember to factor in dry time. Offer alternate play time or a snack while paint is drying.
- Use old oversized t-shirts for smocks.
- Kids can use foam applicators instead of paintbrushes if it's easier.
- Keep costs down by hunting for smooth rocks out in your yard or at the park.
- If you will be placing your rocks outside I recommend a brand of paint called Patio Paint. Or you can use regular acrylic paint and paint them with a coat or two of Patio Paint outdoor sealer.
Latest posts by Amanda Davis (see all)
- Patriotic Pinwheels - June 23, 2026
- Fingerprint Daddy & Me Coffee Mug - June 12, 2026
- Patriotic Bandana Wreath - June 9, 2026


Deb says
Love this project❣️
Adriana Maura Roos says
Fofo, e fácil, dá para fazer com crianças de todas as idades! Obrigada