

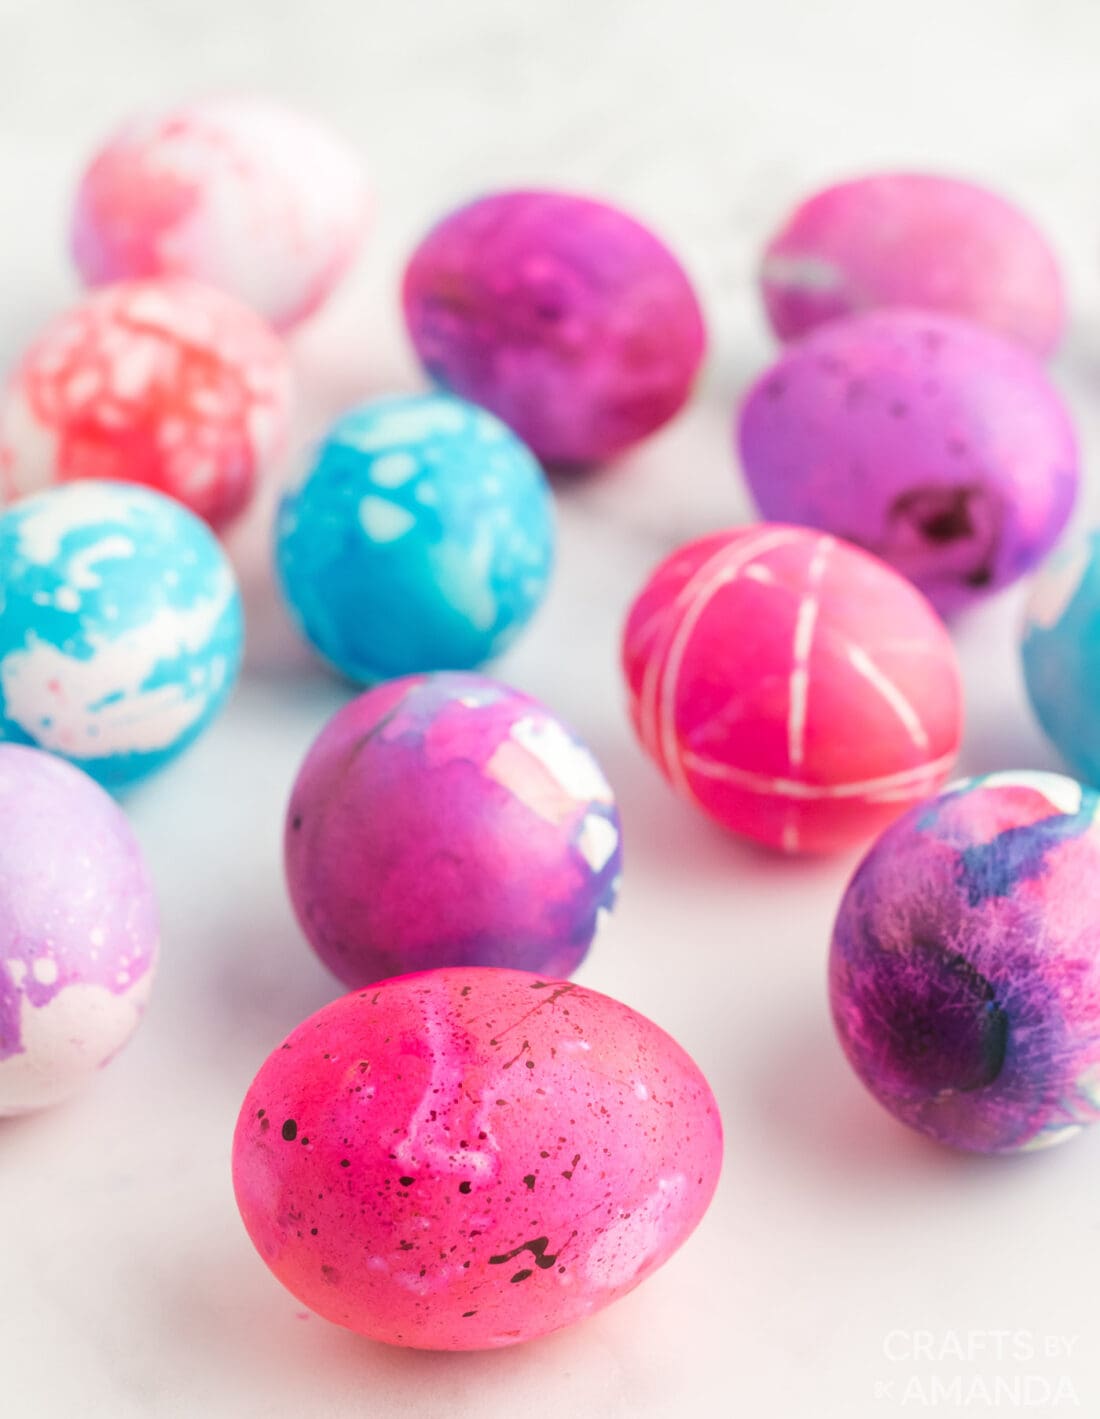
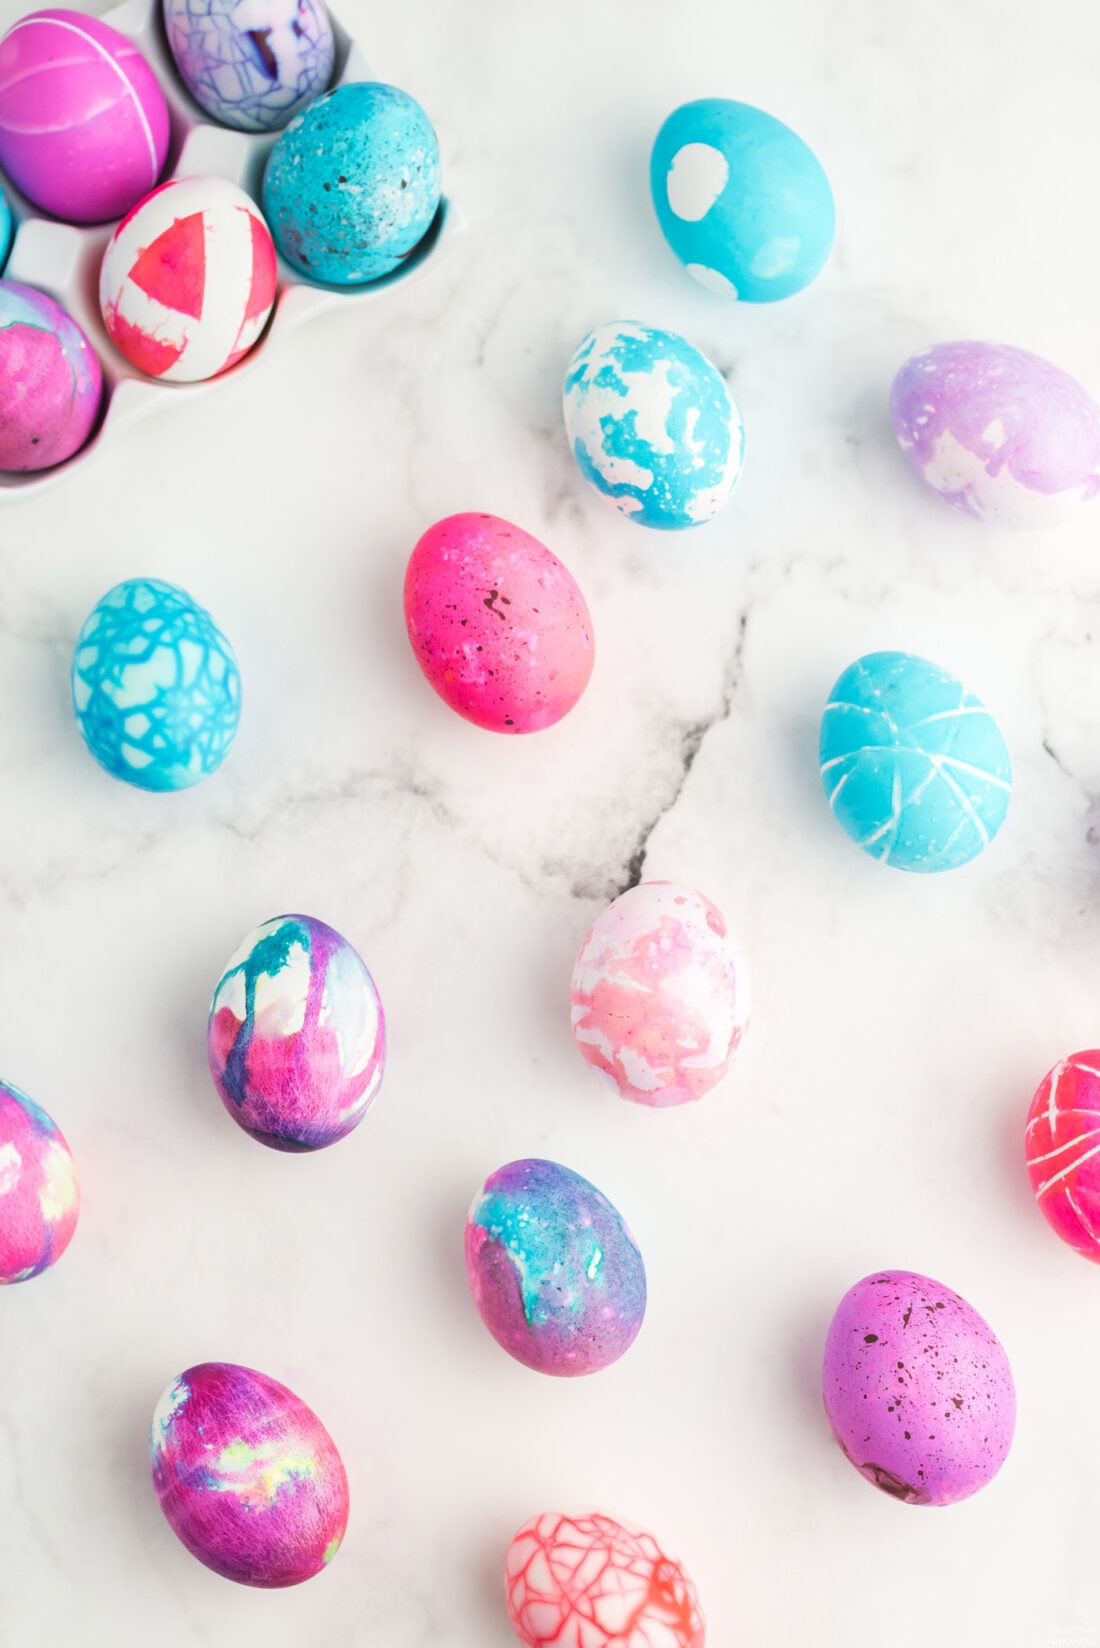
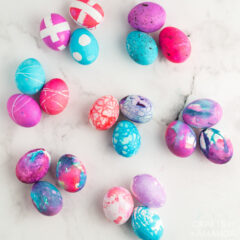
See how you can decorate Easter eggs in beautiful and unique designs with these 7 different methods. These colored eggs are easy for kids and adults alike to create!
Why we love this project
Decorating Easter eggs is a fun tradition for many, and it’s not just for kids! We’ve experimented with lots of different coloring methods over the years, so today we’re compiling some of our favorites into a list of 7 cool ways to decorate Easter eggs.
Have toddlers who would like to join in on the fun? See our 10 Tips for Decorating Easter Eggs with Toddlers. You also won’t want to miss out on my tutorial for how to make pretty Cracked Colored Eggs!
Helpful Project Information:
- Age Level: 6 and up
- Mess Factor: Medium
- Level of Difficulty: Easy
- Time to Complete: Less than 30 minutes
- Cost Estimate: Less than $5.00
How to Make Marbled Eggs
What you will need
- vegetable oil
- white vinegar
- food coloring
- mugs (one for each color)
- spoons (one for each color)
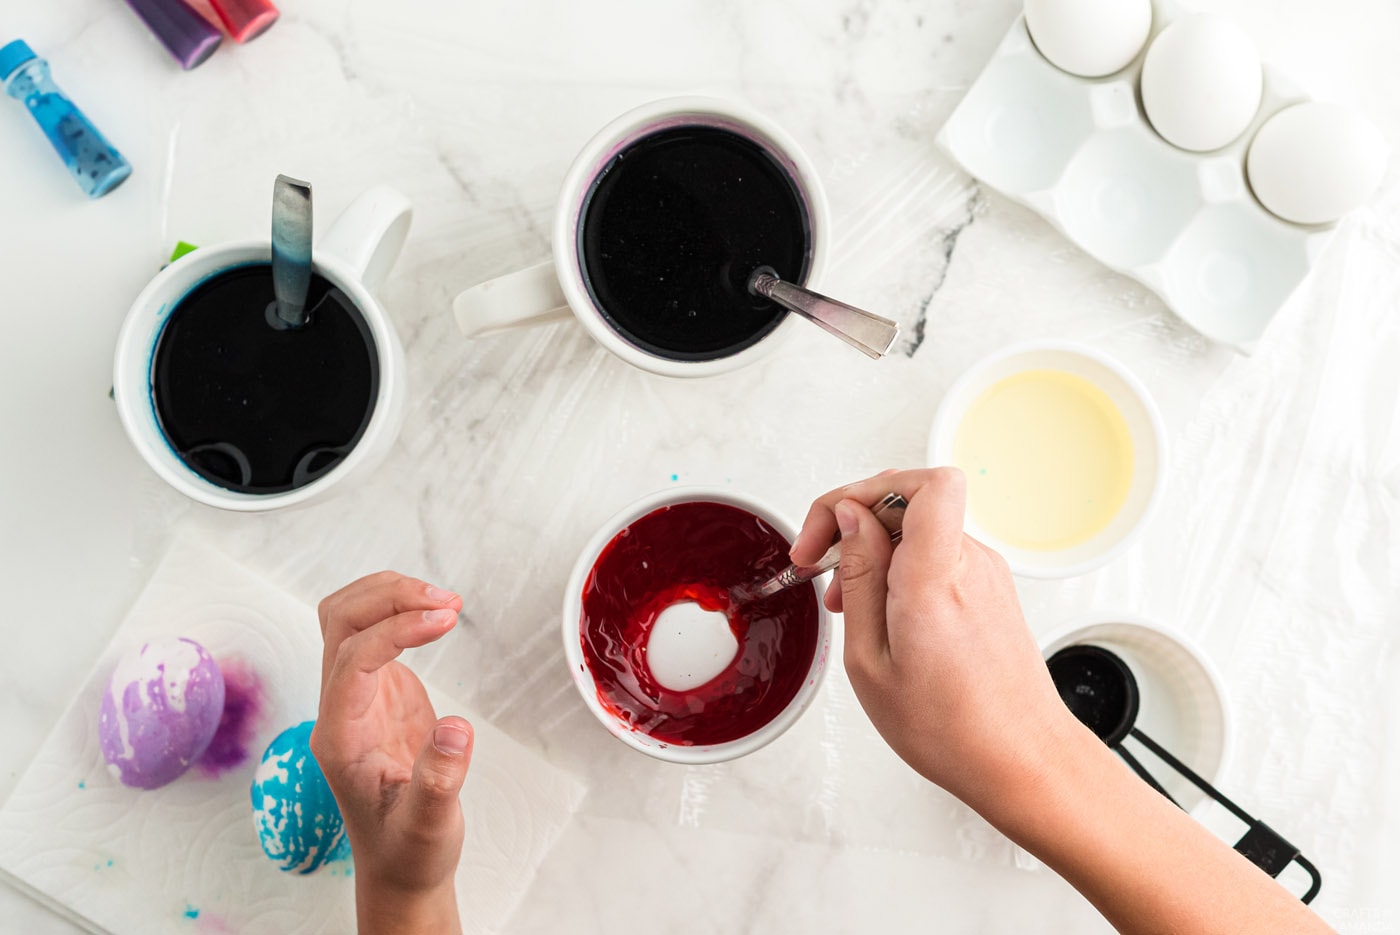
- Place one tablespoon of oil and one tablespoon of vinegar into each mug. Add a different color of food coloring to each mug. Fill to 3/4 full with water and stir each one. Each mug should have its own spoon.
- Hold your boiled egg in one hand and stir the liquid in the mug with the spoon using your other hand. Stir it several times to create a whirlpool effect. Immediately remove the spoon, place egg on spoon and lower egg into swirling water.

- Count to 5 or 6 and remove the egg.
- Place it on a paper towel, but don’t pat it dry. Let each color rest for several minutes, the color may get a bit darker as they rest. Repeat the above for a second color on each, or leave as single colors. Again, let them rest for several minutes. When you are happy with the results, gently wipe the eggs off with paper towel.

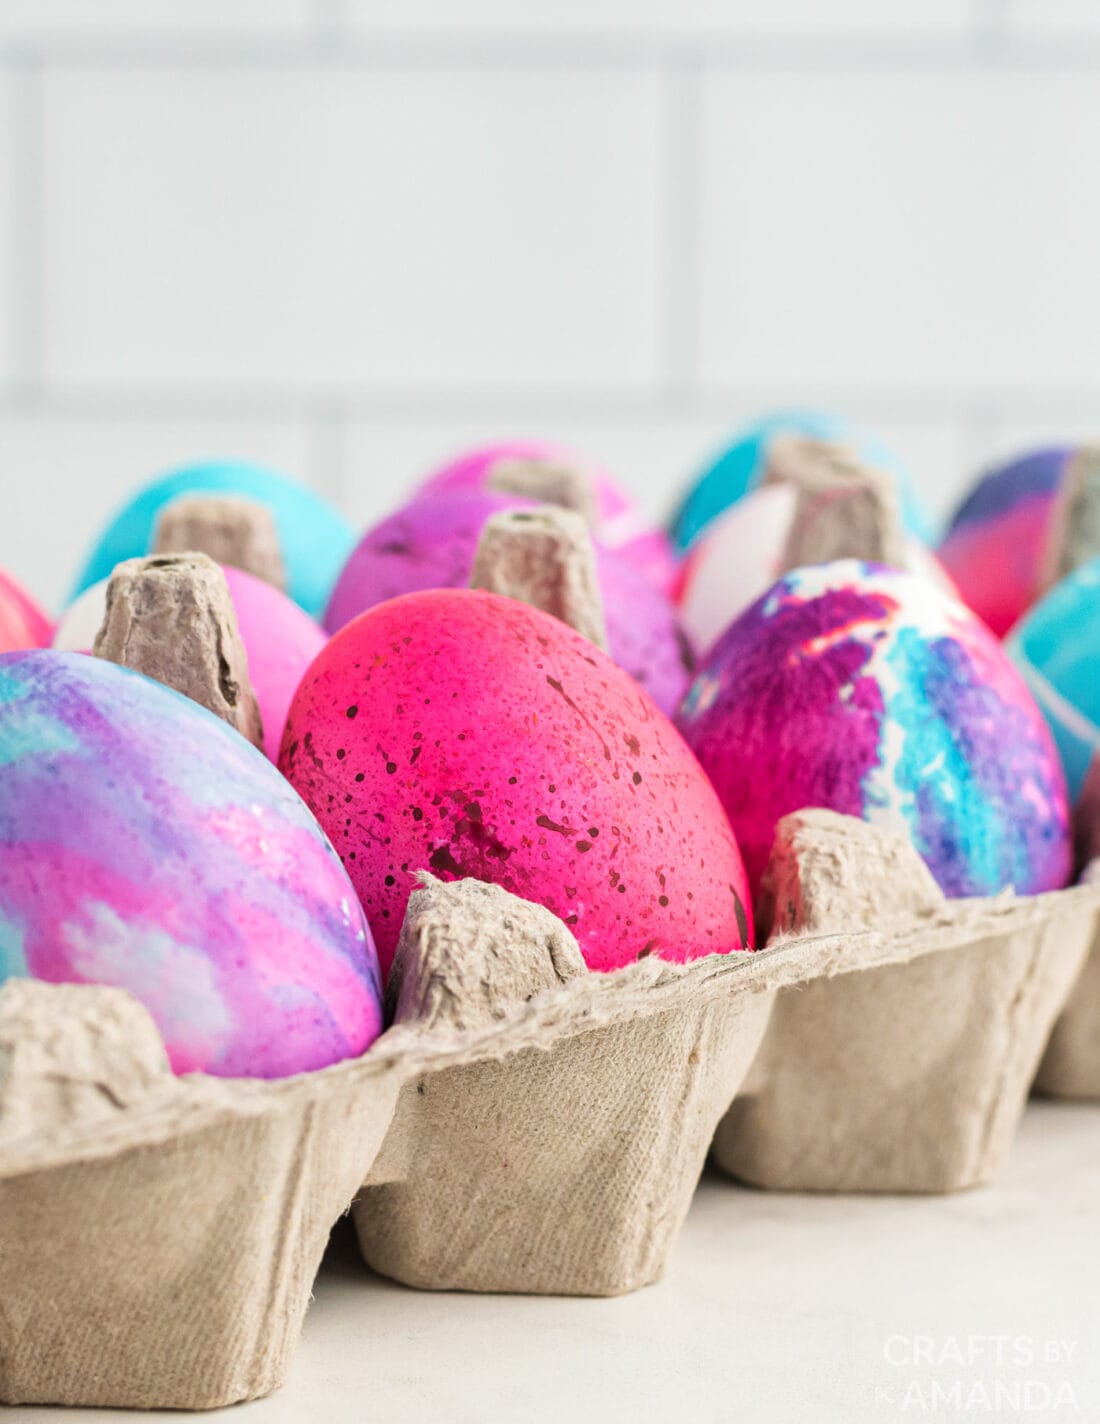
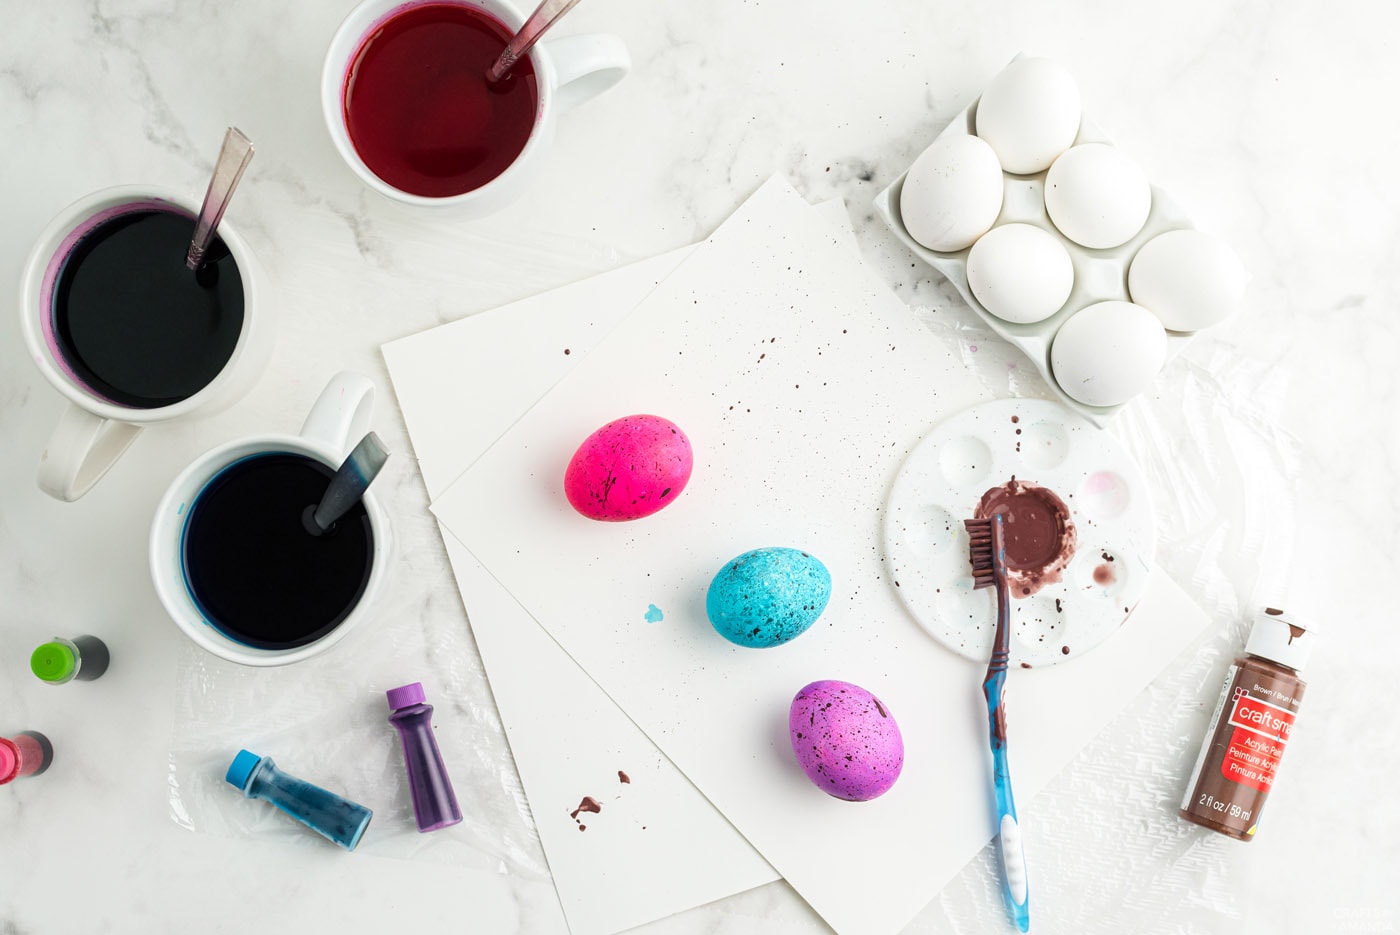
How to Make Speckled Eggs
What you will need
- white vinegar
- food coloring
- mugs (one for each color)
- spoons (one for each color)
- brown craft paint
- water
- old toothbrush
- newspaper
- Add a teaspoon of white vinegar to each mug. Add food coloring and fill mugs with water to 3/4 full. Stir and dye eggs. The longer you leave them in, the deeper the color of eggs you will get. If you’d like a pastel color, take them out sooner.
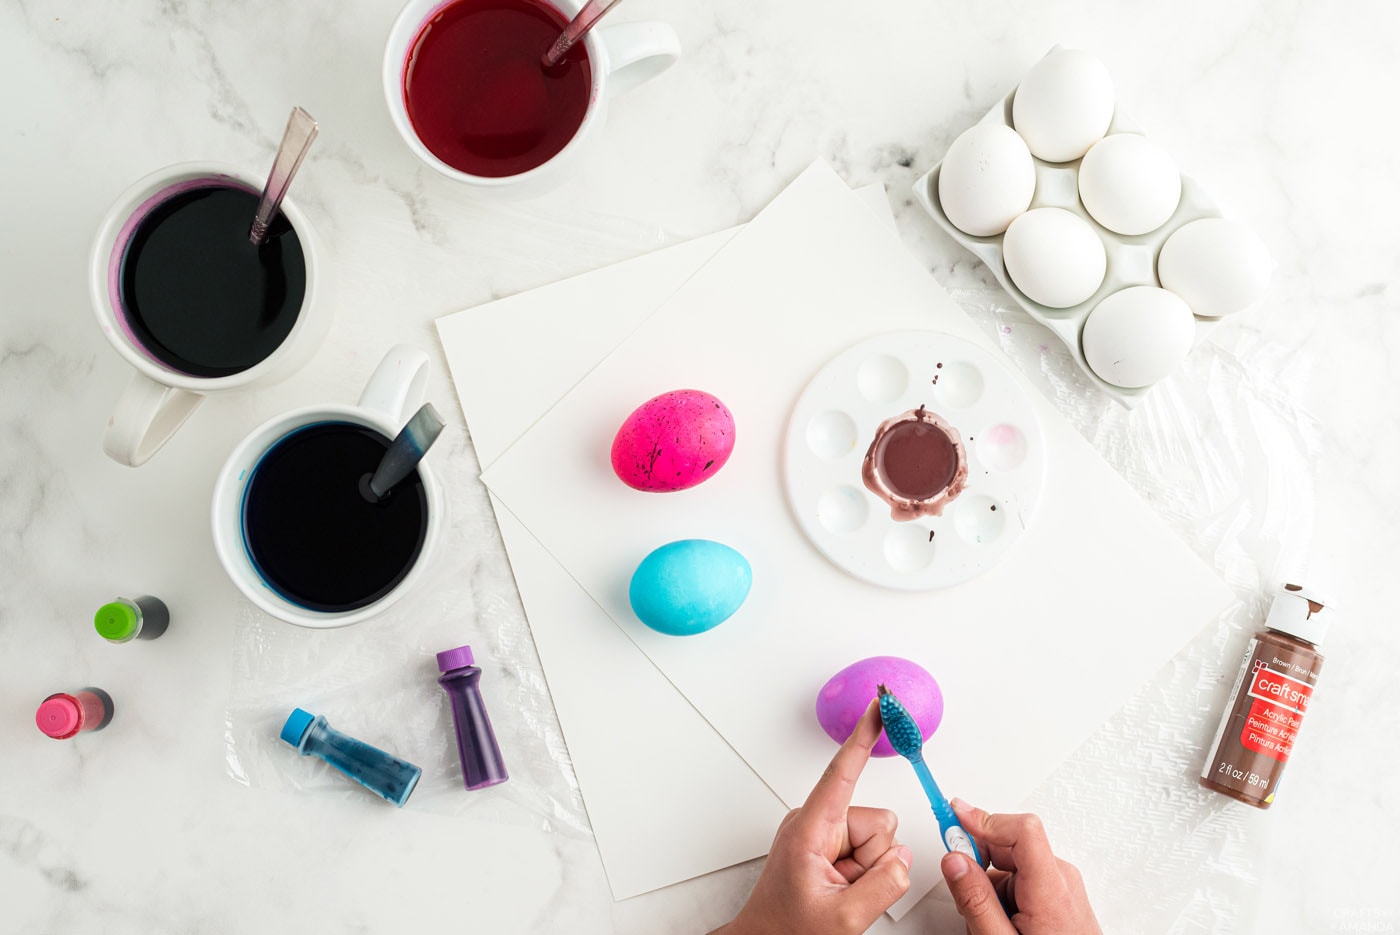
- Mix together a teaspoon of brown acrylic craft paint and 4 or 5 drops of water. Lay newspaper down on the work surface and be sure all the eggs are dry. Practice the flicking method a few times on the newspaper first before attempting on the egg.
- First, get the toothbrush wet, flick off excess water by running your finger across the bristles. Dip the bristles into the thinned brown paint. Holding the toothbrush with the bristles pointing downward, run your finger across the bristles. This will flick the paint onto the newspaper.
- When you are comfortable with the method, flick the paint onto the eggs. Let each side dry before turning over and doing the other side.
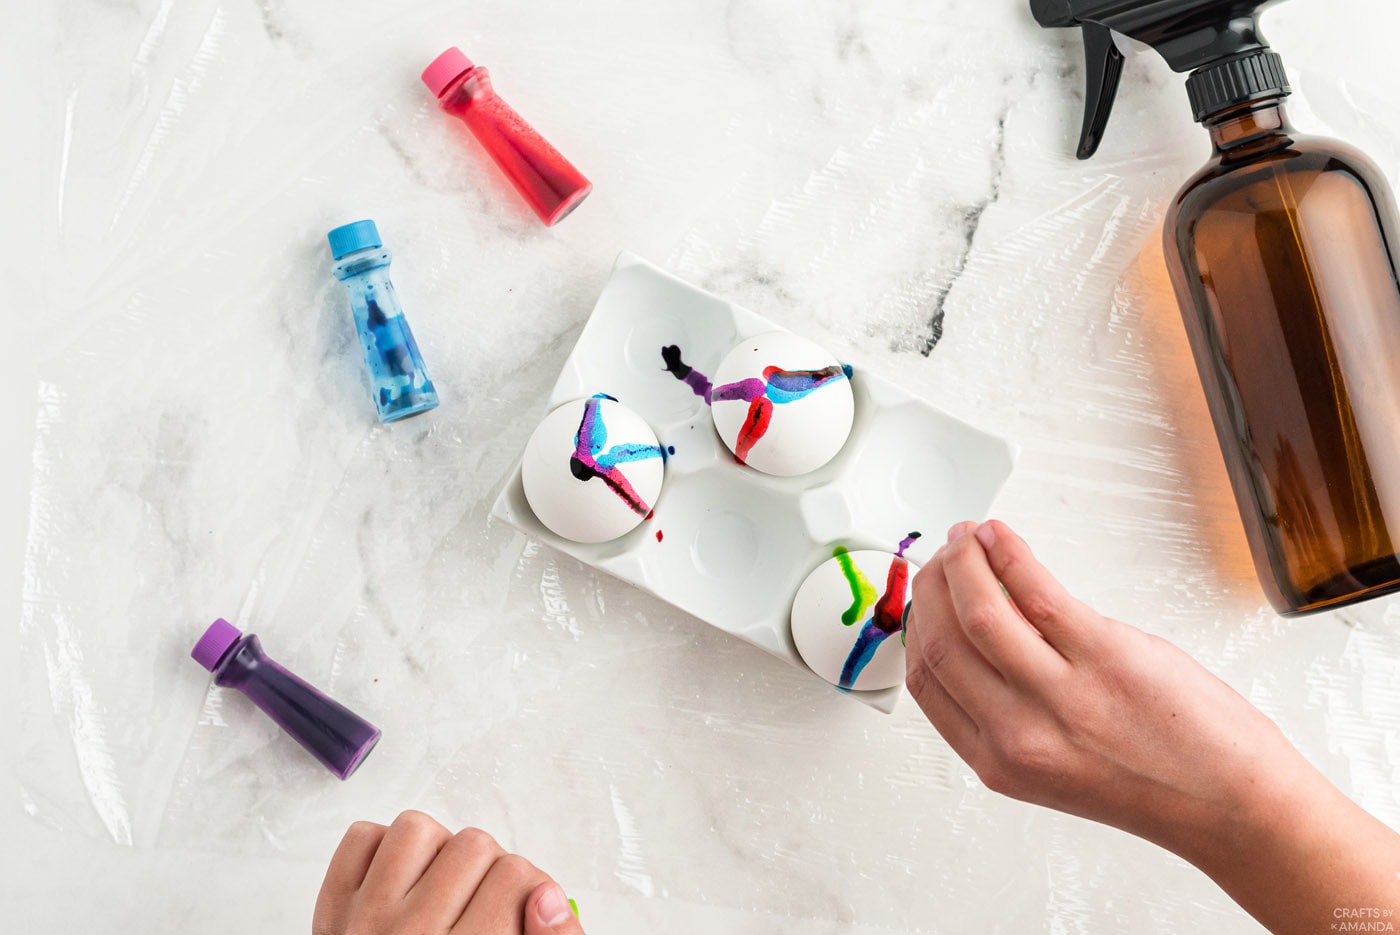
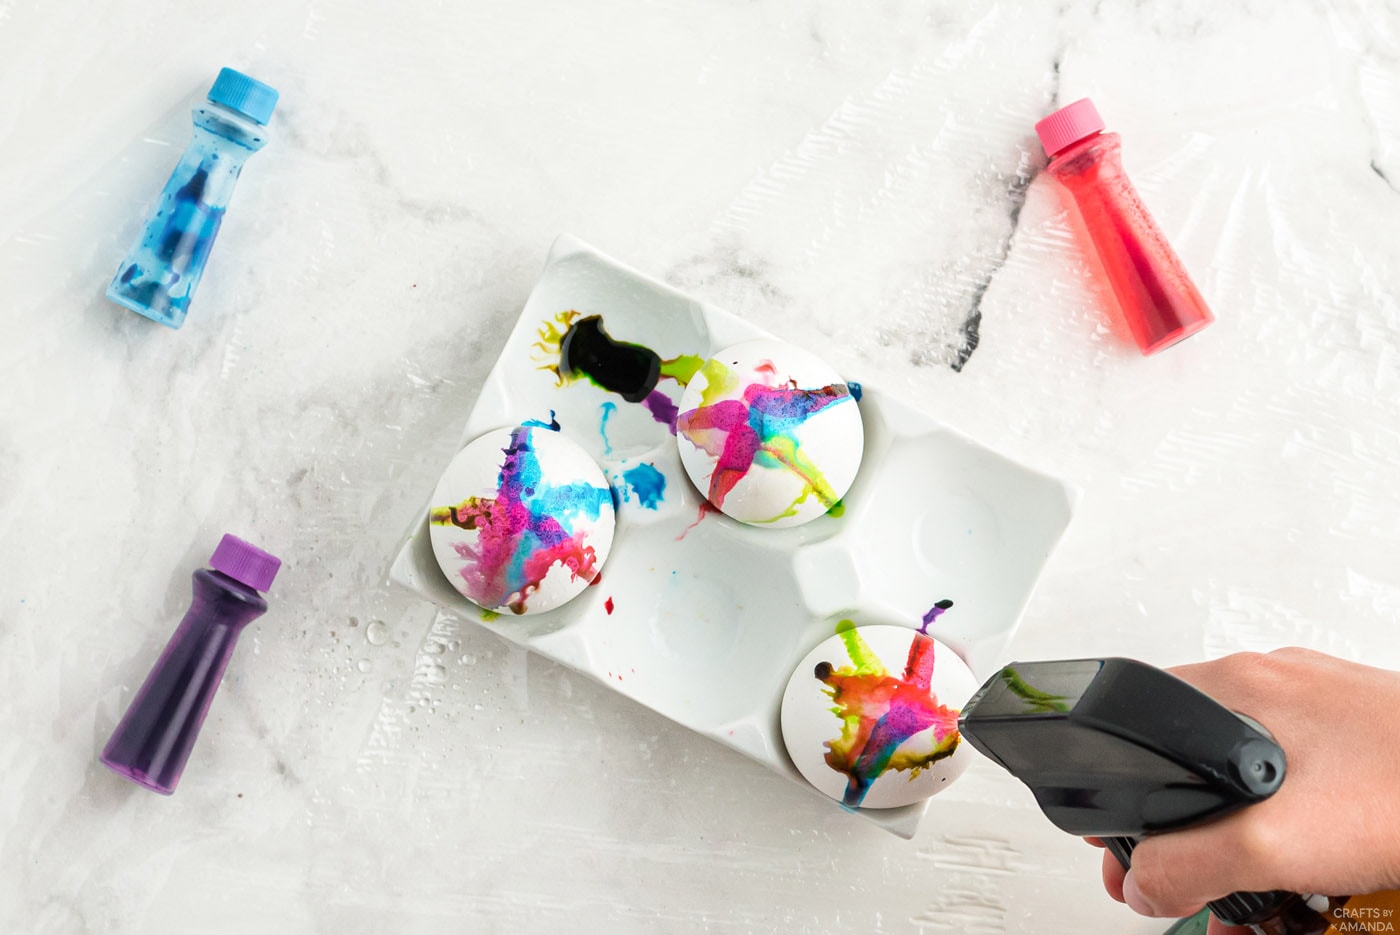
How to Make Drip Eggs
What you will need
- food coloring
- egg holder
- spray bottle of water
- Place egg into an egg cup (or other holder that will hold to egg upright). Use the spray bottle to mist the top of the egg.
- Squeeze a drop of food coloring onto the top of the egg.
- Hold water bottle at a distance and mist the top again.
- Add additional colors.
- Mist or blow on the egg to create the desired effect.
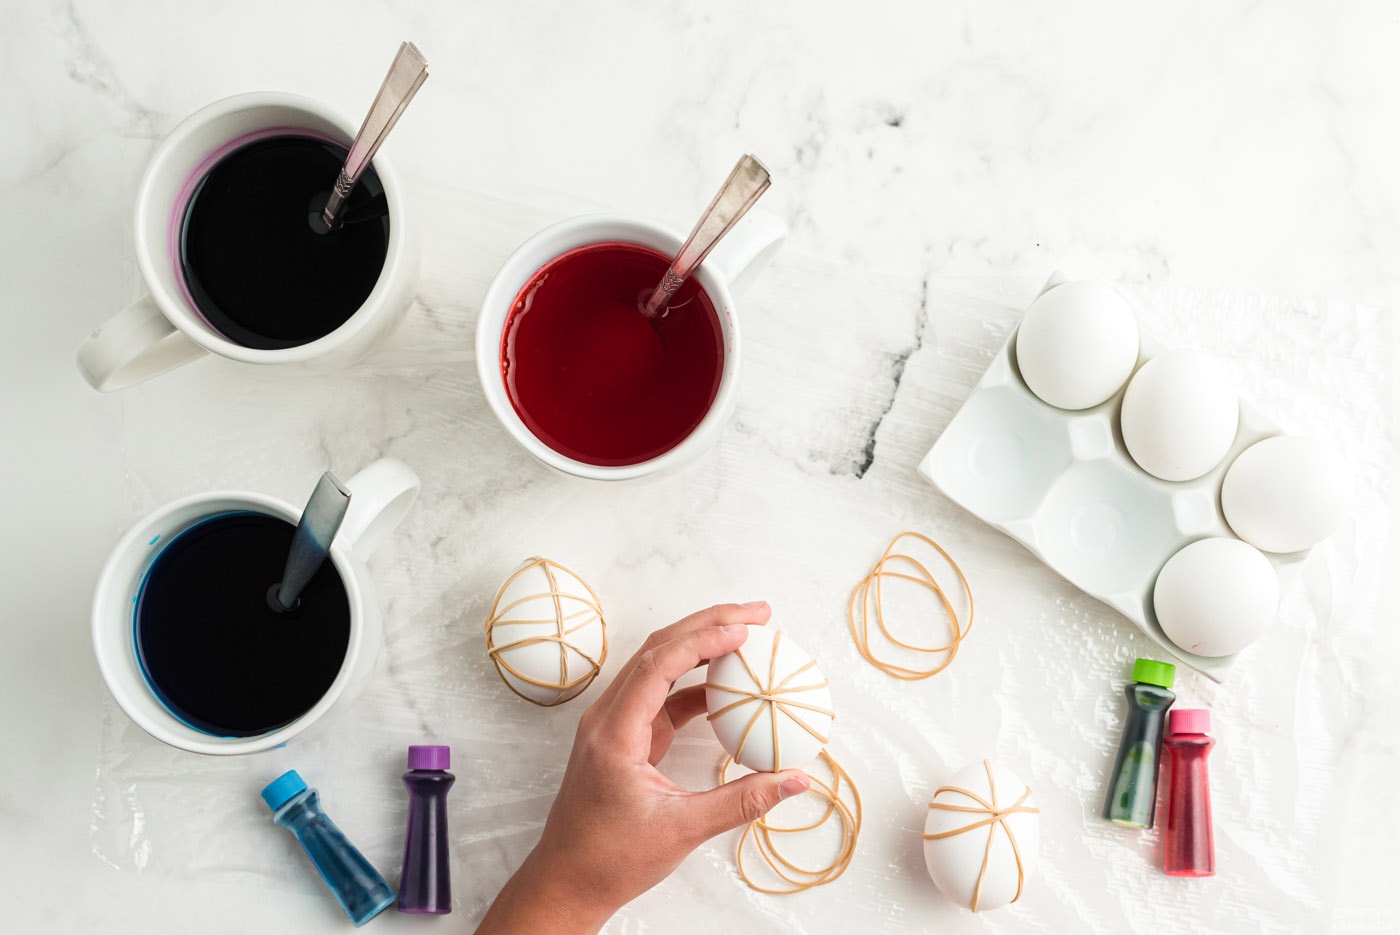
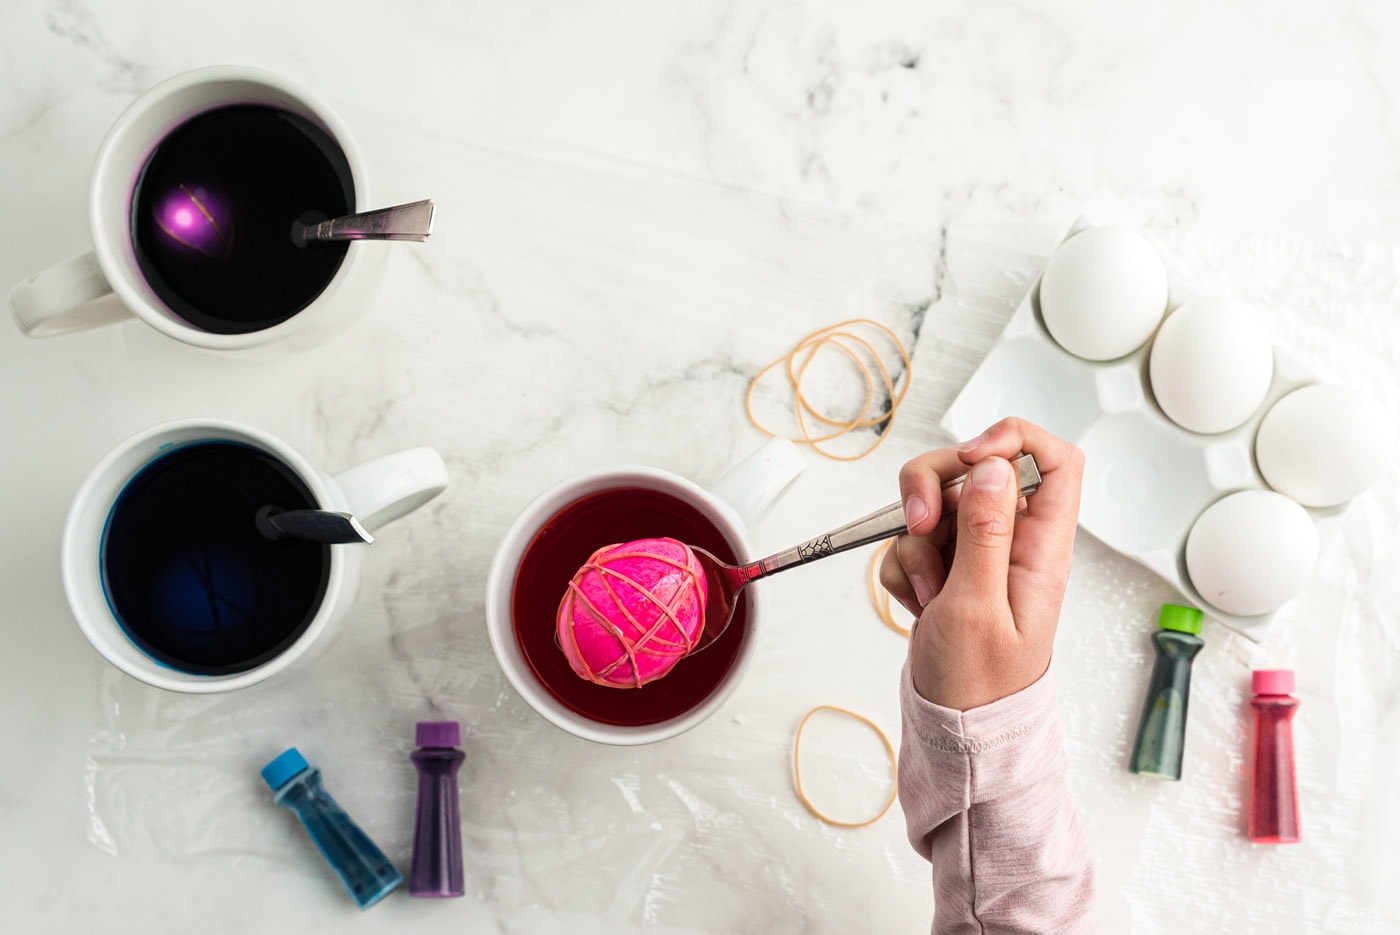
How to Make Rubber Band Eggs
What you will need
- white vinegar
- food coloring
- mugs (one for each color)
- spoons (one for each color)
- rubber bands
- Wrap boiled egg with several rubber bands.
- Dye egg in normal fashion (as described in speckled eggs but with whatever color intensity you like). Let the first color dry, then remove one of the rubber bands and dye in another color.
How to Make Stenciled Eggs
What you will need
- white vinegar
- food coloring
- mugs one for each color
- spoons one for each color
- stickers or painters tape
- Place small stickers on the boiled egg, or use decorative scissors to cut pieces of painter’s tape and decorate the egg.
- Be sure that all areas are stuck to the egg then dye as usual (as described in speckled eggs but with whatever color intensity to like). Let dry completely before removing stickers or tape.


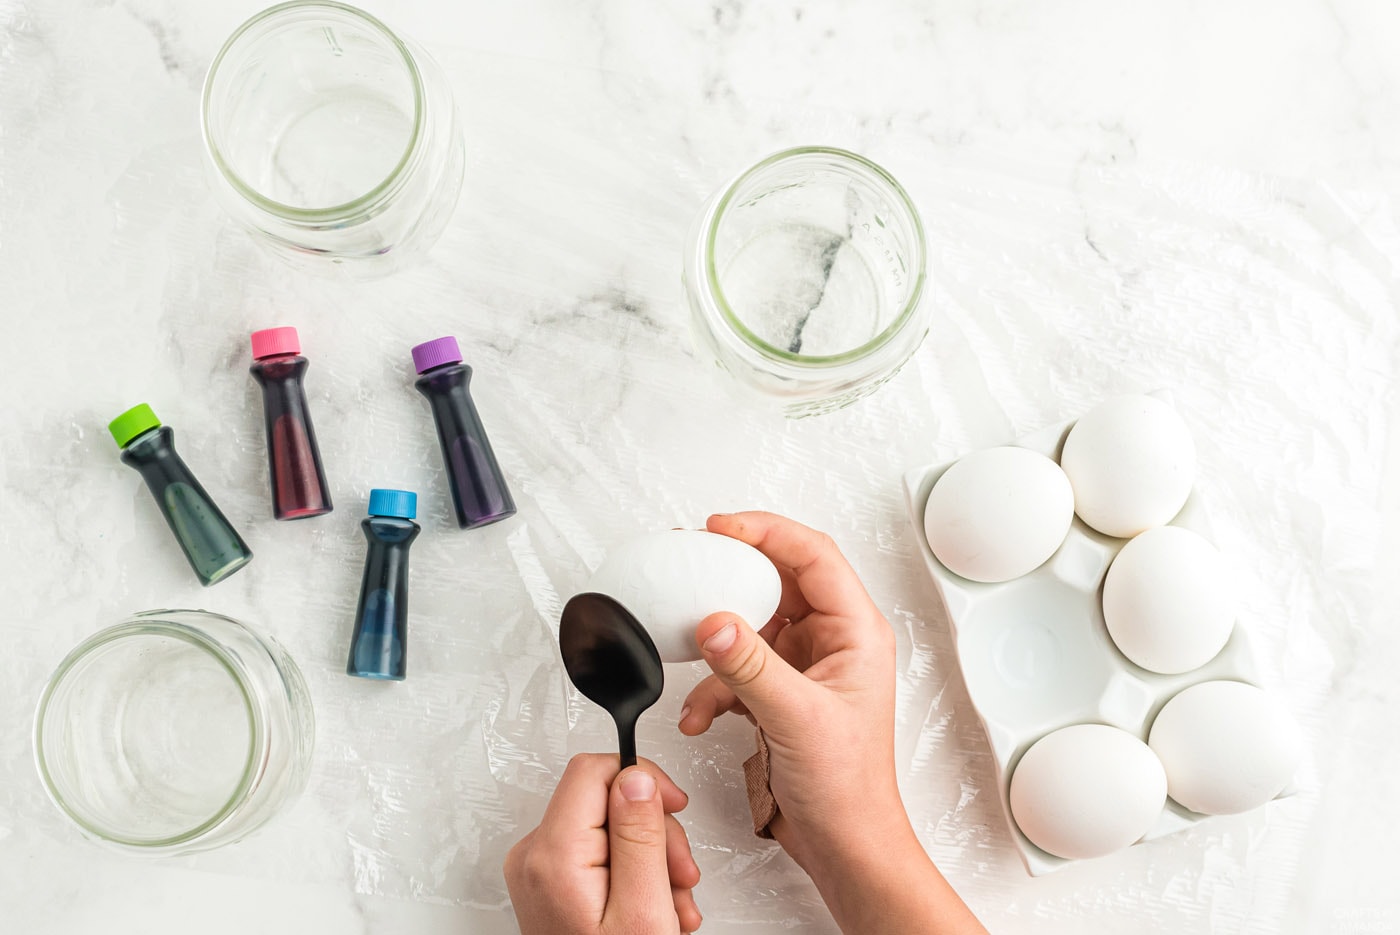
How to Make Colorful Chinese Tea Eggs
What you will need
- food coloring
- mugs (one for each color)
This method originates from soaking boiled eggs with cracked shells in a pot of boiling tea bags. To create a colorful version of this you can use food coloring and water. Some methods describe using paste/gel food coloring and boiling water. These methods also recommend leaving the eggs in the water for 7 hours. Since that is probably not safe, it’s better to use cold water, liquid food coloring, and your refrigerator.
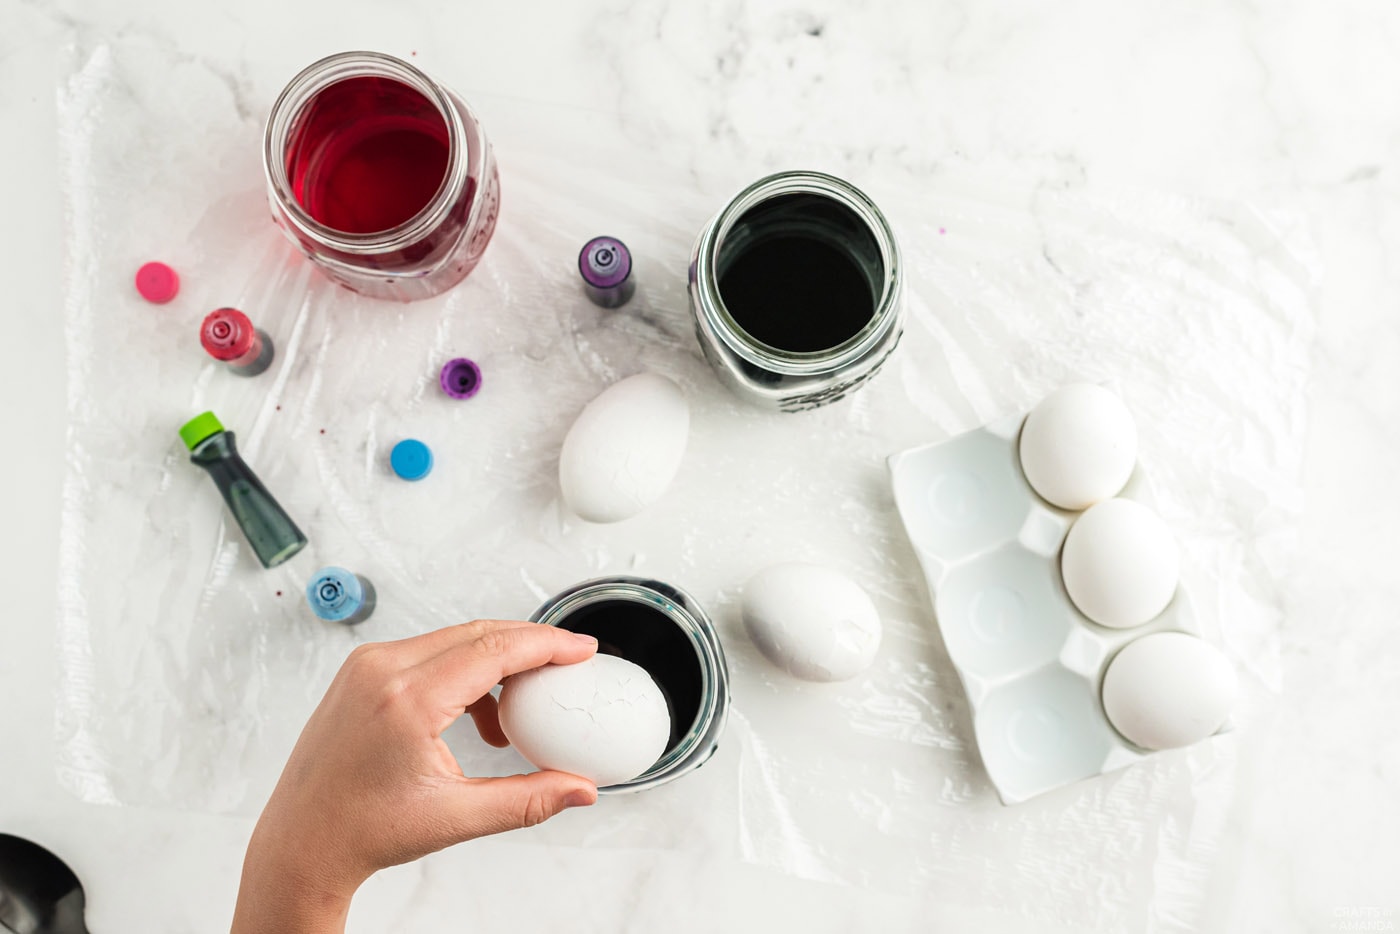
- To begin, use the back of a spoon to gently tap all around the eggshell. You can use your hands to gently squeeze the shell creating more cracks, just try not to make splits in the shell as this will create large areas of dark color instead of the desired effect.
- Your mug should have one full teaspoon of liquid food coloring and water to 3/4 full. Don’t add vinegar or you will be pickling your eggs! Place the egg (I was able to fit 2 eggs in my mugs) into the mug and place in the refrigerator for 3-4 hours, 3 hours being the minimum. You can let them soak longer, but 3 hours seems to be the magical time to achieve a fairly vibrant color.

- Remove the eggshell and see your beautiful creations!
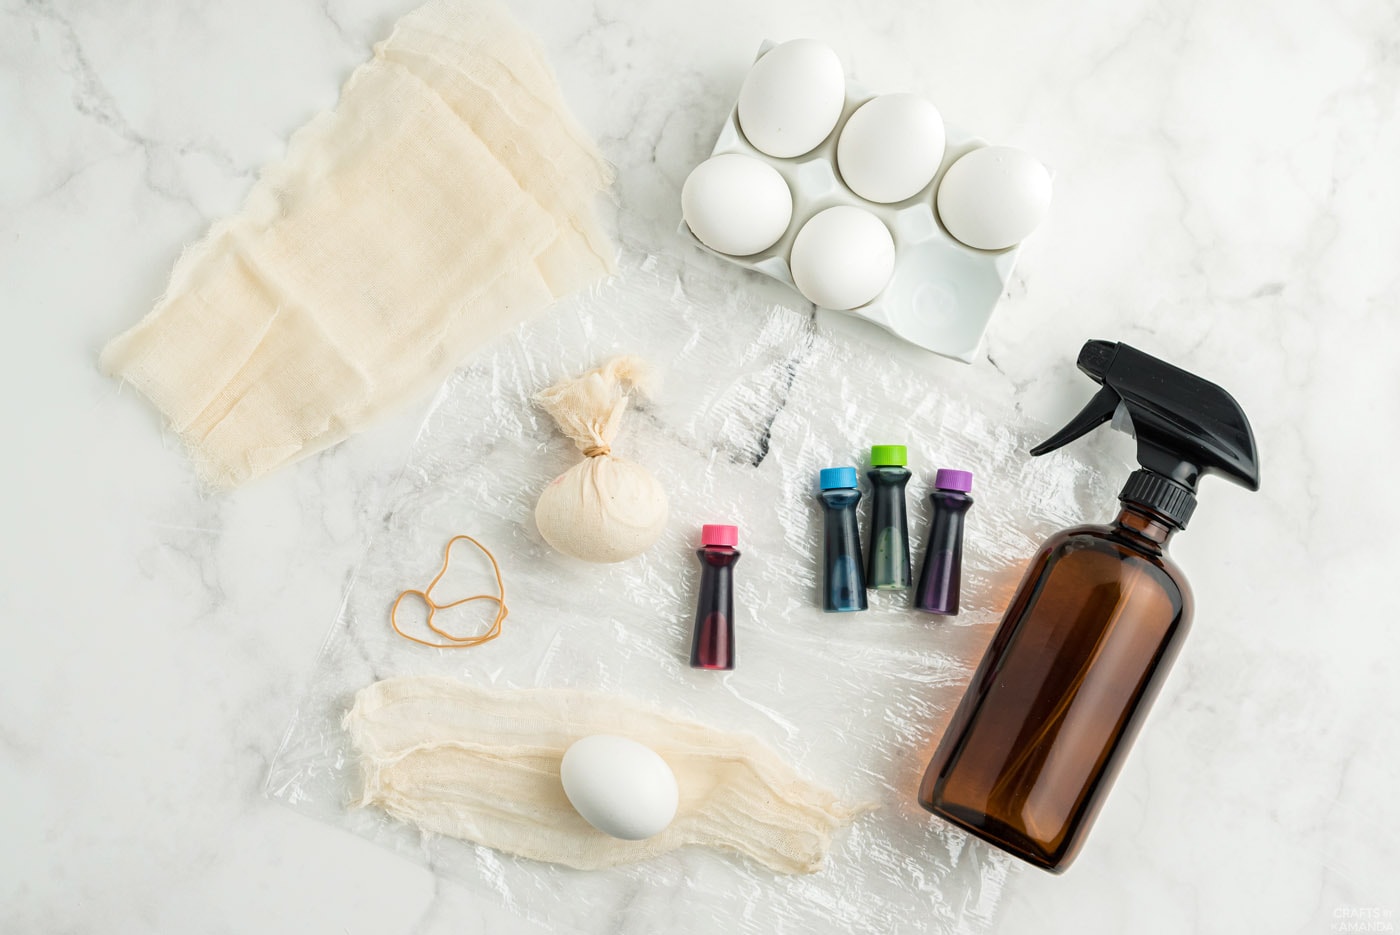
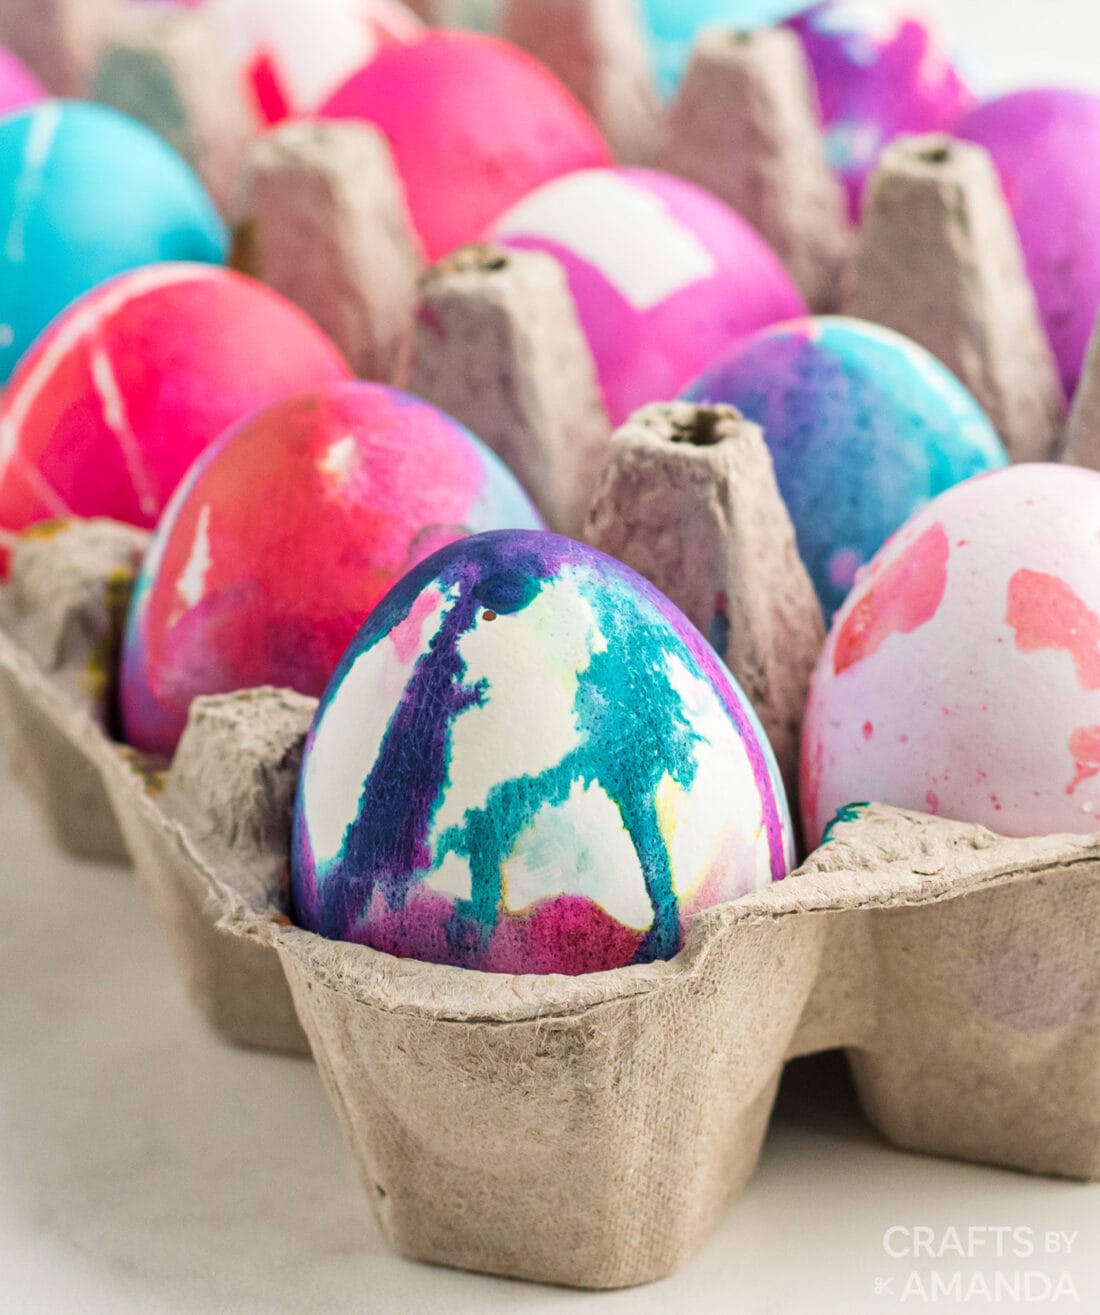
How to Make Tie Dye Eggs
For tie dye Easter eggs, we have two different methods of creating them. Choose whichever suits you best. Over on my cooking blog I have a whole post dedicated on How To Make Tie Dye Easter Eggs, to say they’re my favorite way to decorate Easter eggs is an understatement.
What You Will Need for Method One
- plastic wrap for the counter
- cheesecloth
- liquid food coloring
- a small spray bottle with water (or a small cup of water)
- rubber band
- empty cardboard egg carton to hold eggs
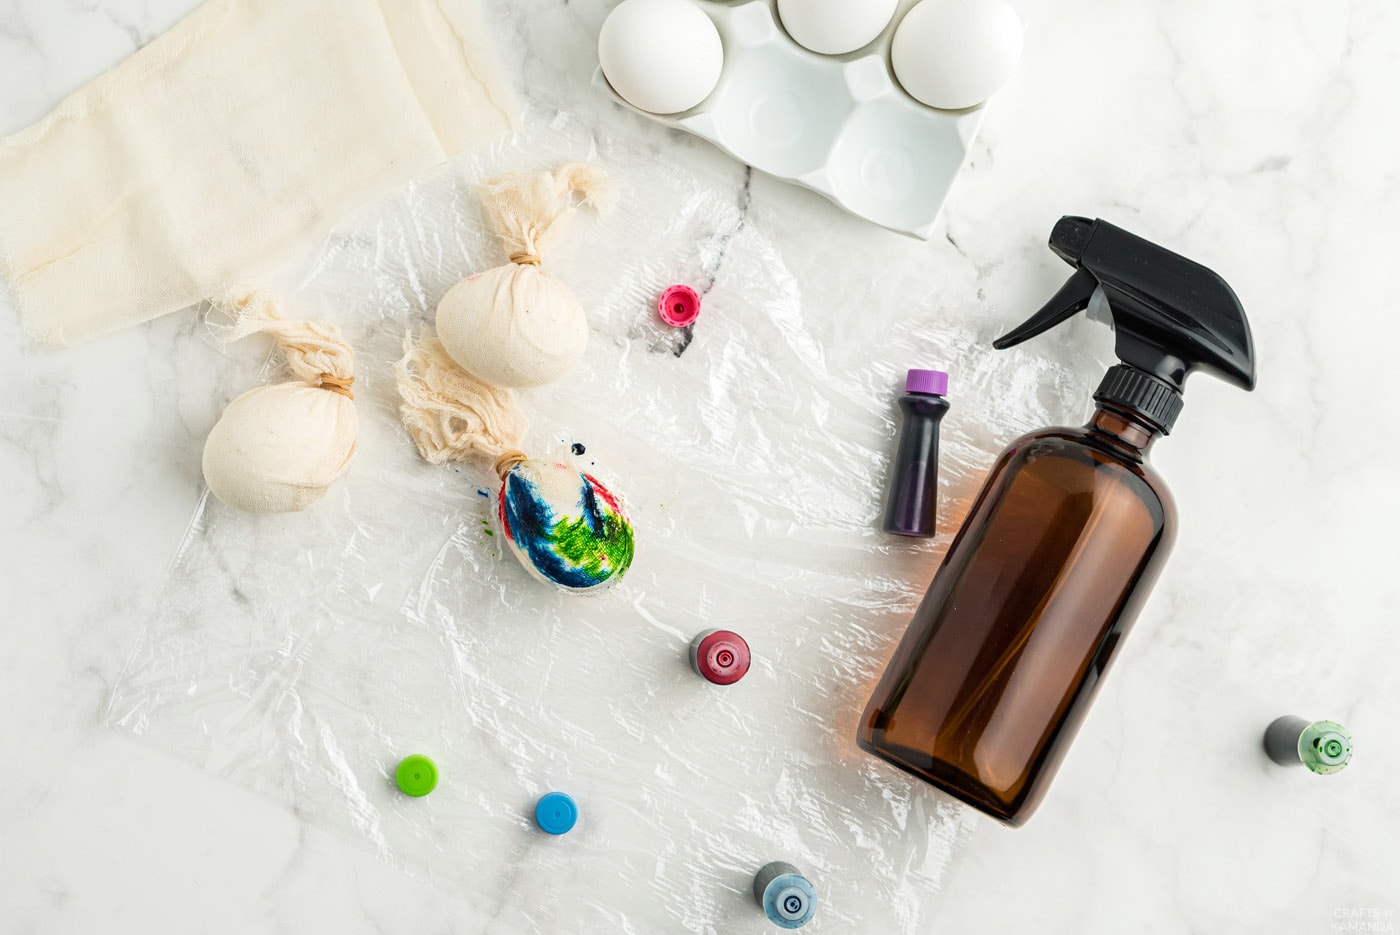
- Layer the counter with plastic wrap. Cut cheesecloth into 6″ lengths.
- Get the cheesecloth wet and wring it out.
- Place a boiled egg into the center of the cheesecloth.
- Gather the ends of the cheesecloth together tightly around the egg and secure with a rubber band.
- Hold egg by the rubber-banded end and add drops of food coloring to the damp cheesecloth.
- Leave some white space, but use whatever colors you like.
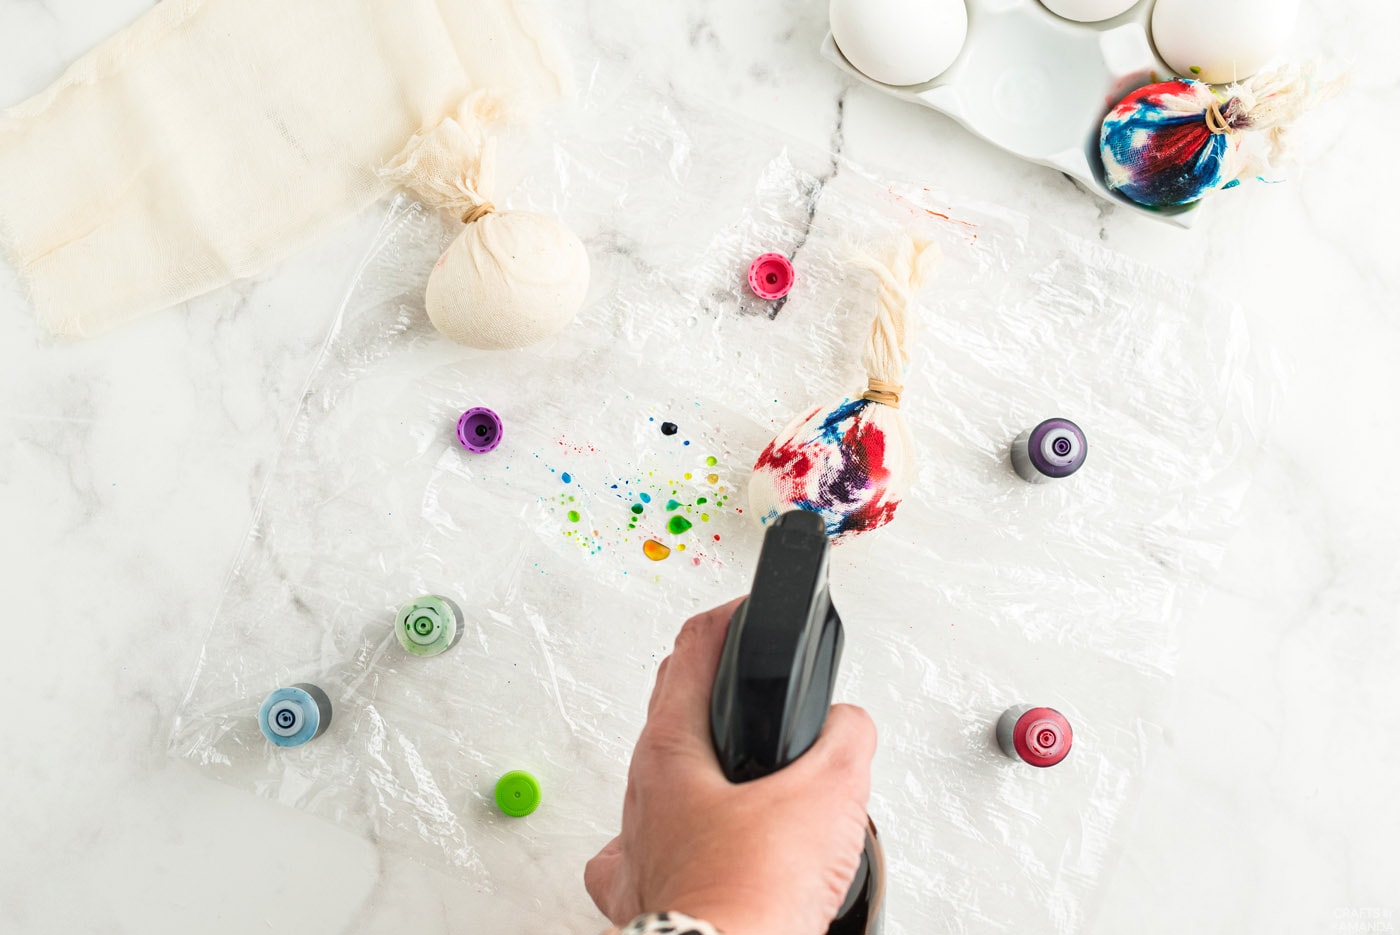
- Spray it with water. The less water you use the darker the colors, the more water you use, the more muted your colors will be.
- The idea is to allow the water to blend the colors together, but not completely combine them into one big color blob.
- Carefully hug the egg with your hand and gently squeeze out any excess food coloring and water.
- Place in the cardboard egg carton to dry.
- You can let all the eggs dry in a cardboard egg carton, or you can be like me and speed up the process using a hairdryer on the cool setting.
- Unwrap and revel in your amazingness.
What You Will Need for Method Two
- plastic wrap for the counter
- paper towels
- liquid food coloring
- a small spray bottle with water (or a small cup of water)
- empty cardboard egg carton to hold eggs
- The second method is a little different. Take a piece of paper towel, get it wet and wring it the water, you just want it to be damp. Open it up and place it on the plastic wrap lined counter.
- Drip some food coloring in the center of the paper towel.
- Place egg in the center of the colors and gather the paper towel around the egg.
- Get it wet using a spray bottle.
- Squeeze out the excess and set in a cardboard egg carton to dry.
We hope you have fun learning these cool new ways on how to decorate Easter eggs! The possibilities are endless.
More Easter Crafts and Activities
- Easter Play Dough
- Easter Bunny Mason Jars
- Painted Rock Chicks
- Handprint Lamb for Easter
- Printable Easter Scavenger Hunt
I love to create and share my projects with you! I know it’s hard to remember to come back and search, so I’ve made it easy for you with my weekly newsletter! You can subscribe for free and I’ll send you fun crafts and delicious recipes every week right to your email.
This post originally appeared here on April 1, 2022.
7 Cool Ways to Decorate Easter Eggs
Instructions
How to Make Marbled Eggs
- YOU NEED – vegetable oil, white vinegar, food coloring, mugs (one for each color), and spoons (one for each color)
- Place one tablespoon of oil and one tablespoon of vinegar into each mug. Add a different color of food coloring to each mug. Fill to 3/4 full with water and stir each one. Each mug should have its own spoon.
- Hold your boiled egg in one hand and stir the liquid in the mug with the spoon using your other hand. Stir it several times to create a whirlpool effect. Immediately remove the spoon, place egg on spoon and lower egg into swirling water.
- Count to 5 or 6 and remove the egg.
- Place it on a paper towel, but don’t pat it dry. Let each color rest for several minutes, the color may get a bit darker as they rest. Repeat the above for a second color on each, or leave as single colors. Again, let them rest for several minutes. When you are happy with the results, gently wipe the eggs off with paper towel.
How to Make Speckled Eggs
- YOU NEED – white vinegar, food coloring, mugs (one for each color), spoons (one for each color), brown craft paint, water, old toothbrush, and newspaper
- Add a teaspoon of white vinegar to each mug. Add food coloring and fill mugs with water to 3/4 full. Stir and dye eggs. The longer you leave them in, the deeper the color of eggs you will get. If you’d like a pastel color, take them out sooner.
- Mix together a teaspoon of brown acrylic craft paint and 4 or 5 drops of water. Lay newspaper down on the work surface and be sure all the eggs are dry. Practice the flicking method a few times on the newspaper first before attempting on the egg.
- First, get the toothbrush wet, flick off excess water by running your finger across the bristles. Dip the bristles into the thinned brown paint. Holding the toothbrush with the bristles pointing downward, run your finger across the bristles. This will flick the paint onto the newspaper.
- When you are comfortable with the method, flick the paint onto the eggs. Let each side dry before turning over and doing the other side.
How to Make Drip Eggs
- YOU NEED – food coloring, egg holder, and spray bottle of water
- Place egg into an egg cup (or other holder that will hold to egg upright). Use the spray bottle to mist the top of the egg.
- Squeeze a drop of food coloring onto the top of the egg.
- Hold water bottle at a distance and mist the top again.
- Add additional colors.
- Mist or blow on the egg to create the desired effect.
How to Make Rubber Band Eggs
- YOU NEED – white vinegar, food coloring, mugs (one for each color), spoons (one for each color), rubber bands
- Wrap boiled egg with several rubber bands.
- Dye egg in normal fashion (as described in speckled eggs but with whatever color intensity you like). Let the first color dry, then remove one of the rubber bands and dye in another color.
How to Make Stenciled Eggs
- YOU NEED – white vinegar, food coloring, mugs one for each color, spoons one for each color, stickers or painters tape
- Place small stickers on the boiled egg, or use decorative scissors to cut pieces of painter’s tape and decorate the egg.
- Be sure that all areas are stuck to the egg then dye as usual (as described in speckled eggs but with whatever color intensity to like). Let dry completely before removing stickers or tape.
How to Make Colorful Chinese Tea Eggs
- To begin, use the back of a spoon to gently tap all around the eggshell. You can use your hands to gently squeeze the shell creating more cracks, just try not to make splits in the shell as this will create large areas of dark color instead of the desired effect.
- Your mug should have one full teaspoon of liquid food coloring and water to 3/4 full. Don’t add vinegar or you will be pickling your eggs! Place the egg (I was able to fit 2 eggs in my mugs) into the mug and place in the refrigerator for 3-4 hours, 3 hours being the minimum. You can let them soak longer, but 3 hours seems to be the magical time to achieve a fairly vibrant color.
- Remove the eggshell and see your beautiful creations!
How to Make Tie Dye Eggs
- YOU NEED – plastic wrap for the counter, cheesecloth, liquid food coloring, a small spray bottle with water (or a small cup of water), rubber band, empty cardboard egg carton to hold eggs
- For tie dye Easter eggs, we have two different methods of creating them. Choose whichever suits you best. Over on my cooking blog I have a whole post dedicated on How To Make Tie Dye Easter Eggs, to say they’re my favorite way to decorate Easter eggs is an understatement.
- Layer the counter with plastic wrap. Cut cheesecloth into 6″ lengths.
- Get the cheesecloth wet and wring it out.
- Place a boiled egg into the center of the cheesecloth.
- Gather the ends of the cheesecloth together tightly around the egg and secure with a rubber band.
- Hold egg by the rubber-banded end and add drops of food coloring to the damp cheesecloth.
- Leave some white space, but use whatever colors you like.
- Spray it with water. The less water you use the darker the colors, the more water you use, the more muted your colors will be.
- The idea is to allow the water to blend the colors together, but not completely combine them into one big color blob.
- Carefully hug the egg with your hand and gently squeeze out any excess food coloring and water.
- Place in the cardboard egg carton to dry.
- You can let all the eggs dry in a cardboard egg carton, or you can be like me and speed up the process using a hairdryer on the cool setting.
- Unwrap and revel in your amazingness.
Method Two
- YOU NEED – plastic wrap for the counter, paper towels, liquid food coloring, a small spray bottle with water (or a small cup of water), empty cardboard egg carton to hold eggs
- The second method is a little different. Take a piece of paper towel, get it wet and wring it the water, you just want it to be damp. Open it up and place it on the plastic wrap lined counter.
- Drip some food coloring in the center of the paper towel.
- Place egg in the center of the colors and gather the paper towel around the egg.
- Get it wet using a spray bottle.
- Squeeze out the excess and set in a cardboard egg carton to dry.
- Tie Dye Beach Towels - July 24, 2026
- Swirling Twirling Ladybugs - July 21, 2026
- Drip Tie Dye Backpack - July 17, 2026


Michelle G says
These all look great! I would love to try all of them lol, but is there any way to print out the instructions?
sara says
Cool ideas
Brionna says
I did all of them last year and they were amazing.Thanks for the tips.
Mason & Ella-Grace says
These are really cool and cute! We are really going to have some fun today! – Mason
These are SUPER cool eggs! My mom and dad will enjoy dyeing these eggs with us. We will surely LOVE it!!! -Ella-Grace
Amanda says
Awesome! Have fun and Happy Easter!
dawn says
will these ides work for styrofoam eggs….i am having an eatster themed birthday party and would like to try some of these and is wondering if it will work on foam eggs?
admin says
Hi Dawn. Not sure if I would try anything involving water with Styrofoam eggs. I haven’t tried it, so I can’t say if it would work or not. If you decide to try it I’d love to hear how they turn out!
Jamie @ hands on : as we grow says
Your ideas blow me away! I featured 2 of them (speckled eggs and the drip eggs) on my 2 dozen ideas and techniques to dye Easter Eggs today! (Also with a link saying there's 5 more awesome ways to dye eggs too!)
Jamie @ hands on : as we grow
Amy @ Positively Splendid says
What a helpful lineup of ideas! I've shared it in my Saturday Seven lineup this week.
http://www.positivelysplendid.com/2011/04/saturday-seven-no-7.html
Julie Anne says
such great ideas… although mine are still small enough that simple dyeing still works for them (and is a whole lot easier)
visiting from CSI project
wifemomwoman says
thanks for all the ideas! what a great list. i linked to you on my blog today.
http://wifemomwoman.wordpress.com/2011/04/05/easter-egg-dying-and-decorating/
christini yogini says
So neat! Thank you for the how-tos!
http://www.christiniyogini.blogspot.com
Debra says
Great ideas! We like to decorate lots of eggs and new ideas are always welcome. Really love the speckele eggs. Thanks for sharing.
Tiffany says
Love your post and the pictures. I blogged about your post and posted a link to your post on my blog! Love Love Love
ladycrafter14.blogspot.com
Lowri says
WOW – so many great ideas on one post! I love them all and am definitely going to be trying some. Will be easy with your fabulous instructions!
Visiting from Tatertots & Jello
Nicolette @ Momnivore's Dilemma says
Thanks for the great pictorials! The rubber band method looks like something to try with my kids this year…
RedTedArt says
Oh wow! You sure know your egg decorating stuff! These are great great great ideas! Thank you again for sharing on Kids Get Crafty!
Maggy
Kelly says
My daughter is going to love this! I'd love it if you would
link up over at the glitter party! http://runwithglitter.blogspot.com/2011/03/weekly-tues-thurs-link-party.html
sharon says
These are really great, and make me feel inspired to try some of these ideas! I am going to link to this post on my Sunday (4/3) Links to Love post at http://www.momof6.com.
Thanks!
Sharon
Erin says
These are so cool!!!
Megan says
They are all so pretty!
ificould says
What amazingly creative ideas! They are all so beautiful!! We posted a link: http://ificould-ificould.blogspot.com/2011/03/decorating-easter-eggs-7-fun-techniques.html
Thanks for sharing!
Missy & Kimi
if i could…
Kate @ An Amazing Child says
These are all so wonderfully beautiful. Thank you so much for all the inspiration and many, many Easter's worth of egg decorating. I love them all but I think the drip eggs are my favourite.
I will definitely be bookmarking this on TEN: The Education Network for our members to pop on over and be inspired.
moneysavingenthusiast says
I love this. I've been looking for different Easter egg ideas for my kids. Cool.
Melissa @ The Chocolate Muffin Tree says
Awesome! Love them all! I will share on my fb page!
Sue says
The speckled eggs are my favorites:)