• Home
  • About
    • About Crafts by Amanda
    • Visit Our Recipe Site
  • Work With Us
  • Join
    • Free Newsletters
    • Join our Facebook craft group
↑
  • Tutorials
    • Tutorial Index
    • Adult Crafts
    • Crafts for Kids
    • Crafts for Seniors
    • Recycled Crafts
    • Seasonal Crafts
    • Holiday Crafts
    • Free Printables
    • Craft Collections
  • Adult Crafts
    • Bath & Body
    • Beach Crafts
    • Clay Pot Crafts
    • Crafts for Seniors
    • Decoupage Crafts for Adults
    • DIY Gift ideas
    • Garden Crafts
    • Home Decor Projects
    • Kitchen Crafts
    • Light Bulb Crafts
    • Luminary Crafts
    • Mason Jar Crafts
    • Needlework
    • Photo Display Ideas
    • Recycled Crafts for Adults
    • Wearable Crafts for Adults
  • Crafts for Kids
    • Animal Crafts for Kids
    • Back to School Crafts
    • Beach Crafts for Kids
    • Camp Crafts
    • Cardboard Tube Crafts for Kids
    • Decoupage Crafts for Kids
    • Easy Crafts for Kids
    • Nature Crafts for Kids
    • Other Kid’s Crafts
    • Paper Plate Crafts for Kids
    • Recycled Crafts for Kids
    • Slimes, Doughs, & Clay
    • Wearable Crafts for Kids
  • Holiday Crafts
    • 4th of July Crafts
    • Christmas Crafts
    • DIY Gift ideas
    • Earth Day Crafts
    • Easter Crafts
    • Father’s Day Crafts
    • Halloween Crafts
    • Memorial Day Crafts
    • Mother’s Day Crafts
    • New Year’s
    • Other Holidays
    • Patriot Day Crafts
    • St. Patrick’s Day Crafts
    • Thanksgiving Crafts
    • Valentine’s Day Crafts
  • Seasonal Crafts
    • Winter Crafts
    • Spring Crafts
    • Summer Crafts
    • Fall Crafts
  • Skip to primary navigation
  • Skip to main content
  • Skip to primary sidebar
  • Skip to footer

Crafts by Amanda

crafts for adults and kid's crafts

  • Tutorials
    • Tutorial Index
    • Adult Crafts
    • Crafts for Kids
    • Crafts for Seniors
    • Recycled Crafts
    • Seasonal Crafts
    • Holiday Crafts
    • Free Printables
    • Craft Collections
  • Adult Crafts
    • Bath & Body
    • Beach Crafts
    • Clay Pot Crafts
    • Crafts for Seniors
    • Decoupage Crafts for Adults
    • DIY Gift ideas
    • Garden Crafts
    • Home Decor Projects
    • Kitchen Crafts
    • Light Bulb Crafts
    • Luminary Crafts
    • Mason Jar Crafts
    • Needlework
    • Photo Display Ideas
    • Recycled Crafts for Adults
    • Wearable Crafts for Adults
  • Crafts for Kids
    • Animal Crafts for Kids
    • Back to School Crafts
    • Beach Crafts for Kids
    • Camp Crafts
    • Cardboard Tube Crafts for Kids
    • Decoupage Crafts for Kids
    • Easy Crafts for Kids
    • Nature Crafts for Kids
    • Other Kid’s Crafts
    • Paper Plate Crafts for Kids
    • Recycled Crafts for Kids
    • Slimes, Doughs, & Clay
    • Wearable Crafts for Kids
  • Holiday Crafts
    • 4th of July Crafts
    • Christmas Crafts
    • DIY Gift ideas
    • Earth Day Crafts
    • Easter Crafts
    • Father’s Day Crafts
    • Halloween Crafts
    • Memorial Day Crafts
    • Mother’s Day Crafts
    • New Year’s
    • Other Holidays
    • Patriot Day Crafts
    • St. Patrick’s Day Crafts
    • Thanksgiving Crafts
    • Valentine’s Day Crafts
  • Seasonal Crafts
    • Winter Crafts
    • Spring Crafts
    • Summer Crafts
    • Fall Crafts
Craft Tutorials | Holiday Crafts | Halloween Crafts | Frankenstein Luminaries for Halloween

Frankenstein Luminaries for Halloween

Author by Amanda Davis on October 14, 2015 Updated on September 13, 2020

5 from 1 vote
Mason jars become Frankenstein luminaries with this fun Halloween craft project!
Jump to Project
682 shares
  • Share
  • Tweet
  • Flipboard
  • Email

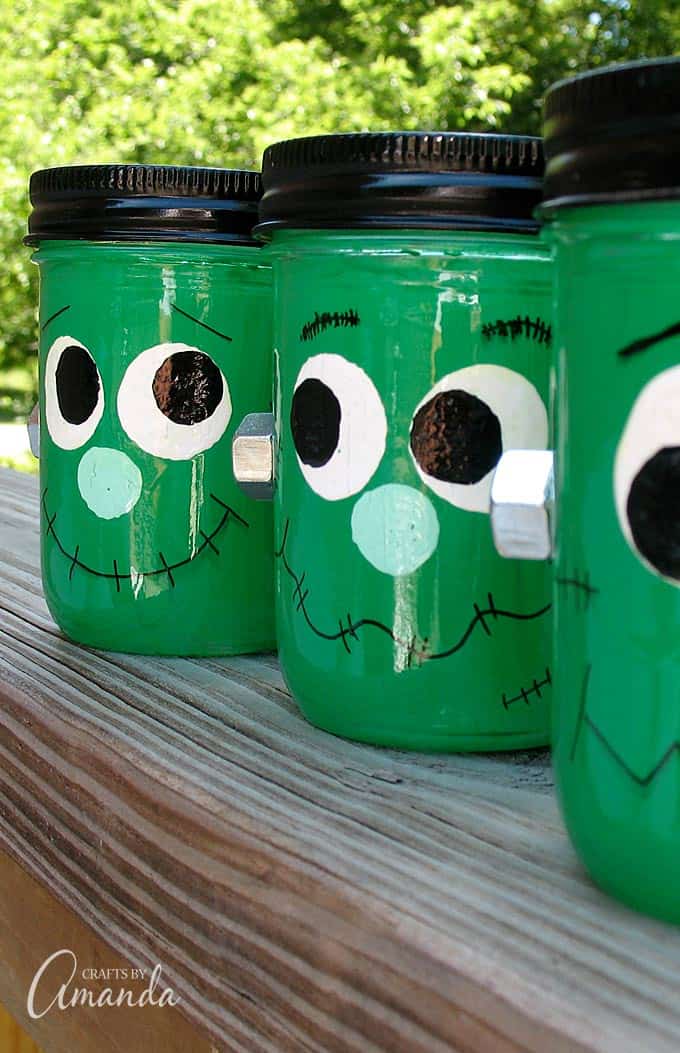
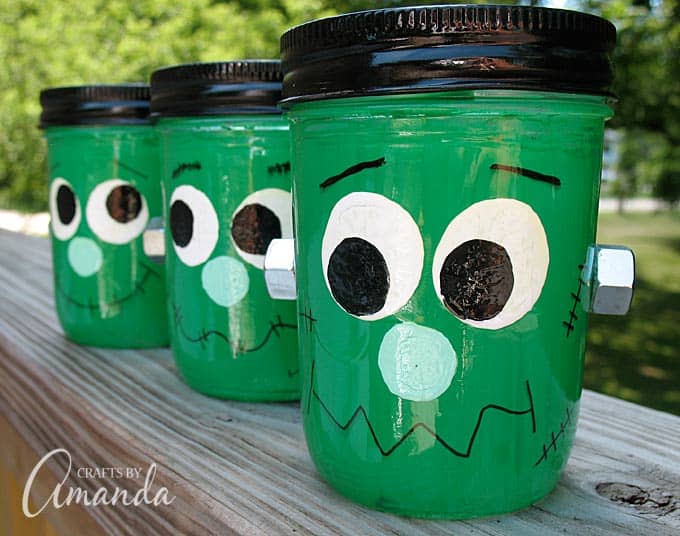
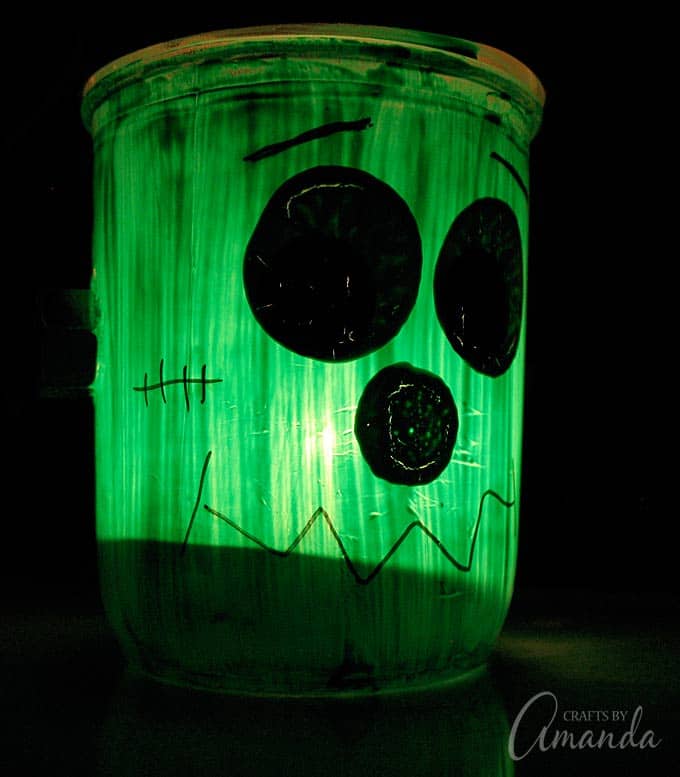
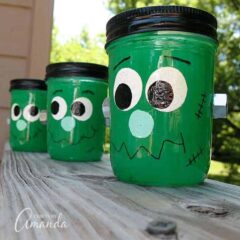
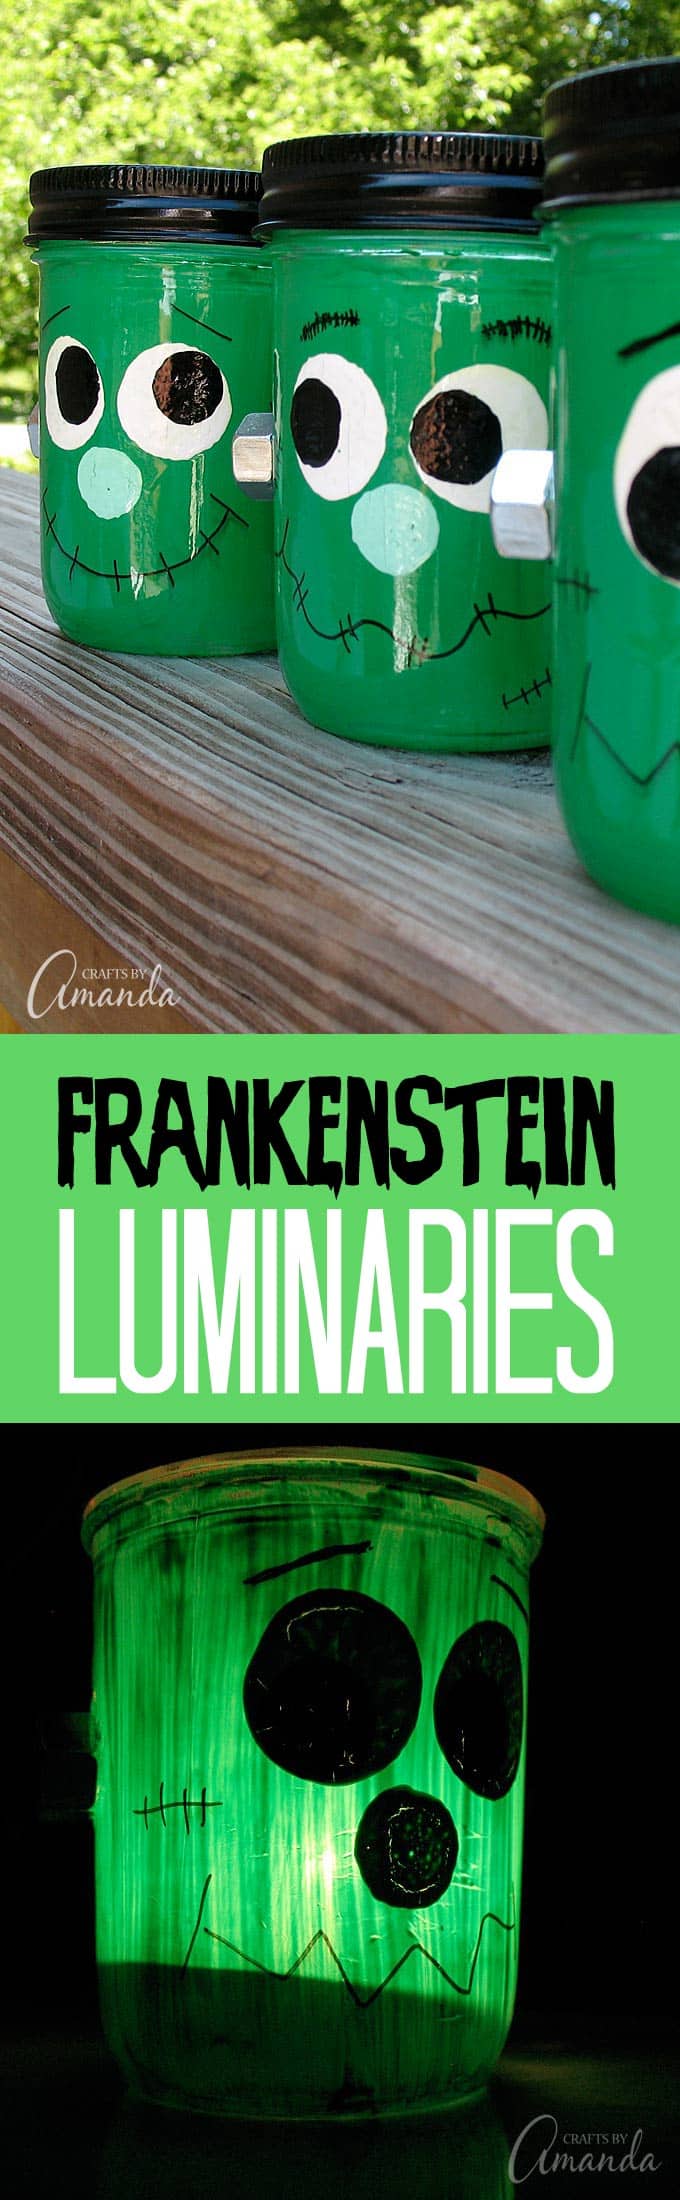
Turn ordinary mason jars into adorable Frankenstein luminaries with this fun Halloween craft for kids. Luminary crafts are great for Halloween, perfect for putting in a window or lining your sidewalk with a festive, spooky glow. These Frankenstein luminaries are sweet rather than scary, so you know it’s kid friendly.

Mason jars become Frankenstein luminaries with this fun Halloween craft project!

 Kids will love making these Frankenstein faces because they are so easy. You can make several different variations to create different expressions just by changing the eyebrows and smiles. Be sure to check out my colorful Halloween luminaries  and these glowing Jack O’Lantern jars as other options for decorating this year.

Mason jars become Frankenstein luminaries with this fun Halloween craft project!

These would be great as centerpieces for a Halloween party, or to add some extra light to your front porch when trick-or-treating time arrives. They would also be great for holding plastic utensils or as a fun and colorful pencil holder for your desk. Another option is to fill them with individually wrapped candies and give as a gift!

Mason jars become Frankenstein luminaries with this fun Halloween craft project!

Making Frankenstein Luminaries

Mason jars are the perfect starting point for luminary crafts. They’re particularly great for this project because the canning lid band becomes Frankie’s hair!

Mason jars become Frankenstein luminaries with this fun Halloween craft project!

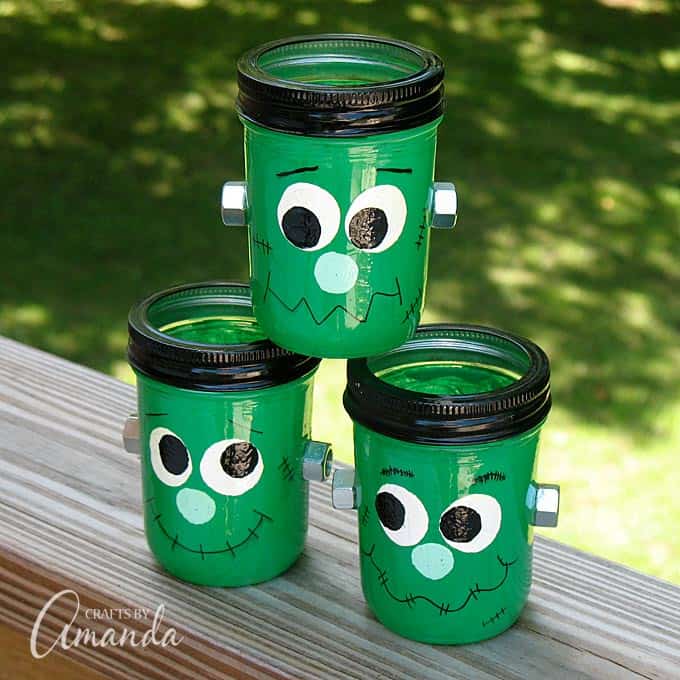
Try changing the shape of the mouth, the angle of the eyebrows, and the position of the pupils to create a variety of facial expressions. You can also use these same techniques for all kinds of other Frankenstein crafts.

Mason jars become Frankenstein luminaries with this fun Halloween craft project!

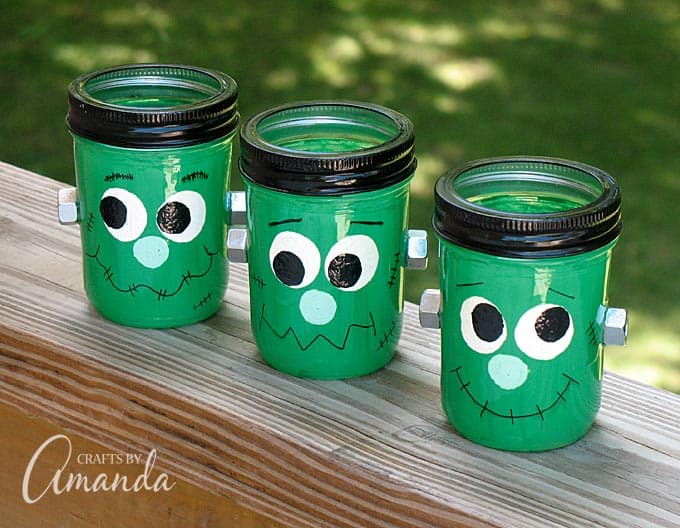
Keep reading for complete instructions; you’ll also find a printable version of the instructions at the end of the post. If you make them, I’d love to see the expressions you come up with for your Frankenstein faces!

Mason jars become Frankenstein luminaries with this fun Halloween craft project!

There are affiliate links in this post. That means if you buy something from that link, I will earn a small commission, but it won’t cost you anything additional.

Supplies needed to make Frankenstein Luminaries

  • Glass canning jars with lid bands
  • Acrylic paint: green, white, black
  • Paintbrush
  • Large, medium, and small round sponge applicators
  • Black marker
  • 2 metal nuts per jar
  • Instant grab glue
  • Clear gloss sealer spray

Mason jars become Frankenstein luminaries with this fun Halloween craft project!

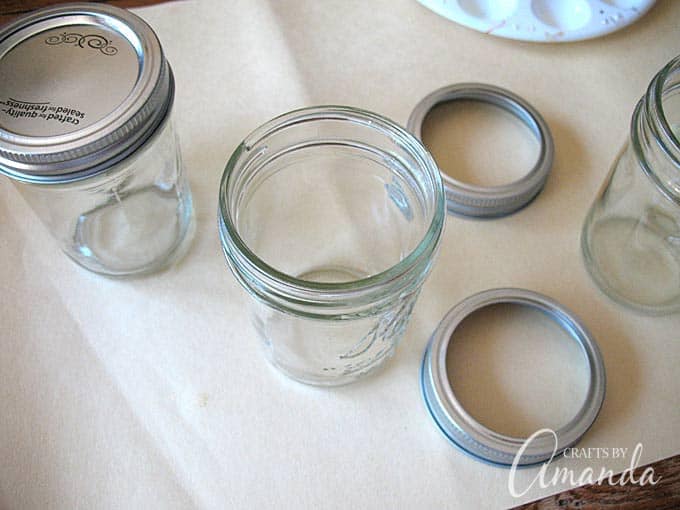
1. Remove bands from jars, save seals for another project.

Mason jars become Frankenstein luminaries with this fun Halloween craft project!

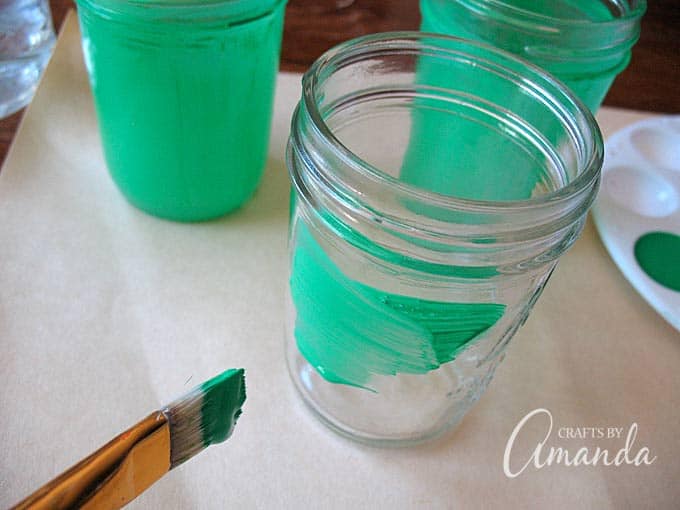
2. Paint bands black and jars green; set aside to dry.

Mason jars become Frankenstein luminaries with this fun Halloween craft project!

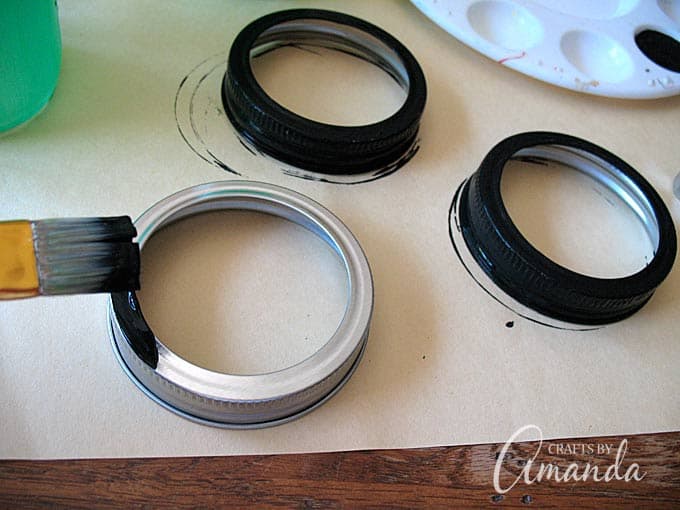
3. When dry, paint a second coat on the jars and have a grownup spray the black bands with sealer spray. Set aside to dry.

Mason jars become Frankenstein luminaries with this fun Halloween craft project!

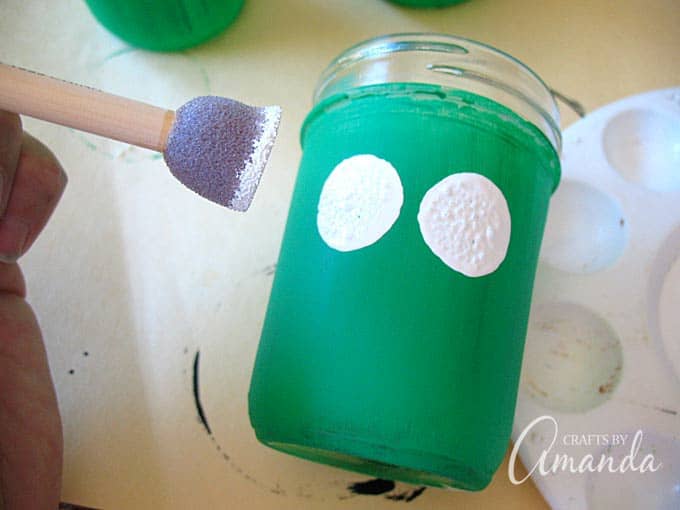
4. Dip the large round sponge applicator into white paint and dot on the eyes to the front of the jar.

Mason jars become Frankenstein luminaries with this fun Halloween craft project!

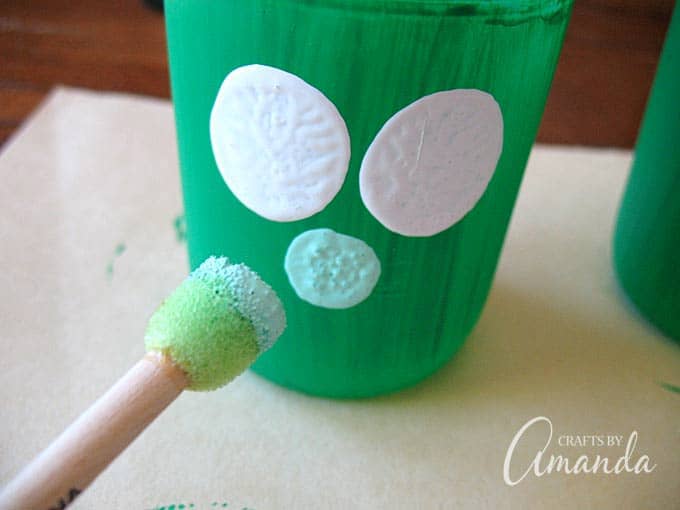
5. Mix a small amount of green paint with some white paint to make a light shade of green. Dip the small round applicator into the green paint and add the nose to the front of the jar.

Mason jars become Frankenstein luminaries with this fun Halloween craft project!

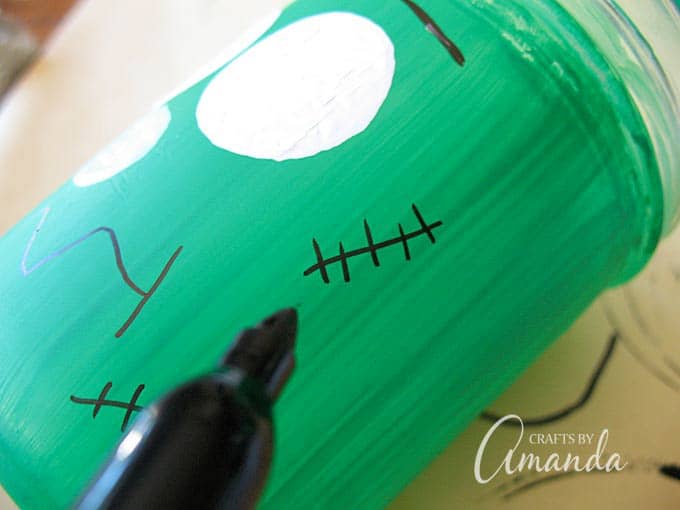
6. While the eyes and nose are drying, with a light hand so as not to rip through the paint, carefully draw on stitches and a mouth.

Frankenstein-Luminaries-step-7

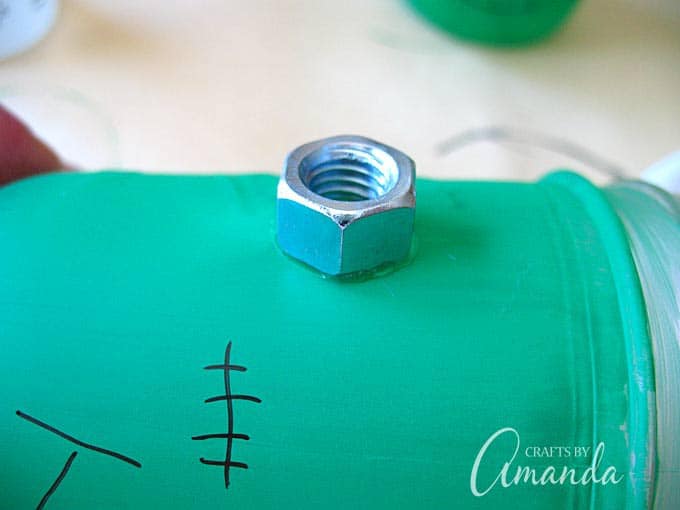
7. Use instant grab glue to attach a nut to the side of the jar. Allow it to dry for several minutes before turning the jar over and gluing a nut to the other side. Stand the jar up and let everything dry. You may need to check the nuts and make sure they are sticking. Simply press them back in place if need be.

Mason jars become Frankenstein luminaries with this fun Halloween craft project!

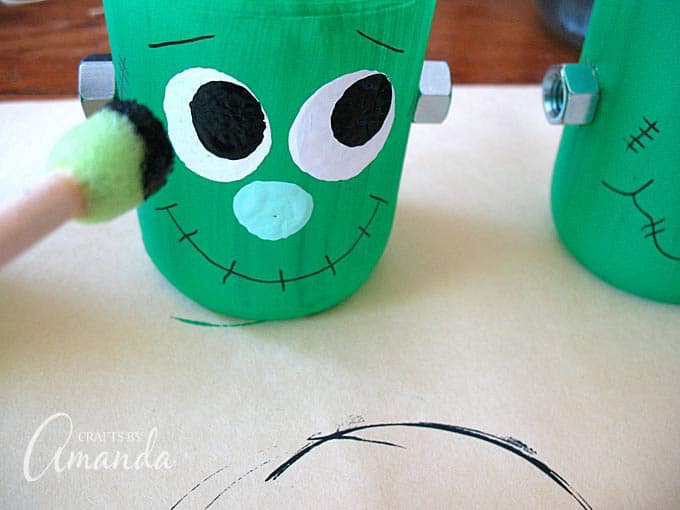
8. Dip the medium round sponge applicator into black paint and add the pupils to the eyes. Allow them to dry completely.

9. Have a grown up spray the jars with gloss sealer spray, each jar and black band should get three coats, wait 30 minutes between coats.

Mason jars become Frankenstein luminaries with this fun Halloween craft project!

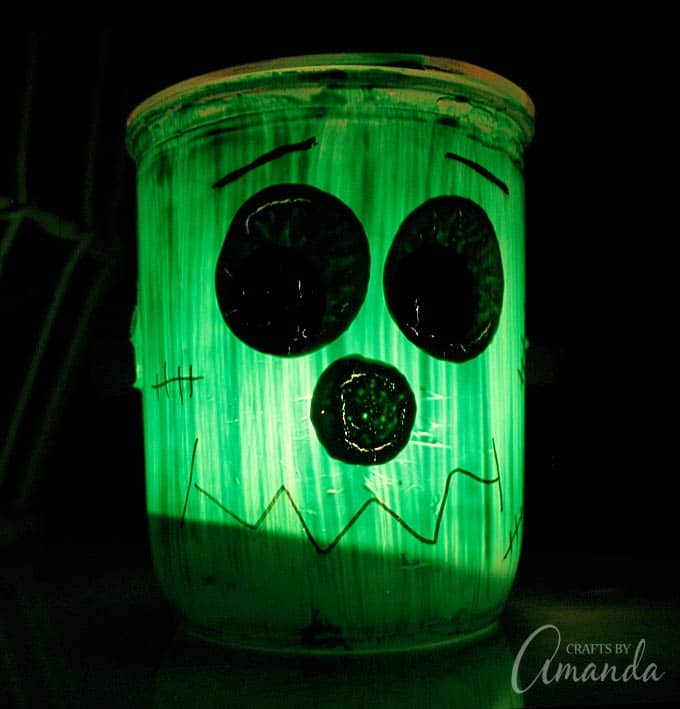
10. When everything is dry, screw the black bands back onto the jars and add a tea light candle.

Helpful Hints:

  • For a safer option, you can purchase battery operated tea light candles.
  • If you don’t have canning jars, you can use any type of recycled glass jar. Simply paint the rim of the jar black in place of a band.
  • These jars make great holders for your Halloween party table as well. Fill them with pixie sticks, straws, or lollipops!

More Halloween Crafts You Might Enjoy

  1. Use larger mason jars or glass jars out of the recycling bin to make my colorful skull luminaries.
  2. For another fun and monster-y idea, try making creepy hand luminaries.
  3. Greet trick-or-treaters with some Halloween monster yard lights!
  4. Hungry? Whip up some Frankenstein Oreo pops. Or if you prefer a healthier snack, try some Frankenstein kiwis instead!
  5. For pretend play, a Frankenstein shirt or craft stick Frankenstein and Bride of Frankenstein puppets offer lots of imaginative fun!
  6. If you’re having a Halloween party, keep everyone entertained with a foam head Frankenstein bowling game.
  7. Continue the Frankenstein crafts theme with a glowing Frankenstein made from a milk jug.
Print Project
5 from 1 vote

Frankenstein Luminaries for Halloween

Mason jars become Frankenstein luminaries with this fun Halloween craft project!
Author: Amanda Formaro

Supplies

  • Glass canning jars with lid bands
  • Acrylic paint: green white, black
  • Paintbrush
  • Large medium, and small round sponge applicators
  • Black marker
  • 2 metal nuts per jar
  • Instant grab glue
  • Clear gloss sealer spray

Instructions

  • Remove bands from jars, save seals for another project.
  • Paint bands black and jars green; set aside to dry.
  • When dry, paint a second coat on the jars and have a grownup spray the black bands with sealer spray. Set aside to dry.
  • Dip the large round sponge applicator into white paint and dot on the eyes to the front of the jar.
  • Mix a small amount of green paint with some white paint to make a light shade of green. Dip the small round applicator into the green paint and add the nose to the front of the jar.
  • While the eyes and nose are drying, with a light hand so as not to rip through the paint, carefully draw on stitches and a mouth.
  • Use instant grab glue to attach a nut to the side of the jar. Allow it to dry for several minutes before turning the jar over and gluing a nut to the other side. Stand the jar up and let everything dry. You may need to check the nuts and make sure they are sticking. Simply press them back in place if need be.
  • Dip the medium round sponge applicator into black paint and add the pupils to the eyes. Allow them to dry completely.
  • Have a grown up spray the jars with gloss sealer spray, each jar and black band should get three coats, wait 30 minutes between coats.
  • When everything is dry, screw the black bands back onto the jars and add a tea light candle.

Expert Tips & FAQs

For a safer option, you can purchase battery operated tea light candles.
If you don’t have canning jars, you can use any type of recycled glass jar. Simply paint the rim of the jar black in place of a band.
These jars make great holders for your Halloween party table as well. Fill them with pixie sticks, straws, or lollipops!
Mason jars become Frankenstein luminaries with this fun Halloween craft project!
  • Author
  • Recent Posts
Amanda Davis
Amanda Davis is the crafty, entrepreneurial mother of four children. She loves to bake, cook, make kid's crafts and create decorative items for her home. She is a crafting expert and guru in the kitchen and has appeared online and in print publications many times over the years.
Latest posts by Amanda Davis (see all)
  • Rainbow Tie Dye Shirts - July 4, 2025
  • Mason Jar Solar Lights - June 27, 2025
  • Patriotic Pinwheels - June 20, 2025
682 shares
  • Share
  • Tweet
  • Flipboard
  • Email

Filed Under: Halloween Crafts, Luminary Crafts Tagged With: frankenstein, halloween, halloween decorations, holidays, kid's craft, luminaries, luminary, Monster Crafts

Reader Interactions

Free CraftsBy email every week

Latest crafts straight to your inbox!

Comments

  1. Shelley @ Two Healthy Kitchens says

    October 20, 2015 at 9:24 am

    These are so fun! Definitely sweet and not scary … very kid-friendly! Perfect for the kiddos to help make, or for parents to surprise the kids with this cute decoration at the next Halloween party! I’m definitely pinning this to share! And thank you so much for mentioning our Frankenstein Kiwis as another fun, (not scary!) Halloween craft families might enjoy – so sweet of you to share our idea! Happy Halloween!

    Reply
    • Amanda Formaro says

      October 25, 2015 at 4:40 pm

      Thanks Shelley! And you’re welcome for the link. Happy to share things I think my readers will enjoy :)

      Reply
  2. Donna Pheneger says

    October 18, 2015 at 1:06 pm

    I love the idea of luminaries, especially at Christmas, Last year we made them for the table but the battery operated tea lights weren’t bright enough to make it shine like a regular candle. Is there another safe way to light the luminary and make it bright? Thank you!

    Reply
    • Amanda Formaro says

      October 25, 2015 at 4:42 pm

      If you don’t want to use flame candles you can use LED string lights. They sell them in short strands that are battery operated.

      Reply
5 from 1 vote

Leave a Reply Cancel reply

Your email address will not be published. Required fields are marked *

Rate This Project


The maximum upload file size: 640 MB. You can upload: image, video. Links to YouTube, Facebook, Twitter and other services inserted in the comment text will be automatically embedded. Drop files here

Primary Sidebar

Hi! I’m Amanda and I’m the founder and head designer of Crafts by Amanda. I have spent over 25 years creating projects to share, but it’s not just me anymore! It’s turned into a complete family affair. Come and meet the Creative Team!

Free CraftsBy email every week

Latest crafts straight to your inbox!

All Time Favorites

Learn to make these adorable ladybug painted rocks. use special outdoor paint for this adorable garden craft so you can keep garden ladybugs all summer!

Ladybug Painted Rocks…

These colorful little ladybug painted rocks are the ... Go To project

snowy pinecone candle jar luminaries

Winter Luminaries: Snowy Pinecone…

Make pretty winter luminaries that appear to be covered ... Go To project

Make this wonderful deco mesh pumpkin wreath to hang on your door this fall!

Deco Mesh Pumpkin Wreath…

Adorn your door this fall with a pretty deco mesh ... Go To project

Reuse those empty prescription pill bottles in all sorts of ways. From organizing to making cookies. Yes, cookies! See how to use your empty pill bottles!

20 Uses for Prescription Pill…

You've been collecting prescription pill bottles for ... Go To project

Meet the Family

Amanda

Founder and Designer

Kristen

Editorial Manager

Lindsay

Social Media Manager

As seen on:

Footer

Favorites

  • Jar Photo Frames
  • No-Sew Roman Shade
  • Paper Flowers
  • How to Make a Scrunchie
  • Mermaid Slime

About

  • Home
  • Meet the Creative Team
  • Work with Us
  • Privacy Policy
  • Accessibility
  • Contact Us

Images/text copyright Amanda Formaro 2020. To feature a post from Crafts by Amanda, you may use one photo credited and linked back directly to the project post.

Free CraftsBy email every week

Latest crafts straight to your inbox!

Copyright ©2025, Crafts by Amanda. All Rights Reserved.
Design by Pixel Me Designs

Rate This Tutorial

Your vote:


To share a photo with your comment click here!

A rating is required
A name is required
An email is required

Recipe Ratings without Comment

Something went wrong. Please try again.