• Home
  • About
    • About Crafts by Amanda
    • Visit Our Recipe Site
  • Work With Us
  • Join
    • Free Newsletters
    • Join our Facebook craft group
↑
  • Tutorials
    • Tutorial Index
    • Adult Crafts
    • Crafts for Kids
    • Crafts for Seniors
    • Recycled Crafts
    • Seasonal Crafts
    • Holiday Crafts
    • Free Printables
    • Craft Collections
  • Adult Crafts
    • Bath & Body
    • Beach Crafts
    • Clay Pot Crafts
    • Crafts for Seniors
    • Decoupage Crafts for Adults
    • DIY Gift ideas
    • Garden Crafts
    • Home Decor Projects
    • Kitchen Crafts
    • Light Bulb Crafts
    • Luminary Crafts
    • Mason Jar Crafts
    • Needlework
    • Photo Display Ideas
    • Recycled Crafts for Adults
    • Wearable Crafts for Adults
  • Crafts for Kids
    • Animal Crafts for Kids
    • Back to School Crafts
    • Beach Crafts for Kids
    • Camp Crafts
    • Cardboard Tube Crafts for Kids
    • Decoupage Crafts for Kids
    • Easy Crafts for Kids
    • Nature Crafts for Kids
    • Other Kid’s Crafts
    • Paper Plate Crafts for Kids
    • Recycled Crafts for Kids
    • Slimes, Doughs, & Clay
    • Wearable Crafts for Kids
  • Holiday Crafts
    • 4th of July Crafts
    • Christmas Crafts
    • DIY Gift ideas
    • Earth Day Crafts
    • Easter Crafts
    • Father’s Day Crafts
    • Halloween Crafts
    • Memorial Day Crafts
    • Mother’s Day Crafts
    • New Year’s
    • Other Holidays
    • Patriot Day Crafts
    • St. Patrick’s Day Crafts
    • Thanksgiving Crafts
    • Valentine’s Day Crafts
  • Seasonal Crafts
    • Winter Crafts
    • Spring Crafts
    • Summer Crafts
    • Fall Crafts
  • Skip to primary navigation
  • Skip to main content
  • Skip to primary sidebar
  • Skip to footer

Crafts by Amanda

crafts for adults and kid's crafts

  • Tutorials
    • Tutorial Index
    • Adult Crafts
    • Crafts for Kids
    • Crafts for Seniors
    • Recycled Crafts
    • Seasonal Crafts
    • Holiday Crafts
    • Free Printables
    • Craft Collections
  • Adult Crafts
    • Bath & Body
    • Beach Crafts
    • Clay Pot Crafts
    • Crafts for Seniors
    • Decoupage Crafts for Adults
    • DIY Gift ideas
    • Garden Crafts
    • Home Decor Projects
    • Kitchen Crafts
    • Light Bulb Crafts
    • Luminary Crafts
    • Mason Jar Crafts
    • Needlework
    • Photo Display Ideas
    • Recycled Crafts for Adults
    • Wearable Crafts for Adults
  • Crafts for Kids
    • Animal Crafts for Kids
    • Back to School Crafts
    • Beach Crafts for Kids
    • Camp Crafts
    • Cardboard Tube Crafts for Kids
    • Decoupage Crafts for Kids
    • Easy Crafts for Kids
    • Nature Crafts for Kids
    • Other Kid’s Crafts
    • Paper Plate Crafts for Kids
    • Recycled Crafts for Kids
    • Slimes, Doughs, & Clay
    • Wearable Crafts for Kids
  • Holiday Crafts
    • 4th of July Crafts
    • Christmas Crafts
    • DIY Gift ideas
    • Earth Day Crafts
    • Easter Crafts
    • Father’s Day Crafts
    • Halloween Crafts
    • Memorial Day Crafts
    • Mother’s Day Crafts
    • New Year’s
    • Other Holidays
    • Patriot Day Crafts
    • St. Patrick’s Day Crafts
    • Thanksgiving Crafts
    • Valentine’s Day Crafts
  • Seasonal Crafts
    • Winter Crafts
    • Spring Crafts
    • Summer Crafts
    • Fall Crafts
Craft Tutorials | Holiday Crafts | Halloween Crafts | Colorful Skull Luminaries for Halloween
Halloween Crafts

Colorful Skull Luminaries for Halloween

Author by Amanda Davis on October 28, 2013 Updated on October 8, 2022

4.50 from 2 votes
Jump to Project
287 shares
  • Share
  • Tweet
  • Flipboard
  • Email

Colorful Skull Luminaries for Halloween @amandaformaro Crafts by Amanda


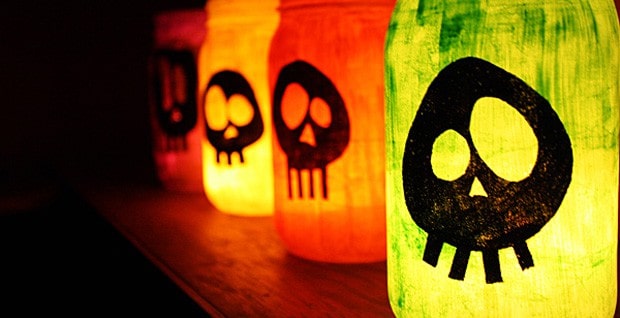
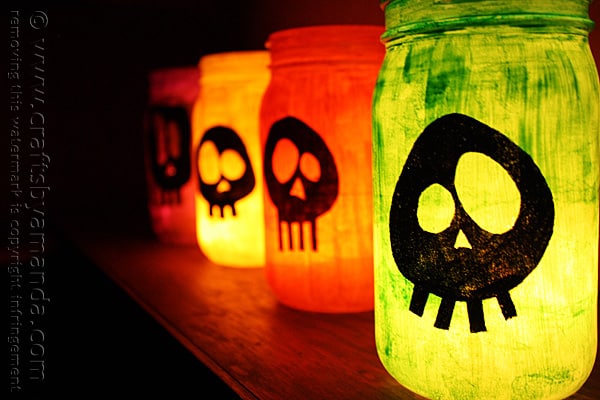
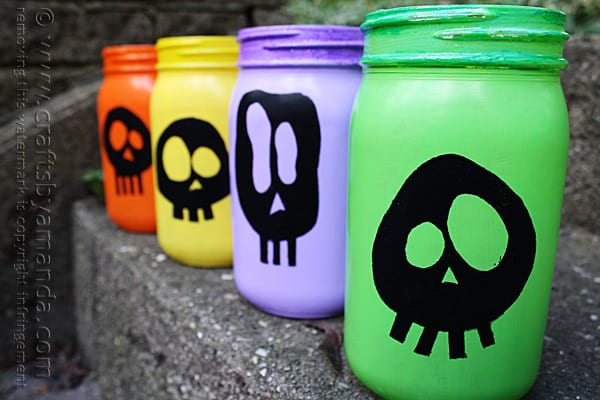
I am all about color when it comes to crafting. There’s something about lots of different colors that just makes me smile. These skull luminaries use four common Halloween themed colors and will light up the night on Halloween! You’ll get a lot of comments and compliments on Halloween night as trick or treaters come to your door.

These would be a great Halloween decoration for your Pumpkin Painting Party!

Colorful Skull Luminaries for Halloween @amandaformaro Crafts by Amanda

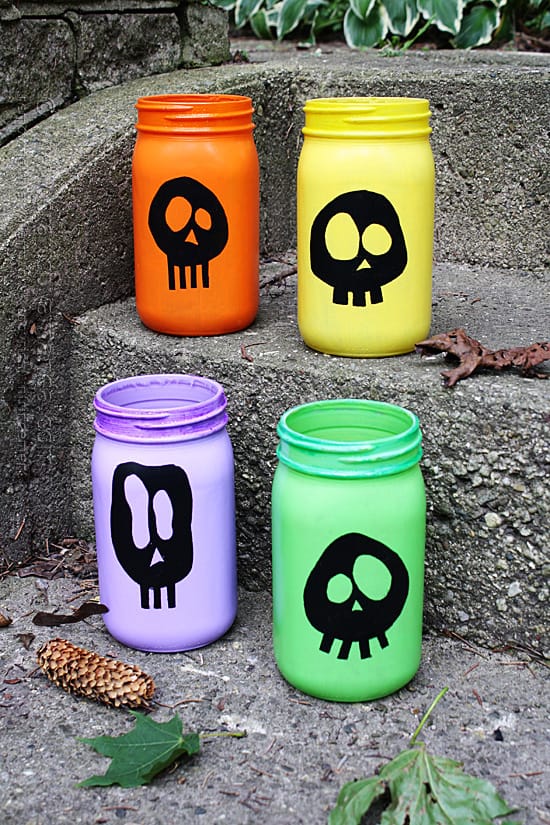
They even look great during the day because of their bright and cheerful colors! Cool enough for teens but friendly and cute enough for little ones. Of course if you’d like to try my ghoulish Halloween luminaries that would be fun too!

Colorful Skull Luminaries for Halloween @amandaformaro Crafts by Amanda

I’ll show you how to make your own stencils using some contact paper and my skull patterns. The pattern is downloadable from the printable instructions below. Here’s some step by steps to help you make these.

Colorful Skull Luminaries for Halloween @amandaformaro Crafts by Amanda

These luminaries originally appeared in my monthly Chicago Tribune column.

Colorful Skull Luminaries for Halloween @amandaformaro Crafts by Amanda

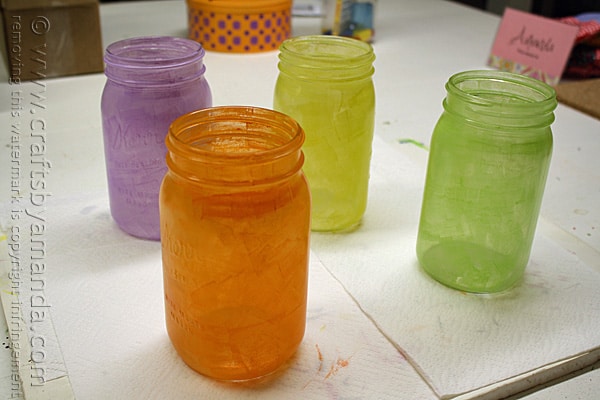
I used Americana Multi Surface Satin on these jars. The colors I used were Pumpkin Patch, Iris, Apple Green, Lemon Zest and Black Tie. That paint is best applied with multiple thin coats. I did two coats with a cosmetic sponge, which really helps with light application.

Colorful Skull Luminaries for Halloween @amandaformaro Crafts by Amanda

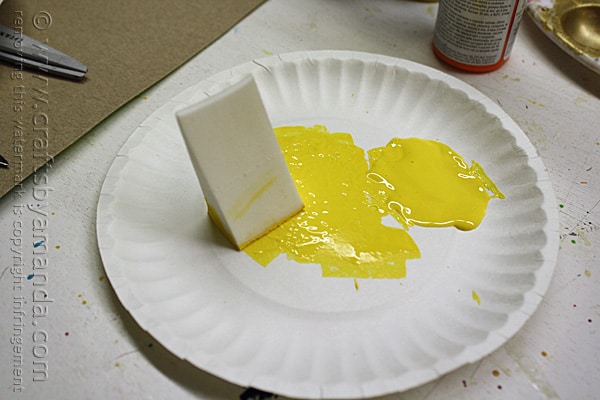
Dab the sponge into the paint and dab off the excess.

Colorful Skull Luminaries for Halloween @amandaformaro Crafts by Amanda

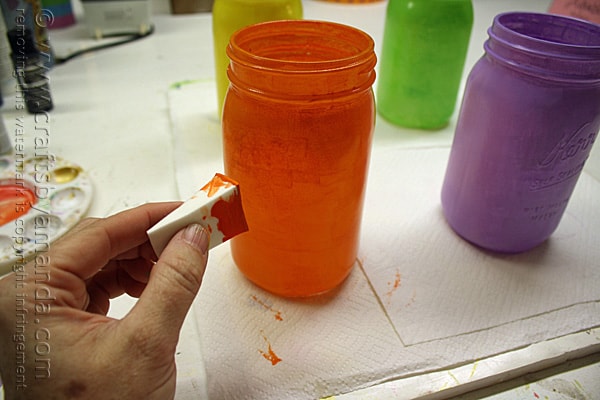
Then apply to the jars.

Colorful Skull Luminaries for Halloween @amandaformaro Crafts by Amanda
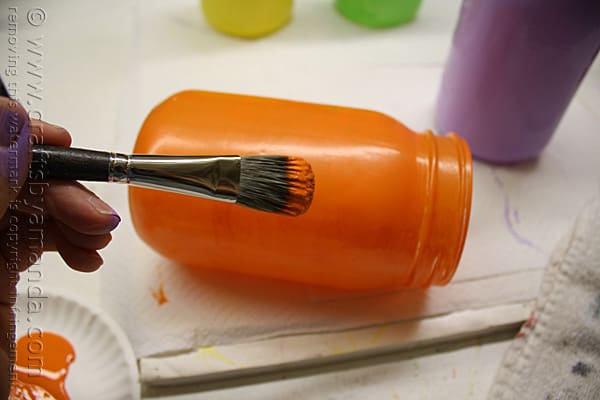
After those coats had dried, I did my third coat with a paint brush.

Colorful Skull Luminaries for Halloween @amandaformaro Crafts by Amanda

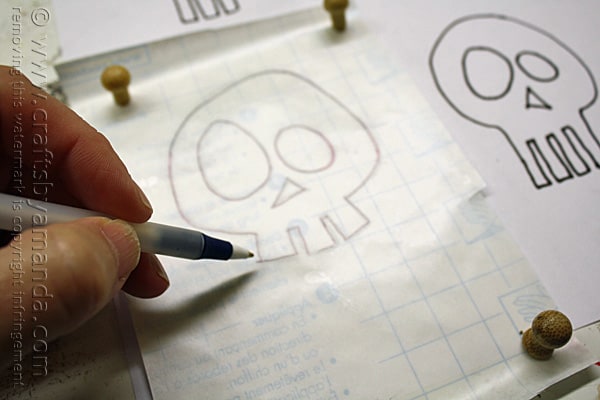
Print out the skull pattern and place it under the clear contact paper. Trace the pattern with a pen. I tacked mine down to a piece of foam core board to hold it in place.

Colorful Skull Luminaries for Halloween @amandaformaro Crafts by Amanda

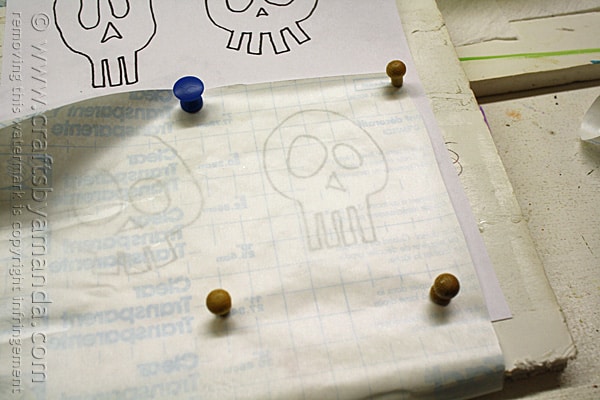
It makes it a lot easier than trying to hold it in place while you trace.

Colorful Skull Luminaries for Halloween @amandaformaro Crafts by Amanda

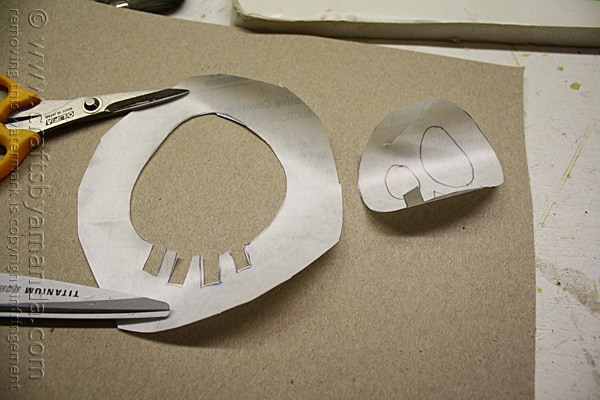
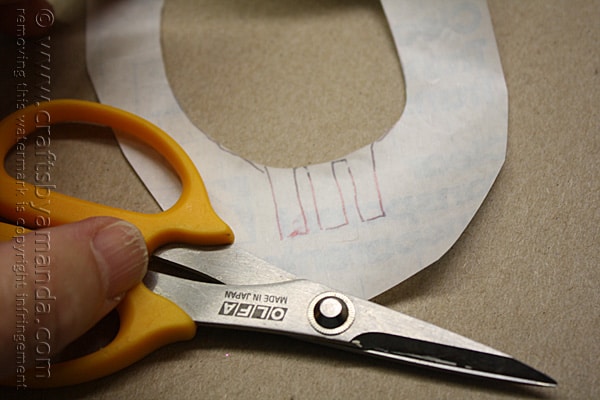
Be careful when you cut these out. The natural tendency is to cut around the pattern. We need to cut INSIDE the pattern instead. Cut the skull out of the center.

Colorful Skull Luminaries for Halloween @amandaformaro Crafts by Amanda

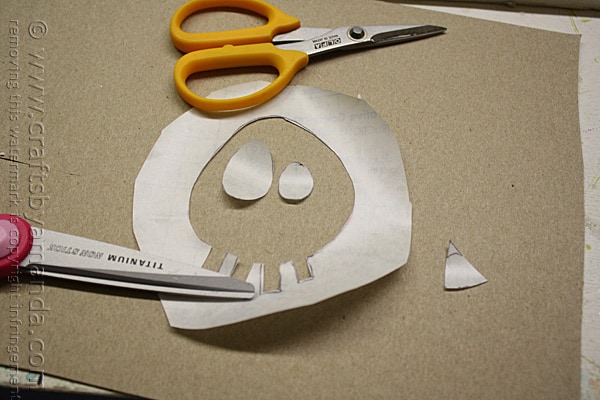
Cut the eyes and the nose out. I left excess contact paper on the nose since it’s so small. It would have been next to impossible to remove the backing otherwise.

Colorful Skull Luminaries for Halloween @amandaformaro Crafts by Amanda

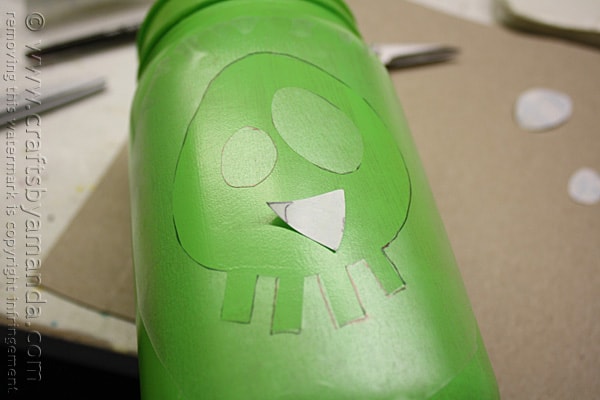
Attach the skull stencil to the jar (the jar should be completely dry!) then add the eyes. For the nose, peel the backing off first, then trim it to the right size and attach. Tweezers are handy here too. :)

Colorful Skull Luminaries for Halloween @amandaformaro Crafts by Amanda

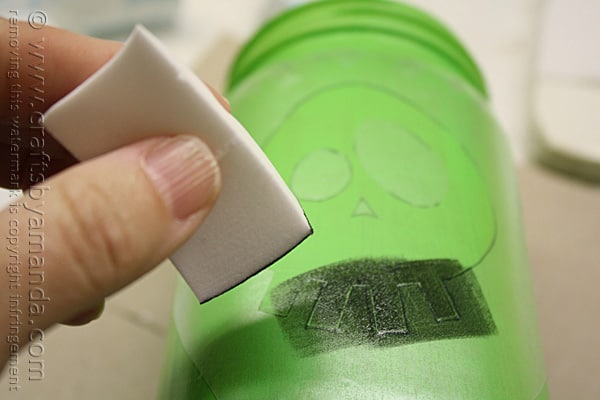
Next you’ll apply a thin coat of black paint using a cosmetic sponge. As with any stencil application, be sure to dab off most of the excess paint before applying. You will probably need two coats, apply right after the first coat.

Colorful Skull Luminaries for Halloween @amandaformaro Crafts by Amanda

A tip for easier cutting. Since you don’t need to keep the inner skull portion of the stencil in tact, cut the circle of the skull out first then you can easily cut out the teeth without the contact paper from the skull getting in your way.

Colorful Skull Luminaries for Halloween @amandaformaro Crafts by Amanda

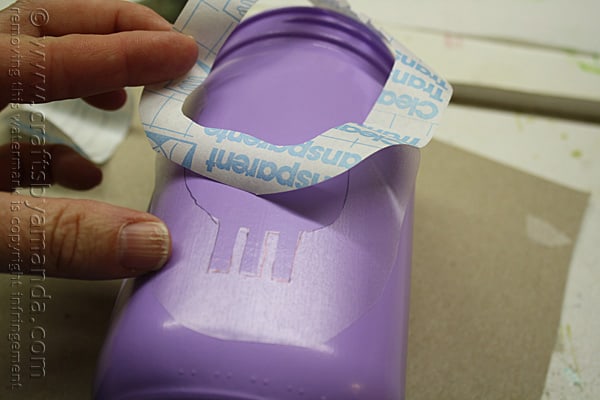
Another tip, this time for applying the stencil. If you start by peeling off just the bottom section and apply that first, you can peel the rest as you go.

Colorful Skull Luminaries for Halloween @amandaformaro Crafts by Amanda

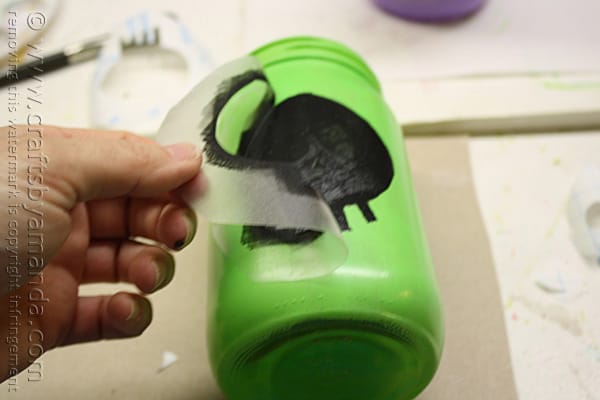
Once your black paint has been applied, don’t wait for it to dry. Go ahead and slowly peel off the stencil.

Colorful Skull Luminaries for Halloween @amandaformaro Crafts by Amanda

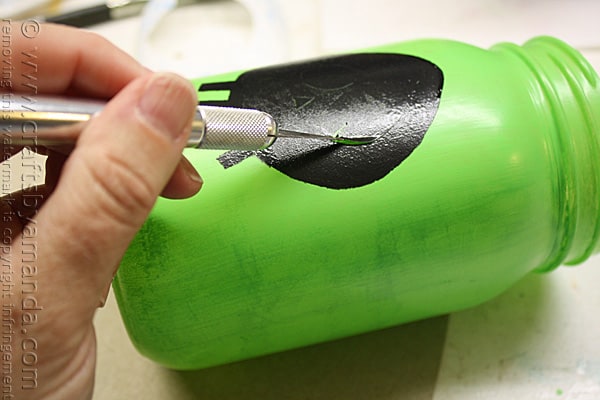
The eyes and nose are admittedly a bit tricky to remove. I used the point of a craft knife to carefully lift the edge of the eye stencil. I did make a couple scratches in the paint underneath, but nothing too dramatic.

Colorful Skull Luminaries for Halloween @amandaformaro Crafts by Amanda

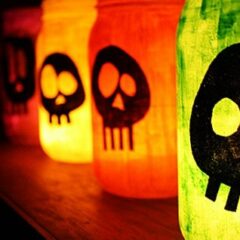
That’s it! Once they are dry you can display them as is or place a candle inside. I used glass votive holders with tea light candles in mine. If real candles make you nervous, you can certainly try using those LED tea lights. Happy creating and Happy Halloween!

For another fun skull project, try my skull painted rocks!

More Halloween Crafts

  • Halloween Ribbon Wreath
  • Mason Jar Lid Pumpkins
  • Fall Napkin Luminaries
  • Barbie Zombies
  • Clay Halloween Village
  • Halloween Terrarium
  • You’ve Been Booed
Print Project
4.50 from 2 votes

Colorful Skull Luminaries for Halloween

Supplies

  • Glass jars
  • Clear contact paper
  • Pen
  • Scissors
  • Cosmetic sponge
  • Skull pattern

Americana Multi Surface Satin

  • Pumpkin Patch
  • Iris
  • Apple Green
  • Lemon Zest
  • Black Tie

Instructions

  • Wash and dry your jars, then paint two coats of acrylic paint to the outside of the jar, drying between coats for 30 minutes. Allow the jars to dry completely.
  • Draw simple skulls on a piece of paper, small enough to fit on your jar. Place a piece of contact paper over the drawing, clear side facing up. Trace the pattern onto the contact paper.
  • You want the outside of the skull to remain intact, so cut the skull out from the inside. Cut out eyes and nose as well as you will need those separately.
  • Press the contact paper with the skull cut-out onto the jar, making sure there are no air bubbles and that all sides and stuck down. Press the contact paper eyes and nose in place.
  • Dip a cosmetic sponge into black paint and remove the excess paint by dabbing it up and down onto a paper towel or paper plate. With a straight up and down motion, apply paint over the top of the stencil. A second coat may be needed, but allow it to dry for just a minute or two first so you don’t lift off your first layer.
  • Carefully remove the contact paper stencils. The pointed end of a craft knife can be used to gently coax the edge of the stencil up, but be careful not to scratch the paint.
  • Use tea light candles or battery operated LED tea lights to illuminate your jars!

Expert Tips & FAQs

There are special paints made for glass called enamels. Regular acrylic craft paints will work, but if you would like your luminaries to last season after season, it’s best to use enamel paints or a multi surface paint that works on glass. If you choose to use acrylic paint, spraying them with a clear gloss thick sealer will help preserve them as well.

Disclaimer: There are affiliate links to Amazon in this post. If you happen to click through AND buy something I will earn a small commission.

  • Author
  • Recent Posts
Amanda Davis
Amanda Davis is the crafty, entrepreneurial mother of four children. She loves to bake, cook, make kid's crafts and create decorative items for her home. She is a crafting expert and guru in the kitchen and has appeared online and in print publications many times over the years.
Latest posts by Amanda Davis (see all)
  • Spring Scavenger Hunt - May 9, 2025
  • How to Make Lip Scrub - May 2, 2025
  • How to Make Lavender Soap - April 22, 2025
287 shares
  • Share
  • Tweet
  • Flipboard
  • Email

Filed Under: Halloween Crafts, Luminary Crafts Tagged With: adult, adult craft ideas, adult crafts, adults, crafts for adults, Crafts Using Recycled Jars, glass, halloween, holidays, luminaries, luminary. luminaries, skulls

Reader Interactions

Free CraftsBy email every week

Latest crafts straight to your inbox!

Comments

  1. Sara says

    September 3, 2019 at 4:26 pm

    There are downloadable skills to make the stencils with? I cant find he link to download them.

    Reply
    • Amanda Formaro says

      September 9, 2019 at 5:41 pm

      Oops, sorry about that! Here you go https://craftsbyamanda.com/wp-content/uploads/2013/10/skull-pattern.pdf

      Reply
  2. Chad and Amanda says

    September 18, 2015 at 11:39 am

    These look so awesome! This is now on my must make list and they will look perfect for decorating the yard for Halloween.

    Reply
    • Amanda Formaro says

      September 25, 2015 at 3:36 pm

      Thanks! I hope you get a chance to make them, they are so fun all lit up!

      Reply
  3. khulood says

    September 24, 2014 at 2:55 pm

    your creations are simple but very effective .I mean very artistic.

    Reply
    • Amanda Formaro says

      October 2, 2014 at 9:36 pm

      Thank you Khulood!

      Reply
  4. Katherine Elliot says

    October 30, 2013 at 7:42 am

    I love these!

    Reply
    • Amanda Formaro says

      October 31, 2013 at 6:51 am

      Thank you Katherine, they were fun to make!

      Reply
  5. Angie | Big Bear's Wife says

    October 28, 2013 at 8:24 am

    hahaha that orange one! I need it!

    Reply
    • Amanda Formaro says

      October 29, 2013 at 7:15 am

      Haha thanks Angie!

      Reply
4.50 from 2 votes (1 rating without comment)

Leave a Reply Cancel reply

Your email address will not be published. Required fields are marked *

Rate This Project


The maximum upload file size: 640 MB. You can upload: image, video. Links to YouTube, Facebook, Twitter and other services inserted in the comment text will be automatically embedded. Drop files here

Primary Sidebar

Hi! I’m Amanda and I’m the founder and head designer of Crafts by Amanda. I have spent over 25 years creating projects to share, but it’s not just me anymore! It’s turned into a complete family affair. Come and meet the Creative Team!

Free CraftsBy email every week

Latest crafts straight to your inbox!

All Time Favorites

snowy pinecone candle jar luminaries

Winter Luminaries: Snowy Pinecone…

Make pretty winter luminaries that appear to be covered ... Go To project

Make this wonderful deco mesh pumpkin wreath to hang on your door this fall!

Deco Mesh Pumpkin Wreath…

Adorn your door this fall with a pretty deco mesh ... Go To project

Learn to make these adorable ladybug painted rocks. use special outdoor paint for this adorable garden craft so you can keep garden ladybugs all summer!

Ladybug Painted Rocks…

I'm going to show you how to make these adorable ... Go To project

Reuse those empty prescription pill bottles in all sorts of ways. From organizing to making cookies. Yes, cookies! See how to use your empty pill bottles!

20 Uses for Prescription Pill…

You've been collecting prescription pill bottles for ... Go To project

Meet the Family

Amanda

Founder and Designer

Kristen

Editorial Manager

Lindsay

Social Media Manager

As seen on:

Footer

Favorites

  • Jar Photo Frames
  • No-Sew Roman Shade
  • Paper Flowers
  • How to Make a Scrunchie
  • Mermaid Slime

About

  • Home
  • Meet the Creative Team
  • Work with Us
  • Privacy Policy
  • Accessibility
  • Contact Us

Images/text copyright Amanda Formaro 2020. To feature a post from Crafts by Amanda, you may use one photo credited and linked back directly to the project post.

Free CraftsBy email every week

Latest crafts straight to your inbox!

Copyright ©2025, Crafts by Amanda. All Rights Reserved.
Design by Pixel Me Designs

Rate This Tutorial

Your vote:


To share a photo with your comment click here!

A rating is required
A name is required
An email is required

Recipe Ratings without Comment

Something went wrong. Please try again.